Publicidad
Idiomas disponibles
Idiomas disponibles
Publicidad
Tabla de contenido

Resumen de contenidos para MD SPORTS 54806
- Página 1 INSTRUCCIONES DE ARMADO Please contact us before returning the product to the store. Toll Free: 877-885-1635 Por favor póngase en contacto con nosotros antes de devolver el producto a la tienda. Número telefónico gratis: 877-885-1635 MODEL/MODELO: 54806...
- Página 2 LIMITED 90 DAYS WARRANTY This product is covered by a limited warranty that is effective for 90 days from the date of purchase. The warranty covers any defects in parts and workmanship. This Limited Warranty gives you specific legal rights and you may also have other rights which very from one state (province) to another.
-
Página 3: Tools Required
IMPORTANT NOTICE! Please contact us before returning the product to the store. Please Keep Your Instructions! Your Model number is necessary should you need to contact us. Please read through this instruction manual book to familiarize yourself with all parts and assembly steps. -
Página 4: Parts List
54806 PARTS LIST Backgammon With Hockey Table Leg Side Panel Billiard Cabinet Left Leg Right Leg Bowling Board With Table Tennis 1 Piece 1 Piece 1 Piece 2 Pieces 2 Pieces 2 Pieces 4*12mm Bolt 1/4'' Hex Nut Basketball Board... - Página 5 Pre-installed Pre-installed F4 x 1-1/4” Table tennis post Flat Head Screw Bean Bag - Green 2 Pieces 8 Pieces 16 Pieces 2 Pieces ASSEMBLY INSTRUCTIONS 1. Find a clean, level place to begin the assembly of your Combo Table. The table will be assembled upside down and then turned over on its legs once the assembly completed.
- Página 6 FIG.3 BILLIARD TABLE ASSEMBLY 8. Attach two previously-assembled Legs (#4 and #5) to the end of Billiard Cabinet(#1) using four Bolts (#8) per Leg. See FIG.3. 9. Attach the other two previously-assembled Legs (#4 and #5) to the other end of Billiard Cabinet(#1) but using only two Bolts (#8) on the sides of each Leg.
- Página 7 FIG.5 BASKETBALL ASSEMBLY 13. Attach the Crooked Pole (#19) to the end of Billiard Table using two Butterfly Bolts (#11) per Crooked Pole. See FIG.5A. Note: The butterfly Bolts (#11) assembled on the holes in the end apron of Billiard. See point 9 on page 5.
- Página 8 16. Attach the previously-assembled Basketball Board (#7) FIG.5D to the Crooked Pole (#19) using two Screws (#16) per side. See FIG.5D. 17. Attach the Basketball Net (#29) to the Rim (#30) by slipping the top of the Net over the Rim hooks. See FIG.5E.
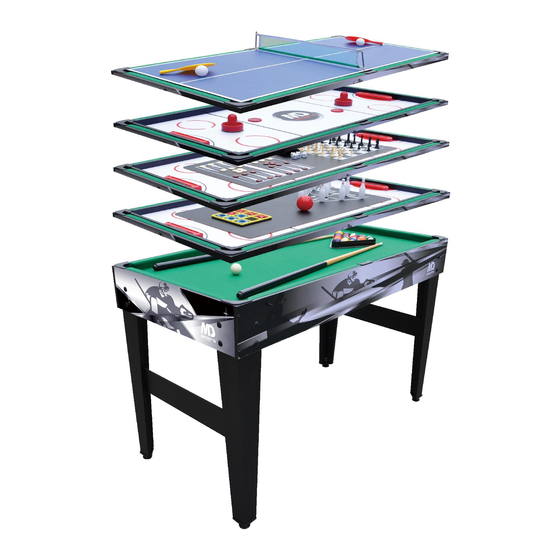
- Página 9 FIG.6 PUSHER ASSEMBLY 19. Tear off the backside paper of the Felt Pad (#34) and stick them at the bottom of the Pushers (#33). FIG.6 DIRECTIONS FOR PLAYING VARIOUS GAMES Billiard – Play the game as assembled using the Cue (#39), Triangle (#38), Pool Balls (#37) and Chalk (#36).
-
Página 12: Lista De Partes
54806 LISTA DE PARTES Backgammon con Mesa de Hockey Panel del Lateral Compartimiento Pata Derecha Pata Izquierda Tablero del Boliche con Tenis de Mesa de la Pata del billar 1 Pieza 1 Pieza 1 Pieza 2 Piezas 2 Piezas 2 Piezas... -
Página 13: Identificador De Partes
Pre-instalado Pre-instalado F4 x 1-1/4” Poste de mesa de Tornillo de Tuerca tenis Saquito Relleno-Verde 9 Piezas 16 Piezas 2 Piezas 2 Piezas IDENTIFICADOR DE PARTES 1. Encuentre un lugar limpio y nivelado para empezar a montar su Mesa de Combo. La mesa será... - Página 14 FIG.3 MONTAJE DE LA MESA DE BILLAR 8. Fije las Patas previamente-montada (#4 y #5) en la parte final del Compartimiento de Billar (#1) usando cuatro Tornillos (#8). Véa FIG.3. 9. Adjunte otras dos piernas pre-montadas (#4 & #5) a la otra final del Gabinete de Billar (#1) pero use solamente dos Tornillos (#8) sobre los lados de cada pierna.
- Página 15 FIG.5 MONTAJE DEL BALONCESTO 13. Fije al Palo Torcido (#19) en la final de la Mesa del Billar usando dos Pernos de Mariposa (#11) por cada Palo Torcido. Véa FIG.5.A Nota:Montado los Tronillos de Mariposa (#11) sobre los agujeros de la delantal final de Billar.
- Página 16 16. Fije al Tablero de Baloncesto (#7) previamente montado en el Palo Torcido (#19) usando dos Tornillos (#16) por FIG.5D cada lado. Véa FIG.5D. 17. Fije la Red del Baloncesto (#29) en la Canasta (#30) deslizándolo la parte superior de la red sobre los ganchos de la Canasta.
-
Página 17: Guía Para Jugar Varios Juegos
FIG.6 MONTAJE DEL GOLPEADOR 19. Desgarre el papel que está detrás del fieltro(#34) y fíjelo en la parte inferior de los Golpeadores (#33). FIG.6 GUÍA PARA JUGAR VARIOS JUEGOS 1) Billar – juegue el juego tal como está montado con el Taco (#39), Triángulo (#38), bolas de Billar (#37) y Tiza (#36).


