Tabla de contenido
Publicidad
Idiomas disponibles
Idiomas disponibles
Enlaces rápidos
All manuals and user guides at all-guides.com
®
ASME A112.18.1 / CSA B125.1
Model 16968 Series
Write purchased model number here.
T E FLO N
For easy installation of your
faucet you will need:
• To READ ALL the instructions
completely before beginning.
• To READ ALL warnings, care,
and maintenance information.
• To purchase the correct water
supply hook-up.
US. Pat. 4,043,359, 3,786,995, 4,562,960, 4,593,430, 4,218,785, 4,696,322, 4,765,365
3/5/07
U P
C
®
You may need the following tools:
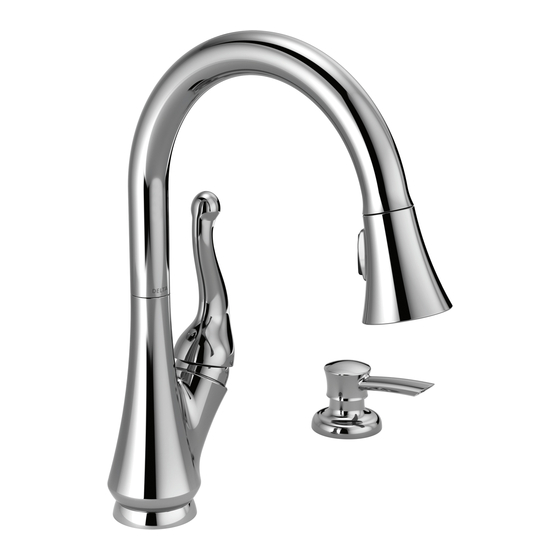
TALBOTT™ HIGH-RISE
PULL-DOWN KITCHEN
FAUCETS
1
49295 Rev. A
Publicidad
Tabla de contenido

Manuales relacionados para Delta TALBOTT 16968


Resumen de contenidos para Delta TALBOTT 16968
- Página 1 All manuals and user guides at all-guides.com TALBOTT™ HIGH-RISE PULL-DOWN KITCHEN FAUCETS ® ® ASME A112.18.1 / CSA B125.1 Model 16968 Series Write purchased model number here. You may need the following tools: T E FLO N For easy installation of your faucet you will need: •...
- Página 2 This warranty excludes all industrial, commercial parts may be obtained by calling 1-800-345- & business usage, whose purchasers are DELTA (in the U.S. and Canada) or by writing to: hereby extended a five year limited warranty from the date of purchase, with all other terms...
-
Página 3: Spout Installation
All manuals and user guides at all-guides.com Alternative Hose Installation Spout Installation Insert hose guide (1) into hose end (2) Align button (1) on clip with hole in as shown. Verify that the friction washer back of spout (2). Using back and forth (3), clip (4) and spout ring (5) are motion insert spout assembly onto main present on spout assembly. -
Página 4: Faucet Installation
All manuals and user guides at all-guides.com Faucet Installation... - Página 5 All manuals and user guides at all-guides.com...
-
Página 6: Hose Installation
All manuals and user guides at all-guides.com Hose Installation Snap clip (1) onto hose (2). Be sure clip is oriented as shown. Attach hose (2) by firmly pushing onto valve shank (3) until it clicks. -
Página 7: Water Line Connections
All manuals and user guides at all-guides.com Cold Water Line Connections Spread the tubes (1) to desired position Important: When making connections by grabbing near the top of the tubes. be sure to use two wrenches when WARNING: Kinked tubes will void the tightening. - Página 8 All manuals and user guides at all-guides.com Soap / Lotion Dispenser Installation bottle and pour not more than 8 oz. Remove the bottle (1). Separate head (2) into bottle. DO NOT remove the bottle from body assembly (3). Make sure gasket (4) is properly seated in the base of the each time as this weakens the neck.
-
Página 9: Important
All manuals and user guides at all-guides.com Lock Unlock Faucet Inspection and Operation Turn on hot and cold water supplies (1). and twisting as shown. Check the Pull the hose assembly (2) out of the operation of the sprayer by operating spout and remove the sprayhead. -
Página 10: Cleaning And Care
All manuals and user guides at all-guides.com Maintenance Cleaning and Care Care should be given to the cleaning of If faucet leaks from under handle – this product. Although its finish is extremely Remove button (1) and loosen set screw durable, it can be damaged by harsh (2) inside of handle. -
Página 11: Usted Puede Necesitar
Escriba aquí el número del modelo comprado. Usted puede necesitar: T E FLO N Para instalación fácil de su llave Delta usted necesitará: • LEER TODAS las instrucciones completamente antes de empezar. • LEER TODOS los avisos, cuidados, e información de mantenimiento. -
Página 12: Garantía Limitada De Por Vida De La Llave Y Su Acabado
RP12301 (bola rompe-vacío) e instalar los topes de la entrada de agua, caliente y fría, (RP12302). GarantÍa Limitada De Por Vida de la Llave y su Acabado Todas las piezas y acabados de la llave Delta CUALQUIER OTRO TIPO DE PÉRDIDA O ®... -
Página 13: Instalación Del Tubo De Salida
All manuals and user guides at all-guides.com Instalación alterna de la Manguera Instalación Del Tubo de Salida Presione la guía de la manguera (1) en la Coloque en línea el botón (1) en el gancho con el agujero en la parte punta la manguera (2) como se muestra. -
Página 14: Instalación De La Llave De Agua/Grifo
All manuals and user guides at all-guides.com Instalación de la Llave de Agua/Grifo... - Página 15 All manuals and user guides at all-guides.com...
-
Página 16: Instalación De La Manguera
All manuals and user guides at all-guides.com Instalación de la Manguera Coloque el gancho a presión (1) en la manguera (2). Asegúrese que esté orientado como se muestra. Conecte la manguera (2) firmemente presionándola en la espiga de la válvula (3) hasta que enganche. -
Página 17: Haga Las Conexiones A Las Líneas De Agua
All manuals and user guides at all-guides.com Fría Caliente Haga las Conexiones a las Líneas de Agua Importante: Cuando haga las conexio- Extienda los tubos (1) a la posición nes asegúrese de usar dos llaves de deseada agarrándolos cerca de la parte tuercas al apretar. -
Página 18: Instalación Del Dispensador De La Loción / Del Jabón
All manuals and user guides at all-guides.com Instalación Del Dispensador De la Loción / Del Jabón cabeza de la botella y el ensamble de Saque la botella (1). Separe la cabeza (2) la bomba y vierta no más de 8 oz. del ensamble del cuerpo (3). -
Página 19: El Funcionamiento De La Llave De Agua Y Su Inspección
All manuals and user guides at all-guides.com Cierre Abra El Funcionamiento de la Llave de Agua y su Inspección Abra los suministros (1) de agua Cierre el rociador en posición insertando caliente y fría. Hale la manguera (2) del las clavijas (4) dentro de las cavidades surtidor y saque la cabeza del rociador. -
Página 20: Mantenimiento
All manuals and user guides at all-guides.com Mantenimiento Limpieza y Cuidado de su Llave Si la llave de agua tiene una filtración por Tenga cuidado al ir a limpiar este producto. debajo de la manija – Quite el botón (1) y Aunque su acabado es sumamente durable, afloje el interior del tornillo de presión (2) de puede ser afectado por agentes de limpieza... - Página 21 All manuals and user guides at all-guides.com TALBOTT ROBINET À COL DE CYGNE ET BEC-DOUCHETTE POUR ÉVIER DE CUISINE ® ® ASME A112.18.1 / CSA B125.1 Modèle 16968 Series Inscrivez le numéro de modèle ici. Articles dont vous pouvez avoir besoin: T E FLO N Pour installer votre robinet Brizo...
- Página 22 (RP12302) doivent être installés. Garantie à vie limitée des robinets et de leurs finis Toutes les pièces et les finis du robinet Delta ® LES PERTES OU DOMMAGES DE TOUTE sont protégés contre les défectuosités de...
-
Página 23: Installation De Bec
All manuals and user guides at all-guides.com Autre méthode d’installation du flexible Installation De Bec Insérez le guide-tuyau (1) dans Faites correspondre le bouton (1) sur l’extrémité du tuyau souple (2) l’agrafe avec le trou au dos du bec conformément aux indications de la (2). -
Página 24: Installation Du Robinet
All manuals and user guides at all-guides.com Installation du robinet... - Página 25 All manuals and user guides at all-guides.com...
- Página 26 All manuals and user guides at all-guides.com Installation du tuyau souple Bloquez l’agrafe (1) sur le flexible (2). Assurez-vous que l’agrafe est orientée comme le montre la figure. Fixez le flexible (2) solidement en poussant fermement sur l’arrivée d’eau (3) jusqu’à...
- Página 27 All manuals and user guides at all-guides.com Froide Chaude Raccordez le robinet à la tuyauterie d’alimentation Écartez les tubes (1) pour les amener 3/8 po D.E. (B). Important: utilisez à la position voulue en les saisissant deux clés pour serrer et prenez garde près de leur partie supérieure.
- Página 28 All manuals and user guides at all-guides.com Installation De Distributeur De Savon / De Lotion Enlevez la bouteille (1). Séparez la tête liquide dans la bouteille. ÉVITEZ (2) du corps (3). Assurez-vous que le d’enlever la bouteille chaque fois pour joint (4) est bien calé...
- Página 29 All manuals and user guides at all-guides.com verrouiller déverrouiller Inspection et utilisation du robinet Bloquez le pulvérisateur en place en Rétablissez l’alimentation en eau chaude introduisant les axes (4) dans les logements et en eau froide (1).Tirez le tuyau souple (5) du bec et en exerçant une mouvement (2) à...
-
Página 30: Instructions De Nettoyage
All manuals and user guides at all-guides.com Entretien Instructions de nettoyage Il faut le nettoyer avec soin. Même si son fini Si le robinet fuit sous la poignée– est extrêmement durable, il peut être abîmé Enlevez le bouton (1) et détachez l’intérieur par des produits fortement abrasifs ou des de la vis de réglage (2) de la poignée. - Página 31 All manuals and user guides at all-guides.com RP49300 Set Screw & Button Tornillo de Presión y Botón Vis de calage et bouton RP49299▲ Lever Handle Manijas de Palanca Manette RP50777▲ RP1050▲ Sprayer Assembly (includes aerator) Casquete Ensamble de rociador Embase (incluye el aireador) RP61 Pulvérisateur...
- Página 32 All manuals and user guides at all-guides.com RP47888 Pump Bomba Pompe RP49302▲ Dispenser Assembly Ensamble del Dispensador Distributeur RP11723 Zinc Weights and Screws Pesas de Zinc y Tornillos Poids en plomb et vis RP32522 Clip Presilla Agrafe RP44647 59" Hose Assembly Ensamble de la manguera de 59"...