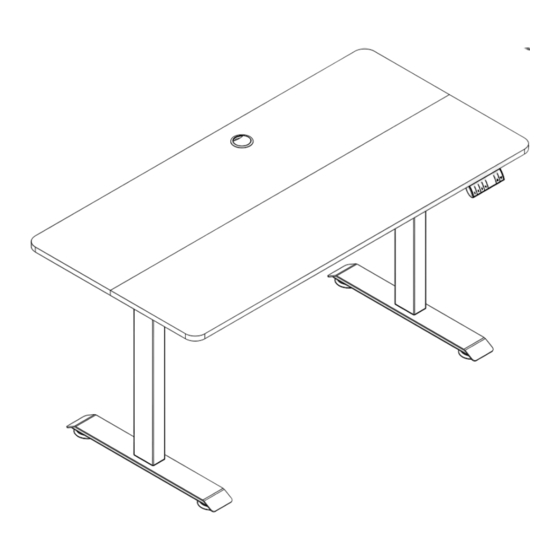
Resumen de contenidos para Vinsetto 920-072V90
- Página 1 IN221101061V01_ES 920-072V90 70KG Max 70kg IMPORTANTE - CONSERVE ESTA INFORMACIÓN PARA SU CONSULTA POSTERIOR: LEER DET ALLA DAMENTE INSTRUCCIONES DE MONTAJE...
- Página 2 Queridos clientes, Gracias por comprar este producto. Para que su electrodoméstico le sirva mejor, lea todas las instrucciones de este manual del usuario. Si tiene alguna pregunta, comuníquese con nuestro Centro de Atención al Cliente. Nuestros datos de contacto son los siguientes: País Teléfono Correo electrónico...
- Página 3 CONSIDERACIONES IMPORTANTES Lea cuidadosamente todas estas instrucciones y guárdelas para las referencias futuras. Cuando utilice este escritorio, siempre debe seguir las precauciones básicas de seguridad por motivo de reducir el riesgo de lesiones, incluidas las siguientes: ● Desempaquete todas las bolsas de hardware y los componentes con el fin de asegurarse de tener todas las piezas.
-
Página 4: Lista De Piezas
Lista de piezas Columna de elevación*1 Columna de elevación*1 Base*2 Marco*1 Varilla del motor*1 Ménsula lateral*2 5# Llave inglesa * 1 Destornillador Superficie de escritorio*2+Pasador de cruzado*1 madera*10 Soporte de fuente de alimentación*1 Tornillos M6*24 Tornillos M4 *1 Auricular + Fuente de alimentación + Cable de alimentación Tornillos autorroscante*4... - Página 5 Pasos de montaje Paso 1: Utilice la llave inglesa H suministrada para fijar la columna de elevación A y la columna de elevación B a las patas del escritorio con los tornillos M6 J. Prohibido eliminarlos Paso 2: 2.1 Apriete el marco con tornillos M6 J. Fije los tornillos M6 con la llave inglesa H. 2.2 Entonces, fije las 2 ménsulas laterales con los tornillos M6 J.
- Página 6 Paso 3: 3.1 Como lo que se muestra en la Figura 1, inserte la barra hexagonal en las patas del escritorio A hasta que la hebilla no esté visible. 3.2 Instale el otro extremo de la varilla de conexión en las patas del escritorio B, luego atornille la manija.
- Página 7 Aviso: En primer lugar precargue todos los tornillos en los orificios adecuados, y entonces fíjelos. Mismo lado Instrucciones de operación 1. Columna de elevación Presione el botón o el botón con el fin de controlar la columna de elevación hacia arriba o hacia abajo.
- Página 8 Reset/Restablecer ya se completa y la altura más baja se muestra. 5. Protección y alarma 1.Protección de bloqueo: En la pantalla se muestra "E02". Durante el movimiento de la vibración de la superficie del escritorio, colisión o inclinación del escritorio, lo que activará la alarma y se detendrá...
-
Página 9: Assembly Instruction
IN221101061V01_EN 920-072V90 70KG Max 70kg IMPORTANT, RETAIN FOR FUTURE REFERENCE: READ CAREFULLY ASSEMBLY INSTRUCTION... - Página 10 Dear customer, Thank you for purchasing this product. So that your appliance serves you well, please read all the instructions in this user's manual. If you have any questions, please contact our customer care center. Our contact details are below: Country Phone Email...
-
Página 11: Important Safeguards
IMPORTANT SAFEGUARDS Read these instructions carefully and retain them for future use. When using the product, basic safety precautions should always be followed to reduce the risk of injury including the following: ●Unpack all hardware bags and components to ensure you have all the parts. -
Página 12: Parts List
Parts List Lift column*1 Lift column*1 Base*2 Frame*1 Side bracket*2 Motor Rod*1 5# wrench*1 Desk top*2 +Wooden pin*10 cross screwdriver*1 Power supply holder*1 Handset + Power supply M6 screws*24 M4 screws*1 Power cord Tapping screws*4... -
Página 13: Assembly Steps
Assembly steps Step 1: Fixing lift column and lift column to the table leg with M6 screws.M6 screws using the supplied spanner . prohibited remove Step 2: 2.1 Assembling frame tightened with M6 screws.M6 screws using the supplied spanner . 2.2 Then install the two side bracket with M6 screws.M6 screws using the supplied spanner . - Página 14 Step 3: 3.1 As shown in Figure 1 , insert the hexagonal bar into the table leg A until the buckle is not visible. 3.2 Assemble the other end of the connecting rod to the table leg B and screw on the handle. The handle does not need to be tightened.
-
Página 15: Operational Instructions
Operational instructions 1. Lift Column Press the button or button to control the lift column up or down Press the button to control up of the lifting column, you can see the height (displayed number) on the screen; press the button to control the down of the lifting column, you can see the height (displayed number) on the screen.


