Tabla de contenido
Publicidad
Idiomas disponibles
Idiomas disponibles
Enlaces rápidos
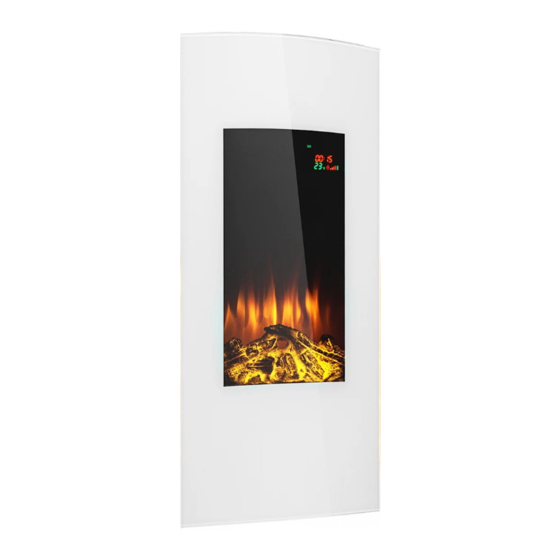
LAMINGTON
Elektrischer Kamin
Fireplace Heater
Cheminée électrique
Camino elettrico
Chimenea eléctrica
10038005 10038006
www.klarstein.com
Hinweis: Das Gerät eignet sich nicht zur Nutzung als
primäre Heizquelle.
Note: The device is not suitable for use as a primary
heat source.
Remarque : l'appareil ne convient pas en tant que
source principale de chauffage.
Nota: il dispositivo non è idoneo ad essere utilizzato
come fonte di riscaldamento primaria.
Advertencia: el aparato no es apto para utilizar como
fuente de calefacción primaria.
Publicidad
Capítulos
Tabla de contenido

Manuales relacionados para Klarstein LAMINGTON


Resumen de contenidos para Klarstein LAMINGTON
- Página 1 LAMINGTON Elektrischer Kamin Fireplace Heater Cheminée électrique Camino elettrico Chimenea eléctrica 10038005 10038006 www.klarstein.com Hinweis: Das Gerät eignet sich nicht zur Nutzung als primäre Heizquelle. Note: The device is not suitable for use as a primary heat source. Remarque : l‘appareil ne convient pas en tant que source principale de chauffage.
-
Página 3: Tabla De Contenido
Sehr geehrter Kunde, wir gratulieren Ihnen zum Erwerb Ihres Gerätes. Lesen Sie die folgenden Hinweise sorgfältig durch und befolgen Sie diese, um möglichen Schäden vorzubeugen. Für Schäden, die durch Missachtung der Hinweise und unsachgemäßen Gebrauch entstehen, übernehmen wir keine Haftung. Scannen Sie den folgenden QR-Code, um Zugriff auf die aktuellste Bedienungsanleitung und weitere Informationen rund um das Produkt zu erhalten. -
Página 4: Produktdatenblatt
PRODUKTDATENBLATT Modellkennung(en) 10038005,10038006 Angabe Symbol Wert Einheit Angabe Einheit Wärmeleistung Nur bei elektrischen Speicher-Einzelraumheizgeräten: Art der Regelung der Wärmezufuhr Nennwärmeleistung Manuelle Regelung der Wärmezufuhr mit nein integriertem Thermostat Mindestwärmeleistung Manuelle Regelung der Wärmezufuhr nein (Richtwert) mit Rückmeldung der Raum- und/oder Außentemperatur Maximale kontinuierliche Elektronische Regelung der Wärmezufuhr... -
Página 5: Sicherheitshinweise
SICHERHEITSHINWEISE • Prüfen Sie vor der Benutzung die Angabe zur Spannung auf dem Typenschild und schließen Sie das Gerät nur an Steckdosen an, die der Nennspannung des Geräts entsprechen. • Falls das Netzkabel beschädigt ist, lassen Sie es von einer ausgebildeten Fachkraft ersetzen. -
Página 6: Geräteübersicht
GERÄTEÜBERSICHT Beschreibung Anzahl Beschreibung Anzahl Untere Sicherung Kamin Karton Befestigungswinkel Dübel Schraube (4 x 8 mm) Wandhalterung Schraube (4 x 35 mm) Obere Sicherung Dübel Schraube (4 x 35 mm) -
Página 7: Installation
INSTALLATION Erste Schritte • Entnehmen Sie das Gerät aus der Verpackung. • Entfernen Sie die Verpackungsmaterialien vom Gerät. • Lagern Sie die Verpackungsmaterialien in der Verpackung oder entsorgen Sie diese fachgerecht. Vor der Installation • Überprüfen Sie nach dem Entpacken alle Bestandteile auf Vollständigkeit und entsorgen Sie die Verpackungsmaterialien erst anschließend. - Página 8 1. Wandinstallation Wählen Sie die Stelle an der Wand aus, an der Sie das Heizgerät aufhängen möchten. Verwenden Sie die Wandhalterung (4) als Tischschablone, um mit einer Wasserwage eine horizontale Linie zu ziehen. Markieren Sie 4 Bohrlöcher für die 4 Verankerungsschrauben. Hinweis: Die Löcher dienen der Befestigung des Heizgeräts und müssen eben sein, damit das Heizgerät ordnungsgemäß...
- Página 9 Bohren Sie an den markierten Stellen 4 Löcher mit einem Durchmesser von 8 mm und einer Tiefe von 43 mm. Entfernen Sie den Staub aus den Bohrlöchern und stecken Sie die Dübel in die Löcher. Klopfen Sie die Dübel vorsichtig mit einem Hammer in die Wand, bis diese mit der Wand bündig sind.
- Página 10 Bringen Sie den Befestigungswinkel (4) mit 2 kurzen Schrauben (3) an der Unterseite des Geräts an. Heben Sie das Gerät vorsichtig an und befestigen Sie es an der Metallwandhalterung. Lassen Sie das Gerät erst dann los, wenn es sicher verankert ist.
- Página 11 Markieren Sie nun die Lochposition für den Befestigungswinkel. Nehmen Sie das Gerät vorsichtig von der Halterung ab. Bohren Sie an den markierten Stellen 2 Löcher mit 8 mm Durchmesser und 43 mm Tiefe. Entfernen Sie den Staub aus den Bohrlöchern und stecken Sie die Dübel in die Löcher.
- Página 12 Setzen Sie das vordere Glaspanel wieder ein.
-
Página 13: Bedienung
BEDIENUNG Inbetriebnahme • Das Gerät kann verwendet werden, sobald es richtig installiert und an eine geerdete Steckdose angeschlossen wurde. Hinweise zur Bedienung • Vergewissern Sie sich, dass die Schutzschalter für die Stromversorgung eingeschaltet sind. • Das Gerät kann sowohl mit der Fernbedienung als auch mit der Touchsteuerung verwendet werden. - Página 14 Bedienung über die Fernbedienung Drücken Sie diese Taste einmal, um das Feuer und den Flammeneffekt zu aktivieren. Auf dem Bildschirm leuchten Raumtemperatur, Datum, Uhrzeit und Flammeneffekt auf. Wenn keine Taste gedrückt wird, erlischt der Bildschirm nach 15 Sekunden. Drücken Sie eine beliebige Taste, um den Bildschirm wieder zu aktivieren.
- Página 15 Datum- und Uhrzeiteinstellung (Die Einstellung erfolgt über die Fernbedienung.) Drücken Sie diese Taste einmal und drücken Sie anschließen die Taste [+] oder [–], um die aktuelle Stunde (0 – 23) einzustellen. Drücken Sie diese Taste erneut, um die Minuten mit den Tasten [+] und [–] einzustellen (von 00 –...
-
Página 16: Reinigung Und Wartung
Hinweise: Wenn die Anzeige nicht auf dem Bildschirm aufl euchtet, ist die Timereinstellung für das gewählte Datum ungültig. Wenn Sie nicht die Taste drücken, wird die Einstellung nur für den aktuellen Tag gespeichert. Drücken Sie 5 Sekunden lang die Taste , wenn das Gerät sich im Standby-Modus befi ndet, um alle Timer- und Temperatureinstellungen auf Werkseinstellung zurückzusetzen. -
Página 17: Hinweise Zur Entsorgung
HINWEISE ZUR ENTSORGUNG Wenn es in Ihrem Land eine gesetzliche Regelung zur Entsorgung von elektrischen und elektronischen Geräten gibt, weist dieses Symbol auf dem Produkt oder auf der Verpackung darauf hin, dass dieses Produkt nicht im Hausmüll entsorgt werden darf. Stattdessen muss es zu einer Sammelstelle für das Recycling von elektrischen und elektronischen Geräten gebracht werden. - Página 19 Dear Customer, Congratulations on purchasing this device. Please read the following instructions carefully and follow them to prevent possible damages. We assume no liability for damage caused by disregard of the instructions and improper use. Scan the QR code to get access to the latest user manual and more product information.
-
Página 20: Product Data Sheet
PRODUCT DATA SHEET Model identifier(s): 10038005,10038006 Item Symbol Value Unit Item Unit Heat output Type of heat input, for electric storage local space heaters only Nominal heat output manual heat charge control, with integrated thermostat Minimum heat output manual heat charge control with room and/or (indicative) outdoor temperature feedback Maximum continuous heat... -
Página 21: Safety Instructions
SAFETY INSTRUCTIONS • Before use, check the voltage information on the rating plate and only connect the device to sockets that correspond to the nominal voltage of the device. • If the power cord is damaged, have it replaced by a trained professional. •... -
Página 22: Device Overview
DEVICE OVERVIEW Description Quantity Description Quantity Lower fuse Fireplace Cardboard Mounting bracket Dowel Screw (4 x 8 mm) Wall mount Screw (4 x 35 mm) Top fuse Dowel Screw (4 x 35 mm) -
Página 23: Installation
INSTALLATION First steps • Remove the unit from the packaging. • Remove the packaging materials from the unit. • Store the packaging materials in the packaging or dispose of them properly. Before installation • After unpacking, check all components for completeness and only then dispose of the packaging materials. - Página 24 1. Wall installation Select the location on the wall where you want to hang up the heater. Use the wall bracket (4) as a table template to draw a horizontal line with a spirit level. Mark 4 drill holes for the 4 anchoring screws. Note: The holes are for mounting the heater and must be level so that the heater can be mounted properly and horizontally...
- Página 25 Drill 4 holes with a diameter of 8 mm and a depth of 43 mm at the marked positions. Remove the dust from the drill holes and insert the dowels into the holes. Carefully tap the dowels into the wall with a hammer until they are aligned with the wall.
- Página 26 Attach the mounting bracket (4) to the bottom of the unit with 2 short screws (3). Carefully lift the unit and attach it to the metal wall bracket. Do not release the unit until it is securely anchored.
- Página 27 Now mark the hole position for the fixing bracket. Carefully remove the unit from the cradle. Drill 2 holes 8 mm in diameter and 43 mm deep at the marked locations. Remove the dust from the drill holes and insert the dowels into the holes. Carefully tap the dowels into the wall with a hammer until they are aligned with the wall.
- Página 28 Replace the front glass panel.
-
Página 29: Operation
OPERATION Commissioning • The unit can be used as soon as it has been properly installed and connected to an earthed socket. Notes on the operation • Make sure that the circuit breakers for the power supply are switched on. •... - Página 30 Operation via remote control Press this button once to activate the fire and flame effect. Room temperature, date, time and flame effect light up on the screen. If no button is pressed, the screen turns off after 15 seconds. Press any button to reactivate the screen.
- Página 31 Date and time setting (The setting is made via remote control) Press this button once and then press the [+] or [–] button to set the current hour (0 - 23). Press this button again to set the minutes with the [+] and [–] buttons (from 00 - 59).
-
Página 32: Cleaning And Maintenance
Notes: If the indicator does not light up on the screen, the timer setting for the selected date is invalid. If you do not press the button, the setting is saved for the current day only. Press the button for 5 seconds when the appliance is in standby mode to reset all timer and temperature settings to factory settings. -
Página 33: Disposal Considerations
DISPOSAL CONSIDERATIONS If there is a legal regulation for the disposal of electrical and electronic devices in your country, this symbol on the product or on the packaging indicates that this product must not be disposed of with household waste. Instead, it must be taken to a collection point for the recycling of electrical and electronic equipment. -
Página 35: Fiche Technique
Cher client, chère cliente, Toutes nos félicitations pour l’acquisition de ce nouvel appareil. Lisez attentivement les indications suivantes et suivez-les pour éviter d’éventuels dommages. Nous ne saurions être tenus pour responsables des dommages dus au non-respect des consignes et à la mauvaise utilisation de l’appareil. -
Página 36: Fiche De Données Produit
FICHE DE DONNÉES PRODUIT Référence (s) du produit 10038005,10038006 Donnée Symbole Valeur Unité Donnée Unité Puissance calorifique Uniquement pour les radiateurs électriques à accumulation : Type de régulation de l'apport de chaleur Puissance calorifique Régulation manuelle de l'apport de chaleur nominale avec thermostat intégré... -
Página 37: Consignes De Sécurité
CONSIGNES DE SÉCURITÉ • Avant utilisation, vérifi ez la tension sur l'étiquette de l'appareil et connectez l'appareil uniquement à des prises qui correspondent à sa tension. • Si le cordon d'alimentation est endommagé, faites-le remplacer par un spécialiste qualifi é. •... -
Página 38: Aperçu De L'aPpareil
APERÇU DE L'APPAREIL N° Description Quantité N° Description Quantité Fusible inférieur Cheminée Emballage Équerre de fi xation Cheville Vis (4 x 8 mm) Support mural Vis (4 x 35 mm) Fusible supérieur Cheville Vis (4 x 35 mm) -
Página 39: Installation
INSTALLATION Premiers pas • Retirez l'appareil de son emballage. • Retirez les matériaux d'emballage de l'appareil. • Conservez les matériaux d'emballage dans leur emballage ou éliminez-les de manière appropriée. Avant l'installation • Après le déballage, vérifiez que tous les composants sont complets avant de jeter les matériaux d'emballage. - Página 40 1. Installation murale Sélectionnez l'emplacement sur le mur où vous souhaitez accrocher le radiateur. Utilisez le support mural (4) comme gabarit de table pour tracer une ligne horizontale avec un niveau à bulle. Marquez 4 trous de perçage pour les 4 vis d'ancrage.
- Página 41 Percez 4 trous d'un diamètre de 8 mm et d'une profondeur de 43 mm aux endroits marqués. Enlevez la poussière des trous de perçage et insérez les chevilles dans les trous. Frappez soigneusement les chevilles dans le mur avec un marteau jusqu'à ce qu'elles affleurent le mur. Fixez le support mural au mur à...
- Página 42 Montez l'équerre de fixation (4) au bas de l'appareil à l'aide de 2 vis courtes (3). Soulevez délicatement l'appareil et fixez-le au support mural métallique. Ne relâchez pas l'appareil tant qu'il n'est pas solidement ancré.
- Página 43 Marquez maintenant la position du trou pour l'équerre de fixation. Retirez délicatement l'appareil du support. Percez 2 trous d'un diamètre de 8 mm et d'une profondeur de 43 mm aux endroits marqués. Enlevez la poussière des trous de perçage et insérez les chevilles dans les trous. Frappez soigneusement les chevilles dans le mur avec un marteau jusqu'à...
- Página 44 Remplacez le panneau de verre frontal.
-
Página 45: Fonctionnement
FONCTIONNEMENT Mise en marche • L'appareil peut être utilisé dès qu'il a été correctement installé et raccordé à une prise de courant reliée à la terre. Remarques sur l'utilisation • Assurez-vous que les disjoncteurs de l'alimentation électrique sont enclenchés. • L'appareil peut être utilisé... - Página 46 Utilisation avec la télécommande Appuyez une fois sur cette touche pour activer l'effet de feu et de flamme. La température ambiante, la date, l'heure et l'effet de flamme s'allument à l'écran. Si vous n'appuyez sur aucun bouton, l'écran s'éteint au bout de 15 secondes. Appuyez sur n'importe quelle touche pour réactiver l'écran.
- Página 47 Réglage de la date et de l'heure (Le réglage se fait avec la télécommande) Appuyez une fois sur cette touche puis appuyez sur la touche [+] ou [–] pour régler l'heure actuelle (0 - 23). Appuyez à nouveau sur cette touche pour régler les minutes à l'aide des touches [+] et [–] (de 00 à...
-
Página 48: Nettoyage Et Maintenance
Remarques : Si le voyant ne s'allume pas à l'écran, le réglage de la minuterie pour la date sélectionnée n'est pas valide. Si vous n'appuyez pas sur la touche , le réglage est enregistré uniquement pour le jour en cours. Appuyez sur la touche pendant 5 secondes lorsque l'appareil est en mode veille pour réinitialiser tous les réglages de la minuterie et de la... -
Página 49: Informations Sur Le Recyclage
INFORMATIONS SUR LE RECYCLAGE S‘il existe une réglementation pour l‘élimination ou le recyclage des appareils électriques et électroniques dans votre pays, ce symbole sur le produit ou sur l‘emballage indique que cet appareil ne doit pas être jeté avec les ordures ménagères. - Página 51 Estimado cliente: Le felicitamos por la adquisición de este producto. Lea atentamente las siguientes instrucciones y sígalas para evitar posibles daños. No asumimos ninguna responsabilidad por los daños causados por el incumplimiento de las instrucciones y el uso inadecuado. Escanee el siguiente código QR para obtener acceso a la última guía del usuario y más información sobre el producto.
-
Página 52: Hoja De Datos Del Producto
HOJA DE DATOS DEL PRODUCTO Denominación del modelo 10038005,10038006 Dato Símbolo Valor Unidad Dato Unidad Potencia térmica Solo con disposítivos de acumulación de calor eléctricos para abastecimiento local: Tipo de regulación del abastecimiento de calor Potencia térmica nominal Regulación manual del abastecimiento de calor con termostato integrado: Potencia térmica mínima Regulación manual de abastecimiento de... -
Página 53: Indicaciones De Seguridad
INDICACIONES DE SEGURIDAD • Antes de su utilización, compruebe la tensión indicada en la placa técnica del aparato y conéctelo solamente a tomas de corriente con la misma tensión. • Si el cable de alimentación está dañado, contacte con un servicio técnico cualifi cado para su sustitución. -
Página 54: Vista General Del Aparato
VISTA GENERAL DEL APARATO Núm Descripción Cant. Núm Descripción Cant. Fusible inferior Chimenea Cartón Soporte de montaje Taco Tornillo (4 x 8 mm) Montaje en la pared Tornillos (4 x 35 mm) Fusible superior Taco Tornillos (4 x 35... -
Página 55: Instalación
INSTALACIÓN Primeros pasos • Retire el aparato de su embalaje. • Retire los materiales de embalaje de la unidad. • Guarde los materiales de embalaje en el embalaje o deséchelos adecuadamente. Antes de la instalación • Después de desembalar, compruebe que todos los componentes están completos y sólo entonces elimine los materiales de embalaje. - Página 56 1. Instalación en la pared Seleccione el lugar de la pared donde quiere colgar el calefactor. Utilice el soporte de pared (4) como plantilla de mesa para trazar una línea horizontal con un nivel de burbuja. Marque 4 taladros para los 4 tornillos de anclaje. Nota: Los agujeros son para el montaje del calentador y deben estar nivelados para que el calentador pueda ser montado correctamente y en forma horizontal...
- Página 57 Perforar 4 agujeros de 8 mm de diámetro y 43 mm de profundidad en las posiciones marcadas. Elimine el polvo de los orificios de perforación e introduzca las clavijas en los mismos. Golpee con cuidado los tacos en la pared con un martillo hasta que queden a ras de la pared.
- Página 58 Fije el soporte de montaje (4) a la parte inferior de la unidad con 2 tornillos cortos (3). Levante con cuidado la unidad y fíjela al soporte metálico de la pared. No suelte la unidad hasta que esté bien anclada.
- Página 59 Ahora marque la posición del agujero para el soporte de fijación. Retire con cuidado la unidad del soporte. Haga 2 agujeros de 8 mm de diámetro y 43 mm de profundidad en los lugares marcados. Elimine el polvo de los orificios de perforación e introduzca las clavijas en los mismos.
- Página 60 Vuelva a colocar el panel de vidrio frontal.
-
Página 61: Funcionamiento
FUNCIONAMIENTO Puesta en funcionamiento • El aparato puede utilizarse en cuanto se haya instalado correctamente y se haya conectado a una toma de corriente con conexión a tierra. Notas sobre el funcionamiento • Asegúrese de que los disyuntores de la fuente de alimentación están conectados. - Página 62 Manejo con el mando a distancia Pulse este botón una vez para activar el efecto de fuego y llamas. La temperatura ambiente, la fecha, la hora y el efecto de la llama se iluminan en la pantalla. Si no se pulsa ningún botón, la pantalla se queda en blanco después de 15 segundos.
- Página 63 Ajuste de la hora y la fecha (El ajuste se realiza a través del mando a distancia) Pulse este botón una vez y luego pulse el botón [+] o [–] para ajustar la hora actual (0 - 23). Pulse de nuevo este botón para ajustar los minutos con los botones [+] y [–] (de 00 a 59).
-
Página 64: Limpieza Y Mantenimiento
Notas: Si el indicador no se enciende en la pantalla, el ajuste del temporizador para la fecha seleccionada no es válido. Si no pulsa el botón , el ajuste se guarda sólo para el día actual. Pulse el botón durante 5 segundos cuando el aparato esté en modo de espera para restablecer todos los ajustes del temporizador y la temperatura a los valores de fábrica. -
Página 65: Indicaciones Sobre La Retirada Del Aparato
INDICACIONES SOBRE LA RETIRADA DEL APARATO Si en su país existe una disposición legal relativa a la eliminación de aparatos eléctricos y electrónicos, este símbolo estampado en el producto o en el embalaje advierte que no debe eliminarse como residuo doméstico. En lugar de ello, debe depositarse en un punto de recogida de reciclaje de aparatos eléctricos y electrónicos. - Página 67 Gentile cliente, La ringraziamo per aver acquistato il dispositivo. La preghiamo di leggere attentamente le seguenti istruzioni per l’uso e di seguirle per evitare possibili danni. Non ci assumiamo alcuna responsabilità per danni scaturiti da una mancata osservazione delle avvertenze di sicurezza e da un uso improprio del dispositivo.
-
Página 68: Scheda Informativa Del Prodotto
SCHEDA INFORMATIVA DEL PRODOTTO Identificazione del modello (i) 10038005,10038006 Indicazione Simbolo Valore Unità Indicazione Unità Potenza termica Solo per gli apparecchi per il riscaldamento d'ambiente locale elettrici ad accumulo: Tipo di controllo dell´apporto termico Potenza termica nominale Controllo manuale del carico termico con termostato integrato Potenza termica minima Controllo manuale del carico termico con... -
Página 69: Avvertenze Di Sicurezza
AVVERTENZE DI SICUREZZA • Prima dell'utilizzo verifi care la tensione sulla targhetta del dispositivo e collegarlo solo a prese che abbiano la stessa tensione. • Se il cavo d'alimentazione è danneggiato, farlo sostituire da un tecnico qualifi cato. • Non posizionare il camino direttamente sotto la presa elettrica. •... -
Página 70: Descrizione Del Dispositivo
DESCRIZIONE DEL DISPOSITIVO Descrizione Qtà Descrizione Qtà Fusibile inferiore Camino Cartone Staff a di montaggio Tasselli Vite (4 x 8 mm) Montaggio a parete Vite (4 x 35 mm) Fusibile superiore Tasselli Vite (4 x 35 mm) -
Página 71: Installazione
INSTALLAZIONE Primi passaggi • Togliere il dispositivo dall'imballaggio. • Rimuovere i materiali di imballaggio dal dispositivo. • Conservare i materiali di imballaggio nella scatola o smaltirli correttamente. Prima dell'installazione • Dopo il disimballaggio, controllare che tutti i componenti siano stati inlcusi nella consegna e solo allora smaltire i materiali di imballaggio. - Página 72 1. Installazione a muro Selezionare la posizione sulla parete dove si desidera appendere il camino. Utilizzare la staffa a muro (4) come modello per tracciare una linea orizzontale. Servirsi di una livella. Segnare 4 fori per le 4 viti di ancoraggio. Nota: i fori servono per il montaggio del camino e devono essere livellati in modo che il camino possa essere montato correttamente e orizzontalmente...
- Página 73 Praticare 4 fori con un diametro di 8 mm e una profondità di 43 mm nelle posizioni segnate. Rimuovere la polvere dai fori e inserire i tasselli nei fori. Picchiettare con attenzione i tasselli nel muro con un martello fino a quando non sono a livello con il muro.
- Página 74 Fissare la staffa di montaggio (4) alla parte inferiore del dispositivo con 2 viti corte (3). Sollevare con attenzione il dispositivo e fissarlo alla staffa di metallo a muro. Non rilasciare il dispositivo finché non è saldamente ancorato.
- Página 75 Ora segnare la posizione del foro per la staffa di fissaggio. Rimuovere con attenzione il dispositivo dal supporto. Eseguire 4 fori con un diametro di 8 mm e una profondità di 43 mm nelle posizioni segnate. Rimuovere la polvere dai fori e inserire i tasselli nei fori. Picchiettare con attenzione i tasselli nel muro con un martello fino a quando non sono a livello con il muro.
- Página 76 Inserire il pannello di vetro anteriore.
-
Página 77: Utilizzo
UTILIZZO Messa in funzione • Il dispositivo può essere utilizzato non appena è stata installato correttamente e collegato a una presa con messa a terra. Avvertenze sull'utilizzo • Assicurarsi che gli interruttori di protezione per l'alimentazione siano inseriti. • Il dispositivo può essere utilizzato sia con il telecomando che con il touch control. - Página 78 Utilizzo tramite telecomando Premere questo pulsante una volta per attivare l'effetto fiamma. La temperatura ambiente, la data, l'ora e l'effetto fiamma si accendono sullo schermo. Se non viene premuto alcun pulsante, lo schermo si spegne dopo 15 secondi. Premere un tasto qualsiasi per riattivare lo schermo.
- Página 79 Impostare l'ora e la data (L'impostazione viene effettuata tramite il telecomando) Premere questo pulsante una volta e poi premere il pulsante [+] o [–] per impostare l'ora corrente (0 - 23). Premere nuovamente questo pulsante per impostare i minuti con i pulsanti [+] e [–] (da 00 a 59).
-
Página 80: Pulizia E Manutenzione
Note: Se l'indicatore non si accende sullo schermo, l'impostazione del timer per la data selezionata non è valida. Se non si preme il pulsante , l'impostazione viene salvata solo per il giorno corrente. Premere il pulsante per 5 secondi quando il dispositivo è in modalità standby per ripristinare tutte le impostazioni del timer e della temperatura alle impostazioni di fabbrica. -
Página 81: Avviso Di Smaltimento
AVVISO DI SMALTIMENTO Se nel proprio paese si applicano le regolamentazioni inerenti lo smaltimento di dispositivi elettrici ed elettronici, questo simbolo sul prodotto o sulla confezione segnala che questi prodotti non possono essere smaltiti con i rifiuti normali e devono essere portati a un punto di raccolta di dispositivi elettrici ed elettronici.