Tabla de contenido
Publicidad
Idiomas disponibles
Idiomas disponibles
Enlaces rápidos
Publicidad
Capítulos
Tabla de contenido
Solución de problemas

Manuales relacionados para Abus TVAC16000B


Resumen de contenidos para Abus TVAC16000B
- Página 1 TVAC16000B User guide Instrukcja obsługi Betjeningsvejledning Manual de instrucciones You can find important information and FAQs about this and other products on the website www.abus.com/plug-and-play Version 11/2013...
- Página 2 This user guide contains important information on starting operation and using the English device. Make sure that this user guide is handed over when the product is given to other persons. Keep this user guide to consult later! For a list of contents with the corresponding page numbers, see page 5. Niniejsza instrukcja obsługi zawiera ważne wskazówki dotyczące uruchamiania i Polski obsługi.
- Página 3 TVAC16000B User guide Version 11/2013 English translation of the original German user guide Retain for future reference!
- Página 4 ABUS Security-Center GmbH is not liable or responsible for direct or indirect damage resulting from the equipment, performance and use of this product. No forms of guarantee are accepted for the contents of this...
-
Página 5: Important Safety Information
English Explanation of symbols The triangular high voltage symbol is used to warn of the risk of injury or health hazards (e.g. caused by electric shock). The triangular warning symbol indicates important notes in these operating instructions which must be observed. This symbol indicates special tips and notes on the operation of the unit. -
Página 6: Unpacking The Device
English Wireless transmission The wireless range depends on a variety of environmental factors. The local conditions at the installation site may have a negative impact on the range. When there are no obstructions between the receiver and transmitter, a range of up to 150m is possible, but this range will be considerably less within buildings. The following environmental conditions compromise both the range as well as the frame rate: Mobile communication masts, high-tension pylons, electrical wires, ceilings and walls, devices with the same or an adjacent wireless frequency. -
Página 7: Tabla De Contenido
English Contents Intended use ............................... 6 Scope of delivery ............................6 Features and functions ..........................6 Information and FAQs ..........................7 Device description ............................. 7 Monitordescription ..........................7 Docking station description ......................7 Camera description ..........................8 Installation ..............................9 Installing the monitor ......................... -
Página 8: Intended Use
You can also view the live images from the camera via smartphone using the ABUS “TVAC16000” app and playback recorded data, provided the monitor is in the docking station and connected to the internet. -
Página 9: Information And Faqs
English 4. Information and FAQs You can find important information and FAQs about this and other products on the website www.abus.com/plug-and-play. You will find information for troubleshooting under item 11 of these instructions. 5. Device description 5.1 Monitordescription ... -
Página 10: Camera Description
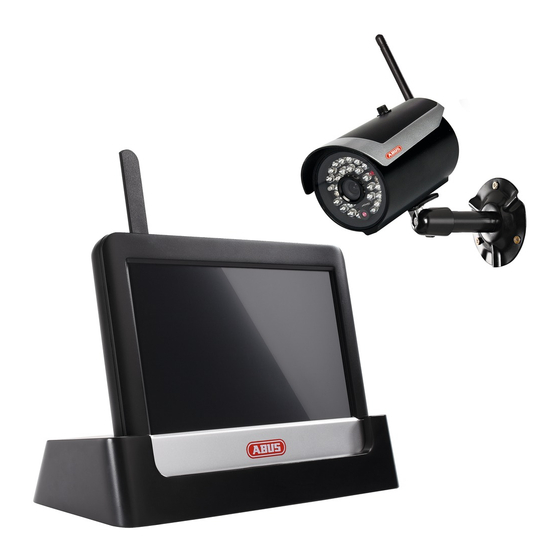
English 5.3 Camera description Antenna Fixed lens Power LED Link LED IR LED Photo sensor Camera mount Microphone Pairing button Power supply connection 5 VDC / 1A ... -
Página 11: Installation
English 6. Installation 6.1 Installing the monitor Connect the power supply unit to the monitor. Switch the device on. Press the power button for about 5 seconds. Important: Please note that if the monitor does NOT have an external power supply, it must be charged for at least 8 hours prior to being used for the first time. -
Página 12: Connecting The Docking Station To The Network
English 6.3 Connecting the docking station to the network To connect the docking station to the internet, proceed as follows: Connect the network cable to your router and the docking station. Connect to the network only after you have made all the required settings on the monitor. The network settings are described in 7.4.3. -
Página 13: Operation
English Screw the camera onto the mount and connect the power supply unit to the camera. 7. Operation To switch the monitor ON / OFF, press and hold down the power button for at least 5 seconds. 7.1 Main menu ... -
Página 14: Live View
English 7.2 Live view Explanation of symbols SD card display No SD card Tip: Always switch off the device before removing the SD card. ... - Página 15 English Timer Schedule has been saved This symbol appears if a programmed recording is running. Recording status Flashes red: the device is recording If you press the REC symbol directly, you start a manual recording. Select this again to stop the recording. Constantly red: device is not recording Camera number and reception...
- Página 16 English Network connection This option is only available if the monitor is on the docking station and the network cable is connected to the docking station as well as the router. Press the network symbol and select whether the object should be connected to the internet or whether the device should just be charged.
-
Página 17: Event List
English Setting the alarm and loudspeaker volume Set the volume of the alarm tone (bell symbol) or camera tone (loudspeaker symbol) by pressing “+” and “-”. The alarm tone sounds if you have saved a timer or a reminder at a certain time. -
Página 18: List Of Recordings
English 7.3.1 List of recordings Press the date with the green background to go to the list of recordings. The recordings are saved to sub- folders which are named with the date on which the recording was made. The recordings are saved as individual files with the duration of the recording being used as the file name. ... -
Página 19: Viewing Recordings
English 7.3.2 Viewing recordings Press the file name to view the recording. Explanation of symbols Live view Change to live view Back Back to the main menu Select one of the numbered cameras to view the recordings. ... -
Página 20: Deleting Recordings
English 7.3.3 Deleting recordings There are three ways to delete files from the SD card: symbol in the event list. Delete the file by pressing the button. To cancel the procedure, Press the press the x button. Format the SD card on the monitor at the “System” > “Format memory card” menu item. Delete the SD card on the computer 7.4 Settings At the “Settings”... -
Página 21: Camera Brightness
English Displaying/concealing a camera Use the buttons to display a camera or press the button to conceal it. If you have not trained all four cameras, conceal the other cameras. Camera brightness Select the required brightness from between -2 (dark) to 2 (bright). - Página 22 English Motion detection Here you can set the sensitivity of the motion detection for each camera. You can choose between “Low”, “High” and “Off”. High: Motion detection with high sensitivity Low: Motion detection with low sensitivity Off: Motion detection is off. Motion is not recorded. ...
-
Página 23: Network Settings
English Timer recordings You can save a recording time to start recording at a very specific time. You can save up to 5 recording procedures. First select the number of the camera. Set the start and stop time. To do this use the arrow buttons. - Página 24 English Securitycode The standard security code is: 123456 For reasons of security, change this code and enter a new password (max. 8 digits). Press the field with the white background and a keyboard appears. Then confirm with “OK”. You will need the security code later if you want to access the cameras via the app.
-
Página 25: Alarm Settings
English 7.4.4 Alarm settings Duration Here you can select the required duration of the alarm. You can set the alarm duration individually: 2 seconds, 10 seconds, 30 seconds or no sound. Press any button to switch off the alarm in the event of an alarm. -
Página 26: System Settings
English 7.4.5 System settings Energy saving mode Here you can activate or deactivate the automatic screen switch-off after 2 minutes. If the energy saving mode is activated, your battery lasts roughly half an hour longer. - Página 27 English Setting the time // date Here you can set the date and time. Then save your entries. Note: AM = 00:00 – 11:59 PM = 12:00 – 23:59 Time zone You can set the time zone for your country. Use the arrow keys to select the country region.
- Página 28 (item number TVAC16000B). To download, please proceed as follows: Remove the SD card from your monitor and insert it in a SD card reader which is connected to your computer.
-
Página 29: Troubleshooting (Faq)
English 7.4.6 Troubleshooting (FAQ) FAQ selection Here you can read about troubleshooting tips directly on your monitor. Select the question to view the help message. 8. Remote access via app This 7" touch screen wireless monitor gives you the option of switching live to your cameras. The app for this device can be found in the App Store under the name of “TVAC16000”. - Página 30 English Entering system information 1. Enter a name for your system at “System Name” which should then be displayed on your mobile phone. 2. Now enter the 15 digit DID number. This you can find in your monitor's network information on the label stuck on the product or click on “Search”...
- Página 31 English Live view Here you can see a live view of the camera you have selected. Camera selection Select the required camera. Screenshot Here you have the option of making a screenshot of your live image. The image is then saved in your photos on your mobile device.
- Página 32 English System configuration System configuration Go to the system configuration here. You can choose one of the following options: Changing playback direction Removing the system Access to the recordings Press to go to the live view again. System information Here you can change the system name, the DID and the security code.
- Página 33 English Access to the recordings Here you can view the recordings from each individual camera on your smartphone. Select the recording you want and it starts immediately. Press to pause the recording, to go back to the event list, press button.
-
Página 34: Maintenance And Cleaning
English 9. Maintenance and cleaning 9.1 Maintenance Regularly check the technical safety of the product, e.g. check the housing for damage. If it seems that it may no longer be possible to operate the device safely, stop using the product and protect it from unintentional use. -
Página 35: Tips For Troubleshooting
English 11. Tips for troubleshooting Question Answer What does pairing the Pairing creates the exclusive, encrypted wireless connection monitor and camera mean between the monitor and camera. and how does this work? To connect a camera with the monitor, proceed as follows: 1. -
Página 36: Technical Data
English 12. Technical data Camera 7" monitor Number of IR LEDs Rechargeable battery running time 1.5 hours Li-Ion polymer battery, 3.7 V / Battery type 1800 mA Resolution 640 x 480 pixels 800 x 480 pixels Image sensor 1/4" CMOS Angle of view 60°... -
Página 37: Instrukcja Obsługi
TVAC16000B Instrukcja obsługi Version 11/2013 Polskie tłumaczenie oryginalnej instrukcji niemieckiej Przechować do wykorzystania w przyszłości! - Página 38 ABUS Security-Center GmbH nie odpowiada za błędy techniczne i typograficzne oraz zastrzega sobie prawo do wprowadzania w każdej chwili bez wcześniejszej zapowiedzi zmian w produkcie i w instrukcjach obsługi.
-
Página 39: Objaśnienie Symboli
Polski Objaśnienie symboli Symbol błyskawicy w trójkącie jest stosowany w celu wskazania na zagrożenie dla zdrowia, np. porażeniem elektrycznym. Wykrzyknik w trójkącie oznacza w niniejszej instrukcji obsługi ważne wskazówki, które muszą być bezwzględnie przestrzegane. Tym symbolem oznaczane są specjalne rady i wskazówki dotyczące obsługi. Ważne zasady bezpieczeństwa Szkody spowodowane nieprzestrzeganiem niniejszej instrukcji obsługi powodują... -
Página 40: Ostrzeżenia
Polski Transmission radio La portée de la transmission radio dépend de différents paramètres environnementaux. Les données du lieu de montage peuvent avoir une influence négative sur la portée. Il est ainsi possible d'atteindre une portée de jusqu'à 150 m, si rien n'interfère entre le récepteur et l'émetteur ; cette portée est donc nettement moins élevée à... - Página 41 Polski Sommaire Użycie zgodne z przeznaczeniem ......................40 Zakres dostawy ............................40 Cechy i funkcje ............................40 Wskazówki i często zadawane ........................ 41 Opis urządzenia ............................41 Opis monitora ........................... 41 Opis stacji dokującej ........................41 Opis kamery ............................42 Instalacja ..............................
-
Página 42: Użycie Zgodne Z Przeznaczeniem
Ponadto za pomocą aplikacji ABUS „TVAC16000“ można przeglądać na smartfonie obraz na żywo pochodzący z kamer i odtwarzać zapisane dane. Wówczas jednak monitor musi znajdować się w stacji dokującej i być... -
Página 43: Wskazówki I Często Zadawane
Polski 4. Wskazówki i często zadawane Ważne wskazówki i często zadawane pytania dotyczące tego produktu, jak również innych produktów znaleźć można na stronie internetowej www.abus.com/plug-and-play. Informacje dotyczące usuwania błędów znajdują się w punkcie 11 niniejszej instrukcji. 5. Opis urządzenia 5.1 Opis monitora ... -
Página 44: Opis Kamery
Polski 5.3 Opis kamery Antena Obiektyw stałoogniskowy LED zasilania LED stanu łącza IR-LED Czujnik światła Uchwyt do kamery Mikrofon Przycisk Pairing Złącze do zasilania napięciowego 5 VDC / 1A ... -
Página 45: Instalacja
Polski 6. Instalacja 6.1 Instalacja monitora Połącz zasilacz z monitorem. Włącz urządzenie. Przez ok. 5 sekund przytrzymaj wciśnięty przycisk Power. Uwaga: Przed pierwszym użyciem monitor należy ładować BEZ zewnętrznego źródła zasilania przez co najmniej 8 godzin! Trwałość akumulatora wynosi ok. 1,5 godziny. Uwaga: Wbudowany akumulator pozwala na elastyczne zastosowanie monitora. -
Página 46: Podłączanie Stacji Dokującej Do Sieci
Polski 6.3 Podłączanie stacji dokującej do sieci Aby połączyć stację dokującą z Internetem, wykonaj następujące czynności: Połącz kabel sieciowy z ruterem i stacją dokującą. Dokonaj połączenia z siecią dopiero po wykonaniu stosownych ustawień monitora. Ustawienia sieciowe opisano w 7.4.3. , a następnie opcji „Połącz z Internetem”. Po ustawieniu sieci dotknij w podmenu symbolu sieci W celu zapewnienia ciągłego zasilania prądem, należy podłączyć... -
Página 47: Obsługa
Polski Następnie przykręć złącze kamery do uchwytu i połącz zasilacz sieciowy z kamerą. 7. Obsługa Aby włączyć/wyłączyć monitor, wciśnij przycisk zasilania i przytrzymaj go wciśniętym przez co najmniej 5 sekund. 7.1 Menu główne Widok na żywo ... -
Página 48: Widok Na Żywo
Polski 7.2 Widok na żywo Objaśnienie symboli Wskazanie dot. karty SD Wskazówka! Zawsze przed usunięciem karty SD wyłącz Brak karty SD urządzenie. Karta SD rozpoznana i Pamiętaj, że urządzenie nie posiada funkcji pamięci prawie pusta cyklicznej. - Página 49 Polski Programator czasowy Został zdefiniowany Symbol ten pojawia się w sytuacji, gdy odbywa się harmonogram. zaprogramowany zapis Status zapisu Dioda migająca w kolorze czerwonym: Urządzenie wykonuje zapis Dotknięcie symbolu REC powoduje uruchomienie ręcznego Dioda świecąca się w zapisu.
- Página 50 Polski Połączenie z siecią Ta opcja dostępna jest jedynie wówczas, gdy monitor znajduje się w stacji dokującej, a kabel sieciowy jest podłączony zarówno do stacji dokującej jak i do rutera. Dotknij symbolu sieci i określ, czy obiekt ma zostać podłączony do Internetu, czy też...
-
Página 51: Lista Zdarzeń
Polski Ustawienie alarmów i głośności Głośność dźwięku alarmu (symbol dzwonka) lub dźwięku kamery (symbol głośnika) ustawia się za pomocą przycisków „+“ i „-“. Dźwięk alarmu pojawia się w przypadku zdefiniowana programatora czasowego lub przypomnienia na określoną godzinę. 7.3 Lista zdarzeń Na liście zdarzeń... -
Página 52: Lista Zapisów
Polski 7.3.1 Lista zapisów Po dotknięciu daty ustawionej na zielono, zostaje wyświetlona lista zapisów. Zapisane obrazy są zapamiętywane w podkatalogach o nazwach nadawanych zgodnie z datą zapisu. Zapisane obrazy są zapisywane w postaci pojedynczego pliku z datą zapisu, która występuje jako nazwa pliku. -
Página 53: Przegląd Zapisu
Polski Przegląd zapisu 7.3.2 Dotykając nazw pliku, można dokonać przeglądu określonego zapisu. Objaśnienie symboli Widok na żywo Przejście do widoku na żywo Z tego miejsca można powrócić do menu głównego. Wstecz Aby wyświetlić zapisy z określonej kamery, należy tę kamerę wybrać... -
Página 54: Kasowanie Zapisów
Polski 7.3.3 Kasowanie zapisów Istnieją trzy możliwości skasowania plików z karty SD: Na liście zdarzeń po dotknięciu symbolu . Aby usunąć plik, należy nacisnąć przyciski . Aby przerwać operację, należy nacisnąć przycisk x. Kartę SD można sformatować za pomocą opcji menu „System” > „Formatuj kartę pamięci” Usuwanie karty SD na komputerze Ustawienia W menu „Ustawienia”... -
Página 55: Ustawienia Nagrywarki
Polski Pokazywanie/ukrywanie kamery Aby pokazać kamerę, użyj przycisków , aby ją ukryć – przycisku . Jeśli nie wszystkie cztery kamery zostały zaprogramowane, ukryj te niezaprogramowane. Jasność kamery Można ustawić jasność w zakresie od -2 (ciemno) do +2 (jasno). 7.4.2 Ustawienia nagrywarki ... - Página 56 Polski Alarmowanie poprzez e-mail Aktywacja tej funkcji umożliwia otrzymywanie za pomocą e-maila alarmów dotyczących wykrycia ruchu przez kamerę. W tym celu postępuj w następujący sposób: Wybierz opcję „Aktywne”. Dotknięcie funkcji „Nieaktywne” powoduje ponowną dezaktywację funkcji, po której system nie wysyła e-mailem informacji o rozpoznaniu ruchu.
-
Página 57: Ustawienia Sieci
Polski 7.4.3 Ustawienia sieci Ustawienia Internetu Aby nawiązać połączenie z Internetem i uzyskać poprzez aplikację dostęp do kamery, podłącz stację dokującą za pomocą kabla sieciowego do rutera. Wybierz statyczny adres IP i DHCP. Potwierdź... -
Página 58: Ustawienia Alarmów
Polski Informacje o sieci W tym miejscu dostępne są wszelkie informacje dot. aktywnej sieci. Kod DID należy wprowadzić później, w aplikacji. 7.4.4 Ustawienia alarmów Czas trwania Tu można wybrać żądany czas alarmowania. Czas alarmowania można ustawić w zależności od własnych potrzeb: 2 sekundy, 10 sekund, 30 sekund lub brak dźwięku. -
Página 59: Ustawienia Systemowe
Polski 7.4.5 Ustawienia systemowe Tryb oszczędzania energii W tym miejscu można aktywować lub dezaktywować automatyczne wyłączanie ekranu po 2 minutach. Jeśli tryb oszczędności energii jest aktywny, akumulator utrzymuje swoją trwałość o ok. pół godziny dłużej. - Página 60 Polski Ustawianie czasu // daty i godziny Tu można ustawić datę i godzinę. Dokonane ustawienia należy zapisać. Wskazówka: AM = 00:00 – 11:59 PM = 12:00 – 23:59 Strefa czasowa Tutaj można ustawić strefę czasową dla kraju. Wybrać region kraju za pomocą strzałek. Dokonane ustawienia należy zapisać.
- Página 61 Należy używać najbardziej aktualnej wersji Taką wersję można oprogramowania firmware. pobrać z naszej strony internetowej www.abus.com (nr produktu TVAC16000B). Aby tego dokonać, postępuj w następujący sposób: Wyjmij kartę SD z monitora i włóż ją do czytnika kart SD połączonego z komputerem.
-
Página 62: Usuwanie Błędów (Faq)
Polski Usuwanie błędów (FAQ) 7.4.7 Wybór FAQ Tutaj można przeczytać rady dotyczące usuwania błędów bezpośrednio na monitorze. W celu wyświetlenia pomocy, należy wybrać odpowiednie pytanie. 8. Dostęp zdalny za pomocą aplikacji Monitor radiowy z ekranem dotykowym 7" umożliwia wysterowanie kamery na żywo. Aplikacja do urządzenia dostępna jest w sklepie App Store pod nazwą... - Página 63 Polski Wprowadzanie informacji o systemie Wprowadź nazwę systemu w polu „Nazwa systemu”. Wprowadzona nazwa będzie wyświetlana w telefonie komórkowym. 2. Wprowadź 15 znakowy numer DID. Numer ten znajduje się w informacjach sieciowych monitora, na naklejce produktu. Aby go ustalić, można również skorzystać z funkcji „Search”, po wybraniu której zostaną...
- Página 64 Polski Widok na żywo W tym miejscu wyświetlany jest widok na żywo z wybranej kamery. Wybór kamery można zmienić. Wybór kamery Wybierz dowolną kamerę. Zrzut ekranowy W tym miejscu można wykonać zrzut ekranowy obrazu na żywo. Obraz zostanie zapisany pośród zdjęć...
- Página 65 Polski Konfiguracja systemu Konfiguracja systemu W tym miejscu wyświetlana jest konfiguracja systemu. Dostępne są następujące możliwości wyboru: Zmiana informacji o systemie Usuwanie systemu Dostęp do zapisów Aby wrócić do widoku na żywo, należy nacisnąć Informacje o systemie W tym miejscu można zmienić nazwę systemu, DID i kod bezpieczeństwa.
- Página 66 Polski Dostęp do zapisów Tutaj można wyświetlić zapisy dla poszczególnych kamer na smartfonie. Wybierz odpowiedni zapis, odtwarzanie rozpocznie się natychmiast. Naciśnij , aby zatrzymać nagranie. Aby powrócić do listy zdarzeń, naciśnij przycisk Kasowanie zapisów Naciśnij symbol na liście zdarzeń. Możliwe jest usuwanie zapisów dla wybranej kamery poprzez wybór jednego lub kilku plików i kliknięcie symbolu .
-
Página 67: Konserwacja I Czyszczenie
Polski 9. Konserwacja i czyszczenie 9.1 Konserwacja Sprawdzaj regularnie bezpieczeństwo techniczne produktu, np. czy obudowa nie jest uszkodzona. Jeżeli są powody do przypuszczenia, że bezpieczna eksploatacja jest niemożliwa, należy wycofać produkt z eksploatacji i zabezpieczyć przed przypadkowym uruchomieniem. Należy przyjąć, że bezpieczna eksploatacja nie jest możliwa, jeżeli: ... -
Página 68: Wskazówki Dotyczące Usuwania Błędów
Polski 11. Wskazówki dotyczące usuwania błędów Odpowiedź Pytania W wyniku sparowania tworzone jest wyłączne, zaszyfrowane Co oznacza sparowanie połączenie radiowe pomiędzy monitorem i kamerą. monitora i kamery i jak to działa? Aby połączyć kamerę z monitorem, wykonaj następujące czynności: 1. Podłącz kamerę i monitor do zasilaczy. 2. -
Página 69: Dane Techniczne
Polski 12. Dane techniczne Monitor LCD 7‘‘ Kamera Liczba diod IR LED 25 diod IR LED Trwałość akumulatora Maks. 1,5 godziny Typ akumulatora Akumulator litowo-jonowy polimerowy 3,7 V / 1800 mA Rozdzielczość 640 x 480 pikseli (VGA) 800 x 480 pikseli Czujnik obrazowy 1/4"CMOS Kąt widzenia... - Página 70 TVAC16000B Betjeningsvejledning Version 11/2013 Dansk oversættelse af den originale tyske betjeningsvejledning Opbevares til fremtidig anvendelse!
- Página 71 ABUS Security-Center GmbH påtager sig intet ansvar for tekniske og typografiske fejl og forbeholder sig retten til på ethvert tidspunkt uden forudgående varsel at ændre produktet og betjeningsvejledningerne.
-
Página 72: Symbolforklaring
Dansk Symbolforklaring Symbolet med lynet i trekanten anvendes, når der er fare for helbredet, f.eks. på grund af elektrisk stød. Et udråbstegn, der befinder sig i trekanten, gør opmærksom på vigtige henvisninger i betjeningsvejledningen, som ubetinget skal overholdes. Dette symbol vises, når du skal have særlige tips og henvisninger vedr. betjeningen. Vigtige sikkerhedshenvisninger Ved skader, der skyldes manglende overholdelse af denne betjeningsvejledning, bortfalder garantien. - Página 73 Dansk Trådløs overførsel Den trådløse overførsels rækkevidde afhænger af forskellige miljøpåvirkninger. De lokale forhold på monteringsstedet kan påvirke rækkevidden negativt. Derfor kan ved frit udsyn opnås en strækning på indtil 150 m mellem modtageren og senderen, men i bygninger betydeligt mindre. Følgende miljøpåvirkninger begrænser både rækkevidden og billedhastigheden: Mobiltelefonantenner, stærkstrømsmaster, elektriske ledninger, lofter og vægge, apparater med samme eller tilstødende trådløs frekvens.
- Página 74 Dansk Inhoudsopgave Korrekt anvendelse ..........................73 Leveringsomfang ............................. 73 Særlige kendetegn og funktioner ......................73 Henvisninger og FAQs ..........................74 Apparatbeskrivelse ..........................74 Beskrivelse af monitoren ........................ 74 Beskrivelse af dockingstationen ....................74 Beskrivelse af kameraet ........................75 Installation ..............................76 Monitorinstallation ...........................
-
Página 75: Korrekt Anvendelse
Derudover kan du via smartphone ved hjælp af ABUS-app'en „TVAC16000“ se live-billedet fra kameraerne og afspille de optagede data, når monitoren står i dockingstationen og den er forbundet med internettet. -
Página 76: Henvisninger Og Faqs
Dansk 4. Henvisninger og FAQs Vigtige henvisninger og FAQs vedrørende dette produkt og andre produkter findes på internetsiden www.abus.com/plug-and-play. Informationer om fejlafhjælpningen findes under punkt 11 i denne vejledning. 5. Apparatbeskrivelse 5.1 Beskrivelse af monitoren ... -
Página 77: Beskrivelse Af Kameraet
Dansk 5.3 Beskrivelse af kameraet Antenne Fast objektiv Power LED Link LED IR-LED Lyssensor Kameraholder Mikrofon Pairing-tast Tilslutning spændingsforsyning 5 V DC/1 A ... -
Página 78: Installation
Dansk 6. Installation 6.1 Monitorinstallation 1. Forbind strømforsyningen med monitoren 2. Tænd apparatet. Tryk hertil på power-tasten i ca. 5 sekunder. Vigtigt: Vær opmærksom på, at monitoren skal oplades mindst 8 timer før den første anvendelse UDEN ekstern spændingsforsyning! Batteriets funktionstid er ca. 1,5 timer. Vigtigt: Med det indbyggede batteri har du mulighed for at anvende monitoren fleksibelt. -
Página 79: Tilslutning Af Dockingstationen Til Netværket
Dansk 6.3 Tilslutning af dockingstationen til netværket Gå frem på følgende måde for at forbinde dockingstationen med internettet: Forbind netværkskablet med din router og dockingstationen. Forbind dig først med netværket, når du har foretaget alle nødvendige indstillinger på monitoren. Netværksindstillingerne beskrives under 7.4.3. Efter indstilling af netværket skal du i undermenuen trykke på... -
Página 80: Betjening
Dansk Skru derefter kameraet på holderen, og forbind strømforsyningen med kameraet. 7. Betjening Hold Power-tasten trykket ind i mindst 5 sekunder for at slå monitoren TIL/FRA. 7.1 Hovedmenu Live-visning Hændelsesliste Indstillinger En løbende optagelse standser altid, så snart du går til hovedmenuen! -
Página 81: Live-Visning
Dansk 7.2 Live-visning Symbolforklaring Visning af SD-kort Intet SD-kort Tip: Sluk altid apparatet, når du fjerner SD-kortet. Vær opmærksom på, at apparatet ikke har en ringlager- SD-kort registreret og funktion. - Página 82 Dansk Timer Der blev gemt en tidsplan. Symbolet vises, når en programmeret optagelse finder sted Optagelsesstatus Blinker rødt: Apparatet optager Hvis du trykker direkte på REC-symbolet, starter du en manuel optagelse. Vælg det igen for at standse optagelsen. Konstant rød: Apparatet optager ikke.
- Página 83 Dansk Netværksindstillinger Denne option står kun til rådighed, hvis monitoren står på dockingstationen, og netværkskablet er tilsluttet til både dockingstation og router. Tryk på netværkssymbolet, og vælg, om du forbinder objektet med internettet, eller om apparatet kun skal indlæses. Vigtigt: Indstil netværket forinden – hvordan du gør det, findes under punkt 7.4.3.
-
Página 84: Hændelsesliste
Dansk Indstilling af alarmen og højttalerens lydstyrke Indstil lydstyrken for alarmtonen (klokkesymbol) eller kameratonen (højttalersymbol) ved at trykke på “+” og “-”. Alarmtonen lyder, når du har gemt en timer eller en erindring om et bestemt klokkeslæt. Hændelsesliste I hændelseslisten vises alle optagelser. Optagelserne er sorteret ud fra dato. ... -
Página 85: Liste Med Optagelserne
Dansk 7.3.1 Liste med optagelserne Så snart du trykke på datoen med grøn baggrund, kommer du til listen med optagelserne. Optagelserne gemmes i undermapper, der benævnes efter optagelsesdatoen. Optagelserne gemmes som enkeltfil med optagelsestiden som filnavn. ... -
Página 86: Visning Af Optagelse
Dansk 7.3.2 Visning af optagelse Så snart du trykker på filnavnet, kan du vise optagelsen. Symbolforklaring Live-visning Skift til live-visningen Tilbage Her kommer du tilbage hovedmenuen. Vælg et af de nummererede kameraer for at vise optagelserne fra ... -
Página 87: Sletning Af Optagelser
Dansk 7.3.3 Sletning af optagelser Der findes tre muligheder for at slette filerne på SD-kortet: . Slet filen ved at trykke på -tasterne. Tryk på x- I hændelseslisten, hvis du trykker på symbolet tasten for at afbryde processen. Formatér SD-kortet på monitoren under menupunktet “System” > “Formatér hukommelseskort” Slet SD-kortet på... -
Página 88: Optagerindstillinger
Dansk Visning/skjulning af kameraet Anvend -tasterne for at vise et kamera, eller tryk på -tasten for at skjule det. Hvis du ikke har indstillet fire kameraer, skjuler du de andre kameraer. Kamera-lysstyrke Vælg den ønskede lysstyrke fra -2 (mørk) til 2 (lys). 7.4.2 Optagerindstillinger ... - Página 89 Dansk Bevægelsesgenkendelse Her kan du indstille bevægelsesgenkendelsens følsomhed for hvert kamera. Du kan mellem “Lav”, “Høj” og “Frau”. Høj: Bevægelsesregistrering med høj følsomhed Lav: Bevægelsesregistrering med lav følsomhed Fra: Bevægelsesgenkendelses frakoblet, her optages der ikke ved bevægelse. Alarmering med e-mail Du kan få...
-
Página 90: Netværksindstillinger
Dansk Timeroptagelse Du kan gemme en optagelsestid for at optage på en helt bestemt tid. Du kan gemme op til 5 optagelser. Vælg først kameraets nummer Indstil start- og stoptidspunktet. Anvend piletasterne hertil. Vælg den ønskede dato i kalenderen Tryk på... - Página 91 Dansk Sikkerhedskode Standard-sikkerhedskoden er: 123456 Indtast af sikkerhedsmæssige årsager en ny kode, og indtast et nyt kodeord (maks. 8-cifret). Tryk hertil på feltet med hvid baggrund, og der åbnes et tastatur. Bekræft derefter med “OK”. Du har senere brug for sikkerhedskoden, når du ønsker adgang til kameraerne via app'en.
-
Página 92: Alarm-Indstillinger
Dansk 7.4.4 Alarm-indstillinger Varighed Her kan du vælge den ønskede alarmeringsvarighed. Alarmeringsvarigheden kan du indstille individuelt: 2 sekunder, 10 sekunder, 30 sekunder eller ingen lyd. Tryk på en vilkårlig tast for at slå alarmtonen fra i tilfælde af alarm. ... -
Página 93: Systemopsætning
Dansk 7.4.5 Systemopsætning Energibesparelsesmodus Her kan du aktivere eller deaktivere den automatiske skærmfrakobling efter 2 minutter. Hvis energibesparelsesmodusen er aktiveret, holder dit batteri ca. en halv time længere. ... - Página 94 Dansk Indstilling af tid // dato og klokkeslæt Her kan du indstille dato og klokkeslæt. Gem derefter dine indtastninger. Henvisning: AM = 00:00 – 11:59 PM = 12:00 – 23:59 Tidszone Her kan du indstille tidszonen for dit land. Vælg landeregionen med piletasterne. Gem derefter dine indtastninger.
- Página 95 Anvend altid den mest aktuelle system- firmware. Den mest aktuelle version kan du downloade fra vores internetside www.abus.com (artikelnummer TVAC16000B). Gå frem på følgende måde for at downloade: Tag SD-kortet ud af monitoren, og sæt det i et SD-kortlæseapparat, som er forbundet med din pc.
-
Página 96: Fejlafhjælpning (Faq)
Dansk 7.4.8 Fejlafhjælpning (FAQ) Udvalg af FAQ Her kan du læse tips vedrørende udbedring af fejl direkte på monitoren. Vælg det pågældende spørgsmål for at vise hjælpen. 8. Fjernadgang via app Med denne trådløse 7"-touchscreen-monitor har du mulighed for at skifte live til dine kameraer. App'en for dette apparat findes i App Store under navnet “TVAC16000”. - Página 97 Dansk Indtastning af systeminformationer Indtast derefter et navn for dit system under “System Name”, som skal vises på din mobiltelefon. 2. Indtast nu det 15-cifrede DID-nummer. Det findes du i netværksinformationerne på din monitor, på produktmærkatet på dit produkt, eller du klikke på søgefunktionen “Search”, og alle apparater i nærheden vises.
- Página 98 Dansk Live-visning Du ser nu live-billedet fra det ønskede kamera og kan vælge det pågældende kamera. Kameravalg Vælg det ønskede kamera. Screenshot Her har du mulighed for at lave et screenshot af dit live-billede. Billedet gemmes derefter under dine fotos på...
- Página 99 Dansk Systemkonfiguration Systemkonfiguration Her kommer du til systemkonfigurationen. Du har følgende valgmuligheder. Ændring af systeminformationen Fjernelse af systemet Adgang til optagelser Tryk på for at komme tilbage til live-visningen. Systeminformation Du har her mulighed for at ændre systemnavnet, DID og sikkerhedskoden.
- Página 100 Dansk Adgang til optagelser Her har du mulighed for at se optagelser for det enkelte kamera på din smartphone. Vælg den ønskede optagelse, afspilningen starter med det samme. Tryk på for at stille optagelsen på pause, tryk på tasten at komme tilbage til hændelseslisten. Sletning af optagelser Tryk i hændelseslisten på...
-
Página 101: Vedligeholdese Og Rengøring
Dansk 9. Vedligeholdese og rengøring 9.1 Vedligeholdelse Kontroller regelmæssigt produktets tekniske sikkerhed, f.eks. skader på kabinettet. Hvis man har en formodning om, at en risikofri drift ikke længere er muligt, skal produktet sættes ud af drift og sikres mod utilsigtet betjening. Fjern akkumulatorerne. Det kan antages, at en risikofri drift ikke længere er mulig, når ... -
Página 102: Tips Vedrørende Fejlafhjælpning
Dansk 11. Tips vedrørende fejlafhjælpning Spørgsmål Svar Hvad betyder det at forbinde Med forbindelsen etableres den eksklusive, kodede trådløse monitor og kamera, og forbindelse mellem monitor og kamera. hvordan fungerer det? Gå frem på følgende måde for at forbinde et kamera med monitoren: 1. -
Página 103: Tekniske Data
Dansk 12. Tekniske data Kamera 7'' monitor Antal IR LED'er Batteriets funktionstid 1,5 timer Batteritype Li-ion polymer 3,7 V/1800 mA Opløsning 640 x 480 pixel 800 x 480 pixel Billedoptager 1/4" CMOS Synsvinkel 60° (Horisontal) / 43° (Vertikal) Frekvens 2,4 GHz Trådløs rækkevidde 150 meter* IR-drejefilter... - Página 104 TVAC16000B Manual de instrucciones Versione 11/2013 Traducción española del manual de instrucciones original alemán Guardar para futuras consultas.
-
Página 105: Introducción
ABUS Security-Center GmbH no asume ningún tipo de responsabilidad por los fallos técnicos ni tipográficos y se reserva el derecho a realizar modificaciones en el producto y en los manuales de instrucciones sin previo aviso. -
Página 106: Explicación De Los Símbolos
Español Explicación de los símbolos El símbolo con un rayo dentro de un triángulo se utiliza para advertir de un peligro para la integridad física debido, por ejemplo, a una descarga eléctrica. Un signo de admiración dentro de un triángulo señaliza una indicación importante que es imprescindible tener en cuenta. -
Página 107: Desembalaje
Español Transmisión inalámbrica La cobertura de la transmisión inalámbrica depende de las condiciones del entorno. Las condiciones concretas del lugar de montaje pueden influir negativamente en la cobertura. Por ello, si no hay obstáculos entre el receptor y el emisor puede alcanzarse una cobertura de 150m, aunque dentro de edificios será... - Página 108 Español Indice Uso adecuado ............................107 Volumen de entrega ..........................107 Características y funciones ........................107 Indicaciones y FAQs ..........................108 Descripción del aparato ........................108 Descripción del monitor ........................ 108 Descripción de la estación de acoplamiento ................108 Descripción de la cámara ......................109 Instalación...............................
-
Página 109: Uso Adecuado
Por lo demás, puede ver la imagen de las cámaras en directo mediante un teléfono inteligente a través de la app ABUS «TVAC16000» y reproducir datos grabados cuando el monitor está en la estación de acoplamiento y ésta está conectada a Internet. -
Página 110: Indicaciones Y Faqs
Español 4. Indicaciones y FAQs En la página de Internet www.abus.com/plug-and-play encontrará indicaciones importantes y FAQs sobre éste y muchos otros productos. En el punto 11 de estas instrucciones encontrará información para solucionar averías. 5. Descripción del aparato 5.1 Descripción del monitor ... -
Página 111: Descripción De La Cámara
Español 5.3 Descripción de la cámara Antena Objetivo fijo LED de alimentación LED de conexión LED IR Fotocelda Soporte de la cámara Micrófono Botón de emparejamiento Conexión a tensión de ... -
Página 112: Instalación
Español 6. Instalación 6.1 Instalación del monitor Conecte la fuente de alimentación al monitor. Encienda el aparato. Pulse para ello aproximadamente 5 segundos la tecla de encendido y apagado. Atención: Tenga en cuenta que el monitor debe cargarse al menos durante 8 horas la primera vez que se vaya a usar SIN tensión de alimentación externa. -
Página 113: Conectar A La Red La Estación De Acoplamiento
Español 6.3 Conectar a la red la estación de acoplamiento Para conectar la estación de acoplamiento a Internet, proceda de la forma siguiente: Conecte el cable de red con su enrutador y la estación de acoplamiento. No se conecte a la red hasta que no haya realizado todos los ajustes necesarios en el monitor. Los ajustes de red se describen en 7.4.3. -
Página 114: Utilización
Español Finalmente, atornille la cámara al soporte y conecte la fuente de alimentación a la cámara. 7. Utilización Para encender y apagar el monitor, pulse la tecla de encendido y apagado durante por lo menos 5 segundos. 7.1 Menú principal ... -
Página 115: Vista En Directo
Español Vista en directo Symbolerklärung Indicación de las tarjetas SD No hay ninguna tarjeta SD Consejo: Antes de extraer la tarjeta SD, apague siempre el aparato. - Página 116 Español Timer Este símbolo aparece cuando tiene lugar una grabación Se ha guardado el horario programada Estado de la grabación Parpadeo en rojo: aparato grabando Pulsando directamente sobre el símbolo REC, se inicia una grabación manual. Vuelva a elegirlo para detener la grabación. Luz roja constante: El aparato no graba.
- Página 117 Español Conexión con la red Solo se dispone de esta opción cuando el monitor está en la estación de acoplamiento y el cable de red está conectado tanto a dicha estación como también al enrutador. Toque suavemente el símbolo de red y elija si el objeto se ha de conectar a Internet o si solo se debe cargar el aparato.
-
Página 118: Lista De Eventos
Español Ajuste del volumen de la alarma y de la voz Ajuste el volumen de la alarma (símbolo de campana) o de la cámara (símbolo de altavoz) pulsando “+” y “-”. La alarma suena cuando se ha ajustado el temporizador o un recordatorio a una hora determinada. -
Página 119: Lista De Las Grabaciones
Español 7.3.1 Lista de las grabaciones Tocando suavemente la fecha con fondo verde, se accede a la lista de grabaciones. Las grabaciones se guardan en subcarpetas que tienen como nombre la fecha de grabación. Las grabaciones se guardan como archivos separados y tienen como nombre la hora de grabación. ... -
Página 120: Ver Grabación
Español 7.3.2 Ver grabación Tocando suavemente sobre el nombre del archivo, se ve la grabación. Explicación de los símbolos Vista en directo Cambio a la vista en directo Volver Aquí se vuelve al menú principal. Seleccione una de las cámaras numeradas para poder ver las ... -
Página 121: Borrar Grabaciones
Español 7.3.3 Borrar grabaciones Hay tres formas de borrar archivos en la tarjeta SD: en la lista de eventos. Para borrar el archivo pulse la tecla . Tocando suavemente sobre el símbolo Para cancelar el proceso pulse la tecla x. Formateando la tarjeta SD en el monitor bajo el punto de menú... -
Página 122: Ajustes De Grabación
Español Mostrar / ocultar cámara Utilice las teclas para mostrar una cámara o pulse la tecla para ocultarla. Si no ha programado cuatro cámaras, oculte las demás cámaras. Luminosidad de la cámara Ajuste la luminosidad que desee entre -2 (oscuro) y 2 (luminoso). - Página 123 Español Detección de movimiento Aquí se puede ajustar la sensibilidad de la detección de movimiento en función de la cámara. Se puede elegir entre “Bajo”, “Alto” y “Desact.”. Alta: detección de movimiento con alta sensibilidad Baja: detección de movimiento con baja sensibilidad Desactivado: Detección de movimiento desactivado.
-
Página 124: Configuración De La Red
Español Grabación con temporizador Puede programar una hora de grabación para grabar a una hora determinada. Puede programar hasta 5 grabaciones. Seleccione primero el número de la cámara. Programe la hora de comienzo y de finalización. Utilice para ello las teclas de flecha. - Página 125 Español Código de seguridad El código estándar de seguridad es: 123456 Por motivos de seguridad cambie el código y asigne una nueva contraseña (máx. 8 dígitos). Para ello toque suavemente el campo con fondo blanco y se abre un teclado. Seguidamente confirme con “OK”.
-
Página 126: Configuración Del Alarma
Español 7.4.4 Configuración del alarma Duración Aquí se puede elegir la duración que se desee para la alarma. La duración de la alarma se puede ajustar individualmente: 2 segundos, 10 segundos, 30 segundos o sin alarma. Pulse cualquier tecla para desconectar el sonido de alarma en caso de alarma. -
Página 127: Configuración Del Sistema
Español 7.4.5 Configuración del sistema Modo de ahorro de energía Aquí se puede activar o desactivar tras dos minutos la desconexión automática de la pantalla. Si está activado el modo de ahorro de energía, la batería dura aproximadamente media hora más. - Página 128 Español Tiempo // Configurar fecha y hora Aquí se puede ajustar la fecha y la hora. Seguidamente guarde las entradas. Nota: AM = 00:00 – 11:59 PM = 12:00 – 23:59 Zona horaria Aquí puede ajustar la zona horaria correspondiente a su país. Seleccione su región mediante las teclas de flecha.
- Página 129 La versión más actual la podrá descargar en nuestra página de Internet www.abus.com (número de artículo TVAC16000B). Para ello, proceda como sigue: Retire la tarjeta del monitor e introdúzcala en un lector de tarjetas SD conectado a su PC.
-
Página 130: Solución De Averías (Faq)
Español 7.4.9 Solución de averías (FAQ) Selección de FAQ Aquí encontrará consejos para solucionar averías directamente en el monitor. Seleccione la pregunta correspondiente para mostrar la ayuda. 8. Acceso remoto vía app Con este monitor RF de pantalla táctil de 7" tiene usted la posibilidad de conectarse en directo a sus cámaras. - Página 131 Español Introducir información del sistema Seguidamente introduzca en “System Name” el nombre para su sistema que se vaya a visualizar en el móvil. 2. Introduzca ahora el número DID de 15 dígitos. Este número lo encontrará en la información de red de su monitor, en el adhesivo del producto o pinche en la función de búsqueda “Search”...
- Página 132 Español Vista en directo Ahora se ve la imagen en directo de la cámara que desee y puede elegir la cámara que corresponda. Selección de cámara Elija la cámara que desee. Captura de pantalla Aquí se puede hacer una captura de pantalla de la imagen en directo.
- Página 133 Español Configuración de sistema Configuración de sistema Aquí se accede a la configuración de sistema. Se puede seleccionar lo siguiente: Modificación de la información del sistema Eliminar el sistema Acceso a grabaciones Pulse para volver a la vista en directo Información del sistema Aquí...
- Página 134 Español Acceso a grabaciones Aquí tiene la posibilidad de visualizar en su teléfono inteligente las grabaciones de cada cámara. Seleccione la grabación deseada; la reproducción comienza de inmediato. Pulse para pausar la grabación; para regresar a la lista de eventos pulse la tecla Borrar grabaciones Pulse el símbolo en la lista de eventos.
-
Página 135: Manutenzione E Pulizia
Español 9. Manutenzione e pulizia 9.1 Manutenzione Verificare regolarmente la sicurezza tecnica del prodotto, ad esempio la presenza di danni all'alloggiamento. Se si presume che non sia più possibile un esercizio sicuro, il prodotto deve essere messo fuori servizio e assicurato contro un esercizio accidentale. -
Página 136: Consejos Para La Solución De Averías
Español 11. Consejos para la solución de averías N.° Pregunta Respuesta ¿Qué significa “emparejar” el A través del emparejamiento se establece una comunicación por monitor y la cámara y cómo radio cifrada y exclusiva entre la cámara y el monitor. funciona? Para conectar una cámara a un monitor proceda como sigue: 1. -
Página 137: Datos Técnicos
Español 12. Datos técnicos Cámara Monitor de 7" Número de LEDs de infrarrojos Duración de la batería 1,5 horas de polímero de iones de litio, Tipo de batería 3,7 V / 1800 mA Resolución 640 x 480 píxeles 800 x 480 píxeles Sensor de imagen 1/4"... - Página 139 ændre frit og uden forudgående advisering. Pie de imprenta Este manual es una publicación de la Seguridad ABUS-Center GmbH & Co. KG, enlazador Kreuthweg 5, 86444 Affing. Todos los derechos reservados, incluyendo traducciones. Queda prohibida la reproducción, por ejemplo, Fotocopia, microfilm, o en los datos de los equipos electrónicos de procesamiento, sin la autorización por escrito de la editorial.