
Manuales relacionados para Costway JB10007


Resumen de contenidos para Costway JB10007
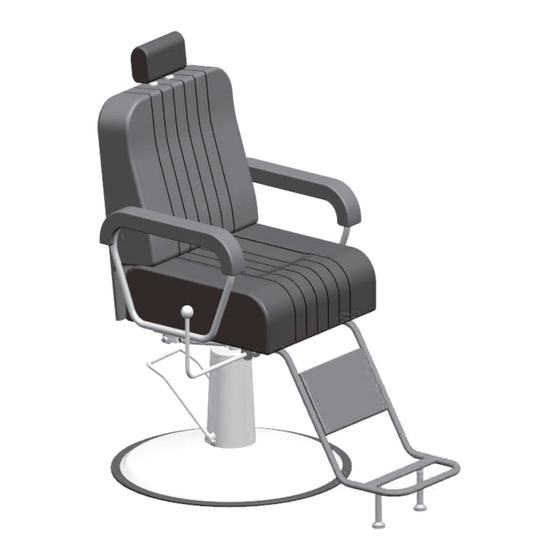
- Página 1 Salon Chair Friseurstuhl Chaise de Salon Silla de Salón Sedia da Salone Fotel do salonu piękności JB10007 THIS INSTRUCTION BOOKLET CONTAINS IMPORTANT SAFETY INFORMATION. PLEASE READ AND KEEP FOR FUTURE REFERENCE.
-
Página 2: Before You Start
Before You Start Please read all instructions carefully. Retain instructions for future reference. Separate and count all parts and hardware. Read through each step carefully and follow the proper order. We recommend that, where possible, all items are assembled near to the area in which they will be placed in use, to avoid moving the product unnecessarily once assembled. -
Página 3: Avant De Commencer
Avant de Commencer Veuillez lire attentivement toutes les instructions. Conservez les instructions pour vous y référer ultérieurement. Vérifiez toutes les pièces et les accessoires. Lisez attentivement chaque étape et suivez l'ordre correct. Nous recommandons que, dans la mesure du possible, tous les produits soient assemblés à... -
Página 4: Prima Di Iniziare
Prima di Iniziare Si prega di leggere attentamente tutte le istruzioni. Conservare le istruzioni per riferimento futuro. Separare e contare tutte le parti e gli accessori. Leggere attentamente ogni passo e seguire l'ordine corretto. Si consiglia, ove possibile, di assemblare tutti gli articoli vicino alla zona in cui verranno posti in uso, per evitare di spostare inutilmente il prodotto una volta assemblato. - Página 5 Salon Chair Friseurstuhl Chaise de Salon Silla de Salón Sedia da Salone Fotel do salonu piękności...
-
Página 6: Safety/Sicherheit/Sécurité /Seguridad/Sicurezza/Bezpieczeństwo
SAFETY/SICHERHEIT/SÉCURITÉ /SEGURIDAD/SICUREZZA/BEZPIECZEŃSTWO EN: To reduce risk of injury when assembling & using the chair, follow these precautions: • Read all of these instructions before assembling and using your salon chair. • It is helpful to have 2 people assemble and turn the chair upright after assembling. - Página 7 PL: Aby zmniejszyć ryzyko obrażeń podczas montażu i użytkowania produktu, należy przestrzegać następujących środków ostrożności: • Przed przystąpieniem do montażu oraz użytkowania produktu należy zapoznać się z instrukcją. • Zalecamy, aby montaż był przeprowadzany przez 2 osoby dorosłe. • Nie należy przekraczać maksymalnego dopuszczalnego obciążenia produktu (150 kg).
- Página 8 gasket M6 nut /Unterlegscheibe /M6-Mutter /Joint /M6 Écrou /arandela /M6 tuerca /Guarnizione /M6 Dado /Podkładka /Nakrętka 10-12 Open end wrench 12-14 Open end wrench /Mutterschlüsse /Mutterschlüssel /Clés à fourche doubles /Clés à fourche doubles /Llave de boca /Llave de boca /Chiavi a doppia estremità...
- Página 9 INSTALLATION INSTRUCTION /INSTALLATIONSANLEITUNG /INSTRUCTIONS D'INSTALLATION /INSTRUCCIONES DE MONTAJE /ISTRUZIONI DI INSTALLAZIONE /INSTRUKCJA MONTAŻU Install pump to the base /Installieren Sie die Pumpe auf dem Sockel. /Installez la pompe à la base /Monte la bomba en la base /Installare la pompa alla base /Przymocuj podnośnik do podstawy.
- Página 10 EN: Step 1. Install the pump to the base with the 4 nuts of pump. Step 2. Loosen the 2 small set screws which pre-fixed in the pump. Step 3. Install the Foot bar to the pump with the 2 small set bolts.
- Página 11 Install seat plate iron /Montieren Sie das Sitzplatteneisen /Installez la plaque de siège en fer /Monte la plancha del asiento /Installare la piastra del sedile in ferro /Zamocuj metalową płytkę siedziska. Note: The mounting seat plate is noted for the front and rear orientation /Hinweis: Die Montage der Sitzplatte ist für die vordere und hintere Ausrichtung vermerkt /Remarque : La plaque de montage est illustrée pour une orientation...
- Página 12 Étape 1 : Retirez les boulons préinstallés. Étape 2 : Installez D. Veuillez suivre le diagramme. Paso 1: Retire los pernos preinstalados. Paso 2: Monte D. Por favor, siga el diagrama. Passo 1: Rimuovere i bulloni preinstallati. Passo 2: Installare D. Si prega di seguire il diagramma.
- Página 13 Install backrest /Installieren Sie die Rückenlehne /Installez le dossier /Monte el respaldo /Installare lo schienale /Zamocuj oparcie. Cotter pin bolt /Zylinderstift /Bolzen /Mutter /Stift /Goupille /Boulon /Écrou /Broche /Chaveta /Perno /Tuerca /Pasador /Copiglia /Bollune /Dado /Perno /Zawleczka /Śruba /Nakrętka /Bolec...
- Página 14 EN: Step 1: Remove the pin shaft from the iron of the preassembled seat plate and open and close the pin. Step 2: Connect the back of the chair to the seat cushion. Step 3: Remove the bolts pre-installed on the gas rod. Step 4: Connect the gas rod to the backrest.
- Página 15 Install G / Installieren Sie G / Installez G / Monte G / Installare G / Zamocuj część G. EN: Step 1: Remove the bolts from the pre-installed seat plate iron. Step 2: Install G. Please follow up the diagram DE: Schritt 1: Entfernen Sie die Schrauben aus dem vorinstallierten Sitzplatteneisen.
- Página 16 Install the pins /Installieren Sie die Stifte /Installez les broches. /Monte los pasadores /Installare i perni. /Zamocuj kołki. EN: Please follow up the diagram DE: Bitte folgen Sie dem Diagramm FR: Veuillez suivre le diagramme. ES: Por favor, siga el diagrama. IT: Si prega di seguire il diagramma.
- Página 17 Set Seat & Backrest onto Hydraulic Pump & Base /Setzen Sie Sitz und Rückenlehne auf Hydraulikpumpe und Sockel /Réglez le siège et le dossier sur la pompe hydraulique et la base /Coloque el asiento y el respaldo en la bomba hidráulica & base /Impostare il sedile &...
- Página 18 ES: Paso 1: Localice la ranura en la columna corta debajo del asiento. Alinee esta ranura con el pasador negro en la parte superior de la bomba hidráulica. Paso 2: Coloque el asiento y el respaldo montados en la bomba hidráulica y la base montadas y presione hacia abajo.
- Página 19 EN: 1. In the natural state, the upper part of the pump can rotate freely on the rotation axis of the pump; 2. Hold up the foot bar to lock the rotating. DE: 1. Im natürlichen Zustand kann sich der obere Teil der Pumpe frei um die Drehachse der Pumpe drehen;...
- Página 20 EN: • Step down on the Foot Bar repeatedly to raise the chair to the desired height. • Do not over-extend the chair, creating the risk of falls or tipping the chair and its occupant over, resulting in injury. • Step down and hold the Foot Bar to allow chair to lower. DE: - Treten Sie wiederholt auf den Fußhebel, um den Stuhl auf die gewünschte Höhe anzuheben.
- Página 21 Recline the Backrest /Neigen Sie die Rückenlehne zurück /Inclinez le Dossier /Recline el respaldo /Reclinare lo schienale /Regulacja nachylenia oparcia EN: Push the lever backwards (35°~40°) and push the backrest to back. The backrest will tilt backwards; loosen the lever to get the tilt degree of backrest;...
- Página 22 ES: Empuje la palanca hacia atrás (35°~40°) y empuje el respaldo hacia atrás. El respaldo se inclinará hacia atrás; afloje la palanca para obtener el grado de inclinación del respaldo; vuelva a girar la palanca hacia atrás (35°~40°), el respaldo puede volver a la posición original. No presione la palanca con demasiada fuerza.
- Página 23 EN: By adjusting the screws can control the backrest shaking angle, pay attention to the shaking angle should not be too large. DE: Durch Verstellen der Schrauben kann der Wackelwinkel der Rückenlehne kontrolliert werden, achten Sie darauf, dass der Wackelwinkel nicht zu groß ist. FR: En ajustant les vis, vous pouvez contrôler l'angle d'oscillation du dossier, en vous assurant que l'angle d'oscillation n'est pas trop grand.
- Página 24 Return / Damage Claim Instructions DO NOT discard the box / original packaging. In case a return is required, the item must be returned in original box. Without this your return will not be accepted. Take a photo of the box markings. A photo of the markings (text) on the side of the box is required in case a part is needed for replacement.
-
Página 25: Instructions De Retour / Réclamation De Dommages
Instructions De Retour / Réclamation De Dommages NE PAS jeter la boîte/l'emballage d'origine. Dans le cas où un retour est requis, l'article doit être retourné dans sa boîte d'origine. Sans cela, votre retour ne sera pas accepté. Prenez une photo des marquages de la boîte. Une photo des marquages (texte) sur le côté... - Página 26 Istruzioni Per La Restituzione / Reclamo Per Danni NON scartare la scatola / confezione originale. Nel caso in cui sia richiesto un reso, l'articolo deve essere restituito nella scatola originale. Senza la scatola originale il tuo reso non sarà accettato. Fare una foto dei contrassegni sulla scatola.
- Página 27 DEU office: FDS GmbH, Neuer Höltigbaum 36, 22143 Hamburg, Deutschland FRA office: Saint Vigor d'Ymonville USA:cs.us@costway.com POL:sklep@costway.com If you're having difficulty, our friendly AUS:cs.au@costway.com DEU:cs.de@costway.com customer team is always here to help. GBR:cs.uk@costway.com FRA:cs.fr@costway.com I T A :cs.i t @costway.com ESP:cs.es@costway.com...