
Manuales relacionados para Pioneer SC-LX59

Resumen de contenidos para Pioneer SC-LX59
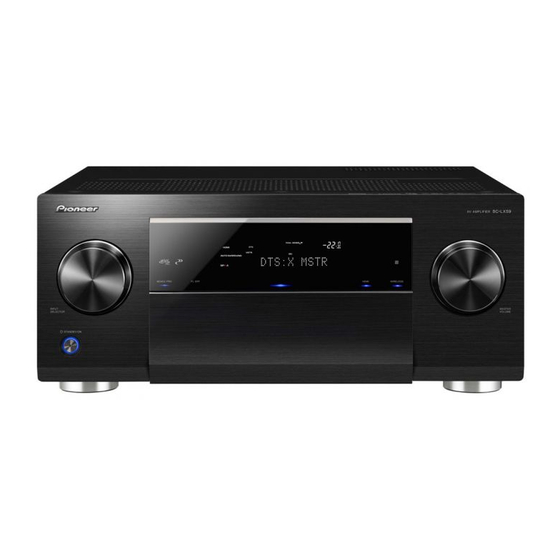
- Página 1 Quick Start Guide Guía de inicio rápido Register your product at http://www.pioneerelectronics.com (US) http://www.pioneerelectronics.ca (Canada) AV Receiver SC-LX Receptor AV...
-
Página 2: What's In The Box
English VENTILATION CAUTION Thank you for buying this Pioneer product. This Quick Start Guide includes instructions for basic connections and operations to When installing this unit, make sure to leave space allow simple use of the receiver. For detailed descriptions of the receiver, see the “Operating Instructions” provided on the... - Página 3 Connection and initial setup Perform connection and initial settings in any of the ways listed below. Follow the guidance of the built-in Follow the instructions in the Use “Start-up Navi” app to perform AVNavigator to perform connection booklet to perform connection connection and initial settings and initial settings and initial settings...
-
Página 4: Connecting To The Network Through Lan Interface
If you have a Mac/PC Connecting to the network through LAN interface Plugging in the receiver After connecting to a LAN, connect the power cord of the Internet receiver to a power outlet. Modem Plug the supplied power cord into the AC IN socket on the Router back of the receiver. -
Página 5: Operating Environment
• With a Windows PC, you can use the following method to ® – Windows PC: Internet Explorer 8, 9, 10, 11 Launch Safari and click <SC-LX59> displayed in ‘Bonjour’ on launch AVNavigator. – Mac OS: Safari 6.0, 7.0 the Bookmarks bar. -
Página 6: Placing The Speakers
Follow the booklet instructions to perform connection and initial settings Connecting up Placing the Speakers L – Front Left C – Center TMdL TMdR R – Front Right SL – Surround Left SR – Surround Right SBL – Surround back Left SBR –... -
Página 7: Connecting The Speakers
Connecting up Connecting the speakers Front Right Subwoofer Center Front Left (SW) • You can use speakers with a nominal impedance between 4 Ω and 16 Ω. Bare wire connections LINE LEVEL INPUT Twist exposed wire strands together. Loosen terminal and insert exposed wire. Tighten terminal. -
Página 8: Connecting A Tv And Playback Components
Check the power cord once in a CONTROL TOTAL 150 mA MAX) while. When you find it damaged, ask your nearest Pioneer authorized service center or your dealer for a replacement. You will not be • The receiver should be disconnected by removing the... -
Página 9: Initial Setup
Initial Setup Before you start Automatically setting up for surround sound (MCACC) Press MAIN RECEIVER on the remote control, Put the batteries in the remote control. The Auto Multi-Channel ACoustic Calibration (MCACC) setup uses the supplied setup microphone to measure and analyze then press the ENTER button. -
Página 10: Basic Playback
Basic playback Switch on the playback component. Multichannel playback To enjoy the many functions of the E.g.) Turn the Blu-ray Disc player connected to the HDMI BD IN terminal on. unit to the fullest extent STANDBY/ON SOURCE Switch the input of the receiver. ALL ZONE STBY E.g.) Press BD to select the BD input. -
Página 11: Frequently Asked Questions
(The power turns off in 5 seconds after the power is devices are unresponsive. turned on. The receiver’s setting will be maintained.) “Pioneer” is a trademark of Pioneer Corporation, and is used under license. Also try replugging the power cord of the connecting devices. © 2015 Onkyo & Pioneer Corporation. -
Página 12: Contenido De La Caja
Español PRECAUCIÓN PARA LA VENTILACIÓN Muchas gracias por haber adquirido este producto de Pioneer. Esta Guía de inicio rápido incluye instrucciones para hacer las Cuando instale este aparato, asegúrese de dejar conexiones y operaciones básicas que le permitirán hacer un uso sencillo del receptor. Para conocer una descripción detallada espacio en torno al mismo para la ventilación con el fin... - Página 13 Conexión y configuración inicial Realice la conexión y la configuración inicial de cualquiera de las siguientes formas. Siga las instrucciones de AVNavigator Use la aplicación para “Start-up Navi” Siga las instrucciones del folleto incorporado para realizar la conexión y realizar la conexión y la configuración para realizar la conexión y la la configuración inicial inicial...
-
Página 14: Si Tiene Un Mac/Pc
Si tiene un Mac/PC Conexión a la red mediante la interfaz LAN Conexión del receptor Tras la conexión a una LAN, conecte el cable de alimentación Internet del receptor a una toma de corriente. Modem Conecte el cable de alimentación suministrado a la toma Enrutador AC IN de la parte posterior del receptor. -
Página 15: Inicio Del Avnavigator Integrado
® – PC con Windows: Internet Explorer 8, 9, 10, 11 Inicie Safari y haga clic en <SC-LX59> que se muestra en • Si está utilizando un PC con Windows, puede usar el – Mac OS: Safari 6.0, 7.0 ‘Bonjour’ en la barra Favoritos. -
Página 16: Disposición De Los Altavoces
Siga las instrucciones del folleto para realizar la conexión y la configuración inicial Conexiones Disposición de los altavoces L – Delantero izquierdo C – Central TMdL TMdR R – Delantero derecho SL – Sonido envolvente izquierdo SR – Sonido envolvente derecho SBL –... -
Página 17: Conexiones
Conexiones Conexión de los altavoces Delantero derecho Subwoofer Central Delantero izquierdo (SW) • Puede utilizar los altavoces con una impedancia nominal de entre 4 Ω y 16 Ω Conexiones de cables desnudos LINE LEVEL INPUT Trence los hilos expuestos del cable. Afloje el terminal e inserte el hilo expuesto. -
Página 18: Conexión De Componentes De Reproducción Y De Un Tv
Revise el cable de alimentación está dañado, solicite el reemplazo del mismo al centro de servicio autorizado No podrá ver Pioneer más cercano, o a su distribuidor. la pantalla de • Cuando no vaya a usar el receptor durante un período de configuración del... -
Página 19: Configuración Inicial
Configuración inicial Antes de comenzar Confi guración automática para sonido envolvente (MCACC) Pulse MAIN RECEIVER en el mando a distancia Ponga las pilas en el mando a distancia. La configuración de calibración acústica automática multicanal (MCACC) utiliza el micrófono incluido de y luego pulse el botón ENTER. -
Página 20: Reproducción Básica
Reproducción básica Encienda el componente de reproducción. Reproducción multicanal Para disfrutar al máximo de las Ej.) Encienda el reproductor de discos Blu-ray conectado al terminal HDMI BD IN. muchas funciones de la unidad STANDBY/ON SOURCE Cambie la entrada del receptor. ALL ZONE STBY Ej.) Pulse BD para seleccionar la entrada BD. -
Página 21: Preguntas Frecuentes
(La alimentación se desactiva 5 segundos después “Pioneer” es una marca comercial de Pioneer Corporation, y se usa bajo licencia. de su activación. Se mantendrá la configuración del receptor.) Pruebe a volver a conectar el cable de alimentación de los ©... - Página 24 © 2015 Onkyo & Pioneer Corporation. All rights reserved. <Japan> 2-3-12 Yaesu, Chuo-ku, Tokyo 104-0028 JAPAN <U.S.A.> 18 PARK WAY, UPPER SADDLE RIVER, NEW JERSEY 07458, U.S.A. Tel: 1-201-785-2600 <Germany> Hanns-Martin-Schleyer-Straße 35, 47877 Willich, Germany Tel: +49(0)2154 913222 <UK> Anteros Building, Odyssey Business Park, West End Road, South Ruislip, Middlesex, HA4 6QQ United Kingdom Tel: +44(0)208 836 3612 <France>...