Tabla de contenido
Publicidad
Idiomas disponibles
Idiomas disponibles
Enlaces rápidos
Publicidad
Capítulos
Tabla de contenido

Manuales relacionados para Luvion Platinum

Resumen de contenidos para Luvion Platinum
- Página 1 P L A T I N U M HANDLEIDING INSTRUCTION MANUAL BETRIEBSANLEITUNG MANUEL DE L’UTILISATEUR MANUAL DE INSTRUCCIONES MANUALE D’USO MANUAL BRUGERMANUAL INSTRUKCJA OBSŁUGI LUVION ® NÁVOD K POUŽITÍ MANU Premium Babyproducts platinum user manual ALL .indd 1 4-11-2009 17:17:22...
- Página 2 ALL .indd 2 4-11-2009 17:17:22...
- Página 3 Nederlands platinum user manual ALL .indd 3 4-11-2009 17:17:23...
-
Página 4: Tabla De Contenido
Luvion Babyfoon in gebruik neemt. ® Wij wensen u veel plezier toe met het gebruik van de Luvion Beeldbabyfoon. ® Luvion is leverancier van verschillende kwaliteitsproducten voor ® baby’s en kinderen. Wij hopen dat u enthousiast en tevreden bent over de Luvion beeldbabyfoon en zien u graag als tevreden klant terug. ® LUVION ® platinum user manual ALL .indd 4 4-11-2009 17:17:23... -
Página 5: Specificaties
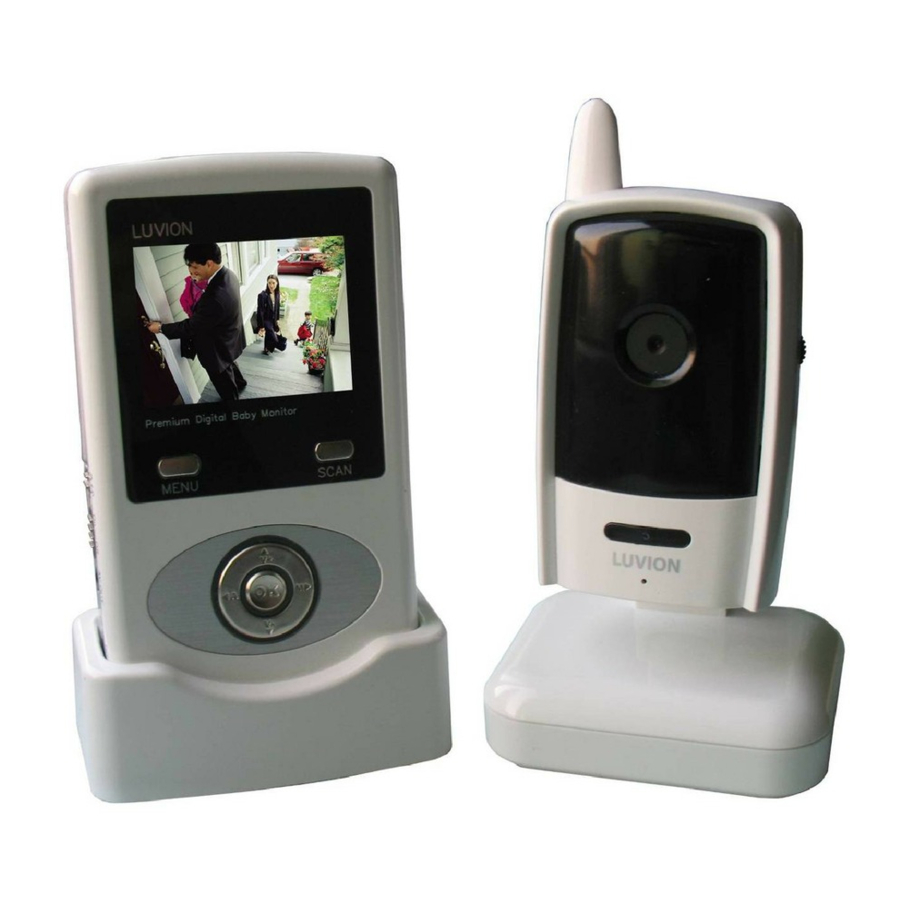
• Camera met nachtzicht tot 4,5 meter. • Camera met ingebouwde microfoon. • In de camera kunnen batterijen worden geplaatst voor een compleet draad- loze verbinding. Specifi caties monitor • 2,4’’ inch kleuren LCD monitor met superieure beeldkwaliteit (25 fps). • Video/Audio output om de beelden op een TV/Monitor te zien of eventueel op te nemen op een VCD/DVD recorder. • Oplaadbare Lithium polymer batterijen. • Gebruiksvriendelijke oplader is inbegrepen. • Audio level meter en alarm. Het systeem wordt geleverd met de volgende componenten: Draadloze ontvanger Basis station Draadloze camera Adapter Adapter RCA kabel (oplader ontvanger) (ontvanger) (camera) Controleert u a.u.b. of bovenstaande items in het pakket aanwezig zijn. platinum user manual ALL .indd 5 4-11-2009 17:17:33... -
Página 6: Menu Mode
Zodoende kunt u TV kijken en tege- lijkertijd de beelden van monitor zien in uw TV op een klein scherm. Beeld Mode: De volgende knoppen kunnen worden gebruikt terwijl u naar het beeldscherm kijkt. •Druk op de naar boven/beneden pijl om het volume harder/zachter te zetten. •Druk op de linker pijl om automatisch te schakelen tussen de camera’s. •Druk op de rechter pijl om handmatig te schakelen tussen de camera’s. Menu mode: Gebruik de naar boven/beneden/links/rechts pijlen om te navi- geren in de menu mode. Druk op de OK knop om uw keuze te selecteren. platinum user manual ALL .indd 6 4-11-2009 17:17:33... -
Página 7: Functieknoppen Monitor Voor- En Achterkant
Om de batterij te sparen. Wanneer er geluid komt vanuit de camera boven het zelf ingestelde audio level zal de monitor een bliep geven en de beelden weer vertonen op het beeldscherm. De ontvanger zal na ongeveer 5 seconden weer automatisch naar de Scan modus gaan. Wanneer u uit het scanmenu wilt kunt u eenvoudig een knop naar keuze (op de OK knop na) indrukken. Menuknop - Druk deze knop in zodat u in het menu komt. Druk deze knop nogmaals in om het menu te verlaten. Navigatie en Ok knop - Deze kunt u gebruiken terwijl het beeld wordt vertoond en wanneer u in het menu veranderingen wilt aanbrengen. Standaard - U kunt de standaard achterop de monitor eruit halen en deze op een vlakke ondergrond plaatsen. Vanzelfsprekend kunt u de monitor tevens in de speciale oplader plaatsen. Pair Button - Druk op de Pair Button wanneer u een camera met de ont- vanger/monitor verbindt. U heeft meer dan één camera nodig indien u de functies wilt gebruiken welke voor meer dan één camera bestemd zijn. Speaker - Produceert het geluid dat via de camera opgevangen wordt. platinum user manual ALL .indd 7 4-11-2009 17:17:35... -
Página 8: Functieknoppen Monitor Overig
DC 9V Power Input- Verbindt de bijgesloten DC 9V adapter met het basisstation om de monitor op te laden. Let op, Indien de monitor met het basisstation is aangesloten én de AV kabel is aangesloten op de TV/monitor, dan zal het beeld van de monitor donker zijn. platinum user manual ALL .indd 8 4-11-2009 17:17:35... -
Página 9: Functieknoppen Camera
Functieknoppen camera Camera antenne - Zendt en ontvangt signalen van en naar de monitor . Nacht lampje - Druk om het nachtlampje Aan/Uit te zetten. Lens/IR LED voorkant - Infrarood LED’s zorgen voor zicht in het donker. Microfoon - Ontvangt geluid uit de omgeving van de camera, en zendt dit geluid naar de monitor. DC 9V Power - Verbindt de DC 9V adapter met de camera. Let op, U kunt tevens batterijen plaatsen in de camera (4xAA niet bijgesloten) zodat de camera compleet draadloos te gebruiken is. Dit is voornamelijk bedoeld voor gebruik gedurende korte termijn. Pair Knop - The pair knop zit aan de achterkant van de camera, tussen de lens en de standaard. Alarm (FOX) functie - Pas het niveau aan wanneer u wilt dat het alarm wordt geactiveerd. De monitor zal een ‘beep’ geluid maken om de gebruiker te laten weten dat het geluid boven het gestelde alarmniveau komt. Camera Aan/Uit knop- Hiermee schakelt u de camera Aan/Uit. platinum user manual ALL .indd 9 4-11-2009 17:17:36... -
Página 10: Installatie Camera
‘pairen’. Kijkt u hiervoor a.u.b. naar het ‘pairing’ hoofdstuk in deze handleiding. Bevestig de camera op een muur of zet deze op een kastje. Markeer met een potlood de 2 schroefingangen en boor een gat in de muur . Bevestig de 2 schroeven en draai deze goed aan. LET OP: U kunt de camera tevens op een vlakke ondergrond plaatsen zoals een kast, tafel of plank. Richt de camera op het gebied dat u wilt Positioneer de gaatjes over de monitoren. schroeven en schuif het basis- station naar beneden voor een goede bevestiging platinum user manual ALL .indd 10 4-11-2009 17:17:36... -
Página 11: Aansluiten Camera Adapter
Plug de adapter in de 9V ingang aan de achterzijde van de camera. Batterijen Verwijder het klepje van de onderkant van de camera. Plaats 4 AA batterijen (niet bijgesloten) in het batterijvak. Zorg ervoor dat u plus en de minus goed bevestigt. Bevestig het klepje weer aan de onderkant van de camera, zodat de batterijen er niet uit kunnen vallen. LET OP: Wanneer de camera verbonden is met de adapter worden de batterij- en niet gebruikt. De batterijen zijn voornamelijk bedoelt voor korte termijn. platinum user manual ALL .indd 11 4-11-2009 17:17:36... -
Página 12: Hoofdmenu
Deze functie kan worden ingesteld op 1 minuut, 2 minuten, 5 minuten, 10 minuten. Om de functie ongedaan te maken, dient men voor “Cancel” te kiezen. Als de monitor wordt geactiveerd door het drukken op een willekeurige knop (behalve de OK-knop) op het front panel van de monitor, dan zal de monitor terug gaan naar een zwart scherm als de vooraf bepaalde tijd is verstreken, indien er gedurende die tijd zich geen geluidstrigger voordoet. A/V Out Menu Het A/V Out Menu wordt gebruikt om de resolutiekwaliteit van het beeld dat naar de viewing device (zoals een televisie, een videorecorder of een monitor) wordt verzonden, aan te passen. Gebruik de BOVEN en BENEDEN pijlen om een resolutie te selecteren. Druk vervolgens op de OK-knop om te bevestigen. platinum user manual ALL .indd 12 4-11-2009 17:17:36... -
Página 13: Camera Pairing
Zet de receiver aan door de power adapter in de 9V input aan de zijkant aan te sluiten. Druk op de MENU-knop op de receiver. Blader naar de Pairing-menu-optie door op de BOVEN en BENEDEN pijlen te drukken. Druk op OK om het Pairing-menu te openen. Selecteer een kanaal door op de BOVEN en BENEDEN pijlen te drukken. Druk op OK van de receiver om te bevestigen. Druk op de Pair-knop aan de onderkant van de receiver , met behulp van de punt van een pen of het uiteinde van een paperclip. Op het scherm van de receiver verschijnt een boodschap. De receiver zal aftellen van 30 tot 0. Gedurende deze 30 seconden dient u de Pair-knop ingedrukt te houden om de camera succesvol te kunnen laten pairen. Als de knop van de camera niet is ingedrukt, zal de receiver automatisch terugkeren naar het viewscherm en zal er geen pairing plaatsvinden. Druk op de Pair-knop op de achterkant van de camera. Als de camera eenmaal is gepaired, zal deze onmiddellijk zichtbaar zijn op de monitor van de receiver. platinum user manual ALL .indd 13 4-11-2009 17:17:37... -
Página 14: Probleem & Oplossing
1 Voor het beste resultaat gebruikt u de TV/Moni- tor PIP (Picture in Picture) functie. Controleer in de handleiding van uw TV/Monitor of deze functie beschikbaar is op uw TV/Monitor. 2 Bekijk de video op een kleiner scherm TV/monitor. platinum user manual ALL .indd 14 4-11-2009 17:17:37... -
Página 15: Technische Specificaties Monitor
VGA 640x320 / 15FPS, QVGA 320x240 / 30FPS Alarmgevoeligheid 80dB ±10% (1M) Voedingsspanning 9V DC ±5% Energieverbruik 400mA Max zonder opladen 800mA met opladen Gebruikstemparatuur -10° ~ 60° C Luchtvochtigheid 0 ~ 85% RH platinum user manual ALL .indd 15 4-11-2009 17:17:37... -
Página 16: Technische Specificaties Camera
8 LEDs / 840nm 5m (met IR LED) Voedingsspanning 9V DC ±5% Energieverbruik 360mA MAX (met nachtlicht) 300mA (zonder nachtlicht) Gebruikstemparatuur -10°C ~ 40°C Luchtvochtigheid 0% ~ 85% Omgevingstemparatuur -10° ~ 60° C platinum user manual ALL .indd 16 4-11-2009 17:17:37... - Página 17 English platinum user manual ALL .indd 17 4-11-2009 17:17:37...
- Página 18 Technical specifications camera Introduction Congratulations with your brand new Luvion Baby monitor! ® Becoming a mom or dad is one of the most exciting moment in your life. We do understand that very well. We hope you will enjoy watching your baby or child grow up on the Luvion baby monitor. ® The Luvion Baby monitor is very useful when you would like to see and ® hear your baby or child. Off course, you can also use the Luvion baby ® monitor for more purposes. You can monitor elder people, pets or your house(door) as well. In this user manual you find a complete installation schedule and all specifications of the monitor and camera. Please read this user manual carefully prior to the use of the Luvion Baby monitor. ® We hope that you will enjoy the use of the Luvion baby monitor. ® Luvion is a supplier of various premium baby products. Based on safety, ® design and quality we offer the best products only. We hope to see you again as a satisfied customer. LUVION ® platinum user manual ALL .indd 18 4-11-2009 17:17:37...
-
Página 19: Camera Features
• Night vision allows for low light viewing up to 15 feet / 4.5 meters. • Built-in microphone. • Camera can be battery operated for true portable wireless operation. Receiver features • 2.4” color LCD monitor/receiver with superior image quality. • Video/Audio output for viewing on TV/Monitor or recording on VCR/DVD recorder. • Rechargeable lithium polymer battery for true portability. • Convenient receiver cradle included. • Audio level indicator and alarm. The system includes the following components: Wireless receiver Receiver cradle Wireless camera Adapter Adapter RCA cable (charging base) (Receiver) (Camera) Check your package to confi rm that you have received the complete system, including all components shown above. platinum user manual ALL .indd 19 4-11-2009 17:17:39... - Página 20 TV/Monitor. This allows you to view TV or other video source and see video from the camera in a small window on the same screen. Viewing Mode: The following controls are used while watching live video from the camera: • Press the UP/DOWN arrows to increase or decrease the volume. • Press the LEFT arrow to view cameras in automatic switching mode. • Press the RIGHT arrow to manually switch between cameras. platinum user manual ALL .indd 20 4-11-2009 17:17:39...
- Página 21 Scan Button - When the SCAN button is pressed, the LCD screen is turned off and the system continuously scans all available cameras while the monitor is dark. The scan feature can be used for the fol- lowing two reasons: (1) to prevent the user from being disturbed (i.e. when sleeping) by the bright LCD screen, or (2) to save battery power. If audio is detected above the preset audio trigger level on the camera(s), the receiver will beep and display the triggered cam- era. The receiver will return to scan mode about 5 seconds after the alarm has completed. Press any button (except OK button) on the front panel of the monitor to exit scan mode. MENU Button – Press to access the receiver menu. Press the button again to exit. Navigation Controls/OK Button – Use the controls in Viewing Mode and Menu Mode. Stand – Flip the stand out to place the receiver on a fl at surface (such as a table or countertop). Alternatively, place the receiver in the receiver cradle. Pair Button - Press the Pair button when pairing the receiver with a camera (more pairing at the pairing chapter) Speaker - Produces the sound transmitted from the cameras. platinum user manual ALL .indd 21 4-11-2009 17:17:40...
- Página 22 NOTE: When the receiver is docked, and the A/V cable is connected (power cable as needs to be connected), the LCD screen on the receiver will be blacked out. The LCD screen will turn back on when the A/V cable is disconnected. platinum user manual ALL .indd 22 4-11-2009 17:17:41...
- Página 23 Pair Button – The pair button is located on the back of the camera behind the stand mount. Sound Alarm Trigger – Adjust the trigger to set the sound alarm sensitivity. The receiver will beep to alert the user when the sound is above a preset sound level. Adjust the side wheel to increase or decrease the level. platinum user manual ALL .indd 23 4-11-2009 17:17:41...
-
Página 24: Installation Warnings
Mount the camera to the wall. Mark the position of the screw holes on the wall, and drill holes and insert 2 screws, then firmly attach the camera to the wall by placing the stand over the installed screws and pushing the base downwards. NOTE: The camera can also be placed on a flat surface, such as a table or shelf, and no mounting hardware is required. Adjust the viewing angle of the camera. Position the base holes over the screws. Slide the base down to lock the base in place. platinum user manual ALL .indd 24 4-11-2009 17:17:41... - Página 25 Remove the battery cover of the base of the camera. Insert 4 AA batteries (not included) into the Battery Pack. Make sure to cor- rectly line up the Positive (+) and negative (-) terminals of the batteries. Place the battery pack cover back on. NOTE: If the camera is plugged in with the AC adaptor, the batteries will not be used. The batteries are intended for short term, portable camera use only. platinum user manual ALL .indd 25 4-11-2009 17:17:41...
- Página 26 A/V Out Menu The A/V Out menu option is used to adjust the resolution quality of the image sent to the viewing device (such as a TV, VCR or Monitor). Use the UP and DOWN arrows to select a resolution, and press OK to accept. It is strongly recom- mended to use the “High” setting to ensure the best image reproduction on large screens – the default setting is “High”. platinum user manual ALL .indd 26 4-11-2009 17:17:42...
- Página 27 Select a channel by pressing the UP and DOWN arrows. Press the OK button on the receiver to accept. Press the Pair button located on the bottom of the receiver using a pen tip or paperclip. A message will be displayed on the receiver screen.The receiver will count down from 30~0 – you must press the Pair button on the camera during this time to suc- cessfully pair the camera. If the button on the camera is not pressed, the receiver will return to the view screen, and no pairing will take place. Press the Pair button on the back of the camera. Once the camera has been paired, it will be immediately viewable on the receiver monitor. platinum user manual ALL .indd 27 4-11-2009 17:17:42...
- Página 28 1 For best performance use with TV/monitor PIP (Picture in Picture) function. Check your TV/ monitor product manual to see if this feature is available on your TV/monitor. 2 View video on a smaller screen TV/Monitor platinum user manual ALL .indd 28 4-11-2009 17:17:42...
- Página 29 80dB ±10% (1M) Power requirement 9V DC ±5% Power consumption 400mA Max without charging 800mA with charging Operating temparature range -10° ~ 60° C (14°F ~ 140°F) Operating humidity 0 ~ 85% RH platinum user manual ALL .indd 29 4-11-2009 17:17:42...
- Página 30 Power consumption 360mA MAX (with night light) 300mA (without night light) Operating temperature -10°C ~ 40°C (14°F ~ 104°F) Operating humidity 0% ~ 85% Environmental rating -10° ~ 60° C (14°F ~ 140°F) platinum user manual ALL .indd 30 4-11-2009 17:17:43...
- Página 31 Deutsch platinum user manual ALL .indd 31 4-11-2009 17:17:43...
- Página 32 Baby monitor is very handy when you would like to see and ® hear your baby or child. Off course, you can use the Luvion baby moni- ® tor for different purposes. You can monitor elder people, pets or your house(door) as well. In this user manual you find a complete installation schedule and all specs. of the monitor and camera. Please read this user manual carefully prior to the use of the Luvion ® Baby monitor. We hope that you will enjoy the use of the Luvion baby monitor ® Luvion is a supplier of different premium baby products. Based on safe- ® ty, design and quality we offer the best products only. We hope to see you again as a satisfied customer. LUVION ® platinum user manual ALL .indd 32 4-11-2009 17:17:43...
-
Página 33: Ausstattung
Receiverausstattung • 2.4” LCD Farbmonitor/Receiver mit hervorragender Bildqualität. • Video/Audio Ausgang für ein TV-Gerät/einen Bildschirm oder eine Aufnahme mit einem VCR/DVD Rekorder. • Wiederaufl adbare Lithium Polymer Batterie für bequeme Tragbarkeit. • Passende Receiverhalterung und Gürtelhalterung werden mitgeliefert • Lautstärkeregler und Alarm. • Convenient receiver cradle included. • Audio level indicator and alarm. Das System besteht aus folgenden Komponenten: Drahtloser Receiver Reciever Drahtloser Netzteil Netzteil RCA Kabel Halterung Kamara (Reciever) (Kamera) Jeder der Gegenstände oben wird mit der Kamera geliefert. Bitte überprüfen Sie Ihr Paket auf die Anzahl der Kameras, die mit Ihrem System geliefert wurden. platinum user manual ALL .indd 33 4-11-2009 17:17:44... -
Página 34: Installation Des Drahtlosen Receivers
Bildschirm, um zu sehen, ob diese Anwendung verfügbar ist. Das ermöglicht Ihnen, ein TV-Gerät oder eine andere Videoquelle zu be- nutzen und am selben Bildschirm ein Video aus der Kamera zu sehen. Ansichtsmodus: Folgende Kontrollen werden verwendet, um ein Live-Video auf der Kamera zu sehen: • Drücken Sie die AUF/AB-Pfeile , um die Ansicht zu vergrößern oder zu verkleinern. • Drücken Sie den LINKS-Pfeil , um die Kameras im automatischen Umschaltmodus zu sehen. • Drücken Sie den RECHTS Pfeil, um manuell zwischen den Kameras zu wechseln. platinum user manual ALL .indd 34 4-11-2009 17:17:44... -
Página 35: Drahtloser Receiver - Vordere Kontrolleinheiten
(2) um Batterieenergie zu sparen. Wenn auf der Kamera* ein Geräusch regis- triert wird, das über dem eingestellten Geräuschpegel liegt, piept der Receiver und zeigt die auslösende Kamera. Der Receiver kehrt 5 Sekunden nach dem Alarm in den Scanmodus zurück. Drücken Sie eine beliebige Taste, außer „OK” auf der vorderen Anzeige des Bildschirms, um den Scan-Modus zu beenden. MENÜ Taste – Drücken Sie sie für den Zugang zum Receivermenü. Für den Ausstieg drücken Sie die Taste erneut. Navigationskontrolle / OK –Taste – Benutzen Sie die Kontrolle im Ansichts- und Menümodus: Standvorrichtung – Klappen Sie die Standvorrichtung aus, um den Receiver auf einer ebenen Oberfläche aufzustellen (Tisch oder Arbeitsplatte). Als Alternative können Sie den Receiver in der Receiverhalterung platzieren. Pairingschalter – Drücken Sie den Pairingschalter, wenn Sie dem Receiver eine Kamera zuordnen schalten. Lautsprecher – Produziert das Geräusch, das von den Kameras weitergeleitet wird. platinum user manual ALL .indd 35 4-11-2009 17:17:46... - Página 36 ACTUNG: Wenn der Receiver an die Ladestation angeschlossen und mit einem A/V Kabel verbunden ist (Stromkabel, wie es angeschlossen sein muss), schaltet sich der LCD- Bildschirm auf dem Receiver aus. Der LCD-Bildschirm schaltet sich wieder ein, wenn das A/V Kabel entfernt wird. platinum user manual ALL .indd 36 4-11-2009 17:17:46...
-
Página 37: Kamera - Vorder- & Rückseite
Netzteil angeschlossen ist, werden die Batterien nicht gebraucht. Die Batterien sind für kurzzeitige Verwendung und den Gebrauch der tragbaren Kamera vorgesehen. PAIRINGschalter – Der Pairingschalter befindet sich an der Rückseite der Kamera hinter der Standvorrichtung. Auslöser des akustischen Alarms – Stellen Sie die Alarmempfindlichkeit des Auslösers ein. Der Receiver piept, um den Anwender zu alarmieren, wenn das Geräusch über einem gegenwärtigen Geräuschpegel liegt. Benutzen Sie das Seitenrad, um den Pegel zu erhöhen oder niedriger zu stellen. Kamera AN/AUS- Schalter – Schaltet die Kamera AN oder AUS. platinum user manual ALL .indd 37 4-11-2009 17:17:46... -
Página 38: D 38 39 Installation Der Kamera
(maximal 4 Kameras).Wenn Sie Kameras hinzufügen, die nicht in der Original-Schachtel mitgeliefert wurden, müssen Sie die Kameras dem Receiver zuordnen. Lesen Sie in diesem Handbuch das Kapitel über das Pairing der Kameras. platinum user manual ALL .indd 38 4-11-2009 17:17:47... -
Página 39: Stromversorgung Der Kamera
Entfernen Sie die Abdeckung des Batteriefaches am Boden der Kamera. Geben Sie 4 x AA Batterien (werden nicht mitgeliefert) in das Batteriefach. Stellen Sie sicher , dass die Anzeigen der Batterien für positiv (+) und negativ (-) korrekt aufgereiht sind. Platzieren Sie die Abdeckung des Batteriefaches wieder an der vorgesehenen Stelle. ACTUNG: Wenn die Kamera an das Netzwerkteil angeschlossen ist, werden die Batterien nicht gebraucht. Die Batterien sind nur für kurzzeitigen Ge- brauch der tragbaren Kamera vorgesehen. platinum user manual ALL .indd 39 4-11-2009 17:17:47... -
Página 40: Hauptmenü
Bildes festzulegen, das an die Ansichtsvorrichtung (TV-, VCR-Gerät oder Bildschirm) gesendet wird. Verwenden Sie die AUF und AB-Pfeile , um die Auflösung festzulegen und drücken Sie zur Bestätigung auf OK. Es wird dringend empfohlen, die Einstellung „Hoch” zu verwenden, um die beste Bildreproduktion auf großen Bildschirmen zu garan- tieren. – Die Standardeinstellung ist „Hoch”. platinum user manual ALL .indd 40 4-11-2009 17:17:47... -
Página 41: Kamera-Pairing
Versorgen Sie die Kamera durch Anschließen an das Netzteil oder das Bat- teriefach mit Strom und stellen Sie den Schalter auf AN. Die Stromanzeige der Kamera muss auf AN stehen. Stellen Sie die Stromversorgung des Receivers her, indem Sie das Netzteil mit dem 9V-Anschluss an der Seite verbinden. Drücken Sie die MENÜ-Taste auf dem Receiver. Navigieren Sie zum Menü PAIRING, indem Sie die Tasten drücken. Drücken sie auf OK, um das PAIRING- MENÜ zu öffnen. Wählen Sie einen Kanal, indem Sie die AUF und AB-Tasten drücken. Drücken Sie zur Bestätigung auf dem Receiver auf OK. Drücken Sie mit einem Stift oder einer Büroklammer auf den PAIRING Knopf an der Unterseite des Receivers. Einen Nachricht erscheint auf dem Bildschirm des Receivers. Der Receiver zählt von 30~0. – Drücken Sie während dieser Zeit den PAIRING-Knopf auf der Kamera, um diese erfolgreich zuzuordnen. Drücken Sie den PAIRING-Knopf auf der Rückseite der Kamera. Wenn die Kamera zugeordnet wurde, wird dies sofort auf dem Bildschirm des Receivers angezeigt. platinum user manual ALL .indd 41 4-11-2009 17:17:48... -
Página 42: Problemlösung
Produktionsfehler. Um die beste Leistung zu er- zielen, verwenden Sie ein TV-Gerät/einen Bildschirm mit PIP-Funktion (Bild-in-Bild-Funktion). Lesen Sie im Handbuch Ihres TV-Geräts/Bildschirms nach, ob diese Anwendung verfügbar ist. Sehen Sie sich das Video auf einem kleineren TV-Gerät/Bildschirm an. platinum user manual ALL .indd 42 4-11-2009 17:17:48... -
Página 43: Receiver Spezifikationen
VGA 640x320 / 15FPS, QVGA 320x240 / 30FPS Alarmempfindlichkeit 80dB ±10% (1M) Anschlusswert 9V DC ±5% Energieverbrauch 400mA max. ohne Aufladen 800mA mit Aufladen Betriebstemperatur -10° ~ 60° C (14°F ~ 140°F) Betriebsfeuchtigkeit 0 ~ 85% RH platinum user manual ALL .indd 43 4-11-2009 17:17:48... -
Página 44: Kamera Spezifikationen
8 LEDs / 840nm 5m (mit Infrarotanzeige) Anschlusswert 9V DC ±5% Energieverbrauch 360mA MAX (mit Nachtbeleuchtung) 300mA (ohne Nachtbeleuchtung) Betriebstemperatur -10°C ~ 40°C (14°F ~ 104°F) Betriebsfeuchtigkeit 0% ~ 85% Umwelttemperatur -10° ~ 60° C (14°F ~ 140°F) platinum user manual ALL .indd 44 4-11-2009 17:17:48... - Página 45 Français platinum user manual ALL .indd 45 4-11-2009 17:17:48...
-
Página 46: Congratulations With Your Brand New Luvion ® Baby Monitor
Baby monitor is very handy when you would like to see and ® hear your baby or child. Off course, you can use the Luvion baby moni- ® tor for different purposes. You can monitor elder people, pets or your house(door) as well. In this user manual you find a complete installation schedule and all specs. of the monitor and camera. Please read this user manual carefully prior to the use of the Luvion ® Baby monitor. We hope that you will enjoy the use of the Luvion baby monitor ® Luvion is a supplier of different premium baby products. Based on safe- ®... - Página 47 Caractéristiques de récepteur • Moniteur LCD de 2.4” en couleur / récepteur avec une grande qualité de l’image. • Sortie vidéo / audio pour se connecter à TV / moniteur ou pour enregistrer sur un appareil VCR/DVD. • Batterie de polymère de lithium qui facilite à que le dispositif soit réellement portable. • Base pour le récepteur sont inclus. • Indicateur du volume de l’audio et de l’alarme. • Audio level indicator and alarm. Le système comprend les éléments suivants: Recepteur sans fi ls Base pour Camera sans fi ls Adaptateur de courant Cable de le recepteur (le recepteur) (le camera) video RCA Il est livré, avec la caméra, un de chacun des éléments ci-dessus. Veuillez vérifi er le carton pour savoir le nombre de caméras inclus avec la système. platinum user manual ALL .indd 47 4-11-2009 17:17:50...
- Página 48 Ceci vous permettra de voir des images de votre TV ou autre source vidéo en même temps que les images reçues de la caméra, qui apparaîtront dans une petite fenêtre sur le même écran. Mode visionnage: Ces différents contrôles s’utilisent lorsque vous visionnez la vidéo reçue depuis la caméra en direct: • Appuyez sur les flèches HAUT/BAS pour augmenter ou baisser le volume. • Appuyez sur la flèche GAUCHE Pour voir les caméras* en mode automatique. • Appuyez sur la flèche DROITE Pour passer manuellement d’une caméra à une autre platinum user manual ALL .indd 48 4-11-2009 17:17:50...
- Página 49 Bouton de navigation/OK – Utilisez les contrôles dans le mode vision- nage et dans le mode menu. Pied – Ouvrez le pied pour situer le récepteur sur une surface plate (comme une table ou étagère). Comme alternative, vous pouvez situer le récepteur sur sa base. Bouton Pair– Appuyez sur le bouton “Pair” lorsque vous voulez accoupler le récepteur avec la caméra. Haut-parleur – Emet le son envoyé de la ou des caméra(s). platinum user manual ALL .indd 49 4-11-2009 17:17:51...
- Página 50 (inclus) à la base du récepteur pour connecter le récepteur et/ou le charger (lorsqu’il est sur la base). AVIS: Lorsque le récepteur est sur la base, et le câble A/V est connecté (correct- ement), l’écran LCD du récepteur s’éteindra. L’écran se rallumera lorsque vous déconnecterez le câble A/V. platinum user manual ALL .indd 50 4-11-2009 17:17:52...
- Página 51 Si la caméra est connectée avec l’adaptateur AC, les piles ne s’utilisent pas. Le fonctionnement avec des piles permet un usage bref et portable. Bouton PAIR – Ce bouton sert à accoupler la caméra au récepteur. Il se trouve sur la partie postérieure du support. Activation de l’alarme - Ajustez la sensibilité de l’alarme au son. Le récepteur émettra un signal sonore lorsqu’il y aura un son supérieur au préétabli. Ajustez la roue latérale pour augmenter ou baisser la sensibilité. Interrupteur ON/OFF de la caméra - Allumez ouéteindre la caméra. platinum user manual ALL .indd 51 4-11-2009 17:17:52...
-
Página 52: Installation De La Caméra
AVIS: la caméra peut aussi être installée sur une surface plate, comme une table ou étagère, dans ce cas vous n’aurez pas besoin de vis. Ajustez l’angle de vision de la caméra Situez les trous de la base sur les vis. Faites glisser la base vers le bas pour bien l’ajuster platinum user manual ALL .indd 52 4-11-2009 17:17:52... - Página 53 Refermer le cache du compartiment à piles. AVIS: si la caméra est connectée avec l’adaptateur AC, les piles ne s’utilisent pas. Le fonctionnement de la caméra avec des piles est destiné à un usage portable et bref. platinum user manual ALL .indd 53 4-11-2009 17:17:53...
-
Página 54: Menu Principal
économiser de l’énergie. Cette fonction peut se configurer à 1 minutes, 2 minutes, 5 minutes, 10 minutes, ou peut se désactiver en sélectionnant Cancel (Annuler). L’écran du moniteur s’éteindra une fois passé le temps établi Par l’utilisateur (1, 2, 5 ou 10 minutes). En appuyant sur n’importe quel bouton du moniteur, le moniteur se rallumera, de la même manière si les caméras détectent un son au volume supérieur à celui préétabli. Si Vous appuyez sur n’importe quel bouton du moniteur pour l’activer (sauf OK), le moniteur se rééteindra une fois passé le temps établi par l’utilisateur, sauf si les caméras détectent un son au volume supérieur à celui préétabli pendant ce lapse de temps. Menu A/V Out (Sortie A/V) L’option A/V Out s’utilise pour régler la qualité de la résolution de l’image envoyée au dispositif de visionnage(par exemple, TV, VCR, moniteur). Utilisez les flèches HAUT et BAS pour sélectionner la résolution souhaitée. Appuyez sur OK pour ac- cepter la sélection. Nous vous recommandons d’utiliser le ré- glage High (Haute) pour garantir la meilleure lecture des im- ages sur des écrans plus grands – la valeur par défaut est High (Haute). platinum user manual ALL .indd 54 4-11-2009 17:17:53... - Página 55 AVIS: nous vous recommandons d’accoupler les caméras au récepteur avant leur installation définitive. Allumez la caméra en connectant l’adaptateur de courant ou en mettant les piles, puis en mettant l’interrupteur sur la position ON. La LED de la caméra doit s’allumer. Allumez le récepteur en connectant l’adaptateur de courant à l’entrée 9V, située sur le latéral. Appuyez sur le bouton MENU du récepteur. Accéder au menu PAIRING (Accouplement) en appuyant sur les flèches . Appuyez sur le bouton OK pour ouvrir le menu Pairing Sélectionnez une chaîne en appuyant sur les flèches HAUT et BAS . Appuyez sur le bouton OK du récepteur pour accepter. Pappuyez sur le bouton PAIR (Accoupler) situé sur la partie su- périeure du récepteur en utilisant la pointe d’un stylo ou un trombone. Il apparaîtra alors un message sur l’écran du récepteur. Le récepteur réalisera un compte à rebours de 30 à 0– vous devrez appuyer sur le bouton PAIR (Accoupler) si tué sur la caméra pendant ce compte à rebours pour accoupler correctement la caméra. Appuyez sur le bouton PAIR (Accoupler) situé sur la partie postérieure de la caméra. Une fois la caméra accouplée, le moniteur du récepteur pourra montrer les images de celle-ci. platinum user manual ALL .indd 55 4-11-2009 17:17:53...
-
Página 56: Solution Des Problèmes
Ceci vous permettra de voir des images de votre TV ou autre source vidéo en même temps que les images reçues de la caméra, qui ap- paraîtront dans une petite fenêtre. platinum user manual ALL .indd 56 4-11-2009 17:17:54... - Página 57 Besoin d’alimentation 9V DC ±5% Consommation d’énergie 400mA Max. Sans charger 800mA en chargeant Rangée de températures en fonctionnement -10° ~ 60° C (14°F ~ 140°F) Humidité en fonctionnement 0 ~ 85% RH platinum user manual ALL .indd 57 4-11-2009 17:17:54...
-
Página 58: Caractéristiques De La Caméra
360mA Max. (avec vision nocturne) 300mA (sans vision nocturne) Température en fonctionnement -10°C ~ 40°C (14°F ~ 104°F) Humidité en fonctionnement 0% ~ 85% Classification environnement -10° ~ 60° C (14°F ~ 140°F) platinum user manual ALL .indd 58 4-11-2009 17:17:54... - Página 59 Español platinum user manual ALL .indd 59 4-11-2009 17:17:54...
- Página 60 Baby monitor is very handy when you would like to see and ® hear your baby or child. Off course, you can use the Luvion baby moni- ® tor for different purposes. You can monitor elder people, pets or your house(door) as well. In this user manual you find a complete installation schedule and all specs. of the monitor and camera. Please read this user manual carefully prior to the use of the Luvion ® Baby monitor. We hope that you will enjoy the use of the Luvion baby monitor ® Luvion is a supplier of different premium baby products. Based on safe- ®...
-
Página 61: Características
La visión nocturna permite visionado con nivel bajo de luz a una distancia de hasta 4,5 metros. • Micrófono incorporado. • La cámara puede funcionar con pilas, lo que permite un funcionamiento del dispositivo completamente inalámbrico. Características del receptor • Monitor LCD de 2.4” a color / Receptor con calidad de imagen superior. • Salida de vídeo / audio para visionado en TV / monitor o para grabación en aparato de VCR / DVD. • Batería de polímero de litio que facilita que el dispositivo sea realmente portátil. • Base para el receptor incluidos. • Indicador de nivel de audio y alarma. El sistema viene equipado con los siguientes componentes: Receptor inalámbrico Base para Cámara inalámbrica Adaptador de alimentaciòn Cable de el receptor (para el recepteur) (para el cámera) video RCA Se entrega, junto con la cámara, uno de cada uno de los elementos mostrados más arriba. Por favor, compruebe la caja para conocer el número de cámaras incluido con su sistema. platinum user manual ALL .indd 61 4-11-2009 17:17:56... -
Página 62: Instalación Del Receptor Inalámbrico
Esto le permite ver imágenes de TV u otra fuente de video simultáneamente con las imágenes recibidas desde la cámara, que aparecen en una pequeña ventana en la misma pantalla. Mode visionnage: Modo visionado: se utilizan los siguientes controles mientras se mira el vídeo recibido desde la cámara en directo: • Pulse las flechas ARRIBA/ABAJO para subir o bajar el volumen. • Pulse la flecha IZQUIERDA para ver las cámaras en modo de cambio automático. • Pulse la flecha DERECHA para cambiar manualmente entre cámaras. platinum user manual ALL .indd 62 4-11-2009 17:17:56... -
Página 63: Receptor Inalámbrico - Controles Frontales
nalizado la alarma. Pulse cualquier botón, excepto el botón OK, del panel frontal del monitor para salir del modo Scan Botón MENÚ – Pulse para acceder al menú del receptor . Pulse de nuevo para salir . Botón de navegación/OK – Use los controles en el modo visionado y en el modo menú. Soporte – Abra el soporte para colocar el receptor sobre una superfi cie plana (como una mesa o una encimera). Alternativamente, coloque el receptor en su base. Botón Pair (Emparejar) – Pulse el botón “Pair” cuando empareje el receptor con la cámara. Altavoz – Emite el sonido transmitido desde la(s) cámara(s). platinum user manual ALL .indd 63 4-11-2009 17:17:57... -
Página 64: Receptor Inalámbrico - Controles Laterales
AVISO: cuando el receptor descansa sobre la base, y el cable A/V está conectado (conéctelo correctamente), la pantalla LCD del receptor se apagará. La pantalla volverá a encenderse cuando desconecte el cable A/V. platinum user manual ALL .indd 64 4-11-2009 17:17:57... - Página 65 Si la cámara está conectada con el adaptador AC, las pilas no se utilizan. El funcionamiento con pilas permite un uso breve y portátil. Botón PAIR (Emparejar) – El botón de emparejamiento está situado en la parte posterior de la cámara, detrás del soporte de mesa. Activador de alarma – Ajuste el activador para establecer la sensibilidad de la alarma de sonido. El receptor emitirá un pitido de aviso cuando tenga lugar un sonido con un volumen superior al preestablecido. Ajuste la rueda lateral para aumentar o disminuir el nivel. Interruptor ON/OFF de la cámara – Enciende o apaga la cámara. platinum user manual ALL .indd 65 4-11-2009 17:17:58...
-
Página 66: Instalación De La Cámara
AVISO: la cámara también puede colocarse sobre una superficie plana, como una mesa o una estan- tería, en cuyo caso no necesitará tornillos. Ajuste el ángulo de visión de la cámara. Situez les trous de la base sur les vis. Faites glisser la base vers le bas pour bien l’ajuster platinum user manual ALL .indd 66 4-11-2009 17:17:58... -
Página 67: Conectar La Alimentación De La Cámara
Vuelva a colocar la tapa del compartimento para las pilas. AVISO: si la cámara está conectada con el adaptador AC, no se utilizarán las pilas. El funcionamiento de la cámara mediante pilas va destinado a un uso portátil y breve. platinum user manual ALL .indd 67 4-11-2009 17:17:58... -
Página 68: Menú Principal
OK), el monitor volverá a apagarse cuando haya transcurrido el tiem- po establecido por el usuario, siempre que las cámaras no detecten un sonido que supere el límite establecido durante el periodo de tiempo predeterminado. Si la pantalla se activa por un sonido que supera el límite establecido por el usuario (activador de sonido), volverá a apa- garse transcurridos 8 segundos desde la última activación por sonido. Menú A/V Out (Salida A/V) La opción A/V Out se utiliza para ajustar la calidad de resolu- ción de la imagen enviada al dispositivo de visionado (como por ejemplo, TV, VCR o monitor). Utilice las flechas ARRIBA y ABAJO para seleccionar la resolución deseada. Pulse OK para aceptar la selección. Le recomendamos encarecidamente que utilice el ajuste High (Alto) para garantizar la mejor repro- ducción de imágenes en pantallas de gran tamaño – el valor por defecto es High (Alto). platinum user manual ALL .indd 68 4-11-2009 17:17:59... -
Página 69: Emparejamiento De Cámaras
Encienda la cámara conectando el adaptador de alimentación o colocando las pilas y poniendo el interruptor en la posición ON. El LED de encendido de la cámara debería encenderse. Encienda el receptor conectando el adaptador de alimentación a la entrada de 9V, situada en el lateral. Pulse el botón MENÚ del receptor. Acceda al menú PAIRING (Emparejamiento) pulsando las teclas de naveg ación . Pulse el botón OK para abrir el menú Pairing. Seleccione un canal pulsando las flechas ARRIBA y ABAJO . Pulse el botón OK del receptor para aceptar . Pulse el botón PAIR (Emparejar) situado en la parte superior del receptor utilizando la punta de un bolígrafo o de un clip. Aparecerá un mensaje en la pantalla del receptor. El receptor realizará una cuenta atrás desde 30 hasta 0 – deberá pulsar el botón PAIR (Emparejar) situado en la cámara durante esta cuenta atrás para emparejar correctamente la cámara. Pulse el botón PAIR (Emparejar) situado en la parte trasera de la cámara. En el momento en que la cámara se haya emparejado, el monitor del re- ceptor podrá mostrar las imágenes de la misma. platinum user manual ALL .indd 69 4-11-2009 17:17:59... -
Página 70: Solución De Problemas
PIP (imagen dentro de imagen) en su TV/ monitor. Consulte el manual de su TV/monitor para saber si está función está disponible en su aparato. 2 Vea el vídeo en una pantalla de TV/monitor más pequeña. platinum user manual ALL .indd 70 4-11-2009 17:17:59... -
Página 71: Especificaciones Del Receptor
80dB ±10% (1M) Requisitos de alimentación 9V DC ±5% Consumo energía 400mA Máx. sin cargar 800mA cargando Rango temperatura operativa -10° ~ 60° C (14°F ~ 140°F) Humedad operativa 0 ~ 85% RH platinum user manual ALL .indd 71 4-11-2009 17:17:59... -
Página 72: Especificaciones De La Cámara
Consumo energía 360mA Máx. (con luz nocturna) 300mA (sin luz nocturna) Temperatura operativa -10°C ~ 40°C (14°F ~ 104°F) Humedad operativa 0% ~ 85% Clasificación ambiental -10° ~ 60° C (14°F ~ 140°F) platinum user manual ALL .indd 72 4-11-2009 17:17:59... - Página 73 Português platinum user manual ALL .indd 73 4-11-2009 17:18:00...
-
Página 74: Introdução
Indice Introdução Características Instalação do Receptor sem fios Receptor – Funções de comandos frontais Receptor – Funções de comandos laterais Funções da câmara Ligar a alimentação da câmara Menu principal Emparelhamento da câmara 84 Solução de problemas Especificações técnicas do receptor Especificações técnicas da câmara Introdução Parabéns pelo seu novo intercomunicador Luvion. Ser mãe ou pai é um dos acontecimentos mais felizes e excitantes da nossa vida. Esperamos que desfrute ver o seu bebé crescer através do intercomunicador Luvion. O intercomunicador Luvion é muito cómodo e conveniente para ver e ouvir o seu bebé. Claro que também poderá utilizar este intercomunicador para out- ros fins. Pode vigiar/monitorar pessoas idosas, animais de estimação ou a sua casa (porta). Neste manual de utilizador irá encontrar todos os passos para instalar o seu intercomunicador, assim como tosas as especificações do moni- tor e da câmara. Esperemos que goste de utilizar o intercomunicador Luvion. A Luvion é uma marca de produtos Premium para bebés. Através do de- sign, segurança e qualidade apenas oferecemos os melhores produtos. Esperemos encontra-lo novamente como um cliente satisfeito. LUVION ® platinum user manual ALL .indd 74 4-11-2009 17:18:00... -
Página 75: O Intercomunicador Vem Equipado Com Os Seguintes Componentes
Monitor LCD de 2.4” a cores/ receptor com qualidade de imagem superior. • Saída de Vídeo/Áudio para visualizar na TV/Monitor ou para gravar em aparelho VCR/DVD. • Para ser verdadeiramente portátil tem uma bateria recarregável de lítio polímero. • Base para receptor incluído. • Indicador de nível áudio e alarme. O intercomunicador vem equipado com os seguintes componentes: Receptorasem fi os Base Câmara sem fi os adaptador Cabo de Adaptador de para o receptor de alimentação vídeo RCA alimentação para o receptor para a Câmara Verifi que se a sua embalagem contém o sistema completo, incluindo todos os elementos acima referidos. platinum user manual ALL .indd 75 4-11-2009 17:18:01... -
Página 76: Modo De Visualização
Isto permite ver as imagens da televisão ou de outra fonte de vídeo simultaneamente com as imagens recebidas pela câmara do intercomunicador, que aparecem numa pequena janela do ecrã. Modo de Visualização: Modo visionado: utilizam-se os seguintes comandos enquanto se visualiza as imagens vindas da câmara em directo. • Carregue nas setas cima/baixo para subir ou baixar o colume • Carregue na seta esquerda para ver as câmaras em modo intercalado automático. • Carregue na seta direita para ir intercalando as câmras manualmente. platinum user manual ALL .indd 76 4-11-2009 17:18:01... - Página 77 nido, o receptor toca (bip) e mostra a imagem da câmara que detectou o som. O receptor voltará ao modo SCAN 5 segundos depois de ter fi ndo o alarme. Carregue em qualquer botão, à excepção do botão OK, do painel frontal do monitor para sair do modo SCAN. Botão MENU – Carregue neste botão para aceder ao menu do receptor. Carregue de novo para sair. Botão de navegação/OK – use os comandos no modo visionado y no modo menu. Suporte – Abra o suporte para colocar o receptor sobre uma superfície plana (mesa ou bancada). Alternativamente, coloque o receptor na sua base. Botão Pair – carregue no botão “Pair” quando emparelhar o receptor com a câmara. Altavoz – Emite o som transmitido pela câmara. platinum user manual ALL .indd 77 4-11-2009 17:18:03...
- Página 78 AVISO: quando o receptor está na base, e o cabo A/V está ligado (certifique-se que está bem encaixado), o ecrã LCD do receptor apaga-se. O ecrã voltará a ligar- se quando desligar o cabo A/V. platinum user manual ALL .indd 78 4-11-2009 17:18:03...
- Página 79 Se a câmara estiver ligada com o adap- tador AC, as pilhas não se utilizam. O funcionamento com pilhas permite um uso leve e portátil. Botão PAIR – O botão PAIR está situado na parte traseira da câmara, por detrás do suporte de mesa. Interruptor de alarme Ajuste o interruptor para estabelecer a sensib- lidade do alarme ao som. O receptor irá emitir um som (bip) de aviso quando houver um som superior ao preestabelecido. Ajuste a roda lateral para aumentar ou diminuir o nível. Interruptor ON/OFF da câmara – Liga e desliga a câmara. platinum user manual ALL .indd 79 4-11-2009 17:18:03...
-
Página 80: Instalação Da Câmara
AVISO: A câmara também pode ser coloca sobre uma superfície plana, como uma mesa ou estante. Collocare i fori della base di sup- Neste caso, já não irá necessitar de parafusos. porto sopra le viti. Far scivolare la base di supporto verso il bas- Ajuste o ângulo de visão da câmara. so per fissarla platinum user manual ALL .indd 80 4-11-2009 17:18:03... - Página 81 Introduza 4 pilhas AA (não incluídas) no compartimento. Assegure-se de que alinha correctamente os pólos positivos (+) e negativos (-) das pilhas. Volte a colocar a tampa to compartimento das pilhas. AVISO: se a câmara estiver ligada com o adaptador AC, as pilhas não são utilizadas. O funcionamento da câmara com pilhas está destinado a um uso breve e portátil. platinum user manual ALL .indd 81 4-11-2009 17:18:04...
- Página 82 Ao carregar em qualquer botão do painel frontal, o monitor volta a ligar-se. O monitor também se volta a ligar se a Câmara detectar um som superior ao volume superior predefinido. Se se carregar em qualquer das teclas do painel frontal para activar o monitor (à excep- ção do botão OK), o mesmo voltará a desligar-se quando tiver decor- rido o tempo predefinido pelo utilizador (desde que as câmaras não detectem um som superior ao limite superior definido pelo utilizador). Se o ecrã se ligar por ter detectado um som superior ao definido pelo utilizador, ele voltará a desligar-se decorridos 8 segundos da última activação por som. Menù A/V Out (Uscita A/V) A opção A/V Out utiliza-se para ajustar a qualidade de resolução de imagem enviada ao dispositivo de visualização (como por ex- emplo, TV, VCR ou monitor). Utilize as setas de cima ou baixo para seleccionar a resolução desejada. Carregue OK para aceitar a selecção. Recomendamos encarecidamente que utilize o ajuste High (elevado) para garantir a melhor reprodução de imagens em ecrãs de grandes dimensões – o valor por defeito é elevado. platinum user manual ALL .indd 82 4-11-2009 17:18:04...
- Página 83 AVISO: recomendamos encarecidamente emparelhar as câmaras ao recep- tor antes de as instalar definitivamente. Ligue a câmara conectando o adaptador de alimentação ou utilizando pilhas e colocando o interruptor na posição ON. O LED de sinal aceso da câmara deverá ligar-se. Ligue o receptor conectando o adaptador de ali mentação à entrada de 9V, que se encontra lateralmente. Carregue no botão MENU do receptor. Aceda ao menu PAIRING carregando nas teclas de navega- ção. Carregue no botão OK para abrir o menu Pairing. Seleccione um canal utilizando as setas para cima e para baixo. Carregue OK no receptor para aceit- ar o canal. Carregue no botão PAIR situado na parte superior do receptor utilizando a ponta de uma caneta ou de um clip. Aparecerá uma mensagem no ecrã do receptor.O receptor efectua uma contagem decrescente de 30-0 . Durante esta contagem deverá carregar no botão PAIR situado na câmara para emparelhar com sucesso a câmara. Carregue no botão PAIR. No momento em que a câmara esteja emparelhada, o monitor do receptor mostra as imagens da mesma. platinum user manual ALL .indd 83 4-11-2009 17:18:05...
-
Página 84: Solução De Problemas
PIP (imagem dentro de imagem) no ecrã da sua TV. Consulte o manual da sua TV ou do seu monitor para verificar se esta função está disponível. 2.Veja o vídeo num ecrã de TV/Monitor mais reduzido platinum user manual ALL .indd 84 4-11-2009 17:18:05... -
Página 85: Lux (Ir Apagado), 0Lux (Ir Ligado)
8 LEDs / 840nm 5m (com LED IR) Requisitos de alimentação 9V DC +/-5% Consumo de energia 360mA Max. (com luz nocturna) 300mA (sem luz nocturna) Temperatura Operativa -10ºC~40ªC Humidade Operativa 0%~85% Classificação ambiental 10ºC~40ªC platinum user manual ALL .indd 85 4-11-2009 17:18:05... - Página 86 80dB ±10% (1M) Requisitos de alimentação 9V DC ±5% Consumo de energia 400mA Max. Sem carregar 800mA Carregando Temperatura Operativa -10° ~ 60° C (14°F ~ 140°F) Humidade Operativa 0 ~ 85% RH platinum user manual ALL .indd 86 4-11-2009 17:18:05...
- Página 87 Italiano platinum user manual ALL .indd 87 4-11-2009 17:18:05...
- Página 88 Baby monitor is very handy when you would like to see and ® hear your baby or child. Off course, you can use the Luvion baby moni- ® tor for different purposes. You can monitor elder people, pets or your house(door) as well. In this user manual you find a complete installation schedule and all specs. of the monitor and camera. Please read this user manual carefully prior to the use of the Luvion Baby monitor. ® We hope that you will enjoy the use of the Luvion baby monitor ® Luvion is a supplier of different premium baby products. Based on safe- ® ty, design and quality we offer the best products only. We hope to see you again as a satisfied customer. LUVION ® platinum user manual ALL .indd 88 4-11-2009 17:18:05...
-
Página 89: Caratteristiche
• Microfono incorporato. • La telecamera può funzionare con batterie tipo AA, che proporzionano un funzionamento assolutamente Wireless. Caratteristiche del ricevitore • Monitor LCD da 2.4” a colori / Ricevitore con qualità d’immagine superiore • Uscita video / Audio per TV / monitor o per registrazione con dispositivi VCR / DVD • Batteria di polimero di litio la quale proporziona una assoluta portabilità • Base (accessorio del ricevitore) • Indicatori LED per il livello di audio e di allerta. Il sistema è composto dai seguenti componente: Ricevitor wireless Base del Telecamera Adattatore Adattatore Cavo Ricevitor wireless Ricevitor Telecamera video RCA Nella confezione è incluso uno di ogni elemento mostrato qui sopra. Preghiamo controllare la confezione per sapere il nº di telecamere incluse con il sistema. platinum user manual ALL .indd 89 4-11-2009 17:18:06... - Página 90 TV per sapere se la funzione è disponibile. Questa funzione permette visualizzare le immagini al televisore simultaneamente alle immagini ricevute dalla telecamera. Modo visualizzazione: viene usato durante la visualizzazione del video in diretta ricevuto dalla telecamera: • Premere le frecce SU/GIÙ per aumentare o diminuire il volume. • Premere la freccia SINISTRA per visualizzare sul monitor le diverse telecamere nel modo cambio automatico. • Premere la freccia DESTRA per visualizzare sul monitor le diverse telecamere* nel modo cambio manuale. platinum user manual ALL .indd 90 4-11-2009 17:18:07...
- Página 91 nalizzato l’allerta. Premere qualunque pulsante, eccetto il pulsante OK, del pannello frontale del monitor per uscire dal modo SCAN. Pulsante MENÙ – Premere per accedere al menù del ricevitore, premere nuovamente per uscire dal menù. Pulsante di navigazione/OK – Usare nel modo di visualizzazione o nel modo menù. Supporto – Aprire il supporto per installare il ricevitore su di una superfi cie piana ( per esempio un tavolo). Altrimenti collocare il ricevitore sulla base in dotazione. Pulsante Pair (Accoppiare) – Premere il pulsante “Pair” per collegare il ricevitore alla telecamera. Alto parlante – Emette il suono trasmesso dalla (e) telecamera (e). platinum user manual ALL .indd 91 4-11-2009 17:18:08...
- Página 92 AVVISO: quando il ricevitore si trova sulla base di supporto in modo standby, ed il cavo AVè collegato allo schermo LCD il ricevitore si spegnerà. Lo schermo si riat- tiverà quando verràscollegato il cavo AV. platinum user manual ALL .indd 92 4-11-2009 17:18:08...
- Página 93 Il funzionamento con batterie proporziona un uso breve pero in modo assolutamente portatile. Pulsante PAIR (Accoppiare) – Il pulsante di accoppiamento si trova nella parte posteriore della telecamera e dietro alla base di supporto. Attivatore di allerta – Funzione per stabilire la sensibilità dell’allerta. Il ricevitore emette un’allarme acustico quando viene rilevato un suono superiore al volume prestabilito. Regolare l’interruttore laterale per aumentare o diminuire il livello. Interruttore ON/OFF della telecamera – Questo pulsante serve per accendere o spegnere la telecamera. platinum user manual ALL .indd 93 4-11-2009 17:18:09...
-
Página 94: Installazione Della Telecamera
AVVISO: la telecamera otre ad essere installata alla parete puòessere usata anche sopra un tavolo o una mensola, di modo che non sono necessarie le viti. Fissare l’angolo di visione della telecamera. Collocare i fori della base di sup- porto sopra le viti. Far scivolare la base di supporto verso il bas- so per fissarla platinum user manual ALL .indd 94 4-11-2009 17:18:09... - Página 95 Collocare nuovamente il compartimento delle batterie. AVVISO: quando la telecamera è collegata con l’adattatore di corrente AC, non usare le batterie. Il funzionamento della telecamera tramite batterie va destinato ad un uso portatile e di breve durata. platinum user manual ALL .indd 95 4-11-2009 17:18:09...
- Página 96 Menù Power Seving (risparmio energetico) Il menù Power Saving (Risparmio energetico) viene usato per speg- nere il monitor in un momento predeterminato per risparmiare ener- gia. Questa funzione più essere configurata in 1 minuto, 2 minuti, 5 minuti, 10 minuti o disattivando completamente il monitor selezionan- do Cancel (Cancellare). Lo schermo si spegnerà trascorso il tempo pre- stabilito dall’utente (1, 2, 5 o 10 minuti). Lo schermo si attiverà quando viene premuto qualsiasi pulsante del frontale e allo stesso modo lo farà quando una delle telecamere rileva un suono superiore al volume prestabilito dall’utente. Quando viene premuto un pulsante del pan- nello frontale per attivare il monitor del ricevitore (eccetto il pulsante OK), il monitor si spegnerà nuovamente trascorso il tempo prestabilito dall’utente, sempre e quando la telecamera non rilevi nessun suono che superi il livello stabilito dall’utente. Menù A/V Out (Uscita A/V) L’opzione A/V Out viene usata per configurare la qualità di risoluz- ione dell’immagine inviata al dispositivo di visione (per esempio; TV, VCR o monitor). Usare le frecce in ALTO o in BASSO per selezionare la risoluzione desiderata. Premere OK per con- fermare la selezione. Raccomandiamo usare l’opzione High (Alto) per garantizzare la maggior risoluzione d’immagine su schermi di grande dimensione – il valore per difetto è high (Alto). platinum user manual ALL .indd 96 4-11-2009 17:18:09...
- Página 97 AVVISO: raccomandiamo accoppiare le telecamere prima di installarle defini- tivamente alla parete. Collegare l’adattatore di corrente o inserire le batterie. A questo punto accendere la telecamera posizionando l’interruttore in posizione ON. Il LED di accensione dovrebbe accendersi. Accendere il ricevitore collegando l’adattatore di corrente all’entrata a 9V situata sul laterale del ricevitore. Premere il pulsante MENÙ del ricevitore e accedere all’opzione PAIRING (Accoppiamento), premendo i tasti di navigazione . Premere il pulsante OK per aprire il menù pairing (Accoppiamen to). Pulse el botón MENÚ del receptor. Acceda al menú. Selezionare il canale premendo le frecce in ALTO o in BASSO . Premere il pulsante OK per confermare. Premere il pulsante PAIR (Accoppiare) situato nella parte supe- riore del ricevitore usando una penna o un clip. Apparirà un messaggio sullo schermo del ricevitore. Il ricevitore inizierà il conto alla rovescia da 30 a 0 secondi – durante il Conto alla rovescia dovrà premere il pulsante PAIR (Accoppiare) situato nella telecamera. Premere il pulsante PAIR (Accoppiare) situato nella parte posteriore del la telecamera. Nel momento in cui la telecamera finalizza l’accoppiamento con il ricevitore Il monitor inizierà a visualizzare le immagini. platinum user manual ALL .indd 97 4-11-2009 17:18:10...
-
Página 98: Soluzione Ai Problemi
PIP (immagine dentro l’immagine) del suo TV/Monitor. Verificare il manuale del suo TV/moni- tor per sapere se questa funzione è disponibile. 2 Oppure visualizzare le immagini su di un TV/ Monitor più piccolo. platinum user manual ALL .indd 98 4-11-2009 17:18:10... - Página 99 Sensibilità di allerta 80dB ±10% (1M) Requisiti di alimentazione 9V DC ±5% Consumo energetico 400mA Máx. Senza carica 800mA caricato Temperatura -10° ~ 60° C (14°F ~ 140°F) Umidità àoperativa 0 ~ 85% RH platinum user manual ALL .indd 99 4-11-2009 17:18:10...
- Página 100 9V DC ±5% Consumo energetico 360mA Máx. (con luce notturna) 300mA (sinza luce notturna) Temperatura -10°C ~ 40°C (14°F ~ 104°F) Umidità 0% ~ 85% Classificazione ambientale -10° ~ 60° C (14°F ~ 140°F) platinum user manual ALL .indd 100 4-11-2009 17:18:10...
- Página 101 Dansk platinum user manual ALL .indd 101 4-11-2009 17:18:10...
- Página 102 Kamera pairing Problemet & løsning Tekniske specifikationer monitor 100 Tekniske specifikationer kamera Forord Tillykke med købet af dit Luvion ® Baby Monitor! At blive forældre er et af de største øjeblikke i livet og med Luvion ® Baby Monitor håber vi, at I vil nyde at se jeres baby vokse dag for dag. Luvion ® Baby Monitor er meget brugbar når I ønsker at høre og se jeres baby fra afstand. I kan endvidere bruge Luvion ® Baby Monitor til at kaste et blik på jeres kæledyr, jeres hjem eller sågar de ældre. I denne guide vil I finde installationsvejledning, samt specifikationer af skærmen og kameraet. Du bedes læse denne manual omhyggeligt, før I tager Lu- vion ® Baby Monitor i brug. Vi håber, at I får masser af sjov ved brug af baby Luvion ® Monitor. Luvion ® er leverandør af mange forskellige kvalitetsprodukter til dit barn eller baby. Vi ønsker dem al held og lykke med produktet og håber på at se jer igen som tilfredse kunder.
-
Página 103: Specifikationer
Specifi kationer for kameraet • Høj opløsning (VGA) kamera. • Kameraet har nattesyn på op til 4,5 meter. • Kamera har indbygget mikrofon. • Kameraet batterierne er placeret i en fuldstændig trådløs forbindelse. Specifi kationer monitor • 2.4’’tommer (6cm) Digital Color LCD Monitor. • Video/Audio output til billederne kan vises på enten TV eller optages DVD. • Inkludere genopladeligt Lithium-batterier til monitor samt opladeren. • Audio level indikator samt alarm. Systemet leveres med følgende komponenter: Trådløst monitor Base station Trådløst kamera Adapter Adapter RCA-kabel (opladeren monitor) (monitor) (kamera) De bedes kontrollere om alt er som det skal være og at produkterne er i pakken. platinum user manual ALL .indd 103 4-11-2009 17:18:12... -
Página 104: Installation Monitor
PIP (Picture i Picture) funktion. Sørg for at dit tv har denne funktion, da kan I så kan se fjernesyn samtidig med at I kan se billederne fra monitoren. Picture Mode: Følgende knapper kan bruges, når I følger barnet ‘live’ fra kameret. • Press the UP/DOWN For at højere eller lavere lydstyrke. • Press the LEFT for automatisk at skifte mellem de forskellige kameraer. • Press the RIGHT for at skifte kameraer manuelt. platinum user manual ALL .indd 104 4-11-2009 17:18:12... -
Página 105: Funktionsknapper Monitor Forreste Og Bagestei
(2) til at spare på batteriet. Når det optager lyde vil modtageren bippe og vise det hvilket kamera der gav lyd fra sig. 5 sekunder efter at alamen er gået vil det gå tilbage til scan mode. Tryk derefter en hvilken som helst knap for at afslutte scan mode. Menu knappen - Tryk for at åbne menuen og tryk så igen for at afslutte menu. Navigation Controls/OK knappen – Bruges til at kontrolere Viewing Mode og Menu Mode. Stand – Flip the stand out to place the receiver on a fl at surface (such as a table or countertop). Alternatively, place the receiver in the receiver cradle. Pair knappen - Tryk denne knap for at forbinde receiveren med kameraet. Højtalerene - Producere lyden fra kameraerne. platinum user manual ALL .indd 105 4-11-2009 17:18:13... -
Página 106: Funktionsknapper Monitor Anden
Alarm +/- knappen - Tryk for at ændre lydvolumen på alarmen. Modtager antenne - Modtager og sender signaler fra eller til kameraet. Antenne locking switch - Skub kontakten til at ændre indstillingen. Modtager antennen til poppe op. Derefter kan I indstile antennen så den modtager et bedre signal. Power slide switch - Skub kontakten til enten on eller off, for at tænde eller slukke modtageren. PA/V out port (Valgfri) - Forbind A/V kablet for at se billederne på enten fjernsynet eller for at optage det på DVD eller VCR. DC 9V Power input - Forbind DC 9V Power adaptor for at oplade modtageren og/eller for at oplade batteriet på modtageren. platinum user manual ALL .indd 106 4-11-2009 17:18:14... -
Página 107: Funktionsknapper Kamera
Bemærk, kameraet kan også bruge 4 AA batterier. Når kameraet bruger AC adaptor, vil batterierne ikke bruges. Batterierne er kun til kortvarig brug. Pair Button - Er på bagsiden af kameraet. Sound Alarm Trigger - Justér lyden på alarmen. Modtageren vil bippe for at gøre opmærksom på alarmens lydniveau. Brug sidehjulet for at ændre niveauet. On/Off switch - Switch camera On or Off platinum user manual ALL .indd 107 4-11-2009 17:18:14... -
Página 108: Installation Kamera
Bemærk,hvis i installere kameraer der ikke fulgte med pakken, se da ‘camera pairing’ kapitel for yderligere information. Placer kameraet op mod vægen og marker hvor skruehullerne skal bores. Derefter sæt- ter der en skrue i hver hul og plaser derefter forsigtigt kameraet på det ønskede sted. Bemærk, kameraerne kan også plaseres stående på et bord. Juster kameraet så det optager i den rigtig vinkel. Position the base holes over the screws. Slide the base down to lock the base in place. platinum user manual ALL .indd 108 4-11-2009 17:18:14... -
Página 109: Tilslutning Af Kameraet Adapter
Batterierne er blot en midlertidig løsning. Power adapor Forbind adaporen til kameraet og vær sikker på at adopteren er i forbindelse med en stik- kontakt for at ungå elektristiske svingninger . Collegare l’adattatore di corrente all’entrata 9V situata nella parte posteriore della telecamera Batteri fjern batteri dekslet. indsæt 4 AA batterier. Sæt batteri dekslet på igen. Bemærk, når kameraet er forbundet med en stikkontakt vil batterierne ikke blive brugt. Batterierne er kun for midlertidig brug. platinum user manual ALL .indd 109 4-11-2009 17:18:15... -
Página 110: Hovedet Menu
1, 2, 5 eller 10 minutter. Skærmen vil blive sort i den pågældende tid. Den vil blive aktiveret ved at tryk- ke på en vilkårlig knap eller ved lyd optaget af kameraet. Når den er aktiveret ved at trykke på en vilkårlig knap, vil den gå tilbage til power saving/ sort skærm efter den valgte tidspe- riode. Når den er aktiveret af lys vil den gå tilbage til power saving/sort skærm efter 8 sekunder. A/V out menu A/V Out bruges til at justere kvalitetenaf billedet der er sendt til fjernsynet, DVD’en eller modtageren. Brug UP eller DOWN for at vælge kvaliteten og tryk Ok for at acceptere. Det an- befales at bruge den højeste kvalitet for at opnå de bed- ste billeder på en stor skærm. Standart indstillingen er den Høje. platinum user manual ALL .indd 110 4-11-2009 17:18:15... - Página 111 (op til 4 kameraer). Bemærk, det anbefales at I linker kameraerne til modtageren før de bruges. Tænd for kameraerne ved at forbinde modtageren eller batterierne og placer knappen på ON. LED’en skal være tændt. Tænd for modtageren ved at forbinde adopteren til 9V Input. Tryk på menu knappen og gå til pairig menuen ved at bruge UP eller DOWN. Tryk derefter på OK for at åbne pairing- menuen. Vælg en kanal ved at bruge UP eller DOWN. Tryk OK knappen for at acceptere. Tryk på Pair knappen på modtageren med en skarp genstand som eksempelvis en kuglepen. En meddelelse vil vise sig på modtageren. Modtageren vil derefter tælle ned fra 30 til 0 hvorefter I skal trykke på Pair knappen i dette tidsrum for at linke kameraet. Hvis knappen ikke er trykket, vil modtageren gå tilbage til menu skærmen og det betyder at Pairingen ikke blev gennemført. Tryk Pair knappen på bagsiden af kameraet, når kameraet er bliver linket kan det ses på modtageren med det samme. platinum user manual ALL .indd 111 4-11-2009 17:18:15...
-
Página 112: Problemet & Løsning
1 For at få det bedste resultat skal der bruges Picture put funktion for at se billedet på en større in picture funktion i dit fjernsyn. Tjek om dit fjernsyn skærm. har denne funktion. 2 Se videon på en mindre skærm. platinum user manual ALL .indd 112 4-11-2009 17:18:15... -
Página 113: Tekniske Specifikationer Monitor
80dB ±10% (1M) Power requirement 9V DC ±5% Power consumption 400mA Max without charging 800mA with charging Operating temparature range -10° ~ 60° C (14°F ~ 140°F) Operating humidity 0 ~ 85% RH platinum user manual ALL .indd 113 4-11-2009 17:18:16... -
Página 114: Tekniske Specifikationer Kamera
Power consumption 360mA MAX (with night light) 300mA (without night light) Operating temperature -10°C ~ 40°C (14°F ~ 104°F) Operating humidity 0% ~ 85% Environmental rating -10° ~ 60° C (14°F ~ 140°F) platinum user manual ALL .indd 114 4-11-2009 17:18:16... - Página 115 Poland platinum user manual ALL .indd 115 4-11-2009 17:18:16...
- Página 116 Mamy nadzieję, że nasz monitor pozwoli Ci z radością oglądać i monitorować Twoje dziecko. The Luvion® Baby Monitor to bardzo praktyczne urządzenie, które poz- wala widzieć i słyszeć Twoje dziecko, kiedy tylko zechcesz. Oczywiście, możesz również używać monitora Luvion® dla innych celów. Możesz monitorować osoby starsze wymagające takiego nadzoru, jak również swoje ulubione zwierzęta domowe, a także wejście do Twojego domu. W przedstawionej “Instrukcji obsługi” znajdziesz wszystkie potrzebne infor- macje dotyczące instalacji monitora oraz pełną specyfikację techniczną odbiornika i kamery. Przeczytaj uważnie instrukcję obsługi zanim roz- poczniesz użytkowanie monitora Luvion® .
-
Página 117: Parametry Techniczne
Rozdzielczość VGA • Możliwość monitorowania w całkowitych ciemnościach do 4,5 metrów • Wbudowany mikrofon • Możliwość zasilania kamery bateriami, dając swobodę użytkowania Parametry techniczne odbiornika: • 2,4” kolorowy monitor LCD monitor, zapewniający najwyższą jakość obrazu • Wyjście Video/Audio, umożliwiajce podłączenie urządzenia do Telewizora / Monitora lub urządzeń nagrywających VCR/DVD • Bateria wielokrotnego ładowania, zapewniająca wygodę W zestawie znajdują się następujące elementy: Odbiornik Stacja bazowa od- Kamera Zasilacz Zasilacz Kabel RCA biornika (z możliwością (odbiornika) (kamery) ładowania baterii) Sprawdź dokładnie czy otrzymałeś wszystkie elementy systemu przedstawione powyżej. platinum user manual ALL .indd 117 4-11-2009 17:18:17... -
Página 118: Instalacja Odbiornika
Funkcja ta pozwoli na podgląd obrazu odbiornika podczas emisji obrazu innego programu na Twoim telewizorze. Tryb oglądania (Viewing Mode): Następujące funkcje możesz używać podczas odbioru obrazu video z kamery na monitorze odbiornika: • Naciśnij przycisk GÓRA/DÓŁ éê aby przyciszyć lub zgłośnić dźwięk • Naciśnij przycisk LEWO ç aby ustawić obraz z różnych kamer w trybie au tomatycznego zmieniania • Naciśnij przycisk PRAWO è aby ręcznie zmieniać obraz z podłączonych kamer platinum user manual ALL .indd 118 4-11-2009 17:18:18... - Página 119 Przycisk MENU – Naciśnij, aby wejść do menu głównego. Naciśnij ponownie, aby wyjść z menu głównego. Przyciski NAWIGACYJNE/Przycisk OK – Używane do kontrolow- ania trybu pracy odbiornika i nawigacji w menu głównym Nóżka – odchyl nóżkę, aby ustawić odbiornik na płaskich powier- zchniach (stół, półka, szafka). Alternatywnie możesz umieścić odbiornik w stacji bazowej. Przycisk Pair - W najnowszym modelu nie ma przycisku - funkcja została zautomatyzowana Głośnik platinum user manual ALL .indd 119 4-11-2009 17:18:19...
- Página 120 Uwaga: Kiedy odbiornik jest w stacji bazowej i kabel A/V jest podłączony (zasilacz także musi być podłączony do stacji ba- zowej) wówczas ekran LCD zgaśnie. Obraz na ekranie LCD zost- anie ponownie wyświetlany po rozłączeniu kabli A/V. platinum user manual ALL .indd 120 4-11-2009 17:18:19...
- Página 121 Zasilanie bateriami jest przeznaczone do krótszych okresów monitorowania. Przycisk Pair – Przycisk „Pair” jest zlokalizowany w tylniej części kamery pod nóżką. Pokrętło czujności monitorowania – Ustaw czujność kamery na sygnały głosowe. Odbiornik wyda sygnał dźwiękowy, aby poinformować ,że zarejestrowany dźwięk jest wyższy od ustawio- nego poziomu przez użytkownika. Dopasuj poziom czujności do własnych preferencji. Przycisk ON/OFF - przycisk do włączenia/wyłączenia kamery. platinum user manual ALL .indd 121 4-11-2009 17:18:20...
-
Página 122: Instalacja Kamery
Uwaga: Kamera może swobodnie stać na płaskich powierzchniach. Wyposażo- na jest w system regulacji, dzięki które- Position the base holes over the mu możesz swobodnie ustawiać kąt i screws. Slide the base down to pozycję monitorowania. Instalacja lock the base in place. trwała na ścianie nie jest konieczna. Ustaw kamerę w odpowiedniej pozycji platinum user manual ALL .indd 122 4-11-2009 17:18:20... - Página 123 Zasilacz Podłącz zasilacz do kamery. Upewnij się, że zasilacz jest podłączony do uziemionego kontaktu. Connecting the power adapter to the 9V input on the back of the camera. Baterie Zsuń klapę przedziału baterii Wsuń 4 baterie typu AA (baterii nie ma w zestawie) do przedziału na baterię. Upewnij się, że baterie są prawidłowo ułożone (+) i (-) . Zamknij klapę przedziału baterii Uwaga: Jeśli kamera jest podłączona do zasilacza, baterie nie będą używane. Baterie są przeznaczone do krótkich okresów monitorowania. platinum user manual ALL .indd 123 4-11-2009 17:18:20...
-
Página 124: Power Saving
(z wyjątkiem przycisku OK) monitor ponownie wygaśnie po czasie, jaki użytkownik ustawił w funkcji Power Saving, pod warunkiem ponownego braku wykrycia sygnału dźwiękowego przez kamerę. Jeśli ekran odbiornika został aktywowany sygnałem głosowym z kamery, ekran ponownie wygaśnie po 8 sekundach od rejestracji ostatniego dźwięku. Setting (A/V Out Menu) Funkcja A/V Out pozwala na dopasowanie rozdzielczości obrazu, jaki jest wysyłany do podłączonego urządzenia zewnętrznego (takiego jak telewizor / monitor/ urządzenie nagrywające). Użyj odpowiedni przycisk GÓRA/DÓŁéê aby wybrać rozdzielczość ekranu, a następnie naciśnij przycisk OK. Rekomendujemy używanie trybu pracy „High”, aby uzyskać najlepsze parametry obrazu. platinum user manual ALL .indd 124 4-11-2009 17:18:20... - Página 125 4 niezależnych kamer monitorujących (do kupienia osobno). Uwaga: Rekomendujemy przeprowadzenie konfiguracji dodatkowych kamer przed ewen- tualnym trwałym montażem zakupionych dodatkowo kamer. Podłącz kamerę do zasilacza i włącz kamerą naciskając przycisk ON. Zielona dioda powinna się włączyć sygnalizując pracę kamery. Podłącz odbiornik do zasilania i włącz. Naciśnij przycisk MENU na odbiorniku. Używając przycisków GÓRA/DÓŁ éê wybierz funkcję „Pairing” , a następnie naciśnij OK. Wybierz kanał, naciskając przyciski GÓRA/ DÓŁ éê . Następnie naciśnij OK. Naciśnij przycisk „Pair” zlokalizowany na tylniej części kamery. Na ekranie monitora pojawi się napis „Please Press Pair Key” oraz licznik odliczający 30 sekund, w których musisz nacisnąć przycisk „Pair” na kamerze, aby skonfigurować urządzenie. Naciśnij klawisz „Pair”, po skonfigurowaniu kamery obraz monitorowany przez to urządzenie zostanie natychmiast wyświetlony na ekranie odbiornika. platinum user manual ALL .indd 125 4-11-2009 17:18:21...
- Página 126 Twojego telewizora / monitora czy ta funkcja jest dostępna. Funkcja ta pozwoli na podgląd obrazu z kamery podczas emisji obrazu innego pro- gramu; 2 Opcjonalnie podłącz urządzenie do telewizora lub monitora z mniejszym ekranem; platinum user manual ALL .indd 126 4-11-2009 17:18:21...
- Página 127 80dB ±10% (1M) Zasilanie 9V DC ±5% Zużycie energii 400mA Max bez ładowania 800mA z ładowaniem Najlepsza temperatura funkcjonowania -10° ~ 60° C (14°F ~ 140°F) Wilgotność optymalna 0 ~ 85% RH platinum user manual ALL .indd 127 4-11-2009 17:18:21...
- Página 128 Konsumpcja energii 360mA MAX (z nocną lampką) 300mA (bez nocnej lampki) Najlepsza temperatura funkcjonowania -10°C ~ 40°C (14°F ~ 104°F) Wilgotność optymalna 0% ~ 85% Środowisko -10° ~ 60° C (14°F ~ 140°F) platinum user manual ALL .indd 128 4-11-2009 17:18:21...
- Página 129 Czech platinum user manual ALL .indd 129 4-11-2009 17:18:21...
- Página 130 Předmluva Gratulujeme vám k nákupu vaší zbrusu nové dětské chůvičky Luvion®! Když se stanete maminkou nebo tatínkem, budete procházet obdobím, které ve vašem životě bude jistě patřit k nejvíce vzrušujícím. V naší společnosti to velice dobře víme a doufáme, že budete s radostí sledovat vaše miminko nebo dítě na obrazovce dětské chůvičky Luvion®. Dětská chůvička Luvion® je vždy při ruce, když chcete sledovat nebo slyšet vaše miminko nebo dítě. Dětskou chůvičku Luvion® můžete samozřejmě používat k různým účelům. Pomocí chůvičky můžete sledovat také starší lidi, domácí zvířata nebo dveře vašeho domu. V této uživatelské příručce naleznete kompletní harmonogram montáže a veškeré specifikace vašeho přijímače a kamery. Prosím, pečlivě si přečtěte tuto uživatelskou příručku před použitím dětské chůvičky Luvion®. Doufáme, že budete s radostí používat dětskou chůvičku Luvion® Luvion® je dodavatelem různých kvalitních výrobků zaměřených na malé děti. Ve své činnosti se soustřeďujeme na bezpečnost, design a...
-
Página 131: Charakteristiky
Zabudovaný mikrofon. • Kamera s možností napájení pomocí baterií, což zajišťuje skutečnou přenosnost kamery. Vlastnosti přijímače • Přijímač s LCD obrazovkou s úhlopříčkou 2,4“ (6 cm) a vynikající kvalitou obrazu. • Obrazový a zvukový výstup pro sledování obrazu na televizoru nebo monitoru nebo nahrávání pomocí videorekordéru nebo DVD rekordéru. • Vyměnitelná baterie na bázi lithium polymeru (LiPol) zajišťující skutečnou mobilitu. • Součástí dodávky je uživatelsky příjemná dobíjecí stanice. • Indikátor hlasitosti a alarmu. Systém je dodáván spolu s následujícími součástmi: Bezdrátový přijímač Nabíjecí stanice Bezdrátová Síťový adaptér Kabel RCA Síťový adaptér kamera (přijímače) (kamery) Zkontroluje balení a ujistěte se, že jste obdrželi kompletní systém včetně všech součástí, které jsou zobrazeny výše. platinum user manual ALL .indd 131 4-11-2009 17:18:23... -
Página 132: Instalace Přijímače
Nejedná se o závadu výrobku. Pro nejlepší obraz na televizoru nebo monitoru je vhodné používat funkci PIP (PIP – picture in picture – obraz v obraze) televizoru/ monitoru. Prohlédněte si příručku k vašemu televizoru nebo monitoru a podívejte se, zda je tato funkce na vašem spotřebiči k dispozici. To vám umožní sledovat televizor nebo jakékoli jiné vizuální zařízení a vidět obraz z kamery v malém okénku na stejné obrazovce. Režim sledování: Následující ovládací prvky se používají, když sledujete aktuální obraz z vaší kamery: • Stiskněte šipku NAHORU/DOLŮ éê k snížení nebo zvýšení hlasitosti. • Stiskněte LEVOU šipku ç pro sledování kamer v automatickém režimu přepínání. • Stiskněte PRAVOU šipku è k manuálnímu přepínání mezi kamerami. platinum user manual ALL .indd 132 4-11-2009 17:18:23... -
Página 133: Funkční Tlačítka Na Přední A Zadní Straně Přijímače
Stisknutím jakéhokoli tlačítka kromě tlačítka OK na přední straně přijímače opustíte režim: pouze snímání. Tlačítko MENU – Stiskněte toto tlačítko k přístupu do menu přijímače. Když znovu stisknete toto tlačítko, opustíte menu přijímače. Navigační tlačítka (šipky)/tlačítko OK – Používejte navigační tlačítka v režimu sledování a v režimu menu. Stojánek – Posuňte stojánek směrem dozadu a umístěte přijímač na vodorovný povrch (stůl nebo jiný vhodný vodorovný povrch). Eventuálně umístěte přijímač do nabíjecí stanice. Tlačítko párování – Stiskněte tlačítko párování, když budete chtít spárovat přijímač s kamerou (více informací o párování naleznete v kapitole párování). Reproduktor – Vydává zvuky, které jsou přenášeny z kamery. platinum user manual ALL .indd 133 4-11-2009 17:18:24... -
Página 134: Funkční Tlačítka Na Boku Přijímače
(VYPNUTO) pro vypnutí a zapnutí přijímače. AV výstup (volitelné použití) – Připojte kabel AV, který je součástí dodávky, abyste mohli obraz z přijímače sledovat na televizoru nebo monitoru nebo ho nahrávat pomocí videorekordéru nebo DVD rekordéru. Eventuálně můžete použít AV výstup na napájecí stanici. Vstup pro připojení síťového adaptéru – Připojte síťový adaptér (9V), který je součástí dodávky, aby bylo možné napájet přijímač nebo dobíjet baterii přijímače (když není přijímač v nabíjecí stanici) AV výstup – Připojte AV kabel, který je součástí dodávky, abyste mohli obraz z přijímače (když je v nabíjecí stanici) sledovat na televizoru nebo monitoru nebo ho nahrávat pomocí videorekor- déru nebo DVD rekordéru. (POZNÁMKA: AV výstup nebude fun- govat, pokud není kabel z adaptéru připojen k nabíjecí stanici. Najednou by měl být používán pouze jeden AV výstup). Vstup pro připojení síťového adaptéru – Připojte síťový adaptér (9V), který je součástí dodávky, aby bylo možné napájet nebo dobíjet přijímač. platinum user manual ALL .indd 134 4-11-2009 17:18:25... -
Página 135: Funkční Tlačítka Kamery
Baterie by měly být používány pro krátkodobé použití přístroje jako přenosné kamery. Tlačítko párování – Toto tlačítko je umístěno na zadní straně kamery za ramenem stojánku. Spouštěč zvukového alarmu - Nastavte spouštěč na určitou citlivost. Přijímač vydá zvuk, aby varoval uživatele, když je zvuk nad přednastavenou úrovní. Pomocí kolečka na straně můžete nastavit vyšší nebo nižší úroveň. platinum user manual ALL .indd 135 4-11-2009 17:18:25... -
Página 136: Připojení Adaptéru Kamery
POZNÁMKA: Můžete instalovat další kamery (maximálně 4 kamery). Když budete přidávat kamery, které nejsou zahrnuty v původní dodávce, bude nutné tyto kamery spárovat s přijímačem. Odkažte se prosím na kapitolu párování kamer. platinum user manual ALL .indd 136 4-11-2009 17:18:25... -
Página 137: Připojení Síťového Adaptéru Bezdrátové Kamery
Připojení síťového adaptéru do 9 vol- tového vstupu v zadní části kamery. Baterie: Vyjměte kryt baterií ze stojánku kamery. Vložte 4 baterie AA (nejsou součástí dodávky) do prostoru ve stojánku, přičemž správně vyrovnejte kladné (+) a záporné (-) póly baterií. Umístěte kryt baterií zpět na své místo. POZNÁMKA: Pokud je do kamery zasunut síťový adaptér, nebudou baterie používány. Baterie by měly být používány pro krátkodobé použití přístroje jako přenosné kamery. platinum user manual ALL .indd 137 4-11-2009 17:18:25... -
Página 138: Hlavní Menu
čase, který jste nastavili, pokud není během této dobu aktivována prostřednictvím zvukového spouštěče. Jestliže je aktivována hlasitějším zvukem (zvukovým spouštěčem), vrátí se do úsporného režimu během asi 8 sekund po posledním spuštění. Menu pro audiovizuální výstup Volba menu pro AV výstup se používá pro nastavení rozlišení obra- zu, který je odesílán do audiovizuálního zařízení (jako je televizor , videorekordér nebo monitor). Použijte šipky NAHORU a DOLŮ éê k volbě rozlišení a pro potvrzení stiskněte OK. Důrazně doporučujeme pro velké obrazovky zvolit nastavení „High“ (vysoké), aby byla zajištěna nejlepší kvalita – výchozí nastavení je „High“. platinum user manual ALL .indd 138 4-11-2009 17:18:26... -
Página 139: Párování Kamery
POZNÁMKY: Důrazně se doporučuje párovat kamery s přijímačem dříve, než budou kamery trvale namontovány. Spusťte kameru tak, že připojíte síťový adaptér nebo instalujete baterie a přepnete vypínač na ON (ZAP- NUTO). LED dioda by měla ukazovat, že je kamera ZAPNUTA. Zapněte přijímač tak, že připojíte síťový adaptér k 9 vol tovému vstupu na boku přijímače. Stiskněte tlačítko MENU na přijímači. Pohybujte se v menu pomocí šipek éê, než dojdete k položce pairing (párování), stiskněte tlačítko OK. Pomocí šipek NAHORU a DOLŮ éê zvolte kanál a pro potvrzení volby stiskněte tlačítko OK. Stiskněte párovací tlačítko umístěné na zadní straně přijímače pomocí hrotu tužky nebo kancelářské sponky. Na obrazovce přijímače se zobrazí zpráva. Přijímač bude odpočítávat od 30 do 0 a během této doby musíte stisknout párovací tlačítko na kameře, aby se kamera úspěšně spárovala. Jestliže nestisknete tlačítko, přijímač se vrátí do režimu sledování a párování se nedokončí. Stiskněte párovací tlačítko na zadní straně kamery. Po spárování kamery bude možné okamžitě sledovat obraz na obrazovce přijímače. platinum user manual ALL .indd 139 4-11-2009 17:18:26... -
Página 140: Řešení Problémů
(640x480 pixelů).Toto není závada přístroje. 1 Pro dosažení lepšího výkonu použijte funkci PIP (obraz v obraze). Prostudujte Váš TV/monitor manuál, zda tuto funkci umožňují. 2 Sledujte video na malé obrazovce Vaší TV/moni- toru. platinum user manual ALL .indd 140 4-11-2009 17:18:26... - Página 141 80dB ±10% (1M) Napájení 9V DC ±5% Spotřeba energie 400mA maximálně, bez nabíjení 800mA s nabíjení Rozsah provozní teploty -10° ~ 60° C (14°F ~ 140°F) Provozní vlhkost 0 ~ 85% RH platinum user manual ALL .indd 141 4-11-2009 17:18:27...
- Página 142 360mA maximálně (s nočním světlem) 300mA (bez nočního světla) Provozní teplota -10°C ~ 40°C (14°F ~ 104°F) Provozní vlhkost 0% ~ 85% Teplota okolního prostředí -10° ~ 60° C (14°F ~ 140°F) platinum user manual ALL .indd 142 4-11-2009 17:18:27...
- Página 143 Turkey platinum user manual ALL .indd 143 4-11-2009 17:18:27...
- Página 144 Tabii Kapalı, farklı amaçlar için Luvion ® bebek monitör kullanabilirsiniz. Bu Ekranla yaşlı insanları, hayvanları veya kapınızı izleye bilirsiniz. Bu kullanıcı el kitabında tam yükleme programı ve tüm özellikleri bulabilirs- iniz. Monitör ve kameranın tüm özelliklerini. Lütfen dikkatle önce Luvion ® Bebek monitörün kullanımı için bu kullanıcı el kitabı okuyun. Sizin Luvion ® bebek monitörün kullanımını seveceğinizi umuyoruz. Luvion ® farklı prim bebek ürünleri bir tedarikçidir. Güvenlik, dayalı tasarım ve kalite sadece en iyi ürünleri sunmaktadır. Tekrar memnun müşteri olarak görmek dileğiyle. LUVION ® platinum user manual ALL .indd 144...
- Página 145 • Interference-, güvenli, özgür ve gizli sinyali. • Kablosuz aktarım aralığı için: 150m. • Olağanüstü ses kalitesi. • Güvenlik mesafesi aşıldı zaman uyarı sinyali vermektedir. • Sistemi 4 Kameraya kadar genişletebilirsiniz. Kamera Donanımı • VGA çözünürlüklü Kamera. • Gece işiğında 4,5 metreye kadar netdir. • Dahili mikrofon. • Taşına bilen aygıt icin Kamera pil ile’de kulanılır. Alıcı Cihazları • 2,4 “renkli monitör / mükemmel görüntü kalitesi ile alıcı LCD. • Video / TV/ ekran veya bir VCD / DVD kaydedici ile kayıt için ses çıkışı. • Kolay taşınabilirlik için şarj edilebilir lityum polimer pil. • Alıcıya uygun tutacak ve kemer tutacagı dahildir. • Ses seviyesi kontrolü ve alarm. • Uygun alıcı beşiği dahil. • Ses seviyesisinin göstergesi ve alarmı. • Indikátor hlasitosti a alarmu. Systém je dodáván spolu s následujícími součástmi: Mönitörü Tutucu Kamara Kablosuz Güç RCA blosu Kablo Kamara kaynağı Alıcısı Yukarıdaki her öğe kamera ile birlikte teslim edilir. Lütfen sisteme dahil tüm kamera sayısını aldıginız pakette kontrol ediniz. platinum user manual ALL .indd 145 4-11-2009 17:18:28...
- Página 146 En iyi performansı almak için, TV nin özelinden PIP-işlevli ekran kullanmanız gerekli. (resim icinde resim işlev özeli). TV nizin ekran kulanma klavuzunu okuyunuz bu işleve-özeliye uygunmu. Bu kullanım ve aynı ekran, kamera bir videoda görmek için bir TV ya da diğer video kaynağı bağlamanızı sağlar. Görünüm modu: Aşağıdaki kontroller kullanılır, Kameradan canlı yayın izlemek icin: • Aşagı yukarı tuşlarına basın,görüntüyü büyütmek veya küçültmek için. • Sol tuşa basınca,Kamera otomatik moda geciyor. • Sağ tuşa basınca,Kamera elle işlev şekline geciyor. platinum user manual ALL .indd 146 4-11-2009 17:18:28...
- Página 147 „OK” tuşu haricinde herhangi bir tuşa basınız, Scan-tarayıcıyı sonlandırmak icin. MENÜ Dümesi – Bu alıcının menüsüne erişmek için tuşa basınınız. Cıkış icin tekrar aynı tuşa basınız. Navigasyon kontrol / OK –Düğme – Görünüm menüsünü ve tür denetimleri kullanın. SAlıcının ayaklığı - Ayaklı acıp herhangi bir düz zemine dike bilirsiniz (mesela masaya )Veya Alıcıtutacağına oturta bilirsiniz. Eşleştirme düğmesi – Başka bir Kamera ile Eşleştirmek istiyorsanız Eşleştirme düğmesine basınız, Hoparlörler – Kameradan alıcıya sesi iletir. platinum user manual ALL .indd 147 4-11-2009 17:18:30...
- Página 148 Alarm +/- Devre – Devre düğmesine basınız, ses ve alarm seviyesini ayarlamak-düzenleyici. Alıcı anten – Kamera sinyaleri al ve gönderir. Anten kilitleme Switch – Konum kilidin açılması için düğmesini kaydırın, alıcı anten kadar penceresi açılır. O zaman daha iyi sinyal alımı için dikey konuma anten ayarlayabilirsiniz. Güç kaynağı düğmesi – acma kapama düğmesi. A/V Cıkış (Optional) – Alıcıyı mevcut olan A/V Kablosunla TV ye veya DVD/VCD izlemek icin bağlayın. Alternativ olarak A/V cıkışını Alıcıtutacağı’na bağlayabilirsiniz. DC 9V Güç kaynağı – Mevcut bulunan Güç kaynağı ile burdan şarj edebilirsiniz. A/V Cıkışı – Alıcıtutacağını mevcut bulunan A/V Kablosunla TV ekranında izleye bilirsiniz veya DVD/VCD ile. (Dikkat: A/V cıkışı sadece güc kaynağı takılı olmadı zaman calışır). DC 9V Güç kaynağı – Mevcut bulunan Güç kaynağı ile burdan şarj edebilirsiniz. platinum user manual ALL .indd 148 4-11-2009 17:18:30...
- Página 149 Güç kaynağı devreye girdinde piller devre dışı kalır.Pilli kulanım sadece kısa süre taşına bilen aygıtlar icindir. Eslestirme Dugmesi(çiftleştirme-düğmesi) – Çiftleştirme düğmesi aygıtın ayaklının altındadır. Tetikler ve sesli alarm – Alarmı tetikleyecek bir duyarlılık ayarlayın. Eğer mevcut bir gürültü seviyesi üzerinde gürültü olan alıcı bip sesi duyulur, kullanıcı uyarmak icin.Yanda bulunan düğmeden istediniz seviyeye ayarlıya bilirsiniz. Kamera Ac/Kapa- Düğmesi – Kamerayı acıp kapatır. platinum user manual ALL .indd 149 4-11-2009 17:18:30...
- Página 150 DİKKAT: Kamera’yı düz bir düzeye de asmadan monte edebilirsiniz. Kameranın görünüm şeklini ayarayınız. Position the base holes over the screws. Slide the base down to lock the base in place. DİKKAT: Ayrıca 4 kamera birden yükleyebilirsiniz. Yüklemek iste- diniz kameralar orginal bu paketden oluşmuyorsa çiftleştirme bölümünden yardım alabilirsiniz. platinum user manual ALL .indd 150 4-11-2009 17:18:31...
- Página 151 Ağ Bölümü: Ağ kablosunu kameraya takınız. Kamerayı geçerli dalgalardan korumak icin çıkış veya bir anahtar FI topraklanmış olduğundan emin olun. Kameranın arka kısmında ağ çıkışına 9v-Kablosunu takın. Pil kısmı. Kameranın alt kısmınıdaki pil yuvasının kapağını acın. İçeriğine 4 x AA Pil yerleştirin (Piller pakete dahil degildir). Pilleri dogru taktınızdan emin olun. (+) ve negatif (-) Pill yuvasının kapağını kapatınız. DİKKAT: Kamera ağ parçası ile bağlıysa, pil gerekli değildir. Kameradaki piller sadece kısa süre kullanım icin öngörülmüştür. platinum user manual ALL .indd 151 4-11-2009 17:18:31...
- Página 152 Volba menu pro AV výstup se používá pro nastavení rozlišení obrazu, který je odesílán do audiovizuálního zařízení (jako je televizor, videorekordér nebo monitor). Použijte šipky NAHORU a DOLŮ éê k volbě rozlišení a pro potvrzení stiskněte OK. Důrazně doporučujeme pro velké obrazovky zvolit nastavení „High“ (vysoké), aby byla zajištěna nejlepší kvalita – výchozí nastavení je „High“. platinum user manual ALL .indd 152 4-11-2009 17:18:31...
- Página 153 Kamera Eşleştirme Sistemde kameralar ayarlıdır. Bu kameralar alıcı ile iletişimdedir elektriye takıldıgi andan itibaren. Eşleştirme işlevi kablosuz alıcı başka bir kanala ve diğer kameraların yapılandırma sorumlu her kamera atar gereklidir. DİKKAT: Uyarı, önce kalıcı olarak yüklü olan kameralar alıcıya atanır. Adaptör veya pil gücü bağlanma ile kamera sağlayın ve ON için geçiş ayarlayın. Kamera üzerindeki güç göstergesini beklemek gerekir. Şarj aletini alıcıya takınız 9V-cıkişi ile birleştirin. Alıcının Menü düğmesine basınız. İlerliyerek eşleştirme menüsüne gelin, sag sol tuşları ile ilerleyin OK tuşu ile onaylayınız. než dojdete k položce pairing (párování), stiskněte tlačítko OK. Bir kanal yukarı ve aşağı düğmelerine basarak seciniz. Aliciyi onaylamak icin tamam tusuna basiniz Bir kalem veya alıcının alt üzerindeki eşleştirme düğmesini bir raptiye ile basınız. Bir mesaj alıcının ekraninda görüntülenir. Alıcı biri 30 biri ~ 0 sayar. Başarı ile tamamla- mak icin eşleşmiş tuşuna basın Kameranın arkasındakı Eşleştirme tuşuna basınız. Cıkan kamera seceneklerinden sectiniz ekran görüntüye gelir. platinum user manual ALL .indd 153 4-11-2009 17:18:32...
-
Página 154: Sorun Giderme
En iyi performansı almak için, Bu bizim ürünün bozuk olduğunu göstermez. En iyi performansı almak için, TV’nin özelinden PIP-işlevli ekran kullanmanız gerekli. (resim içinde resim işlev özeli).TV’nizin ekran kullanma klavuzunu okuyunuzbu işleve-özeliye uygun’mu. platinum user manual ALL .indd 154 4-11-2009 17:18:32... - Página 155 Alarm duyarlılık 80dB ±10% (1M) Bağlı yük 9V DC ±5% Enerji 400mA max. 800mA şarj ile şarj olmadan Sıcaklığı -10° ~ 60° C (14°F ~ 140°F) İşletim nem 0 ~ 85% RH platinum user manual ALL .indd 155 4-11-2009 17:18:32...
- Página 156 9V DC ±5% Enerji 360mA MAX (gece aydınlatma) 300mA (ile gece ışıkları hariç) Sıcaklığı -10°C ~ 40°C (14°F ~ 104°F) İşletim nem 0% ~ 85% Çevre sıcaklığı -10° ~ 60° C (14°F ~ 140°F) platinum user manual ALL .indd 156 4-11-2009 17:18:32...
- Página 157 All rights reserved. © 2009 THD platinum user manual ALL .indd 157 4-11-2009 17:18:32...
- Página 158 LUVION ® platinum user manual ALL .indd 158 4-11-2009 17:18:32...