Tabla de contenido
Publicidad
Idiomas disponibles
Idiomas disponibles
Lavavajillas
Lave-vaisselles
Dishwashers
Geschirrs pülmaschinen
Lavastoviglie
ES: INSTRUCCIONES DE INSTALACIÓN, USO Y MANTENIMIENTO
FR: INSTRUCTIONS D'INSTALLATION, D'UTILISATION ET D'ENTRETIEN
EN: INSTALLATION, USAGE AND MAINTENANCE INSTRUCTIONS
DE: INSTALLATIONS, GEBRAUCHS UND WARTUNGSANLEITUNG
IT: ISTRUZIONI PER L'INSTALLAZIONE, L'USO E LA MANUTENZIONE
CODE: 12114012
REV.:11/2014
Publicidad
Capítulos
Tabla de contenido

Manuales relacionados para Fagor evo Serie


Resumen de contenidos para Fagor evo Serie
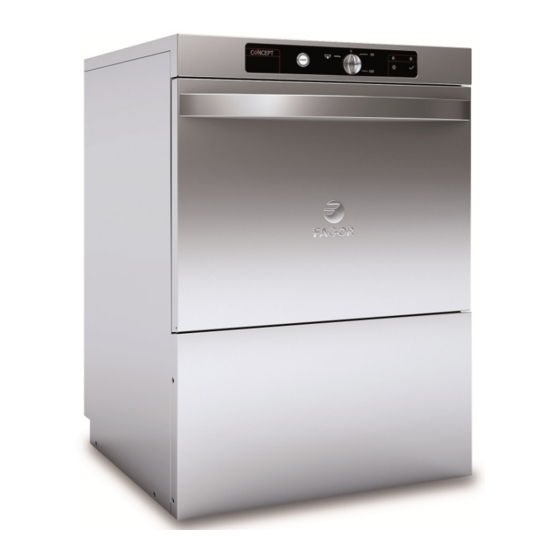
- Página 1 Lavavajillas Lave-vaisselles Dishwashers Geschirrs pülmaschinen Lavastoviglie ES: INSTRUCCIONES DE INSTALACIÓN, USO Y MANTENIMIENTO FR: INSTRUCTIONS D'INSTALLATION, D'UTILISATION ET D'ENTRETIEN EN: INSTALLATION, USAGE AND MAINTENANCE INSTRUCTIONS DE: INSTALLATIONS, GEBRAUCHS UND WARTUNGSANLEITUNG IT: ISTRUZIONI PER L'INSTALLAZIONE, L'USO E LA MANUTENZIONE CODE: 12114012 REV.:11/2014...
- Página 2 TENSIÓN LEA LAS TIERRA DE PRECAUCIÓN EQUIPOTENCIALIDAD PELIGROSA INSTRUCCIONES PROTECCIÓN TENSION LISEZ LES TERRE DE PRÉCAUTION ÉQUIPOTENTIALITÉ DANGEREUSE INSTRUCTIONS PROTECTION HAZARDOUS PLEASE READ PROTECTIVE EQUIPOTENTIAL WARNING VOLTAGE INSTRUCTIONS EARTH BONDING GEFÄHRLICHE ANLEITUNG SCHUTZ- ERDE POTENZIALAUSGLEICH VORSICHT SPANNUNG GRÜNDLICH LESEN TENSIONE LEGGERE LE TERRA DI PRECAUZIONE...
- Página 3 DIMENSIONES GENERALES Y ACOMETIDAS (mm.) DIMENSIONS GÉNÉRALES ET BRANCHEMENTS(mm.) GENERAL MEASUREMENTS AND CONNECTIONS (mm.) ALLGEMEINE ABMESSUNGEN UND ZULEITUNGEN (mm.) DIMENSIONI GENERALI E CONNESSIONI (mm.) Entrada Toma de agua Manguera Desagüe Manguera eléctrica Regleta conexión Entrada detergente Equipotencial abrillantador Réglette Prise d’eau Tuyau vidange Gaine électrique Lustrant entrée...
- Página 4 MOD.A MOD.B MOD.C...
- Página 5 GUÍAS RÁPIDAS DE FUNCIONAMIENTO GUIDES RAPIDES DE FONCTIONNEMENT QUICK START-UP GUIDES ABGEKÜRZTE BEDIENUNGSANLEITUNG GUIDAS RAPIDA DI FUNZIONAMENTO MOD. A, B...
- Página 6 MOD. C...
-
Página 7: Tabla De Contenido
1. ÍNDICE ÍNDICE ............................... 7 INFORMACIÓN Y ADVERTENCIAS GENERALES ................. 8 DATOS DEL PRODUCTO ......................... 8 INSTRUCCIONES DE INSTALACIÓN ...................... 9 Desembalaje ............................9 Emplazamiento y nivelación ......................9 Conexión eléctrica ..........................9 Conexión hidráulica ......................... 10 Conexión del desagüe ........................10 Dosificador abrillantador hidráulico (MOD. -
Página 8: Información Y Advertencias Generales
2. INFORMACIÓN Y ADVERTENCIAS INFORMACIÓN Y ADVERTENCIAS GENERALES Este manual ha sido creado para facilitar la completa comprensión del funcionamiento, instalación y Este manual ha sido creado para facilitar la completa comprensión del funcionamiento, instalación y Este manual ha sido creado para facilitar la completa comprensión del funcionamiento, instalación y mantenimiento de la máquina. -
Página 9: Instrucciones De Instalación
4. INSTRUCCIONES DE INSTALACIÓN ES DE INSTALACIÓN El emplazamiento El emplazamiento y la instalación, así como reparaciones o transformaciones, y la instalación, así como reparaciones o transformaciones, deben realizarse siempre por un TÉCNICO AUTORIZADO, atendiendo a la deben realizarse siempre por un TÉCNICO AUTORIZADO, atendiendo a la deben realizarse siempre por un TÉCNICO AUTORIZADO, atendiendo a la reglamentación en vigor en cada país. -
Página 10: Conexión Hidráulica
4.4 Conexión hidráulica Se han de utilizar las mangueras nuevas suministradas con el aparato (no reutilizar mangueras viejas) Se han de utilizar las mangueras nuevas suministradas con el aparato (no reutilizar mangueras viejas) Se han de utilizar las mangueras nuevas suministradas con el aparato (no reutilizar mangueras viejas). Antes de conectar la máquina a la red hidráulica es necesario realizar el análisis de la calidad del agua Antes de conectar la máquina a la red hidráulica es necesario realizar el análisis de la calidad del agua Antes de conectar la máquina a la red hidráulica es necesario realizar el análisis de la calidad del agua. -
Página 11: Dosificador Abrillantador Eléctrico (Mod. B, C)
4.7 Dosificador abrillantador eléctrico (MOD. brillantador eléctrico (MOD. B, C) Funcionamiento: este dosificador absorbe abrillantador cuando se este dosificador absorbe abrillantador cuando se activa la bomba de aclarado, activa la bomba de aclarado, esto es cuando la máquina se está llenando y cuando la máquina está realizando el proceso de esto es cuando la máquina se está... -
Página 12: Instrucciones De Uso Y Mantenimiento
5. INSTRUCCIONES DE USO Y MANTENIMIENTO ANTES DE PROCEDER A LA PUESTA EN SERVICIO DEL APARATO, LEER DETENIDAMENTE LAS INSTRUCCIONES DE ESTE MANUAL. ESTE ES UN APARATO EXCLUSIVAMENTE PARA USO PROFESIONAL, Y DEBE SER UTILIZADO POR PERSONAL CUALIFICADO. 5.1 Funcionamiento A continuación se mostrará... -
Página 13: Preparación De La Vajilla
Es posible que en el primer calentamiento del día, por inercia de calentamiento, el calderín alcance más temperatura de lo comentado anteriormente. Esto es totalmente normal. Si observa que en el calentamiento del calderín, sale vapor a presión por las toberas de las ramas de aclarado, avise al servicio técnico. 5.1.5 Preparación de la vajilla Para lavar la vajilla hay que seguir los siguientes pasos para su preparación: Retirar los residuos más gruesos de la vajilla antes de colocarla en los cestillos. -
Página 14: Ciclo De Regeneración (Sólo Versiones Soft)
5.1.10.2 Vaciado por bomba de desagüe El vaciado mediante bomba de desagüe, es una opción de la máquina bajo pedido previo en los modelos A, B. El tubo de desagüe debe colocarse siempre en un sifón para que no haya retorno de olores. -
Página 15: Ciclo De Auto-Limpieza (Sólo Mod. C)
5.1.13 Ciclo de auto-limpieza (sólo sólo MOD. C) La máquina que usted ha adquirido dispone de la La máquina que usted ha adquirido dispone de la función de auto-limpieza. Se recomienda realizar limpieza. Se recomienda realizar el ciclo de auto-limpieza al final de cada jornada laboral. Esto consiste en que la máquina realiza un limpieza al final de cada jornada laboral. -
Página 16: Selección De La Fecha Y La Hora (Sólo Mod. C)
5.1.18 Selección de la fecha y la hora Selección de la fecha y la hora (sólo MOD. C) La fecha y la hora tienen el siguiente formato. La fecha y la hora tienen el siguiente formato. D Para realizar configuración de la fecha y de la hora se ha de realizar lo siguiente: configuración de la fecha y de la hora se ha de realizar lo siguiente: Con la máquina apagada pulse el botón de Con la máquina apagada pulse el botón de MENU durante 5 segundos. -
Página 17: No Uso Prolongado
5.2.5 No uso prolongado En el caso de no tener la máquina en funcionamiento durante un periodo largo de tiempo (vacaciones, cierre temporal,…) tenga en cuenta estas directrices: Vacíe la máquina totalmente, calderín incluido. • Limpie la máquina intensamente. • Deje abierta la puerta de la máquina. - Página 18 No hay producto abrillantador. Cargue el depósito de líquido abrillantador. Llame al servicio técnico para la regulación del Líquido abrillantador insuficiente. dosificador. La vajilla y el menaje no quedan secos. Vajilla ha estado demasiado tiempo Según finaliza el lavado de la vajilla, sacarla del dentro del lavavajillas.
-
Página 19: Diagnóstico De Errores (Mod.B)
6.1 Diagnóstico de errores (MOD.B) ERROR DESCRIPCIÓN CONSECUENCIAS El led del ON/OFF se enciende durante 0,5 segundos y queda apagado durante 2 segundos para volver a encenderse, y así sucesivamente siempre PUERTA ABIERTA y cuando la puerta se encuentre abierta mientras el ciclo seleccionado no haya finalizado. -
Página 20: Avisos De La Máquina (Mod.C)
MENSAJE: “E9-NO DESAGUA” y señal Se detecta que BD lleva 1 minuto en acústica durante 30 segundos cada 3 No desagua. marcha y no baja 5 mm. el nivel de la minutos, durante 15 minutos. Máquina cuba (PT no varía). completamente deshabilitada. -
Página 21: Table Des Matières
1. TABLE DES MATIÈRES TABLE DES MATIÈRES .......................... 21 INFORMATIONS ET AVERTISSEMENTS GÉNÉRAUX ................ 22 DONNÉES DU PRODUIT ........................22 INSTRUCTIONS D'INSTALLATION ......................23 Déballage ............................23 Mise en place et nivellement ......................23 Connexion électrique ........................23 Connexion hydraulique ........................24 Connexion de la vidange ......................... -
Página 22: Informations Et Avertissements Généraux
2. INFORMATIONS ET AVERTISSEMENTS GÉNÉRAUX INFORMATIONS ET AVERTISSEMENTS GÉNÉRAUX Ce manuel a été créé pour faciliter la complète compréhension du fonctionnement, de l'installation et de Ce manuel a été créé pour faciliter la complète compréhension du fonctionnement, de l'installation et de Ce manuel a été... -
Página 23: Instructions D'INstallation
4. INSTRUCTIONS D'INSTALLATION INSTRUCTIONS D'INSTALLATION La mise en place et l'installation, ainsi que les réparations ou La mise en place et l'installation, ainsi que les réparations ou La mise en place et l'installation, ainsi que les réparations ou transformations transformations transformations doivent doivent... -
Página 24: Connexion Hydraulique
Ne pas respecter les spécifications du fabricant ou une installation inadé Ne pas respecter les spécifications du fabricant ou une installation inadé Ne pas respecter les spécifications du fabricant ou une installation inadéquate, dégage ce dernier de toute responsabilité, ne pouvant être tenu pour responsable dégage ce dernier de toute responsabilité, ne pouvant être tenu pour responsable dégage ce dernier de toute responsabilité, ne pouvant être tenu pour responsable des dommages personnels ou matériels que pourraient subir la machine. -
Página 25: Doseur De Produit Lustrant Hydraulique (Mod. A)
4.6 Doseur de produit lustrant hydraulique (MOD. A t lustrant hydraulique (MOD. A) Fonctionnement : ce doseur absorbe le liquide lustrant lorsqu'il détecte une perte de pression lors ce doseur absorbe le liquide lustrant lorsqu'il détecte une perte de pression lors ce doseur absorbe le liquide lustrant lorsqu'il détecte une perte de pression lors de ce processus. -
Página 26: Instructions D'UTilisation Et D'ENtretien
5. INSTRUCTIONS D'UTILISATION ET D'ENTRETIEN AVANT DE PROCÉDER À LA MISE EN SERVICE DE L'APPAREIL, LISEZ ATTENTIVEMENT LES INSTRUCTIONS DE CE MANUEL. CET APPAREIL EST À USAGE EXCLUSIVEMENT PROFESSIONNEL ET DOIT ÊTRE UTILISÉ PAR LE PERSONNEL QUALIFIÉ. 5.1 Fonctionnement Nous vous indiquons ci-dessous les pas à suivre pour optimiser le fonctionnement de votre lave- vaisselle et vous montrons toutes les options de fonctionnement dont il dispose. -
Página 27: Préparation De La Vaisselle
Il est possible que lors du premier réchauffement de la journée, par inertie de réchauffement, la chaudière atteigne une température plus élevée que celle commentée précédemment. Ceci est complètement normal. Si vous remarquez que lors du réchauffement de chaudière, de la vapeur sous pression sort des tuyères des lignes de rinçage, prévenez le service technique. -
Página 28: Cycle De Régénération (Uniquement Versions Soft)
5.1.10.2 Vidange à l'aide d'une pompe à vidange La vidange à l'aide d'une pompe à vidange est une option de la machine, disponible lors de la commande dans les modèles. Le tube de vidange doit toujours être placé dans un siphon pour qu'il n'y ait pas de retour d'odeurs. -
Página 29: Cycle D'aUtonettoyage (Uniquement Mod. C)
5.1.13 Cycle d'autonettoyage (uniquement uniquement MOD. C) La machine que vous avez acquise dispose de la fonction d'autonettoyage. No La machine que vous avez acquise dispose de la fonction d'autonettoyage. No La machine que vous avez acquise dispose de la fonction d'autonettoyage. Nous vous recommandons de réaliser le cycle d'autonettoyage à... -
Página 30: Sélection De La Date Et De L'hEure (Uniquement Mod. C)
5.1.18 Sélection de la date et de l'heure Sélection de la date et de l'heure (uniquement MOD. C) La date et l'heure ont le format suivant. La date et l'heure ont le format suivant. D . Pour configurer la date et Pour configurer la date et l'heure, réalisez les pas suivants : l'heure, réalisez les pas suivants :... -
Página 31: Anomalies, Alarmes Et Pannes
Si la machine ne va pas fonctionner pendant un certain temps (vacances, fermeture provisoire, etc.), tenez compte des directives suivantes : Videz complètement la machine, chaudière inclus. • Nettoyez minutieusement la machine. • Laissez la porte de la machine ouvert. •... - Página 32 pas secs. Appelez le service technique pour qu'il Liquide lustrant en quantité insuffisante. procède au réglage du doseur. Dès que le lavage de la vaisselle se La vaisselle est restée trop longtemps dans le termine, sortez-la du lave-vaisselle pour lave-vaisselle. qu'elle puisse sécher à...
-
Página 33: Diagnostic D'eRreurs (Mod.B)
6.1 Diagnostic d'erreurs (MOD.B) ERREUR DESCRIPTION CONSÉQUENCES Le voyant ON/OFF s'allume pendant 0,5 secondes et reste éteint pendant 2 secondes avant de se rallumer, et ainsi de suite tant que la porte reste PORTE OUVERTE ouverte et que le cycle sélectionné ne s'est pas achevé. Le voyant ON/OFF s'allume deux fois pendant 0,5 secondes à... -
Página 34: Avertissements De La Machine (Mod. C)
MESSAGE : « E10-MAL RINCÉ ». La machine n'est Etant PC>20, le niveau de Erreur de pas désactivée, uniquement l'erreur apparaît et un chaudière ne diminue pas rinçage signal sonore retentit pendant 30 secondes toutes 5mm en 12 secondes. les 3 minutes, pendant 15 minutes. Le niveau de réservoir PT4 a MESSAGE : «... -
Página 35: Index
1. INDEX INDEX ..............................35 GENERAL INFORMATION AND WARNINGS ..................36 PRODUCT DETAILS ..........................36 INSTALLATION INSTRUCTIONS ......................37 Removal of packaging ........................37 Positioning and levelling ........................37 Electrical connection ........................37 Hydraulic connection ........................38 Drainage connection ........................38 Hydraulic rinse aid dispenser (A MOD.) .................. -
Página 36: General Information And Warnings
2. GENERAL INFORMATION AND WARNINGS GENERAL INFORMATION AND WARNINGS This manual has been created to help you understand the operation, installation and maintenance This manual has been created to help you understand the operation, installation and maintenance This manual has been created to help you understand the operation, installation and maintenance of the machine. -
Página 37: Installation Instructions
4. INSTALLATION INSTRUCTIONS INSTALLATION INSTRUCTIONS The positioning and installation, and all repairs or modifications, The positioning and installation, and all repairs or modifications, The positioning and installation, and all repairs or modifications, should always be carried out by an AUTHORISED TECHNICIAN, should always be carried out by an AUTHORISED TECHNICIAN, should always be carried out by an AUTHORISED TECHNICIAN, in accordance with the applicable legislation of the country. -
Página 38: Hydraulic Connection
4.4 Hydraulic connection The new hoses supplied with the appliance should be used (do not reuse old hoses). The new hoses supplied with the appliance should be used (do not reuse old hoses). The new hoses supplied with the appliance should be used (do not reuse old hoses). Before connecting the machine to the water Before connecting the machine to the water supply, the water quality should be tested. -
Página 39: Hydraulic Rinse Aid Dispenser (A Mod.)
4.6 Hydraulic rinse aid dispenser ( Hydraulic rinse aid dispenser (A MOD.) Operation: This dispenser absorbs the rinse aid when it detects a loss in pressure during rinsing. dispenser absorbs the rinse aid when it detects a loss in pressure during rinsing. dispenser absorbs the rinse aid when it detects a loss in pressure during rinsing. -
Página 40: Use And Maintenance Instructions
5. USE AND MAINTENANCE INSTRUCTIONS BEFORE STARTING THE APPLIANCE, PLEASE READ THE INSTRUCTIONS CONTAINED IN THIS MANUAL CAREFULLY. THE APPLIANCE IS EXCLUSIVELY FOR PROFESSIONAL USE, AND SHOULD ONLY BE USED BY QUALIFIED PERSONNEL. 5.1 Operation The steps required to optimise the operation of your dishwasher are shown below, with all the available options. -
Página 41: Preparation Of The Dishes
During the first heating of the day, the boiler may reach a higher temperature than that mentioned above due to heating inertia. This is normal. If pressurised steam is observed coming out of the rinse branch nozzles, while the boiler is heating, the technical service should be notified. -
Página 42: Regeneration Cycle (Only Soft Versions)
5.1.10.2 Drainage using the drainage pump The drainage using the drainage pump option is only available on request in the A, B models. The drainage pipe must always be fitted on a siphon to prevent the return of odours.To drain the machine using this method, proceed as follows: Remove the overflow valve. -
Página 43: Self-Cleaning Cycle (Only C Mod.)
5.1.13 Self-cleaning cycle (only C C MOD.) The machine you have purchased is fitted with a self The machine you have purchased is fitted with a self-cleaning function. The self function. The self-cleaning cycle should be run at the end of each working day. The programme runs an internal clean cycle to should be run at the end of each working day. -
Página 44: Selecting The Date And Time (Only C Mod.)
5.1.18 Selecting the date and time Selecting the date and time (only C MOD.) The date and time are displayed in the following format. The date and time are displayed in the following format. D . To programme the date and the time, proceed as follows: the date and the time, proceed as follows: With the machine switched off, press With the machine switched off, press MENU for 5 seconds. -
Página 45: Prolonged Non Use
5.2.5 Prolonged non use If the machine is kept out of service for a long period of time (holidays, temporary closure…), please observe the following: Drain the machine completely, including the boiler. • Clean the machine thoroughly. • Leave the door of the machine open. •... - Página 46 There is no rinse aid Fill the rinse aid container. Rinse aid low. Call technical service to adjust dispenser. Dishes and kitchenware are not dry. Dishes left inside dishwasher When the dishwasher finishes, remove the basket for too long. from the machine and allow to dry naturally. Rinse temperature lower than Call technical service to analyse problem.
-
Página 47: Error Diagnosis (Mod.B)
6.1 Error diagnosis (MOD.B) ERROR DESCRIPTION CONSEQUENCE The ON/OFF LED lights up for 0.5 seconds and then remains unlit for 2 seconds OPEN DOOR before lighting up again. This continues as long as the door is open and the selected cycle is unfinished. The ON/OFF LED light up twice for 0.5 seconds each time and then remains unlit TANK FILL for 2 seconds, then lighting up again twice. -
Página 48: Machine Warnings (Mod. C)
MESSAGE: “E10-INCORRECT RINSE”. The machine is not disabled. If PC>20 the level does not go Rinse error The error is displayed and an acoustic down 5 mm in 12 seconds. signal is emitted for 30 seconds every 3 minutes, for 15 minutes. MESSAGE: “E11-MAX. -
Página 49: Inhaltsangabe
1. INHALTSANGABE INHALTSANGABE ........................... 49 ALLGEMEINE INFORMATION UND HINWEISE ..................50 ANGABEN ZUM GERÄT ......................... 50 INSTALLATIONSANWEISUNG....................... 51 Auspacken ............................51 Aufstellung und Nivellierung ......................51 Elektrischer Anschluss ........................51 Wasseranschluss ..........................52 Anschluss des Abflusses ......................... 53 Hydraulischer Klarspülmitteldosierer (MOD. A) ................53 Elektrischer Klarspülmitteldosierer (MOD. -
Página 50: Allgemeine Information Und Hinweise
2. ALLGEMEINE INFORMATION UND HINWEISE ALLGEMEINE INFORMATION UND HINWEISE Das vorliegende Handbuch soll Ihnen dabei behilflich sein, alle zur Verfügung gestellten Informationen in Das vorliegende Handbuch soll Ihnen dabei behilflich sein, alle zur Verfügung gestellten Informationen in Das vorliegende Handbuch soll Ihnen dabei behilflich sein, alle zur Verfügung gestellten Informationen in Bezug auf Funktionsweise, Installation Bezug auf Funktionsweise, Installation und Wartung des Gerätes vollständig verstehen zu können. -
Página 51: Installationsanweisung
TYPENSCHILD 1: GERÄTENAME GERÄTENAME 2: ARTIKELNUMMER DES GERÄTES ARTIKELNUMMER DES GERÄTES 3: SERIENNUMMER UND SERIENNUMMER UND HERSTELLUNGSDATUM HERSTELLUNGSDATUM 4: ELEKTRISCHE EIGENSCHAFTEN ELEKTRISCHE EIGENSCHAFTEN 5: WASSER-EIGENSCHAFTEN EIGENSCHAFTEN Halten Sie bitte diesen Angaben bereit, wenn Sie sich an den Kundendienst wenden. Halten Sie bitte diesen Angaben bereit, wenn Sie sich an den Kundendienst wenden. Halten Sie bitte diesen Angaben bereit, wenn Sie sich an den Kundendienst wenden. -
Página 52: Wasseranschluss
Dieser Schalter ist mit Sicherungen ausgerüstet, die auf die Nennspannung (A) Dieser Schalter ist mit Sicherungen ausgerüstet, die auf die Nennspannung (A) Dieser Schalter ist mit Sicherungen ausgerüstet, die auf die Nennspannung (A) des Gerätes ausgelegt sind. des Gerätes ausgelegt sind. Alternativ kann ein ordnungsgemäß bemessener Alternativ kann ein ordnungsgemäß... -
Página 53: Anschluss Des Abflusses
Kaltwasser Warmwasser 5 ⁰C < Temperatur < 35 C < Temperatur < 35 ⁰C / 41 ⁰F < 50 ⁰C < Temperatur ≤ 60 ⁰C / 122 C / 122 ⁰F < Temperatur < 95 ⁰F Temperatur < 140 ⁰F Wird Warmwasser verwendet, so darf die Temperatur 60 Wird Warmwasser verwendet, so darf die Temperatur 60 ⁰C / 140 C / 140 ⁰F nicht überschreiten. -
Página 54: Druckerhöhungspumpe (Nür Für Mod. A)
4.9 Druckerhöhungspumpe ( Druckerhöhungspumpe (Nür für MOD. A) Beträgt der Druck im Wassernetz weniger als 2 bar (200 kPa), so Beträgt der Druck im Wassernetz weniger als 2 bar (200 kPa), so on bietet on bietet Ihnen die Möglichkeit, eine Druckerhöhungspumpe zu installieren. Beträgt der Druck weniger als 2 bar (200 kPa), kann es eine Druckerhöhungspumpe zu installieren. -
Página 55: Einschalten Des Gerätes
5.1.3 Einschalten des Gerätes Vor dem Einschalten des Gerätes vergewissern Sie sich bitte, dass folgende Bedingungen gegeben sind: Der Hauptschalter ist eingeschaltet. Der Durchlaufhahn für Wasser steht offen. Die Wasserversorgung muss sichergestellt sein. Alle Filter befinden sich an dem für sie vorgesehenen Platz. Der Überlauf befindet sich an dem für ihn vorgesehen Platz. -
Página 56: Thermostop-Funktion (Nur Mod. B, C)
Modellen gewünschten Spülzyklus durch Drücken Taste (Programmwahlschalter drücken), um einen Spülvorgang zu starten. Jedem Spülvorgang ist eine bestimmte Spülzeit zugeordnet, Anwender bedarfsgerecht auswählen kann (60”/90”/180”/90”). Anschließend die Taste Q zur (Zyklusanwahl START drücken). Die Gerätetür muss vollständig geschlossen sein, damit der Spülvorgang starten kann. -
Página 57: Regenerierungszyklus (Nur Soft Ausführungen)
5.1.11 Regenerierungszyklus (nur SOFT Ausführungen) Bei den Modellen A, B, der Geschirrspüler verfügt über eine manuelles Regenerierungs- oder Entkalkungsystem für Wasserhärten von 10 ⁰fH oder höher. In diesen Fällen muss das Wasser weicher gemacht werden, bevor es in das Gerät gelangen kann. Steht dieses System nicht zur Verfügung, so deutet das auf eine übermäßige Kalkansammlung hin, die zum Verstopfen der im Gerät befindlichen Leitungen führt. -
Página 58: Reinigung Zum Feierabend
5.1.14 Reinigung zum Feierabend Zum Feierabend müssen die Filter, Spülarme, Klarspülarme, sowie alles weitere Zubehör gründlich Zum Feierabend müssen die Filter, Spülarme, Klarspülarme, sowie alles weitere Zubehör gründlich Zum Feierabend müssen die Filter, Spülarme, Klarspülarme, sowie alles weitere Zubehör gründlich gereinigt werden. -
Página 59: Ratschläge Und Tipps
5.2 Ratschläge und Tipps Die folgenden Ratschläge und Tipps gründlich zu lesen und anzuwenden, um alle Möglichkeiten des ie folgenden Ratschläge und Tipps gründlich zu lesen und anzuwenden, um alle Möglichkeiten des ie folgenden Ratschläge und Tipps gründlich zu lesen und anzuwenden, um alle Möglichkeiten des Geschirrspülers optimal nutzen zu können. -
Página 60: Störungen Und Alarme
6. STÖRUNGEN UND ALARME Bei Auftreten von Störungen oder Funktionsfehlern befolgen Sie bitte die folgenden Schritte. Die folgende Tabelle enthält die möglichen Ursachen und Behebungsmaßnahmen. Wenden Sie sich bitte bei Zweifeln an Ihren zuständigen Kundendienst. Gleiches gilt, wenn Sie den Fehler nicht selbst beseitigen können. Nehmen Sie auf keinen Fall Eingriffe an den elektrischen Komponenten vor. - Página 61 Wenden Sie sich an den Kundendienst, um die Zu viel Klarspülmittel Einstellung der Klarspülmitteldosierers vornehmen zu vorhanden. lassen. Das Wasser ist stark Die Wasserhärte überprüfen und nach Möglichkeit sofort Riefen oder Flecken auf kalkhaltig. einen Regenerierungszyklus durchführen. dem Geschirr. Der Salzbehälter ist fast leer. Den Salzbehälter (falls vorhanden) nachfüllen.
-
Página 62: Fehlerdiagnose (Mod.B)
6.1 Fehlerdiagnose (MOD.B) FEHLER BESCHREIBUNG FOLGEN Die LED EIN/AUS 0,5 Sekunden lang aufleuchtet und dann 2 Sekunden lang erlischt, TÜR OFFEN um dann erneut aufzuleuchten. Dieser Vorgang wiederholt sich so lange wie die Tür bei nicht beendetem Waschvorgang nicht geschlossen wird. Die LED EIN/AUS zweimal 0,5 Sekunden lang aufleuchtet und dann 2 Sekunden lang BEIM FÜLLEN DES erlischt, um dann erneut aufzuleuchten. -
Página 63: Hinweise Des Gerätes (Mod.C)
MELDUNG: E10-KLARSPÜLEN STÖRUNG. Das Bei PC> 20, Pegel sinkt nicht Gerät wird nicht ausgeschaltet, sondern es wird Fehler beim beim Klarspülen 5 mm.in 12 lediglich der Fehler angezeigt und das akustische Klarspülen. sekunden. Signal ertönt 30 Sekunden lang und wird 15 Minuten lang alle 3 Minuten wiederholt. -
Página 64: Indice
1. INDICE INDICE ..............................64 INFORMAZIONI E AVVERTENZE GENERALI ..................65 DATI PRODOTTO ........................... 65 ISTRUIZIONI PER L’INSTALLAZIONE ....................65 Disimballaggio ..........................66 Posizionamento e livellamento ......................66 Connessione elettrica ........................66 Collegamento idraulico ........................67 Connessione dello scarico ....................... 67 Dosatore del brillantante idraulico (MOD. -
Página 65: Informazioni E Avvertenze Generali
2. INFORMAZIONI E AVVERTENZE GE INFORMAZIONI E AVVERTENZE GENERALI Il presente manuale è stato redatto per favorire la comprensione del funzionamento, l'installazione e Il presente manuale è stato redatto per favorire la comprensione del funzionamento, l'installazione e Il presente manuale è stato redatto per favorire la comprensione del funzionamento, l'installazione e la manutenzione della macchina. -
Página 66: Disimballaggio
L'ubicazione e l'installazione, nonché le riparazioni o modifiche devono L'ubicazione e l'installazione, nonché le riparazioni o modifiche devono L'ubicazione e l'installazione, nonché le riparazioni o modifiche devono sempre essere effettuate sempre da un TECNICO AUTORIZZATO, sulla base sempre essere effettuate sempre da un TECNICO AUTORIZZATO, sulla base sempre essere effettuate sempre da un TECNICO AUTORIZZATO, sulla base della normativa in vigore in ogni paese. -
Página 67: Collegamento Idraulico
4.4 Collegamento idraulico Collegamento idraulico Devono essere utilizzati solo tubi nuovi forniti con l'apparecchio (non riutilizzare tubi vecchi). Devono essere utilizzati solo tubi nuovi forniti con l'apparecchio (non riutilizzare tubi vecchi). Devono essere utilizzati solo tubi nuovi forniti con l'apparecchio (non riutilizzare tubi vecchi). Prima di collegare la macchina alla rete idrica, è... -
Página 68: Dosatore Del Brillantante Idraulico (Mod. A)
4.6 Dosatore del brillantante idraulico (MOD. A rillantante idraulico (MOD. A) Funzionamento: questo dosatore assorbe il liquido brillantante quando rileva una perdita di questo dosatore assorbe il liquido brillantante quando rileva una perdita di questo dosatore assorbe il liquido brillantante quando rileva una perdita di pressione durante il risciacquo, cioè, quando l'elettrovalvola di riempimento si chiude, si crea un il risciacquo, cioè, quando l'elettrovalvola di riempimento si chiude, si crea un il risciacquo, cioè, quando l'elettrovalvola di riempimento si chiude, si crea un... -
Página 69: Istruzioni Per L'USo E La Manutenzione
5. ISTRUZIONI PER L'USO E LA MANUTENZIONE PRIMA DELLA MESSA SERVIZIO DELL'APPARECCHIO, LEGGERE ATTENTAMENTE LE ISTRUZIONI DI QUESTO MANUALE. QUESTO È UN APPARECCHIO ESCLUSIVO PER USO PROFESSIONE, E DEVE ESSERE UTILIZZATO SOLO DA PERSONALE QUALIFICATO. 5.1 Funzionamento Di seguito, sono mostrati i passi da seguire per ottimizzare le prestazioni della sua lavastoviglie, che descrivono tutte le possibilità... -
Página 70: Preparazione Delle Stoviglie
La macchina acquistata è dotata di un termostato di sicurezza nel boiler e un altro nella vasca, in modo che in caso di guasto di uno dei termostati principali, questi possono interrompere il riscaldamento. È possibile che durante il primo riscaldamento della giornata, per inerzia del riscaldamento, il boiler raggiunge una temperatura superiore rispetto a quella indicata sopra. -
Página 71: Ciclo Di Rigenerazione (Solo Versioni Soft)
5.1.10.1 Svuotamento per gravità (MOD. A, B) Per svuotare la macchina tramite questo metodo, è sufficiente estrarre lo sfioratore dalla macchina e si svuoterà da sola. Si raccomanda di utilizzare questo tipo di scarico con la macchina spenta per sicurezza. 5.1.10.2 Svuotamento tramite pompa di scarico Lo svuotamento tramite pompa di scarico, è... -
Página 72: Ciclo Di Pulizia-Automatica (Solo Mod.C)
5.1.13 Ciclo di pulizia-automatica ( automatica (solo MOD.C) La macchina acquistata prevede la funzione di La macchina acquistata prevede la funzione di pulizia-automatica. Si raccomanda di eseguire il ciclo . Si raccomanda di eseguire il ciclo di pulizia-automatica alla fine di ogni giornata lavorativa. Ciò prevede l'esecuzione di un ciclo di alla fine di ogni giornata lavorativa. -
Página 73: Selezione Della Data E Dell'oR (Solo Mod. C)
5.1.18 Selezione della data e dell'or (solo MOD. C) Selezione della data e dell'or (solo MOD. C) La data e l'ora presentano la seguente struttura: La data e l'ora presentano la seguente struttura: G . Per l'esecuzione dell'impostazione della data e dell'ora fare quanto segue: dell'impostazione della data e dell'ora fare quanto segue: Con la macchina spenta premere il pulsante di Con la macchina spenta premere il pulsante di MENU per 5 secondi. -
Página 74: Risultati Ottimi
5.2.4 Risultati ottimi Per ottenere i migliori risultati nella pulizia delle stoviglie, il costruttore vi consiglia di effettuare le seguenti operazioni: Lavare le stoviglie quando la macchina è pronta. • Mantenere sempre ben regolati i diversi dosatori. • Mantenere la lavastoviglie in perfette condizioni di pulizia. •... - Página 75 Non c'è il prodotto brillantante. Caricare il serbatoio di brillantante. Contattare il servizio tecnico per la regolazione Liquido brillantante insufficiente. del dosatore. Le stoviglie e gli utensili Al termine del lavaggio delle stoviglie, toglierle non sono asciutti. Le stoviglie sono state troppo tempo dalla lavastoviglie per la loro successiva all'interno della lavastoviglie.
-
Página 76: Diagnosi Degli Errori (Mod.B)
6.1 Diagnosi degli errori (MOD.B) ERRORE DESCRIZIONE CONSEGUENZE Il led di ON/OFF si accende per 0,5 secondi e resta spento per 2 secondi per PORTA APERTA riaccendersi di nuovo, e così di seguito ogni volta che la porta resta aperta mentre il ciclo selezionato non si è... -
Página 77: Avvisi Della Macchina (Mod.C)
Se PC >20, non MESSAGGIO: "E10-RISCIACQUO INSUFFICIENTE". Errore di diminuisce il livello di La macchina non è disattivata, però compare l'errore e il risciacquo. risciacquo 5 mm in 12 segnale acustico per 30 secondi ogni 3 minuti, durante secondi. 15 minuti. È... - Página 79 Fagor Industrial S. Coop. Bº Sancholopetegui, 22 Aptdo. 17 20560 OÑATI (ESPAÑA) Tel.: +34 943 71 80 30 Fax: +34 943 71 81 81 info@fagorindustrial.com www.fagorindustrial.com...