Publicidad
Enlaces rápidos
ASSEMBLY INSTRUCTIONS
SUPPLIED MATERIAL
1.
2.
1
Allen key / Llave allen / Imbußschlüssel
Key / Llave / Schlüssel
2
3
Rod / Caña / Stange
Shade / Pantalla / Schirm
4
Sconce / Aplique / Leuchte
5
TECHNICAL SPECIFICATIONS
North
Design by Arik Levy
INSTRUCCIONES DE MONTAJE
MATERIAL SUMINISTRADO
3.
5630
2 un.
1 un.
1 un.
1 un.
1 un.
ESPECIFICACIONES TÉCNICAS
MONTAGEANLEITUNG
GELIEFERTES MATERIAL
4.
5.
TECHNISCHE DATEN
Publicidad

Manuales relacionados para VIBIA North 5630


Resumen de contenidos para VIBIA North 5630
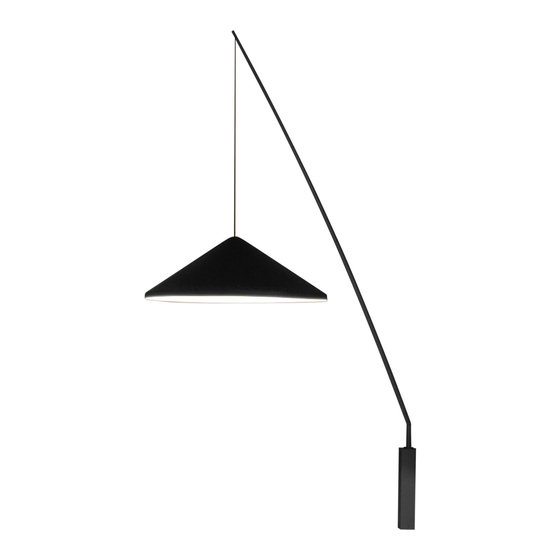
- Página 1 North Design by Arik Levy ASSEMBLY INSTRUCTIONS INSTRUCCIONES DE MONTAJE MONTAGEANLEITUNG SUPPLIED MATERIAL MATERIAL SUMINISTRADO GELIEFERTES MATERIAL 5630 2 un. Allen key / Llave allen / Imbußschlüssel 1 un. Key / Llave / Schlüssel 1 un. Rod / Caña / Stange 1 un.
-
Página 2: Important Notice
ASSEMBLY INSTRUCTIONS INSTRUCCIONES DE MONTAJE MONTAGEANLEITUNG IMPORTANT NOTICE: Switch of the mains before installing the lamp. 1. Loosen the spigot (A) attaching the carcass (B) of the sconce. Then remove the carcass following the steps shown in the drawing so that the carcass is completely released. - Página 3 ASSEMBLY INSTRUCTIONS INSTRUCCIONES DE MONTAJE MONTAGEANLEITUNG 3. Attaching the sconce using its electrical installation cable. The cable (E) that is supplied connected to the switch (F) must be disconnected. In order to do so press each one of the three tabs of the switch and remove the cable through the bottom part of the sconce.
- Página 4 ASSEMBLY INSTRUCTIONS INSTRUCCIONES DE MONTAJE MONTAGEANLEITUNG 5. Place the rod (G) in position as indicated in the drawing. In order to assemble the rod (G) the silicone tube with both ends (H) must be first passed through cavity of the rod support;...
- Página 5 ASSEMBLY INSTRUCTIONS INSTRUCCIONES DE MONTAJE MONTAGEANLEITUNG 8. At the other end of the rod connect the electrical terminals (K) of the supplied cable and the shade (L). Make sure that they are correctly connected. 9. Screw the piece (M) in place by hand without using any tools.
- Página 6 ASSEMBLY INSTRUCTIONS INSTRUCCIONES DE MONTAJE MONTAGEANLEITUNG 10. To regulate the height of the shade (L) these instructions must be followed: - To increase the height of the fitting pull on the wall sconce cable, always with the help of another person to support the shade.
- Página 7 ASSEMBLY INSTRUCTIONS INSTRUCCIONES DE MONTAJE MONTAGEANLEITUNG BLACK to 11. Connect the cables with the two ends (H) using a NEGRO a RED to screwdriver within the connection terminal in such a SCHWARZ way that the red connection terminal is inserted into ROJO a the “+”...