Tabla de contenido
Publicidad
Idiomas disponibles
Idiomas disponibles
Enlaces rápidos
2300/2310
USER'S GUIDE
GUÍA DE USUARIO
• Read this User's Guide before you start using your P-touch.
• Keep this User's Guide in a handy place for future reference.
• Antes de usar su equipo por primera vez, lea cuidadosamente esta Guía de Usuario.
• Guarde esta Guía de Usuario para futuras referencias.
Publicidad
Capítulos
Tabla de contenido
Solución de problemas

Manuales relacionados para Brother P-Touch 2300


Resumen de contenidos para Brother P-Touch 2300
- Página 1 2300/2310 USER’S GUIDE GUÍA DE USUARIO • Read this User’s Guide before you start using your P-touch. • Keep this User’s Guide in a handy place for future reference. • Antes de usar su equipo por primera vez, lea cuidadosamente esta Guía de Usuario. •...
-
Página 2: Tabla De Contenido
CONTENTS Getting Started GENERAL DESCRIPTION ................... 1 GENERAL PRECAUTIONS .................. 2 BATTERIES ......................3 OPTIONAL AC ADAPTOR ................. 4 TAPE CASSETTE ....................5 CONNECTING THE P-TOUCH TO A COMPUTER ..........6 INSTALLING P-TOUCH EDITOR ............... 7 STARTING P-TOUCH EDITOR ................. 20 ATTACHING LABELS .................. - Página 3 MIRROR PRINTING FUNCTION ..............53 LENGTH FUNCTION ..................54 AUTO CUT FUNCTION ................... 56 PRINT KEY ....................... 57 FEED & CUT FUNCTION ................. 57 NUMBERING FUNCTION ................58 REPEAT PRINTING FUNCTION ............... 59 MEMORY FUNCTIONS ..................61 TROUBLESHOOTING ..................65 ERROR MESSAGE LIST ..................
-
Página 5: Getting Started
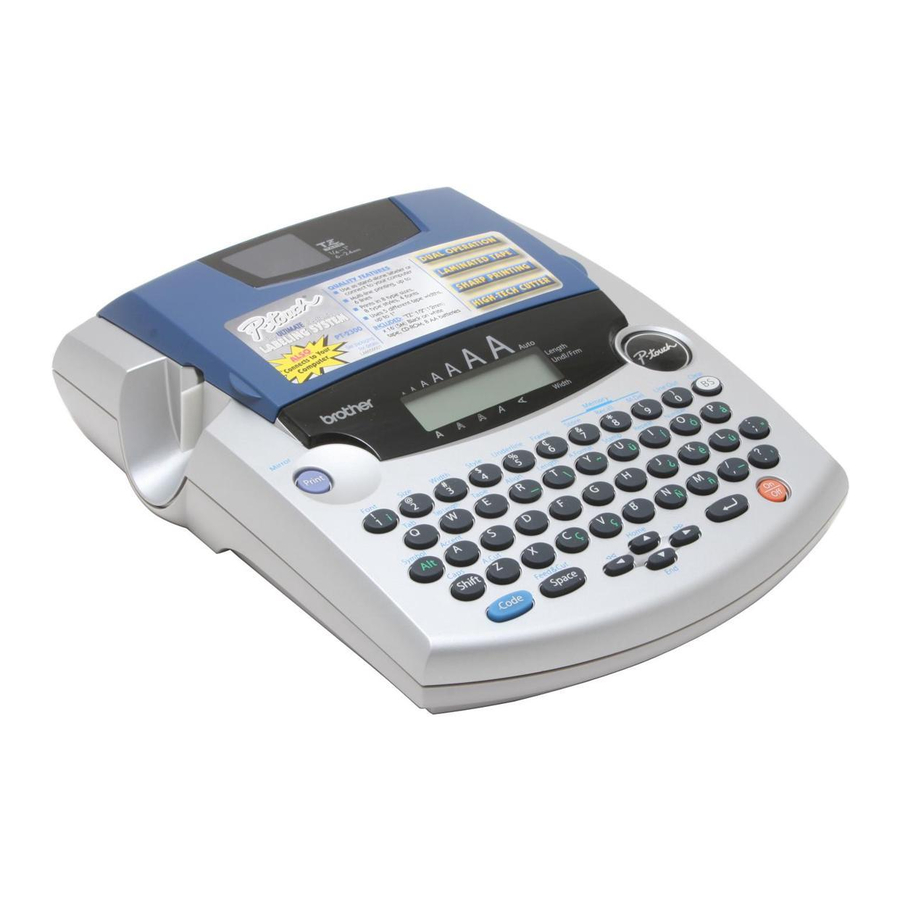
Getting Started GENERAL DESCRIPTION TOP VIEW Tape compartment cover AC adaptor connector USB port LCD display Keyboard BOTTOM VIEW Tape exit slot Battery compartment cover... -
Página 6: Keyboard & Lcd Display
Return key Power key GENERAL PRECAUTIONS Use only Brother TZ tapes with this machine. Do not use tapes that do not have the mark. Do not pull on the tape being fed from the P-touch. This may damage the tape cassette. -
Página 7: Batteries
Do not expose the machine to high temperatures or high humidity. Never leave it on the dashboard or in the back of your car. Do not leave any rubber or vinyl on the machine for an extended period of time. Doing so may cause staining. -
Página 8: Optional Ac Adaptor
OPTIONAL AC ADAPTOR The AC adaptor (model AD-60) allows you to use this machine wherever there is an electrical outlet. To connect the optional AC adaptor: 1 Insert the plug on the adaptor cord into the connector marked DC IN 9.5V on the right side of the machine. -
Página 9: Tape Cassette
TAPE CASSETTE A single TZ tape cassette is supplied with this unit. However, since TZ tape cassettes are avail- able for this machine in a wide variety of colors and sizes, it is possible to make distinctive color-coded and stylized labels. In addition, this machine has been designed to allow you to change the tape cassettes quickly and easily. -
Página 10: Connecting The P-Touch To A Computer
CONNECTING THE P-TOUCH TO A COMPUTER This machine is equipped with a USB port, allowing you to connect the P-touch to your IBM PC-compatible or Macintosh computer, and print labels and stamps created using the P-touch Editor software. The P-touch Editor software and the printer driver must be installed before the P-touch is connected to the computer or turned on. -
Página 11: Installing P-Touch Editor
INSTALLING P-TOUCH EDITOR The P-touch Editor software adds even more illustration and layout features to the label-mak- ing possibilities available with your PT-2300/2310. Do not connect the PT-2300/2310 to the computer before installing the P-touch Editor software, otherwise it may not be installed correctly. Be sure not to connect the PT- 2300/2310 until you are instructed to do so. - Página 12 3 Click the top button (P-touch Editor). The ® InstallShield Wizard for installing the P-touch Editor software starts up, and then the Welcome dialog box appears. To install just the printer driver, click the lower button (Printer driver). The first Driver Setup dialog box appears, informing you that the PT-2300/2310 printer driver will be installed.
- Página 13 6 Click the Yes button to register the entered information. The Setup Type dialog box appears. To change the information, click the No button, and then return to step 5. 7 Select the installation method, and then click the Next button. •...
- Página 14 Plug-and-Play. Be sure to read the installation instructions described below before installing the file supplied on the CD-ROM. Do not connect the P-touch 2300/2310 to the computer until you are instructed to do so, otherwise the PT-2300/2310 printer driver may not be installed correctly.
- Página 15 ® With Windows 98/98SE/ME/2000: 1 Click the Next button. A dialog box appears, instructing you to connect the PT-2300/2310 to the computer. 2 Connect the PT-2300/2310 to the computer using a USB interface cable as described on page 6, and then turn on the PT-2300/2310. A dialog box appears, showing that the printer driver has been installed.
- Página 16 Next button. 2 After the dialog box appears, instructing you to connect the P-touch 2300/2310 and turn it on, connect the P-touch 2300/2310 to the computer using the enclosed USB interface cable as described on page 6, and then turn on the P-touch 2300/2310.
- Página 17 5 In the Found New Hardware Wizard dialog box that appears, indicating that installation of the PT-2300/2310 and the Found New Hardware Wizard are finished, click the Fin- ish button. 6 In the dialog box that appears, indicating that installation is finished, select “Yes, restart immediately.”, and then click the Finish but- ton.
- Página 18 Windows 2000/XP and changing to a PT-2300/ 2310 with a different serial number. If “Add Brother PT-2300/2310” is selected, a new printer driver is added. With a ® USB connection on Windows 98/Me, only a port is added without adding it as a new printer.
- Página 19 Connect the PT-2300/2310 to the computer using a USB interface cable as described on page 6, and then turn on the PT-2300/2310. A dialog box appears, showing that the printer driver has been installed. Select “Yes, restart immediately.”, and then click the Finish button to restart the com- puter.
- Página 20 Finish button. The computer is restarted. Remove the CD-ROM from the computer. If “Delete Brother PT-2300/2310” was selected: A dialog box appears, asking for confirmation to delete all PT-2300/2310 printer drivers. Click the Yes button. A dialog box appears, show- ing that the printer drivers have been deleted.
-
Página 21: On A Macintosh Computer
On a Macintosh Computer The Mac version of the software is for a Mac with an English operating system. If the software is installed on a Mac with an operating system in a different language, the software may not run properly. To Install the P-touch Editor Software: 1 Check that your system configuration meets the following requirements. - Página 22 • For a Custom Installation Clicking the Custom Install button dis- plays a dialog box that allows you to select which options to install. Only the options with a check mark beside them are installed. Select the options that you wish to install, and then click the Install button.
- Página 23 To Select the PT-2300/2310 as the Printer: 1 Turn on the PT-2300/2310. 2 Pull down the Apple menu and select “Chooser” to display the Chooser window. 3 In the list on the left, click the PT-2300/ 2310 icon. Then, select the appropriate printer from the list on the right.
-
Página 24: Starting P-Touch Editor
STARTING P-TOUCH EDITOR The P-touch Editor application makes it easy for anyone to design and print labels for almost any need imaginable. On an IBM PC-Compatible Computer To Start Up P-touch Editor: • By clicking the P-touch Editor icon: • Double-click the “P-touch Editor 3.1” icon in the “P-touch Editor 3.1” group window. •... - Página 25 Font Properties icon Database Properties icon (not available on the Macintosh version of the software) Layout Properties icon Click an icon to display its Properties. • Page Properties ( Click this button to hide the Properties. When using the P-touch 2300/2310...
- Página 26 Creating a New Layout ® Although the screens shown in the following explanations are for Windows 95/98/98SE/Me, ® the operations for Windows NT4.0/2000/XP and Macintosh are the same unless specifically mentioned. • Entering text 1 Click (Text button) on the draw toolbar. Text can be typed in, and the pointer changes from (selection pointer) to (I-beam...
- Página 27 Notes on Usage Barcodes Keep the following points in mind when using P-touch Editor Version 3.1 to print barcodes. • Barcodes should be printed on white tape. If other colors of tape are used, the barcode reader may not be able to read the barcode correctly. •...
-
Página 28: Attaching Labels
ATTACHING LABELS LAMINATED TAPE The enclosed stick enables you to easily remove the backing from labels printed on laminated tapes. 1 Hold the tape in your left hand, with the printed surface facing up, and hold the stick in your right hand. 2 Pass the tape halfway through the long narrow hole in the stick. -
Página 29: Print Head & Rollers
PRINT HEAD & ROLLERS Occasionally, specks of dust or dirt become attached to the machine’s print head and rollers. This is particularly likely when you are using the unit outdoors or in a very dusty environment. If a section of the print head is covered with dust, a blank horizontal streak may appear through the label text. -
Página 30: For Your Information
For Your Information POWER KEY The power key ( o ) is located in the lower-right corner of the keyboard. If batteries have been installed or the machine has been plugged in using the optional AC adaptor, the previ- ous session’s information is displayed when the machine is turned on. This feature allows you to stop work on a label, turn off the machine, and return to it later without having to re-enter the text. -
Página 31: Code, Alt & Shift Keys
RIGHT CURSOR KEY To move the cursor one character to the right: Press w once. To move the cursor several characters to the right: Hold down w until the cursor moves to the desired position. To move the cursor to the end of the current line: Hold down c and press w. - Página 32 EXAMPLE To start the Symbol function: 1: D A N G E R _ Caps Hold down and press once. Ü Æ æ Ã ã Caps ALT KEY To type in characters printed in color on the right-hand side of the keys: Hold down a and press the key of the desired character written in color.
- Página 33 SHIFT KEY To type in a capital letter or a symbol printed in the top left-hand corner of a key: Hold down s and press the key of the desired letter or symbol. EXAMPLE To type in “%”: 1: 5 _ Caps Hold down and press...
-
Página 34: Space Key
SPACE KEY The Space key ( _ ) lets you add blank spaces between characters in your text. It is differ- ent from the right cursor key ( w ), which just moves the cursor without adding blank spaces. To add a space: Press _. -
Página 35: Tab Function
Tape widths Maximum number of lines that can be printed 1/4" (6 mm) 3/8" (9 mm) 1/2" (12 mm) 3/4" (18 mm) 1" (24 mm) Stamp 3/4" (18 mm) Stamp 1" (24 mm) The return key can also be used to select an item from a list (e.g., add a symbol or accented character to the text) or to apply a selected setting. - Página 36 To set the tab length: 1 Hold down c and press W once. The current tab length is displayed. 2 Press h or e until the desired length is displayed or use the number keys to type in the length. To change the units (inches or centimeters) used to display the tab lengths, press M until the desired units are displayed.
-
Página 37: Delete Key
Press until 1.0 is displayed. T A B L E N G T H 1 . O i n c h Caps Press To add a tab: Hold down and press once. 1: a r t N O . Caps DELETE KEY The delete key ( * ) allows you to remove characters to the left of the cursor’s current posi- tion. -
Página 38: Line Out Function
To delete a sequence of characters: 1 Press f, w, h or e to position the cursor below the character immediately to the right of the last character that you wish to delete. 2 Hold down * until all of the characters that you wish to delete are deleted. To quit a function without changing your text: Press * to return to your text. -
Página 39: Clear Function
CLEAR FUNCTION When clearing the display before entering new text, the Clear function can be used to choose whether all of the text is erased and all format functions (Font, Size, Width, Style, Underline, Frame, Tape margin, Alignment, Tab length, Mirror printing, and Length) are returned to their default settings, or whether just the text is erased. - Página 40 To delete just the text: 1 Hold down c and press *. 2 Press h or e until TEXT ONLY is selected (flashing). To return to the text without erasing anything, press *. 3 Press r. EXAMPLE To clear just the text: 1: G a r d e n 2: 3 4 5 –...
-
Página 41: Accent Function
ACCENT FUNCTION The Accent function can also be used to add accented characters to your text. Many of these characters can also be typed in using the Symbol function. The accented characters are grouped according to the capital or small letter that they are com- bined with. -
Página 42: Symbol Function
EXAMPLE To add the accented character “É”: Hold down and press A C C E N T a – u / A – U ? Caps Hold down and press È ˜ É Ë Ê E Caps Press until É appears in the frame. É... - Página 43 Group Symbol ˜ Ü Æ æ Ã ã e ˜ Õ õ ° × ÷ § To type in a symbol: 1 Hold down c and press a. A row of symbols appear in the display. 2 Press h or e to display different rows of symbols and press f or w until the desired symbol appears enlarged within the frame in the middle of the display.
-
Página 44: Auto Format Function
Press 1: D A N G E R Caps AUTO FORMAT FUNCTION With the Auto Format function, you can select from a variety of preset formats perfect for your specific need. This function automatically adjusts the label length, tape margins and horizon- tal alignment without changing the text or any other formats, allowing you to create labels faster and easier. -
Página 45: Stamp Function
To select a preset format: 1 Hold down c and press Y once. The currently selected setting appears in the dis- play. 2 Press h or e to select the desired setting. To return to default settings, press _. 3 Press r to apply the selected setting. The Length indicator comes on if any setting other than DEFAULT is selected. - Página 46 3 Press r. The text is automatically formatted for the installed stamp: centered within the preset message area with the tape length and margins automatically adjusted. 4 Press p to cut the text out of the stamp stencil film. 5 After the stamp stencil film is cut off, remove the backing paper from the stamp stencil film and affix it to the ink pad of a stamp film holder.
- Página 47 Hold the end of the stamp stencil film in place Guides with your thumb, then pass the tape through the guides while pulling it tight. Fold the other end of the stamp stencil film over Fold over the other side of the stamp film holder and hold it in place with your finger.
-
Página 48: Font Function
FONT FUNCTION With the Font function, you can choose one of four fonts for your text. The following font settings are available: The default font setting is FONT 1. To change the font setting: 1 While holding down c, press 1 once, and keep c held down to display the current font setting. -
Página 49: Size & Width Functions
SIZE & WIDTH FUNCTIONS The character size can be adjusted using both the Size and Width functions. Since the charac- ter size that can be used depends on the width of the tape, the following table shows the char- acter sizes that can be used with each tape width. Tape widths Sizes (in points) 1/4”... - Página 50 To change the size setting: 1 While holding down c, press 2 once, and keep c held down to display the current size setting. 2 While still holding down c, continue pressing 2 until the desired size setting is displayed. The current size setting is shown by the size indicators at the top of the display.
-
Página 51: Style Function
To change the width setting: 1 While holding down c, press 3 once, and keep c held down to display the current width setting. While still holding down c, continue pressing 3 until the desired width setting is displayed. The Width indicator comes on when a setting other than MEDIUM is selected. 3 Release c to apply the selected width setting to the entire text. - Página 52 2 While still holding down c, continue pressing 4 until the desired style setting is displayed. The current style setting is shown by the style indicator at the bottom of the display. 3 Release c to apply the selected style setting to the entire text. EXAMPLE To select the I+SHAD style setting: While holding down...
-
Página 53: Underline Function
Style setting Font setting I+BOLD I+OUTL I+SHAD VERT FONT 1 FONT 2 FONT 3 FONT 4 UNDERLINE FUNCTION You can emphasize your text by underlining it. The default underline setting is OFF. When the Underline function is set to UNDL ON, the Undl/Frm indicator on the right side of the display comes on. -
Página 54: Frame Function
EXAMPLE To select the UNDL ON underline setting: While holding down , press once, and keep held down. U N D L O F F Caps While still holding down , continue pressing until UNDL ON is displayed. U N D L Caps Release FRAME FUNCTION... -
Página 55: Tape Margin Function
2 While still holding down c, continue pressing 6 until the desired frame setting is displayed. The Undl/Frm indicator comes on when any setting other than FRAME OFF is selected. 3 Release c to apply the selected frame setting to the entire text. EXAMPLE To select the candy frame setting: While holding down... -
Página 56: Horizontal Alignment Function
To change the tape margin setting: 1 While holding down c, press E once, and keep c held down to display the current tape margin setting. 2 While still holding down c, continue pressing E until the desired tape margin set- ting is displayed. -
Página 57: Mirror Printing Function
To change the horizontal alignment setting: 1 While holding down c, press R once, and keep c held down to display the current horizontal alignment setting. 2 While still holding down c, continue pressing R until the desired horizontal align- ment setting is displayed. -
Página 58: Length Function
To turn on or off the mirror printing setting: 1 While holding down c, press p once, and keep c held down to display the current mirror printing setting. 2 While still holding down c, continue pressing p until the desired mirror printing setting is displayed. - Página 59 To turn on or off the Length function: 1 While holding down c, press T once, and keep c held down to display the current length of the label (the text and both margins) briefly, then display the current label length setting (ON or OFF). 2 While still holding down c, continue pressing T until the desired label length set- ting is displayed.
-
Página 60: Auto Cut Function
Press until 5.0inch is displayed. L E N G T H 5 . 0 i n c h Caps Press AUTO CUT FUNCTION The Auto cut function allows you to set whether or not the machine will automatically cut off each label after it is printed. -
Página 61: Print Key
While still holding down , continue pressing until ON is displayed. A U T O C U T Caps Release PRINT KEY After you have entered your text and chosen the desired format settings, you are ready to print. If the Auto cut function is set to ON, the label will automatically be cut off after it is printed. -
Página 62: Numbering Function
NUMBERING FUNCTION This function can be used to print many copies of the same text while increasing a certain number in the text by 1 after each label is printed. To use the Numbering function: 1 Press f, w, h or e to position the cursor below the number that you wish to increase. -
Página 63: Repeat Printing Function
Press N U M B E R U N T I L Caps Press C O P I E S C O P I E S 1 / 3 2 / 3 Caps Caps C O P I E S 3 / 3 Caps REPEAT PRINTING FUNCTION... - Página 64 3 Press p (or r ) to begin printing the labels. The number of each copy is displayed while it is being printed. If the Auto cut function is set to ON, each label is automatically cut off after it is printed.
-
Página 65: Memory Functions
MEMORY FUNCTIONS You can use the memory to store your most frequently used text files. The text remains in the memory, along with its formatting, even after all characters are removed from the display using the Clear function (holding down c and pressing * ). When each file is stored, it is given a number to make recalling it easier. -
Página 66: Deleting A File
RECALLING TEXT To recall a text file: 1 Hold down c and press 8. The message “RECALL” appears on the display with the file number and beginning of the most recently stored or recalled text. To quit the Recall function without recalling text, hold down c and press 8 (or press just * ). - Página 67 EXAMPLE To store text under file number 4: Hold down and press S T O R E [ 0 ] Caps Press S T O R E [ 4 ] Caps Press 1: J . S m i t h _ Caps To recall the text from file number 1: Hold down...
- Página 68 EXAMPLE To delete the text stored under file number 4: Hold down and press C L E A R [ 1 ] B i l l Caps Press C L E A R [ 4 ] J . S m i t Caps Press C L E A R ?
-
Página 69: Troubleshooting
TROUBLESHOOTING Problem Remedy 1. The display stays blank after you have • Check that the AC adaptor is connected turned on the machine. correctly. • If you are using alkaline batteries, check that they are correctly inserted. • If the batteries are low, replace them with new ones. -
Página 70: Error Message List
ERROR MESSAGE LIST Error Message Cause Remedy 6 LINE This message appears if six lines Limit the number of lines to six. already exist when you press r. LIMIT! BATTERIES This message appears when the Replace the batteries or use the WEAK! installed alkaline batteries become AC adaptor. - Página 71 Error Message Cause Remedy CUTTER This message appears if the tape cut- Turn the P-touch off, then on ERROR! ter is closed when you try to print or again. feed the tape. EEPROM This message appears if a checksum Contact your service representa- ERROR! error occurred when the P-touch was tive.
- Página 72 Error Message Cause Remedy This message appears if you try to print Install a tape cassette and try TAPE! a label or feed the tape when no tape again. cassette is installed. REPLACE This message appears if the installed Replace the batteries or use the BATTERIES! alkaline batteries are about to run AC adaptor.
-
Página 73: Specifications
SPECIFICATIONS HARDWARE Input Device: Keyboard - 51 keys 10 characters × 2 lines (semi-graphical) LCD: 20 indicators (including Alt and Caps) Print Tape: Pressure-sensitive, Adhesive-based 26’ 3” (8 m) long Five widths available: 1/4” (6 mm) 3/8” (9 mm) 1/2” (12 mm) 3/4”... -
Página 74: Accessories (For Usa Only)
Supplies Obtain tape cassettes from your nearest authorized dealer. Use only Brother TZ tapes with this machine. Brother cannot be held responsible for trouble caused by the use of unauthorized supplies. Do not use tapes that do not have the mark. - Página 75 QTY/ Stock No. Description PRICE PACKAGE Fabric Iron-On Tapes: TZ-FA3 Blue characters on 1/2” (12 mm) white fabric adhesive 9.8’ tape length $24.99 Print Head Cleaning Cassette: TZ-CL4 Print Head Cleaning Cassette approx. 100uses $20.99 Standard Laminated Tapes: QTY/ Stock No. Description PRICE PACKAGE...
- Página 76 QTY/ Stock No. Description PRICE PACKAGE 1/2” (12mm)-wide laminated tapes TZ-131 Black characters on clear adhesive $16.99 TZ-135 White characters on clear adhesive $17.99 TZ-231 Black characters on white adhesive $17.99 TZ-232 Red characters on white adhesive $17.99 TZ-334 Gold characters on black adhesive $20.99 TZ-335 White characters on black adhesive...
-
Página 78: Pt-2300/2310 Contact Information (For Usa Only)
For purchasing accessories and certain Brother products: http://www.brothermall.com Accessories and Supplies To order Brother accessories or supplies by Visa, MasterCard, Discover or American Express, you may call toll tree 1-888-879-3232, or complete the order form in your user’s guide and fax both sides of the form to 1-800-947-1445. -
Página 79: P-Touch Accessory Order Form
Fax completed form to 1-800-947-1445 (Continental U.S. only): $8.75 d. Mail completed form along with proper • Overnight Delivery payment to (Continental U.S. only): $14.75 BROTHER INTERNATIONAL CORP. Attn: Consumer Accessory Div. TOTAL DUE P.O.Box 341332 No C.O.D. orders Bartlett, TN 38184-1332... - Página 80 For purchasing accessories and certain Brother products: http://www.brothermall.com Accessories and Supplies To order Brother accessories or supplies by Visa, MasterCard, Discover or American Express, you may call toll tree 1-888-879-3232, or complete the order form in your user’s guide and fax both sides of the form to 1-800-947-1445.
- Página 81 Fax completed form to 1-800-947-1445 (Continental U.S. only): $8.75 d. Mail completed form along with proper • Overnight Delivery payment to (Continental U.S. only): $14.75 BROTHER INTERNATIONAL CORP. Attn: Consumer Accessory Div. TOTAL DUE P.O.Box 341332 No C.O.D. orders Bartlett, TN 38184-1332...
- Página 82 GUIA DE INSTRUCCIONES...
-
Página 83: Introducción
Ya no hay por qué preocuparse por tareas urgentes que requieren impresión profesional. En la oficina, fábrica, laboratorio, o en casa, la calidad y el rendimiento del P-touch 2300/2310 la convierten en una máquina muy práctica. - Página 84 ÍNDICE CUIDADOS Y PRECAUCIONES GENERALES............1 PILAS........................2 ADAPTADOR DE CA OPCIONAL............... 3 CASETES DE CINTA .................... 4 CONEXIÓN DE LA P-TOUCH A UN PC ............. 5 INSTALACIÓN DEL P-TOUCH EDITOR.............. 6 INICIO DEL P-TOUCH EDITOR ................ 19 COLOCACIÓN DE ETIQUETAS ................ 23 CABEZA DE IMPRESIÓN Y RODILLOS .............
- Página 85 FUNCIONES DE LA MEMORIA................. 44 SOLUCIÓN DE PROBLEMAS ................46 LISTA DE MENSAJES DE ERROR ............... 47 ESPECIFICACIONES ..................50 ACCESORIOS (Sólo para EE.UU.) ..............51 INFORMACIÓN PARA CONTACTAR CON PT-2300/2310 (Sólo para EE.UU.)..54...
-
Página 86: Cuidados Y Precauciones Generales
CUIDADOS Y PRECAUCIONES GENERALES Con esta máquina emplee sólo cintas TZ Brother. No emplee cintas que no tengan la marca No tire de la cinta que se alimenta desde la P-touch. Podría dañar el casete de cinta. No utilice la máquina en lugares polvorientos, y manténgala alejada de la luz solar directa y la lluvia. -
Página 87: Pilas
PILAS Este rotulador es portátil puede utilizarse en cualquier lugar instalando ocho (8) pilas alcalinas o de manganeso de tamaño AA. Cuando cambie las pilas, reemplace siempre las ocho pilas al mismo tiempo. Para cambiar las pilas: 1 Extraiga la cubierta del compartimiento de las pilas de la parte posterior de la máquina. 2 Si ya hay pilas instaladas, extráigalas. -
Página 88: Adaptador De Ca Opcional
ADAPTADOR DE CA OPCIONAL El adaptador de CA (modelo AD-60) le permite emplear esta máquina siempre que disponga de una toma de corriente eléctrica. Para conectar el adaptador de CA opcional: 1 Inserte el conector del adaptador que tiene la marca DC IN 9.5V al lado derecho de la máquina. -
Página 89: Casetes De Cinta
CASETES DE CINTA Un casete de TZ se suministra con la unidad. Sin embargo, para esta máquina hay disponibles una amplia gama de cintas TZ de distintos colores y tamaños, es posible crear etiquetas dife- rentes codificadas por colores o tamaños. Además, este equipo ha sido diseñado para permitirle cambiar los casetes de cinta rápida y fácilmente. -
Página 90: Conexión De La P-Touch A Un Pc
CONEXIÓN DE LA P-TOUCH A UN PC Esta máquina dispone de un puerto USB, que le permite conectar la P-touch a su PC compati- ble con IBM u PC Macintosh, e imprimir etiquetas y sellos creados utilizando el software P- touch Editor. -
Página 91: Instalación Del P-Touch Editor
INSTALACIÓN DEL P-TOUCH EDITOR El software P-touch Editor añade aún más ilustraciones y funciones de diseño a las posibil- idades de creación de etiquetas disponibles con su PT-2300/2310. No conecte la PT-2300/2310 al PC antes de instalar el software P-touch Editor, de lo contrario, éste podrá... - Página 92 3 Haga clic sobre el botón superior (P-touch ® Editor). Se iniciará el asistente “InstallShield Wizard” para instalar el software P-touch Edi- tor, y a continuación aparecerá el cuadro de diálogo “Welcome”. Para instalar solamente el controlador de impresora, haga clic sobre el botón inferior (Printer Driver).
- Página 93 6 Haga clic sobre el botón “Yes” para registrar la información ingresada. Aparecerá un cuadro de diálogo “Setup Type”. Para cambiar la información, haga clic sobre el botón “No” y a continuación vuelva al paso 5. 7 Seleccione el método de instalación y a con- tinuación haga clic sobre el botón “Next”.
- Página 94 CD-ROM. No conecte la P-touch 2300/2310 al PC hasta que se le pida que lo haga, de lo con- trario, el controlador de impresora PT-2300/2310 podrá no instalarse correctamente.
- Página 95 ® Con Windows 98/98SE/ME/2000: 1 Haga clic sobre el botón “Next”. Aparecerá un cuadro de diálogo indicándole que conecte la PT-2300/2310 al PC. 2 Conecte la PT-2300/2310 al PC utilizando el cable de interface USB suministrado como se describe en la página 5, y a continuación encienda la PT-2300/2310.
- Página 96 PT-2300/2310, haga clic sobre el botón “Next”. 2 Cuando aparezca el cuadro de diálogo, indicándole que conecte la P-touch 2300/ 2310 y que la encienda, conecte la P-touch 2300/2310 al PC utilizando el cable de inter- face USB suministrado como se describe en las página 5, y después encienda la P-touch...
- Página 97 5 En el cuadro de diálogo “Found New Hard- ware Wizard” que aparece, indicando que la instalación del PT-2300/2310 y de “Found New Hardware Wizard” han finalizado, haga clic sobre el botón “Finish”. 6 En el cuadro de diálogo que aparece, indi- cando que la instalación del PT-2300/2310 ha finalizado, seleccione “Yes, restart imme- diatelly.”, y después haga clic sobre el botón...
- Página 98 Windows 2000/XP y cambiando a una PT-2300/2310 con diferente número de serie. Si se selecciona “Add Brother PT-2300/2310”, se agregará un nuevo controlador de ® impresora. Con una conexión USB en Windows 98/Me, solamente se añadirá...
- Página 99 Conecte la PT-2300/2310 al PC utilizando el cable de interface USB suministrado como se describe en la página 5, y a continuación encienda la PT-2300/2310. Aparecerá un cuadro de diálogo mostrándole que el contro- lador de impresora ha sido instalado. Seleccione “Yes, restart immediatelly”...
- Página 100 “Finish”. Se reiniciará el PC. Extraiga el CD-ROM del PC. Si se seleccionó “Delete Brother PT-2300/2310”: Aparecerá un cuadro de diálogo pidiéndole que confirme que quiere eliminar todos los controla- dores de impresora PT-2300/2310.
- Página 101 En un PC Macintosh La versión Mac del software es para un Mac con sistema operativo en inglés. Si el software es instalado en un Mac con un sistema operativo en un idioma diferente al inglés, el software podrá no funcionar correctamente. Para Instalar el Software P-touch Editor: 1 Compruebe que la configuración de su sistema satisface los siguientes requisitos.
- Página 102 Para comenzar la instalación se necesitan unos 20 MB de espacio libre en el disco duro. Para poder instalar todas las opciones, se necesitan unos 120 MB de espacio libre en el disco duro. Si hay disponible suficiente espacio en el disco duro, haga clic sobre el botón “Install”.
- Página 103 Para Seleccionar la PT-2300/2310 como Impresora: 1 Encienda la PT-2300/2310. 2 Despliegue el menú Apple y seleccione “Chooser” para visualizar ventana “Chooser”. 3 En la lista de la izquierda, haga clic sobre el icono “PT-2300/2310”. Después, seleccione la impre- sora apropiada en la lista de la derecha. 4 Cierre la ventana “Chooser”...
-
Página 104: Inicio Del P-Touch Editor
INICIO DEL P-TOUCH EDITOR La aplicación P-touch Editor facilita a cualquier usuario el diseño y la impresión de etiquetas para casi cualquier necesidad imaginable. En un PC compatible con PC de IBM: Para Iniciar el P-touch Editor: • Haciendo clic sobre el icono P-touch Editor: •... - Página 105 Macintosh Icono de propiedades del software) de diseño Haga clic sobre un icono para visualizar sus propiedades. • Propiedades de página ( Haga clic sobre este botón para ocultar las propiedades. Cuando utilice la P-touch 2300/2310...
- Página 106 Creación de un Nuevo Diseño ® Aunque las pantallas mostradas en las siguientes explicaciones son para Windows 95/98/ ® 98SE/Me, las operaciones para Windows NT4.0/2000/XP y Macintosh son las mismas a menos que se mencione específicamente. • Introducción de texto 1 Haga clic sobre el botón (Texto) de la barra de herramientas de dibujo.
- Página 107 Notas sobre el uso Códigos de barras Tenga en cuenta lo siguiente cuando utilice el P-touch Editor Version 3.1 para imprimir códi- gos de barras. • Los códigos de barras habrán de imprimirse en cinta blanca. Si se emplean otros colores, el lector de códigos de barras quizás no pueda leer los códigos correctamente.
-
Página 108: Colocación De Etiquetas
COLOCACIÓN DE ETIQUETAS CINTA LAMINADA La varilla suministrada permite que, en las cintas laminadas, usted pueda extraer facilmente el papel del dorso de la etiqueta. 1 Tome la cinta con la mano izquierda, con la superficie impresa arriba, y tome la varilla con la mano derecha. -
Página 109: Cabeza De Impresión Y Rodillos
CABEZA DE IMPRESIÓN Y RODILLOS De vez en cuando, el polvo se adhieren al cabezal de impresión y a los rodillos del el equipo. Suele suceder cuando se emplea la unidad en exteriores o en lugares con mucho polvo. Si alguna parte de la cabeza termica de impresión está... -
Página 110: Tecla Del Cursor
TECLA DEL CURSOR La pantalla de LCD de esta máquina muestra dos filas de 9 caracteres; sin embargo, el texto que usted diseñe puede tener hasta 99 caracteres de longitud. Podrá revisar y editar el texto empleando las teclas del cursor para moverlo y que muestre las distintas partes la pantalla. TECLA DEL CURSOR IZQUIERDA Para mover el cursor un carácter hacia la izquierda: Presione f una vez. -
Página 111: Teclas Code, Alt Y Shift
TECLAS CODE, ALT Y SHIFT La mayoría de los caracteres pueden introducirse simplemente presionando sus teclas. Sin embargo, para emplear funciones especiales o para introducir letras en mayúsculas, caracte- res acentuados y algunos símbolos, se requieren las siguientes teclas especiales. TECLA CODE Para emplear una función impresa encima de la tecla: Mantenga presionado c y presione la tecla que está... -
Página 112: Tecla De Retorno
TECLA DE RETORNO Al igual que en una máquina de escribir o procesador de texto, la tecla de retorno ( r ) de esta máquina se emplea para poner fin a una línea de texto y empezar otra. Cuando haya ter- minado de introducir una línea, presione la tecla de retorno para hacer una línea nueva y mover al cursor a la misma. -
Página 113: Tabulación
TABULACIÓN Esta función le permitirá separar secciones de una línea de texto añadiendo tabulaciones. Esto le permitirá crear columnas perfectamente alineadas sin tener que introducir varios espa- cios. Todas las tabulaciones tendrán la misma longitud y se medirán desde el comienzo de la línea, o de la tabulación anterior, si es que existe. -
Página 114: Tecla De Borrado (Del)
Se imprimirá la etiqueta mostrada a continuación. Margen Tabulación Tabulación Margen (1,2” (3,0 cm)) (1,2” (3,0 cm)) TECLA DE BORRADO (DEL) La tecla de borrado ( * ) le permite eliminar caracteres situados a la izquierda de la posi- ción actual del cursor. Se diferencia de la tecla del cursor izquierda ( f ) que sólo mueve el cursor sin borrar ningún carácter. -
Página 115: Función De Borrado De Línea (Line Out)
FUNCIÓN DE BORRADO DE LÍNEA (LINE OUT) Con la función de borrado de línea, podrá sacar con facilidad una línea entera de texto. Para borrar una línea de texto: 1 Presione f, w, h o e para situar el cursor dentro de la línea del texto que usted desee borrar. -
Página 116: Función De Acentos
FUNCIÓN DE ACENTOS La función de Acentos también se puede utilizar para añadir caracteres acentuados a su texto. Muchos de estos caracteres también se pueden escribir utilizando la función de Símbolos. Los caracteres acentuados se agrupan de acuerdo con la letra mayúscula o minúscula con la que se combinan. -
Página 117: Función De Símbolos
FUNCIÓN DE SÍMBOLOS Además de letras, de los símbolos y los números de las teclas, hay 53 marcas adicionales con la función de símbolos. Los siguientes símbolos están disponibles: Grupo Símbolos ˜ Ü Æ æ Ã ã e ˜ Õ õ... -
Página 118: Función De Formato Automático
FUNCIÓN DE FORMATO AUTOMÁTICO Con la función de formato automático, podrá seleccionar gran variedad de formatos preajus- tados adecuados para su necesidad específica. Esta función ajustará automáticamente la lon- gitud de la etiqueta y los márgenes de la cinta sin cambiar el texto ni ningún otro formato, permitiéndole crear etiquetas con mayor rapidez y facilidad. -
Página 119: Función De Sellos
FUNCIÓN DE SELLOS Le permite crear con rapidez y facilidad sus propios sellos. Después de haber insertado un casete de clichés, seleccione esta función para centrar automáticamente el texto y ajustar la longitud de la cinta y los márgenes a un formato perfecto para los soportes de películas de membrete entintados. -
Página 120: Función Del Tipo De Caracteres
FUNCIÓN DEL TIPO DE CARACTERES Con la función del tipo de caracteres podrá seleccionar uno de cuatro de tipos de caracteres para su texto. Los ajustes de tipos de caracteres siguientes están disponibles: El ajuste inicial del tipo de caracteres es FONT 1. Consulte el apartado de Referencia, al final de esta sección, para ver muestras de los ajustes disponibles. - Página 121 El ajuste de tamaño inicial es AUTO y el ajuste de ancho inicial es MEDIUM. El ajuste de tamaño seleccionado actualmente se indica siempre mediante los indicadores de encima del visualizador. Además, cuando se seleccione un ancho diferente a MEDIUM, se encenderá el indicador Width.
-
Página 122: Función De Estilo
FUNCIÓN DE ESTILO Podrá seleccionar entre nueve estilos de caracteres distintos que podrá aplicar a su texto. Los caracteres que se imprimen utilizando los tamaños más pequeños pueden resultar difíciles de leer si se seleccionan ciertos ajustes de estilos (por ejemplo, (I+SHAD). Hay disponibles los siguientes ajustes de estilos: NORMAL, BOLD (negrilla), OUTLINE (perfilado), SHADOW (sombreado), ITALIC (cursiva), I+BOLD (cursiva y negrilla), I+OUTL (cursiva y perfilado),... -
Página 123: Función De Marcos
Para cambiar el ajuste del subrayado: 1 Manteniendo presionada c, pulse una vez 5, y mantenga presionada c para hacer que se visualice el subrayado actualmente ajustado. 2 Siguiendo manteniendo presionada c, continúe presionando 5 hasta que se visualice el subrayado actualmente ajustado mediante el indicador del mismo. Cuando seleccione el ajuste UNDL ON, el indicador de Undl/Frm se en encenderá. -
Página 124: Función De Cinta
FUNCIÓN DE CINTA La función de margen cinta le permite ajustar el tamaño de los márgenes de los lados izquierdo y derecho del texto. El ajuste inicial de margen cinta es FULL, aunque hay también disponibles otros tres ajustes. FULL (márgenes de 1” (24 mm)) NARROW (márgenes de 1/3”... -
Página 125: Función De Impresión En Modo Espejo
Para cambiar el ajuste de la alineación horizontal: 1 Manteniendo presionada c, pulse una vez R, y mantenga presionada c para hacer que se visualice la alineación horizontal actualmente ajustado. 2 Siguiendo manteniendo presionada c, continúe presionando R hasta que se visualice la alineación horizontal actualmente ajustado. -
Página 126: Functión De Longitud
FUNCTIÓN DE LONGITUD Aunque la longitud de la etiqueta impresa ajusta automáticamente dicha longitud de acuerdo con el texto introducido, es posible que usted desee hacer una etiqueta con una longitud específica. La función de longitud le permitirá ajustar la longitud de la etiqueta entre 1,6” y 11,8”... -
Página 127: Función De Corte Automático
FUNCIÓN DE CORTE AUTOMÁTICO La función de Corte automático le permite ajustar si la máquina va a cortar automáticamente o no cada etiqueta después de imprimirla. Active la función de corte automático antes de empezar a imprimir para cortar automáticamente las etiquetas después de imprimirlas. Para activar o desactivar la función de corte automático: Después de imprimir una etiqueta con la función de Corte automático ajustada en OFF, mantenga presionada c y presione _ una vez para avanzar la cinta, y después... -
Página 128: Función De Numeración
FUNCIÓN DE NUMERACIÓN Esta función podrá utilizarse para imprimir muchas copias del mismo texto aumentando en cierto número en el texto después de haber impreso cada etiqueta. Para utilizar la función de numeración: 1 Presione f, w, h, o e para colocar el cursor debajo del número que desee aumentar. -
Página 129: Funciones De La Memoria
FUNCIONES DE LA MEMORIA Usted podrá utilizar la memoria para almacenar los archivos de texto que utilice con más fre- cuencia. El texto permanecerá en la memoria, junto con su formato, incluso después de haber quitado todos los caracteres del visualizador utilizando la función de Borrado (manteniendo presionada c y presionando *). -
Página 130: Invocación De Texto
INVOCACIÓN DE TEXTO Para invocar un archivo de texto: 1 Mantenga presionada c y presione 8. En el visualizador aparecerá el mensaje “RECALL” con el número de archivo y el principio del texto almacenado o invocado más recientemente. Para abandonar la función de memoria sin solicitar texto, mantenga pulsada c y presione 8 (o presione simplemente *). -
Página 131: Solución De Problemas
SOLUCIÓN DE PROBLEMAS Problema Remedio 1. La pantalla se queda en blanco después • Compruebe que el adaptador de CA esté de haber conectado la alimentación de correctamente enchufado. la máquina. • Si está empleando pilas alcalinas, com- pruebe que estén correctamente inserta- das. -
Página 132: Lista De Mensajes De Error
LISTA DE MENSAJES DE ERROR Mensaje de Causa Remedio error 6 LINE Este mensaje aparecerá cuando pre- Limite el número de líneas a sione r si ya existen seis líneas. LIMIT! seis. BATTERIES Este mensaje aparece cuando las Reemplace las pilas o emplee el WEAK! pilas alcalinas instaladas están gasta- adaptador de CA. - Página 133 Mensaje de Causa Remedio error COOLING Este mensaje aparece cuando el Espere hasta que continúe la DOWN cabezal de impresión es utilizado impresión. intensivamente (por ejemplo, cuando se imprimen múltiples copias de un texto muy grande). CUTTER Este mensaje aparecerá cuando Suelte la palanca del cortador de ERROR! intente imprimir o avanzar la cinta...
- Página 134 Mensaje de Causa Remedio error MEMORY Este mensaje aparecerá si intenta Borre un archivo que no desee almacenar un archivo de texto des- para dejar espacio para el FULL! pués de haber almacenado el nuevo. número máximo de caracteres. Este mensaje aparece si intenta lla- Almacene primero un archivo mar o borrar un archivo de texto de de texto.
-
Página 135: Especificaciones
ESPECIFICACIONES HARDWARE Dispositivo de entrada: Teclado de 51 teclas LCD: 10 caracteres x 2 líneas (semi-gráfico) 20 indicadores (incluidos Alt y Caps) Cinta de impresión: Sensible a la presión, base adhesiva, 26´3” (8 m) de longitud Cinco anchos disponibles: 1/4” (6 mm) 3/8”... -
Página 136: Accesorios (Sólo Para Ee.UU.)
Adquiera los casetes de cinta en el distribuidor autorizado que le quede más cerca. Emplee sólo cintas Brother TZ con esta máquina. Brother no puede hacerse responsable por los problemas causados por el empleo de accesorios de consumo no autorizados. - Página 137 N.º de producto Descripción CANT./PAQUETE PRECIO** Cintas ID flexibles: Adhesivo especial para doblar, envolver y señalizar TZ-FX231 Cinta ID flexible 12 mm (caracteres en negro, adhesivo blanco) $18.99 TZ-FX241 Cinta ID flexible 18 mm (caracteres en negro, adhesivo blanco) $21.99 TZ-FX251 Cinta ID flexible 24 mm (caracteres en negro, adhesivo blanco) $25.99...
- Página 138 N.º de producto Descripción CANT./PAQUETE PRECIO** TZ-WB41 Caracteres negros sobre fondo Bugs Bunny $23.99 TZ-WT41 Caracteres negros sobre fondo Taz $23.99 TZ-WS41 Caracteres negros sobre fondo Tweety & Sylvester $23.99 Cintas laminadas de 1/2” (12 mm) TZ-131 Caracteres negros sobre fondo transparente $16.99 TZ-135 Caracteres blancos sobre fondo transparente...
-
Página 139: Información Para Contactar Con Pt-2300/2310 (Sólo Para Ee.UU.)
Bartlett, TN 38133-1332 Sistema de contestación por fax El servicio de asistencia postventa de Brother tiene instalado un sistema de contestación por fax fácil de utilizar para que usted pueda obtener contestación instantánea a las preguntas técnicas más comunes e información sobre todos los productos Brother. -
Página 140: Hoja De Pedidos De Accesorios Para P-Touch
• Entrega a la mañana siguiente: 947-1445 (EE.UU. continental solamente): $14,75 d. Envíe por correo la hoja de pedido rellena inclu- yendo el pago apropiado a BROTHER INTERNA- TOTAL A ABONAR TIONAL CORP. No se admiten pedidos de envío contra Attn: Consumer Accessory Div. -
Página 141: Asistencia Por Internet
Bartlett, TN 38133-1332 Sistema de contestación por fax El servicio de asistencia postventa de Brother tiene instalado un sistema de contestación por fax fácil de utilizar para que usted pueda obtener contestación instantánea a las preguntas técnicas más comunes e información sobre todos los productos Brother. - Página 142 • Entrega a la mañana siguiente: 947-1445 (EE.UU. continental solamente): $14,75 d. Envíe por correo la hoja de pedido rellena inclu- yendo el pago apropiado a BROTHER INTERNA- TOTAL A ABONAR TIONAL CORP. No se admiten pedidos de envío contra Attn: Consumer Accessory Div.
- Página 143 Printed in China LA6053001B...