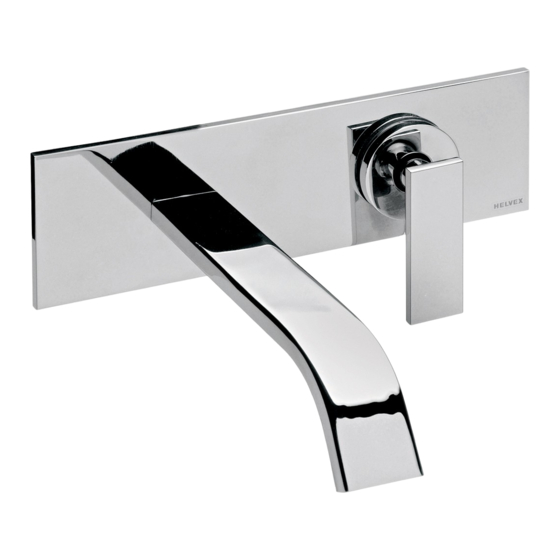
Helvex Vertika E-3007 Guia De Instalacion
Monomando a pared con desagüe tipo hongo sin rebosadero
Ocultar thumbs
Ver también para Vertika E-3007:
- Instructivo de instalación y operación (13 páginas) ,
- Guia de instalacion (6 páginas)
Publicidad
Enlaces rápidos
Asesoría y Servicio Técnico:
Consultancy and Technical
Service:
servicio.tecnico@helvex.com.mx
Hola soy Fluxy, te
ayudaré a instalar
tu producto.
Hi I'm Fluxy, I'll
help you to install
your product.
Herramienta Requerida
/ Required Tools
perico
llave de plomero
plumber´s wrench
adjustable
wrench
Dimensiones Instalación en Muro / Dimensions in Wall Installation
1
8,4 cm min.
Vista Superior
*8,9 cm
Top View
9,4 cm max.
GUÍA DE INSTALACIÓN
INSTALLATION GUIDE
01800 909 2020
01(55)53339431
Agradecemos su elección por los productos HELVEX.
Estamos seguros de que su confiabilidad por el producto excederá sus más altas expectativas, cuya
funcionalidad, estética, durabilidad, respaldo integral y alta calidad le otorgarán plena satisfacción por años,
reflejando el compromiso con la calidad, innovación y el medio ambiente que forman parte de Helvex.
Thank you for choosing HELVEX products.
We are confident that the product reliability will exceed your maximum expectations. The functionality,
aesthetics, durability are at its highest quality! The comprehensive support will grant full satisfaction for years,
reflecting the commitment to quality, innovation and the environment as part Helvex.
Para disminuir el riesgo de lesiones o daños a la propiedad, lea todas las instrucciones antes de instalar el
producto. Utilice gafas de seguridad. En obras de construcción, instalación, modificación, ampliación y
reparación deben cumplir con el reglamento de construcción y obras de su localidad. El producto ilustrado
puede sufrir cambios de aspecto como resultado de la mejora continua a la que está sujeto.
To reduce the risk of injury or property damage, read all instructions. Before installing the product, please
remember to use safety glasses. In construction, installation, alteration, extension and repair, the rules of
constructions must be applied. As result of continuous improvement, the illustration product may change in
appearance.
Este instructivo aplica al producto en cualquier acabado. / This instructive applies
Requerimientos de
Instalación
Installation Requirements
Para el correcto funcionamiento de
este producto, la presión mínima
es de (1 kg/cm²) 14,3 PSI.
For the correct operation of this
product, the minimum pressure is
(1 kg/cm ²) 14,3 PSI.
Herramienta Incluida en su Producto
/ Tools Included in your Product
teflón
llave allen 1/16"
teflon
allen wrench 1/16"
pared con acabado final
wall finish
4,0 cm
indicador del nivel
de profundidad
indicator of depth
Refacciones Originales:
Original Spare Parts:
refacciones@helvex.com.mx
ADVERTENCIA
to the product in any finish.
Relación
Altura Tinaco-Presión
Relation
Tub Height-Pressure
Altura (h)
kg/cm²
Height (h)
2,5 m
0,25
3 m
0,3
4 m
0,4
llave allen 2 mm
allen wrench 2mm
19,0 cm
pared con
acabado final
wall finish
ranura en
6,5 cm
muro
wall slot
muro sin
acabado final
drywall finishing
Vista Frontal
9,5 cm
Front View
1-02-1516-6
E-3007
Monomando a Pared con Desagüe tipo
hongo sin Rebosadero
Mounted, Single Control Faucet with
Mushroom Style Drain without overflow
01 800 890 0594
01 (55) 53 33 94 00
Ext. 5068, 5815 y 5913
/ WARNING
Cada metro de altura de
su producto a la base
del tinaco equivalen a
(0,1 kg/cm²) [1,42 PSI].
PSI
Every meter of height of
your product to the base
of the water tank (0,1
3,55
4,2
kg/cm²) [1,42 PSI]
5,6
equivals.
llave para tuerca monomando
tap wrench nut
Verifique el rango de
profundidad indicada en la
guía de instalación, para
evitar problemas posteriores.
Check the depth range
specified in the installation
guide, to avoid problems later.
Vertika
/
Wall
53 33 94 21
llave para
aireador
aerator wrench
Publicidad

Manuales relacionados para Helvex Vertika E-3007


Resumen de contenidos para Helvex Vertika E-3007
- Página 1 Estamos seguros de que su confiabilidad por el producto excederá sus más altas expectativas, cuya funcionalidad, estética, durabilidad, respaldo integral y alta calidad le otorgarán plena satisfacción por años, reflejando el compromiso con la calidad, innovación y el medio ambiente que forman parte de Helvex. Thank you for choosing HELVEX products.
- Página 2 Retire el capuchón con guía, desenrosque el tornillo y retire el porta cartucho. Posteriormente enrosque los conectores con su tubo previamente soldado. / Remove cap with a guide, unscrew the screw and remove the cartridge holder. Then screw the connectors with your previously welded pipe.
- Página 3 Construya una estructura, para fijar el cuerpo con su placa de sujeción (incluida). / Construct to fix the body with its plate (included). vista superior top view *4,0 cm *1,5 plg canal estructural horizontal horizontal structural pared con acabado final wall finish tablacemento canal estructural...
- Página 4 Coloque el acabado final y retire la guía de instalación. / Place the Para asegurar la profundidad óptima del porta cartucho utilice finish and remove the installation guide. la llave incluida como escantillón y apriete o afloje el tornillo según sea el caso. / To ensure the optimum depth of the cartridge holder and use the included key fixture and tighten or loosen the screw as appropriate.
- Página 5 Instalación Contra Desagüe Operación / Operation Enrosque el tubo unión céspol y posteriormente el desagüe (no incluido). Screw the tailpiece and then to trap (not included). Abra la línea de alimentación principal, para abrir el flujo de agua, levante el maneral y para cerrar bájelo.
- Página 6 4. It is recommended to clean your product daily. Nota: Vea nuestros tips en la pag. www.helvex.com.mx Note: See our tips on: www.helvex.com.mx HELVEX, S. A. DE C.V. Calzada Coltongo 293, Col. Industrial Vallejo 02300 Del. Azcapotzalco, México, D.F . T el. (55) 53-33-94-00.