Publicidad
Enlaces rápidos
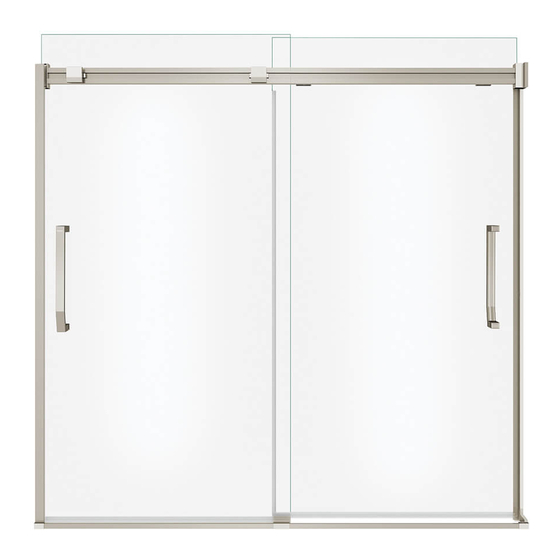
INSTALLATION INSTRUCTIONS
GUIDE D'INSTALLATION
GUÍA DE INSTALACIÓN
For Inverto sliding shower and tub shower door
Pour porte de douche et baignoire douche coulissante Inverto
Para puerta corrediza de ducha y bañera ducha Inverto
Read all instructions carefully before proceeding.
Lire toutes les instructions attentivement avant de commencer
l'installation.
Leer detenidamente todas las instrucciones antes de comenzar
la instalación.
IMPORTANT
• Record the serial number
IMPORTANT
• Noter le numéro de série
IMPORTANTE
• Registre el número de serie
FOR RIGHT AND LEFT SIDE DOOR INSTALLATION
(LEFT SIDE SHOWN)
POUR INSTALLATION DE PORTE CÔTÉ DROIT ET GAUCHE
(CÔTÉ GAUCHE ILLUSTRÉ)
PARA LA INSTALACIÓN DE LA PUERTA DEL LADO DERECHO E IZQUIERDO
(SE MUESTRA INSTALACIÓN AL LADO IZQUIERDO)
MODEL • MODÈLE • MODELO
138760 • 138761 • 138762
SAVE THIS GUIDE FOR FUTURE REFERENCE.
CONSERVER POUR UN USAGE ULTÉRIEUR.
CONSERVE ESTE MANUAL COMO REFERENCIA.
Serial number • Numéro de série • Número de Serie
Publicidad

Manuales relacionados para MAAX 138760


Resumen de contenidos para MAAX 138760
- Página 1 For Inverto sliding shower and tub shower door Pour porte de douche et baignoire douche coulissante Inverto Para puerta corrediza de ducha y bañera ducha Inverto 138760 • 138761 • 138762 Read all instructions carefully before proceeding. SAVE THIS GUIDE FOR FUTURE REFERENCE.
- Página 2 PARTS PIÈCES PIEZAS AND COMPONENTS ET COMPOSANTES Y COMPONENTES...
- Página 3 PARTS INCLUDED | PIÈCES COMPRISES | PIEZAS INCLUIDAS x 2 left x 2 right x 12 x 12 x 1 kit Part Nom de la pièce Pieza Qt/Cant Code Glass door Porte en verre Puerta en vidrio Threshold Seuil Umbral 10041444-XXX-001 End cap Capuchon...
- Página 4 TOOLS OUTILS HERRAMIENTAS REQUIRED REQUIS NECESARIAS Electric drill Level Pencil Perceuse électrique Niveau Crayon Taladro eléctrico Nivel Lápiz ¼'' ceramic drill bit ⅛ " drill bit Mèche à céramique ⅛ Clear silicone sealant Mèche de ¼ po. ⅛ Broca de "...
- Página 5 BEFORE AVANT ANTES YOU BEGIN DE COMMENCER DE COMENZAR NOTE | REMARQUE | NOTA Boxed image shows configuration that will be installed. Follow the same steps for the mirror installation. L'image encadrée montre la configuration qui sera installée. Suivre les mêmes étapes pour l'installation opposée. La imagen enmarcada muestra la configuración que se instalará.
- Página 6 2½" MIN Door Wall 1⅞" MIN Code Description Adjustable Opening Adjustment 138760 Inverto 56" - 59" x 55 1/2" 59" 55 1/2" 56" - 59" 24 1/2" - 27 1/2" 3/4" 138761 Inverto 44" - 47" x 70 1/2" 74"...
- Página 7 BEFORE AVANT ANTES YOU BEGIN DE COMMENCER DE COMENZAR Double the studs (2x4) where the wall jambs will be installed. Doubler les montants de bois (2x4) là où les montants muraux seront installés. Duplique los montantes (2x4) en los lugares en los que se instalarán las jambas murales. Doubled stud Montant double Montante doble...
- Página 8 Parts required: Pieces requis: Partes requeridas: THRESHOLD INSTALLATION INSTALLATION DU SEUIL INSTALACIÓN DE LA CINTA X-3/8 A. Measure the distance between the shower walls and remove 3/8" from that measure. A. Mesurer la distance entre les murs de douche et enle- ver 3/8 po de cette mesure.
- Página 9 Parts required: Pieces requis: Partes requeridas: THRESHOLD INSTALLATION INSTALLATION DU SEUIL INSTALACIÓN DE LA CINTA A. Measure the distance between the shower walls. A. Mesurer la distance entre les murs de douche. A. Medir la distancia entre los muros de la ducha. B.
- Página 10 Based on you shower head position, proceed with step 2A or 2B Selon le positionnement de votre pomme de douche, opter pour l'étape 2A ou 2B Dependiendo de la posición de su ducha, opte por el paso 2A o 2B Parts required: Pieces requis: Partes requeridas:...
- Página 11 Parts required: Pieces requis: Partes requeridas: LOWER BUMPER INSTALLATION - RIGHT CONFIGURATION INSTALLATION DES PARE-CHOCS INFÉRIEURS - CONFIGURATION DROITE INSTALACIÓN DE PARACHOQUES INFERIORES - CONFIGURACIÓN DERECHA Bumper installation detail Détail de l'installation des pare-chocs Detalle de la instalación de parachoques A.
- Página 12 Parts required: Pieces requis: Partes requeridas: WALL JAMB INSTALLATION Inside Outside INSTALLATION DES MONTANTS MURAUX Intérieur Extérieur Interior INSTALACIÓN DE LAS JAMBAS MURALES Exterior A. Temporarily place the wall jambs in position. A. Placer temporairement les montants muraux en position. A.
- Página 13 Parts required: Pieces requis: Partes requeridas: HEADER SUPPORT INSTALLATION INSTALLATION DES SUPPORTS DE RAIL INSTALACIÓN DE LOS SOPORTES DEL RIEL A. Temporarily place the header supports against the wall jambs aligned with the top and mark the position of the holes as shown.
- Página 14 Parts required: Pieces requis: Partes requeridas: HEADER CUTTING COUPE DU RAIL CORTE DEL RIEL A. Measure the distance between the shower walls, remove 7/16'' (11mm) from this measurement A. Mesurer la distance entre les murs de douche, enlever 7/16 po (11mm) de cette mesure. A.
- Página 15 Parts required: Pieces requis: Partes requeridas: HEADER INSTALLATION INSTALLATION DU RAIL INSTALACIÓN DEL RIEL A. Slide the header inside the header supports. A. Glisser le rail à l'intérieur des supports de rail. A. Deslizar el riel dentro de sus soportes. B.
- Página 16 Parts required: Pieces requis: Partes requeridas: HEADER LEVELING MISE À NIVEAU DU RAIL NIVELACIÓN DEL RIEL Leveling the header is critical to the proper functioning of the doors. La mise de niveau du rail est essentielle au bon fonctionnement des portes. Nivelar el riel es crítico para el buen funcionamiento de las puertas.
- Página 17 Parts required: Pieces requis: Partes requeridas: Ø ⅛ HEADER FIXATION FIXATION DU RAIL FIJACIÓN DEL RIEL A. With a 1/8'' drill bit predrill the header using the middle hole on top of the brackets. A. Pré-percer le rail en utilisant un forêt de 1/8po dans le trou du milieu sur le dessus des supports. A.
- Página 18 Parts required: Parts required: Pieces requis: Pieces requis: Partes requeridas: Partes requeridas: DOOR GUIDE INSTALLATION INSTALLATION DU GUIDE DE PORTE INSTALACIÓN DE LA GUÍA DE PUERTA L / 2 A. Measure the distance between the shower walls, divide that distance in two and mark it on the threshold.
- Página 19 Parts required: Pieces requis: Partes requeridas: DOOR PANEL INSTALLATION PREPARATION PRÉPARATION À L'INSTALLATION DES PANNEAUX DE PORTE PREPARACIÓN DE LA INSTALACIÓN DE LOS PANELES DE PUERTA A. Insert the wall jambs gaskets in the wall jambs, as shown. A. Insérer les joint dans les montants muraux, tel que montré. Long lip against the aluminum A.
- Página 20 Parts required: Pieces requis: Partes requeridas: UPPER BUMPER INSTALLATION INSTALLATION DES PARES-CHOCS SUPÉRIEURS INSTALACIÓN DE LOS PARACHOQUES SUPERIORES A. Temporarily place the bumpers against the header supports aligned with the top and mark the position of the holes as shown. A.
- Página 21 Parts required: Pieces requis: Partes requeridas: DOOR PANEL INSTALLATION PREPARATION - CONTINUED PRÉPARATION À L'INSTALLATION DES PANNEAUX DE PORTE - SUITE PREPARACIÓN DE LA INSTALACIÓN DE LOS PANELES DE PUERTA - CONTINUACION Outside Extérieur A. Install drip shields on doors as shown. Exterior A.
- Página 22 A two person installation is recommended. Parts required: Une installation par deux personnes est recommandé Pieces requis: Partes requeridas: Se recomienda realizar la instalación entre dos personas. DOOR PANEL INSTALLATION INSTALLATION DES PANNEAUX DE PORTE INSTALACIÓN DE LOS PANELES DE PUERTA Install inside panel first.
- Página 23 Parts required: Pieces requis: Partes requeridas: DOOR PANEL LEVELING MISE À NIVEAU DES PANNEAUX DE PORTE NIVELACIÓN DE LOS PANELES DE PUERTA A. Adjust the excentric nut to level the doors, as shown. A. Ajuster l'écrou excentrique pour mettre de niveau les portes, tel que montré. A.
- Página 24 Parts required: Pieces requis: Partes requeridas: HANDLE AND GASKET INSTALLATION INSTALLATION DE LA POIGNÉE ET DES JOINTS D'ÉTANCHÉITÉ INSTALACIÓN DE LA MANIJA Y DE LAS JUNTAS DE ESTANQUEIDAD A. Assemble the handles on the glass panels as shown. A. Assembler les poignées sur les portes. A.
- Página 25 APPLICATION OF THE SILICONE APPLICATION DU SILICONE APLICACIÓN DE LA SILICONA A. From outside the shower apply a bead of silicone along the wall jamb, the threshold on the base and on the side of the door guide as shown. A.
-
Página 26: Garantie Limitée - Canada
LIMITED WARRANTY — UNITED STATES MAAX Bath Inc. offers express limited warranty on each of its products. This warranty extends only to the original owner/end-user for personal household use. For commercial uses, additional limitations apply. For accessing product Limited warranty please visit: www.maax.com/us-warranty... - Página 27 Notes / Notes / Nota...
- Página 28 Technical Services / Service technique / Servicio técnico T. 1 877 GET-MAAX (1 877 438-6229) F. 1 888 361-2045 www.maax.com 10038164 © MAAX Bath Inc. PRINTED IN CANADA / IMPRIMÉ AU CANADA / IMPRESO EN CANADA 2020-03-10...