Publicidad
Enlaces rápidos
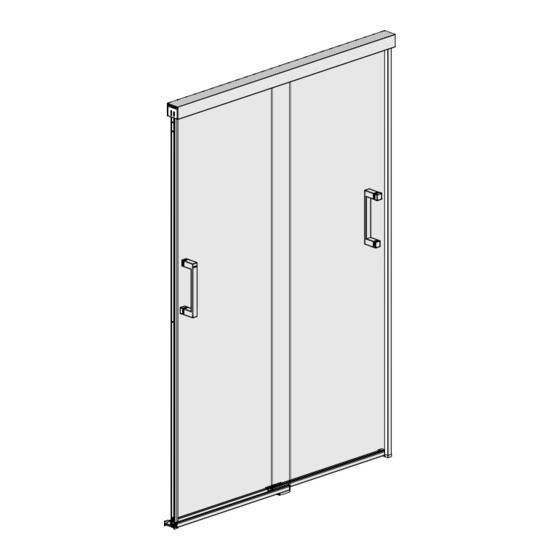
INSTALLATION INSTRUCTIONS
GUIDE D'INSTALLATION
GUÍA DE INSTALACIÓN
135330 • 135331 • 135332 • 135334 • 135335 • 139349 • 139350 • 139351 • 139352
Read all instructions carefully before proceeding.
Lire attentivement toutes les instructions avant de commencer l'installation.
Leer detenidamente todas las instrucciones antes de comenzar la instalación.
IMPORTANT
• Record the serial number
IMPORTANT
• Noter le numéro de série
IMPORTANTE
• Registre el número de serie
MODEL • MODÈLE • MODELO
Sliding shower door
Porte de douche coulissante
Puerta corrediza de ducha
• 139353 • 139354 • 837352 • 837353 • 837354
SAVE THIS GUIDE FOR FUTURE REFERENCE.
CONSERVER POUR UN USAGE ULTÉRIEUR.
CONSERVE ESTE MANUAL COMO REFERENCIA.
Serial number • Numéro de série • Número de Serie
Publicidad

Manuales relacionados para MAAX 135330


Resumen de contenidos para MAAX 135330
- Página 1 Porte de douche coulissante Puerta corrediza de ducha 135330 • 135331 • 135332 • 135334 • 135335 • 139349 • 139350 • 139351 • 139352 • 139353 • 139354 • 837352 • 837353 • 837354 Read all instructions carefully before proceeding.
- Página 2 PARTS PIÈCES PIEZAS AND COMPONENTS ET COMPOSANTES Y COMPONENTES Incognito Shaker handle. Poignée pour Incognito Shaker. Manija para Incognito Shaker. * According to selected model. | * Selon le modèle selectionné | * Según el modelo seleccionado...
- Página 3 PARTS PIÈCES PIEZAS AND COMPONENTS ET COMPOSANTES Y COMPONENTES For all Incognito doors use the following sections of the cutting jig: Pour toutes les portes Incognito utiliser les sections suivantes du gabarit de coupe: Para todas las puertas Incognito use las siguientes secciones de la plantilla de corte: * According to selected model.
- Página 4 PARTS PIÈCES PIEZAS AND COMPONENTS ET COMPOSANTES Y COMPONENTES XXX 084=Chrome, Cromo 305=Brushed nickel, Nickel brossé, Níquel cepillado 173=Dark bronze, Bronze foncé, Bronce oscuro 340=Matte black, Noir mat, Negro mate DOOR | PORTE | PUERTA Code Part Nom de la pièce Pieza Código Cant.
-
Página 5: Tools Outils
TOOLS OUTILS HERRAMIENTAS REQUIRED REQUIS NECESARIAS Electric drill Level Pencil Perceuse électrique Niveau Crayon Taladro eléctrico Nivel Lápiz ¼'' ceramic drill bit ⅛ " drill bit Mèche à céramique ⅛ Clear silicone sealant Mèche de ¼ po. ⅛ Broca de "... - Página 6 56" - 59" 24" - 27" 33 7/8" 3/4" Incognito 76 Shaker 8mm 76" x 44 - 47" 135330 Incognito Shaker 8mm 56 3/4" x 56 - 59" 56 3/4" 54 5/8" 55" - 59'' 24 1/4" - 28 1/4"...
- Página 7 BEFORE AVANT ANTES YOU BEGIN DE COMMENCER DE COMENZAR Double the studs (2x4) where the wall jambs will be installed. Doubler les montants de bois (2x4) là où les montants muraux seront installés. Duplique los montantes (2x4) en los lugares en los que se instalarán las jambas murales. Doubled stud Montant double Montante doble...
- Página 8 Parts required: Pieces requises: Partes requeridas: THRESHOLD DRY FIT ADJUSTMENT RÉGLAGE DE LA POSITION DU SEUIL À SEC AJUSTE EN SECO DE LA POSICIÓN DEL UMBRAL A. Place the corner brackets (#2) on the base thres- If necessary, file the corners of the two corner supports to hold and against the shower walls.
- Página 9 Parts required: Pieces requises: Partes requeridas: THRESHOLD DRY FIT ADJUSTMENT Disassemble. RÉGLAGE DE LA POSITION DU SEUIL À SEC Désassembler. AJUSTE EN SECO DE LA POSICIÓN DEL UMBRAL Desmontar. D.Snap the door guide (#9) on the center of the threshold. D.
- Página 10 Parts required: Pieces requises: Partes requeridas: WALL JAMB INSTALLATION INSTALLATION DU MONTANT MURAL INSTALACIÓN DEL MONTANTE MURAL A. Insert the inner wall jambs (#3) in the corner brackets. A. Insérer les montants muraux intérieurs (#3) dans les suports de coin. A.
- Página 11 Parts required: Pieces requises: Partes requeridas: INNER HEADER INSTALLATION INSTALLATION DU RAIL INTÉRIEUR INSTALACIÓN DEL RIEL INTERIOR A. Measure the distance wall to wall at the top of the wall jambs and substract 13/16". A. Prendre la mesure de mur à mur en haut des montants muraux et soustraire 13/16 po.
- Página 12 Parts required: Pieces requises: Partes requeridas: INNER HEADER INSTALLATION INSTALLATION DU RAIL INTÉRIEUR INSTALACIÓN DEL RIEL INTERIOR D. Insert a header retainer (#5) on each end using a soft hammer. D. Insérer un dispositif de retenue (#5) à chaque bout du rail à l'aide d'un marteau en plastique. D.
- Página 13 Parts required: Pieces requises: Partes requeridas: INNER HEADER INSTALLATION INSTALLATION DU RAIL INTÉRIEUR INSTALACIÓN DEL RIEL INTERIOR G. Install the door catchers (#11) on the retainers for header. G. Installer les dispositifs de retenu de porte (#11) dans les dispositifs de retenu pour rail. G.
- Página 14 Parts required: Pieces requises: Partes requeridas: We recommend putting the interior door on the side of the shower head. Please determine which panel will be ROLLERS AND HANDLES INSTALLATION on the inside of the shower. INSTALLATION DES ROULETTES ET POIGNÉES Nous recommandons de mettre la INSTALACIÓN DE LOS RODAMIENTOS Y MANIJAS porte intérieure du côté...
- Página 15 Installer les boutons de INCOGNITO porte inversés, de sorte SHAKER qu'il n'y ait pas d'obstruc- 135330 • 135331 • 135332 tion entre les poignées lors de l'ouverture Instalar las perillas de la puerta invertidas, de modo que no haya obstrucciones...
- Página 16 Parts required: Pieces requises: Partes requeridas: ROLLERS AND HANDLES INSTALLATION Place the interior door inside INSTALLATION DES ROULETTES ET POIGNÉES the shower alcove. Exterior door INSTALACIÓN DE LOS RODAMIENTOS Y MANIJAS Placer la porte intérieur à Porte extérieure l'intérieur de l'alcôve de Puerta exterior douche.
- Página 17 Installer les boutons de INCOGNITO porte inversés, de sorte SHAKER qu'il n'y ait pas d'obstruc- 135330 • 135331 • 135332 tion entre les poignées lors de l'ouverture Instalar las perillas de la puerta invertidas, de modo que no haya obstrucciones...
- Página 18 DOORS INSTALLATION INSTALLATION DES PORTES INSTALACIÓN DE LAS PUERTAS A. Lift the inner door and align one of the rollers with the slot on the rail. Insert the door roller in the header thru the slot (A1). Slide the door until the other roller is aligned with the other slot (A2).
- Página 19 Parts required: Pieces requises: Partes requeridas: THRESHOLD AND DOOR GUIDE INSTALLATION INSTALLATION DU SEUIL ET GUIDE DE PORTE INSTALACIÓN DEL UMBRAL Y GUÍA DE PUERTA A. Remake the threshold assembly. Take the threshold assem- bly. Verify that there is a clearance on ends for the corner brackets teeth.
- Página 20 Parts required: Pieces requises: Partes requeridas: THRESHOLD AND DOOR GUIDE INSTALLATION INSTALLATION DU SEUIL ET GUIDE DE PORTE INSTALACIÓN DEL UMBRAL Y GUÍA DE PUERTA D. Insert the door guide (#8) under each door panel. D. Insérer le guide de porte (#8) sous chaque panneau de porte. D.
- Página 21 Parts required: Pieces requises: Partes requeridas: DOOR ADJUSTMENT AJUSTEMENT DE PORTE AJUSTE DE LA PUERTA A. Slightly unscrew the rollers. A. Dévisser légèrement les vis des roulettes. A. Desatornillar ligeramente los tornillos de los rodamientos. Do not over-loosen the screws. Half a turn maximum.
- Página 22 Parts required: Pieces requises: Partes requeridas: WALL JAMB COVER INSTALLATION INSTALLATION DU MONTANT MURAL DECORATIF INSTALACIÓN DE LA CUBIERTA PARA JAMBA MURAL A. Install the wall jamb cover (#12) on the wall jambs. A. Installer les montants muraux décoratifs (#12) sur les montants muraux.
- Página 23 Parts required: Pieces requises: Partes requeridas: HEADER COVER INSTALLATION - CONTINUED INSTALLATION DU COUVERT DE RAIL - SUITE INSTALACIÓN DE LA CUBIERTA DEL RIEL - CONTINUACIÓN B. Take the measurement taken in step 10a and mark it on the header cover (#13). Insert the cutting jig and align the slot in the middle with the mark on the header.
- Página 24 Parts required: Pieces requises: Partes requeridas: GASKET INSTALLATION INSTALLATION DU JOINT D'ÉTANCHÉITÉ INSTALACIÓN DE LA JUNTA DE ESTANQUEIDAD A. Install one gasket (#20) on the outer edge of each door using a soft hammer. Use a soft plastic hammer ONLY A.
- Página 25 Gasket for Incognito Shaker ONLY. Partes requeridas: Joint pour Incognito Shaker SEULEMENT. Junta para Incognito Shaker ÚNICAMENTE. 135330 • 135331 • 135332 GASKET INSTALLATION INSTALLATION DU JOINT D'ÉTANCHÉITÉ INSTALACIÓN DE LA JUNTA DE ESTANQUEIDAD A. Install one gasket (#22) on the inner edge of the inside door.
- Página 26 Parts required: Pieces requises: Partes requeridas: APPLICATION OF THE SILICONE APPLICATION DU SILICONE APLICACIÓN DE LA SILICONA A. On the outside of the shower apply a bead of silicone as shown. A. À l'extérieur de la douche, appliquer du silicone tel qu'illustré. A.
-
Página 28: Garantie Limitée - Canada
LIMITED WARRANTY — UNITED STATES MAAX Bath Inc. offers express limited warranty on each of its products. This warranty extends only to the original owner/end-user for personal household use. For commercial uses, additional limitations apply. For accessing product Limited warranty please visit: www.maax.com/us-warranty...