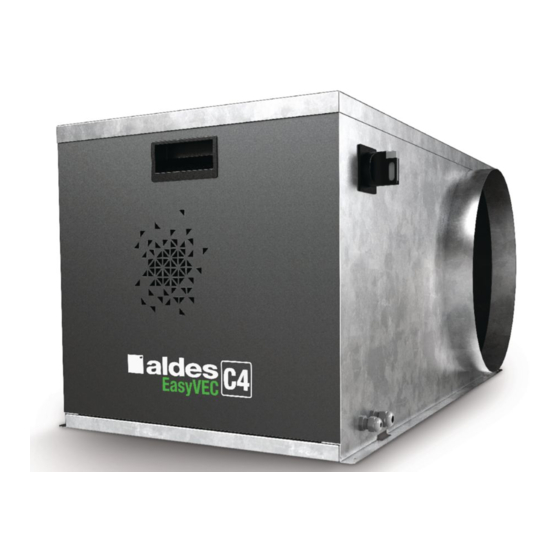
Resumen de contenidos para aldes EasyVEC C4 4000
- Página 1 Notice d’installation Installation instructions Installationsanleitung Montagehandleiding Instrucción de utilización ® EasyVEC Manuale di installazione www.aldes.com...
- Página 2 Referenzdokumente • Bijbehorende referentie documenten • Documentos de referencia asociados • Documenti di riferimento associati Documents / Documents / Dokumente / Documenten / Documentos / Documenti Aldes.com ✔ Guide de démarrage rapide / Quick Start Guide / Kurzanleitung / Snelstartgids / Guía de arranque rápido / Sauf / Except / Außer /...
-
Página 3: Télécommande
1.2. Schéma de principe • Layout diagram • Schaltplan • Blokschema • Esquema de principio • Schema generale Local technique / Utility room / Geräteraum / Technische ruimte / Local técnico / Locale tecnico 1.3. Vue éclatée • Exploded view • Explosionszeichnung • Explosietekening • Vista despiezada • Vista esplosa Panneau d’accès Access panel... - Página 4 1.4. Encombrement • Dimensions • Abmessungen • Afmetingen • Dimensiones generales • Ingombri ® EasyVEC (Vue de dessus / Top View / Aufsicht / Bovenaanzicht / Vista superior / Vista dall’alto) EasyVEC ® P (mm) L (mm) H (mm) Ø (mm) D (mm) E (mm) F (mm)
- Página 5 2. DESCRIPTION GÉNERALE • GENERAL DESCRIPTION • ALLGEMEINE BESCHREIBUNG • ALGEMENE BESCHRIJVING • DESCRIPCIÓN GENERAL • DESCRIZIONE GENERALE 2.1. Déchargement • Unloading • Entladen • Uitladen • Descarga • Scarico 4.83 Torx * Télécommande disponible sur micro-watt et micro-watt+ / Remote control available on micro-watt and micro-watt+ / Fernbedienung nur für microwatt und microwatt + erhältlich / Afstandsbediening leverbaar voor micro-watt en micro-watt + / Control remoto disponible en microvatio y microvatio + / Telecomando disponibile su micro-watt e micro-watt+...
- Página 6 3. PRÉCONISATIONS AVANT MONTAGE • RECOMMENDATIONS PRIOR TO ASSEMBLY • EMPFEHLUNG VOR MONTAGE • MONTAGEVOORSCHRIFTEN • RECOMENDACIONES ANTES DEL MONTAJE • RACCOMANDAZIONI PRIMA DEL MONTAGGIO ® EasyVEC (Vue de dessus / Top View / Modèle / Model / Modell / Model / Aufsicht / Bovenaanzicht / Modelo / Modello (mm)
- Página 7 4. MONTAGE • ASSEMBLY • EINBAU • MONTAGE • MONTAJE • MONTAGGIO 4.1. Consignes de sécurité • Safety instructions • Sicherheitshinweise • Veiligheidsinstructies • Consignas de seguridad • Istruzioni di sicurezza ® EasyVEC...
- Página 8 4.2. Raccordements aérauliques • Air duct connections • Lufttechnische Anschlüsse • Aansluiting van luchtkanalen • Conexiones aeráulicas • Raccordi aeraulici ® EasyVEC C4 4000 à 12 000 ® Pour les caissons EasyVEC C4 à partir de 4000 m³/h, 2 arrangements sont disponibles permettant au total de réaliser 3 confi gurations sur site : - Arrangement 1 - EasyVEC ®...
- Página 9 4.3. Raccordements électriques • Electrical connections • Elektroanschlüsse • Elektrische aansluitingen • Conexiones eléctricas • Connessioni elettriche ® EasyVEC...
- Página 10 5. MISE EN SERVICE • ACTIVATION • INBETRIEBNAHME • INBEDRIJFSTELLING • PUESTA EN SERVICIO • MESSA IN SERVIZIO 5.1. Opérations de mise en service • Activation operations • Inbetriebnahmearbeiten • Uit te voeren taken voor de ingebruikneming • Operaciones de puesta en servicio • Operazioni di messa in servizio ®...
- Página 11 ® EasyVEC 0-10 V N0 C NC BOOST 30 min Contact représenté en position défaut/hors tension PUSH Contact shown in default/de-energized position Kontakt in der Position Störung/Aus dargestellt Contact uitgebeeld in de storings-/spanningsloze stand Contacto representado en posición defecto/sin tensión Contatto presentato in posizione guasto/fuori tensione Modbus Modbus...
- Página 12 5.2. Diagnostic et dépannage / Troubleshooting and repairs / Diagnose und Fehlerbehebung / Diagnose en probleemoplossing / Diagnóstico y reparación / Diagnostica e riparazione guasti Si vous ne parvenez pas à éliminer vous-même le défaut à l’aide du tableau suivant : - Versions Microwatt et Microwatt+ réinitialiser la télécommande en paramètres usine, voir notice télécommande 11025983 - Couper l’alimentation électrique.
- Página 13 If you cannot manage to eliminate the fault yourself using the following table: - Microwatt and Microwatt+ version reset the remote control to its factory settings, see instructions remote control 11025983 - Turn off the power. Wait until the screens are unlit. Turn on the power. - If the problem persists, read the product rating plate and contact our after-sales service.
- Página 14 Falls Sie den Fehler nicht selbst anhand der folgenden Tabelle beheben können: - Version Microwatt und Microwatt+ die Fernbedienung auf die Werkseinstellung zurücksetzen, siehe Anleitung Fernbedienung 11025983 - Die Stromversorgung abschalten. Warten, bis auch die Bildschirme erloschen sind. Wieder einschalten. - Falls das Problem weiterhin besteht, am Typenschild nachsehen und unseren Kundendienst kontaktieren.
- Página 15 Als u er niet in slaagt om zelf de storing te verhelpen met behulp van onderstaande tabel, dan: - Versie Microwatt en Microwatt+ de fabrieksinstellingen van de afstandbediening terugzetten, zie gebruiksaanwijzing afstandsbe- diening 11025983 - De stroom uitschakelen. Wachten tot de schermen zijn gedoofd. De stroom weer inschakelen. - Als het probleem blijft bestaan, het typeplaatje kopiëren en contact opnemen met onze technische dienst.
- Página 16 Si no logra eliminar usted mismo el defecto con la siguiente tabla: - Versión Microwatt y Microwatt+ reinicializar el control remoto en parámetros planta, ver la instrucción control remoto 11025983 - Cortar la alimentación eléctrica. Esperar hasta que se apaguen las pantallas. Vuelva a poner bajo tensión. - Si persiste el problema, leer la placa del fabricante del producto y contactar con nuestro servicio posventa.
- Página 17 Se non si riesce ad eliminare il guasto facendo riferimento alla tabella sottostante: - Versione Microwatt e Microwatt+ reinizializzare il telecomando con i parametri di fabbrica, vedere manuale telecomando 11025983 - Escludere l’alimentazione elettrica. Attendere che le schermate scompaiano. Rimettere sotto tensione. - Se il problema permane, prendere i dati del prodotto sulla targa segnaletica e contattare il nostro Servizio Post Vendita.
- Página 18 NOTES...
- Página 19 NOTES...
- Página 20 www.aldes.com...


