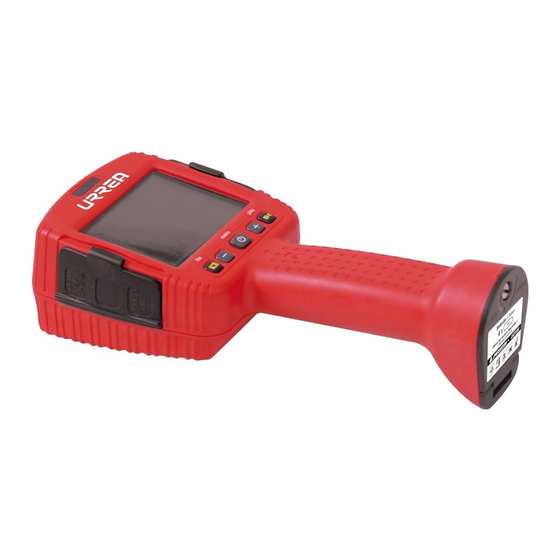
Resumen de contenidos para Urrea UBORVI
- Página 1 Boroscopio de Video Boroscope Rec MANUAL DE USUARIO Y GARANTÍA USER’S MANUAL AND WARRANTY UBORVI...
-
Página 2: Tabla De Contenido
E S P A Ñ O L E N G L I S H CONTENIDO CONTENT Especificaciones Specifications Guía de componentes Identification guide Íconos Icons Normas generales de seguridad General safety rules Área de trabajo Work area Uso y cuidado del equipo Tool use and care Servicio Service... -
Página 3: Especificaciones
Manu al de U s uar io E S P A Ñ O L ESPECIFICACIONES Cámara Tamaño de la cabeza de la cámara.....5.5mm Ángulo de campo de visión...60o (diagonal) Distancia visible......20mm a 70mm Resolución........720 x 480 pixeles LED..........4 LEDS blancos Temperatura recomendada de trabajo...-0o a 60o Parte posterior Resistencia al agua.....Punta de la cámara y... -
Página 4: Normas Generales De Seguridad
para reducir el riesgo de choque eléctrico Cámara fotográfica -indica que el boroscopio o algún otro daño de consideración. esta capturando una fotografía Modo vista previa -señala una fotografía en archivo ÁREA DE TRABAJO Video cámara -indica que el aparato está grabando video • Mantenga su área de trabajo limpia y bien Indica que el boroscopio está... -
Página 5: Servicio
Manu al de U s uar io E S P A Ñ O L • No sumerja el mango o la pantalla de visualiza- directamente al modo de video en vivo. ción en el agua. El tomar esta precaución reducirá Figura 1- OSD el riego de descargas eléctricas o daños severos. • La cabeza de la cámara y el cable son resis- tentes a el agua cuando la unidad esté... - Página 6 Operación primaria y ajustes micro SD. Presione el botón una vez más Opérelo usando el teclado estático en la parte para detener la grabación del video. inferior de la pantalla, alineado con los boto- nes abalo mencionados. Seleccione el tabulador de ajustes del sistema, usted puede acceder al menú...
-
Página 7: Ensamble, Uso Y Operación
Manu al de U s uar io E S P A Ñ O L tará que seleccione "SI" o "NO" para borrar la imagen. Mostrar video Iniciar En el modo de vista previa, seleccione un archi- vo de video y presione "iniciar" (teclado botón) para proyectar una película. - Página 8 • Cuando coloque las pilas, asegúrese de que el que el conector hembra en el cable del conduc- boroscopio está apagado, siga los símbolos + y - to está correctamente alineado con el conector en el interior del compartimento de la batería. macho cerrar en la unidad de mano. (Figura 5) • Si la herramienta no se utiliza durante más de Ajuste los conectores juntos y apriete la tapa dos semanas, retire las pilas y guárdelas en un...
-
Página 9: Specifications
U s er’s Manu al E N G L I S H SPECIFICATIONS IDENTIFICATION GUIDE Camera FRONT / SIDE VIEW Camera head size ........Ø 5.5mm MAIN KEYPAD (DUAL Function Key) • In Live-Video Screen Field of view angle......60o(diagonal) From Left : PHOTO – LED (decrease) – POWER (on/off) – LED Viewable Distance ………..20mm to 70mm (increase) –... -
Página 10: General Safety Rules
Live-video Press once to pause a video playing, press sec- ond time to resume Micro SD card inserted Can’t find Micro SD card GENERAL SAFETY RULES Battery life indicator WARNING Fully charged – 3 bars Less than 75% - 2 bars This section contains important safety Less than 50% - 1 bar information that is specific to the Inspec-... -
Página 11: Service
U s er’s Manu al E N G L I S H accordance with these instructions, taking into LIVE-VIDEO SCREEN account the working conditions and the work The live-video screen is set default in this de- to be performed. vice. You can zoom, adjust LED brightness and •... - Página 12 Select the System Setup Tab. You can switch over VIEW SAVED IMAGE / VIDEO FILES the System Setup Menu - Language setup, Time/ While in the live-video screen, press the MODE Date Setup by pressing (keypad ‘+’ button) button at the rear enclosure will take you to to switch the setup tab from one to another.
-
Página 13: Assembly,Operation And Use
U s er’s Manu al E N G L I S H connectivity. A folder ‘DCIM’ displayed in the external device folder. Open the folder and se- lect the files copy to your computer hard disk. PLAYBACK VIDEO PLAY While in the PREVIEW mode, select the Video file and press ‘Play’ (Keypad button) to playback the movie. - Página 14 place them near a fire or hot surface. Even hot, aligned with the male dine connector on the direct sunlight may cause them to explode. hand held unit. (Figure 5) • When loading batteries, make sure the tool Push the connectors together and finger tight- is turned off, then follow the + and - symbols en the cap by turning it in a clockwise direction.
-
Página 15: Notas
Man ual de U s uar io / Us er ’s Man ual NOTAS / NOTES... -
Página 16: Sello Del Distribuidor
The warranty is not applicable if the product does not show the URREA brand, if the product is worn out by its daily use, shows signs of abuse, damage, its original composition has been altered, or specifies a different warranty.


