Capítulos
Tabla de contenido

Resumen de contenidos para Truper PRETUL RECE-160P
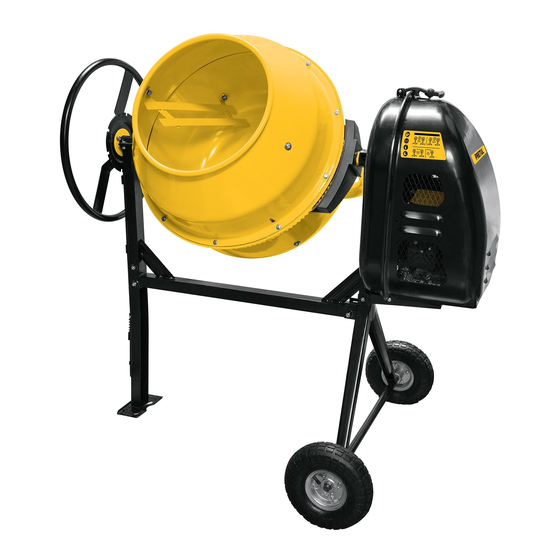
- Página 1 Instructivo de Revolvedora de cemento RECE-160P 160 L Capacidad Este instructivo es para: Modelo Código RECE-160P 28147 Lea este instructivo por completo ATENCIÓN antes de usar la herramienta.
-
Página 2: Tabla De Contenido
ndice Í ATENCIÓN Especificaciones técnicas Especificaciones de combustible Para poder sacar el máximo provecho del equipo, alargar su Advertencias generales de seguridad vida útil, hacer válida la garantía para herramientas motorizadas en caso de ser necesario y evitar riesgos o lesiones graves, es Advertencias de Seguridad fundamental leer este para uso de revolvedoras de cemento... -
Página 3: Especificaciones Técnicas
Especificaciones técnicas RECE-160P Código 28147 Descripción Revolvedora de cemento con motor a gasolina Capacidad de la olla 160 L Capacidad de mezcla 120 L Capacidad en sacos Producción por hora 2 400 L/h Velocidad de la olla 33 r/min Boca de la olla 40 cm Motor OHV a 4 tiempos... -
Página 4: Advertencias Generales De Seguridad Para Herramientas Motorizadas
Advertencias generales de seguridad para herramientas motorizadas Mantenga su área de trabajo limpia, ordenada y bien Utilice equipo adecuado de protección personal. iluminada. ATENCIÓN Usar protección para los ojos, mascarillas antipolvo, ATENCIÓN Áreas desordenadas y obscuras pueden provocar zapatos de seguridad antideslizantes, casco, protección accidentes. -
Página 5: Advertencias De Seguridad
Advertencias de Seguridad para uso de revolvedoras de cemento • La mayoría de las quemaduras con cemento se Manejo de combustible producen en la parte inferior de las piernas, cuando el • Nunca fume cerca del combustible, ni de la zona en cemento fresco penetra a través de zapatos de protección defectuosos. -
Página 6: Listado De Partes
Advertencias de Seguridad para uso de revolvedoras de cemento ATENCIÓN • Mantenga ambos pies bien firmes y en equilibrio • Nunca cargue el material en la olla cuando cargue o descargue la revolvedora. detenida, siempre debe de estar en movimiento. ATENCIÓN •... -
Página 7: Ensamble
Ensamble ATENCIÓN • La revolvedora debe ser ensamblada por al menos dos personas. • Ensamble la revolvedora en un piso bien nivelado y capaz de sostener su peso. Utilice calzas para nivelar el equipo en caso de bamboleo. • La revolvedora incluye toda la tornillería necesaria para su ensamble. - Página 8 Ensamble 4. Coloque la montura (K) en el eje de transmisión de la olla (L). Monte la parte inferior de la olla (M) al soporte (H) introduciendo la montura (K) en el poste (N) y colocando el eje de soporte en la abrazadera (O).
-
Página 9: Partes
Ensamble 8. Monte el volante de control en el eje de soporte (A). Utilice dos juegos de pernos M8 x 20 rondanas, rondanas de presión y tuercas para asegurar el volante en su lugar. • Asegure la parte superior de las paletas (P) a la cubierta de la olla con dos juegos de tornillos de cruz M10 x 20, rondanas aislantes*, rondanas de presión y tuercas. -
Página 10: Combustible Y Aceite
Partes Polea Tanque de Tapa del tanque de combustible combustible Cable de bujía Interruptor Silenciador Palanca del Eje del ahogador motor Tapa del aceite con nivel Cubierta del de varilla filtro del aire Arrancador Combustible y aceite Gasolina limpia sin plomo Abastecimiento de aceite •... -
Página 11: Puesta En Marcha
Puesta en marcha Encendido • Mueva la palanca del ahogador (A) a la posición cerrada ( ATENCIÓN Cuando el motor está caliente o la temperatura del ambiente es muy alta, no es necesario cerrar el obturador antes de encender. • Coloque el interruptor (B) en posición de encendido ( I ). •... -
Página 12: Inclinación De La Olla
Puesta en marcha Inclinación de la olla Carga y mezcla de • El volante de control gira en la misma dirección que el mortero ángulo de la olla. Controla fácilmente el ángulo de trabajo de la olla para mezclar, descargar y almacenar la revolvedora. -
Página 13: Mantenimiento
Mantenimiento ATENCIÓN • Utilice únicamente repuestos y refacciones originales ATENCIÓN • Antes de dar mantenimiento a la revolvedora apague el motor. • De no cumplir cualquiera de los puntos anteriores se expone a lesiones serias o a producir daños a la revolvedora que no serían cubiertos por la garantía. -
Página 14: Mantenimiento Periódico
Mantenimiento Cada Cada 25 h o Cada 50 h o Cada 100 h o Cada 250 h o Mantenimiento periódico cada 3 meses cada 6 meses cada 6 meses cada 2 años. Limpieza general Inspección de aceite Cambio de aceite Inspección del filtro de aire Realizar limpieza Cambiar... -
Página 15: Notas
Notas ESPAÑOL... -
Página 16: Centros De Servicio Autorizados
Centros de Servicio Autorizados En caso de tener algún problema para contactar un Centro de Servicio consulte nuestra página www.truper.com donde obtendrá un listado actualizado, o llame al teléfono: 01(800) 690-6990 ó 01(800) 018-7873 donde le informarán cuál es el Centro de Servicio Autorizado más cercano. - Página 17 671432 MERCADO DE LA SOLDADURA DEL SURESTE, ZAMORA, MICH. TEL.: 01(351) 517-8420 S.A. DE C.V. BLVD. ADOLFO RUÍZ CORTÍNEZ 2001-B, 670805 LA NUEVA FERRETERÍA TRUPER COL. ATASTA, VILLAHERMOSA, C.P. 86100 TEL.: 01(933) GENERAL PUEBLITA No. 356, COL. CENTRO C.P. 58600, 161-4820 | 161-4479 ZACAPU, MICH.
-
Página 18: Sucursales
Sello del establecimiento comercial: Fecha de entrega: TRUPER, S.A. de C.V. Importado por: Parque Industrial No. 1, Jilotepec, C.P. 54240, Estado de México, México. Tel.: 01 (761) 782 9100, R.F.C.: THE-791105-HP2 www.truper.com... - Página 19 Manual Cement mixer RECE-160P 42.2 Gallons Applies for: Model Code RECE-160P 28147 Read this manual thoroughly CAUTION before using the tool.
- Página 20 Contents CAUTION Technical data Fuel requirements To gain the best performance, longer tool life span, make the Safety warnings for motor tools warranty valid if needed, and to avoid risks or fatal injuries Safety warnings for concrete mixers please read and understand the entire manual prior to using the Parts List tool.
-
Página 21: Technical Data
Technical data RECE-160P Code 28147 Description Gasoline motor cement mixer Drum capacity 42.2 Gallons Mix capacity 31.7 Gallons Capacity per bag Production per hour 634 Gal/h Drum speed 33 RPM Drum's opening diameter 15.75” Motor 4-cycle OHV Motor cylinders capacity 99 cc Potency 2.5 Hp... -
Página 22: Safety Warnings For Motor Tools
Safety warnings for motor tools Keep your work area tidy and with good lighting. Use the right personal protection equipment. CAUTION CAUTION Cluttered and dark areas can cause injuries. Using eye protection, anti-dust masks, non-skid safety shoes, helmet, hearing protection and safety gloves Never use the mixer in explosive environments or considerably reduce the risk of injury. -
Página 23: Safety Warnings For Concrete Mixers
Safety warnings for concrete mixers to water use a cloth dampened with vinegar to wash the Fuel handling contaminated area. • To prevent contact with fresh cement the workers need • Never smoke near the fuel, nor the supply area or when operating the mixer. -
Página 24: Parts List
Safety warnings for concrete mixers CAUTION • When loading or unloading the mixer keep both legs • Never load material into a stopped firm and balanced. drum. It shall always be in movement. CAUTION • Never stand up on the mixer. It could tilt over you or the •... -
Página 25: Assembly
Assembly CAUTION • At least two people shall assemble the mixer. • Assemble the mixer in a well-leveled floor that can support its weight. Use wedges to level the machine in case it wobbles. • The mixer is shipped with all the screws and bolts. Use Allen keys set and the open-end wrenches necessary to assemble. - Página 26 Assembly 4. Set the frame (K) into the drum drive axis (L). Mount the lower part of the drum (M) into the support (H) inserting the frame (K) into the pole (N) and placing the support axis in the bracket (O). Use a set of M8 x 70 bolt, washer, pressure washer and nut to secure the mount to the support pole.
-
Página 27: Parts
Assembly 8. Mount the control flywheel in the support axis (A). Use two M8 x 20 sets of bolts, washers, pressure washers and nuts to secure the flywheel in place. • Secure the upper part of the paddles (P) to the drum cover using two sets of M10 x 20 recessed head screws, insulated washers * pressure washers and nuts. -
Página 28: Fuel And Oil
Parts Pulley Fuel Fuel tank tank Spark plug cable Switch Muffler Choke Motor lever axis Oil cap with oil level Air filter measuring rod cover Starter Fuel and oil Clean Oil supply unleaded gasoline • Verify the oil level: Remove the oil cap with oil level measuring rod (A) and wipe it clean. -
Página 29: Start Up
Start Up Turning on • Move the choke lever (A) into the closed ( position. CAUTION When the motor is hot or room temperature is too high, it is not necessary to close the shutter before starting. • Set the switch (B) in the ON position ( I ). •... - Página 30 Start Up Drum tilt Loading and mixing mortar • The control flywheel turns in the same direction as the drum angle. It easily controls the drum-working angle: to mix, unload and to store it. • The slots in the flywheel inner disc determine the work angles.
-
Página 31: Maintenance
Maintenance CAUTION • Use only original spare parts. CAUTION • Before servicing the mixer shut off the motor. • Failure to comply with any of the previous points expose the user to severe injury o can damage the mixer. These damages are not covered by the Warranty. General maintenance Oil change •... -
Página 32: Periodic Maintenance
Maintenance Each Each 25 h Each 50 h Each 100 . Each 250 h Periodic maintenance or each 3 moths or each 6 moths or each 6 moths or each 2 years General cleansing Oil inspection Oil change Air filter inspection Perform cleaning Change Air filter... -
Página 33: Notes
Notes ENGLISH... -
Página 34: Authorized Service Centers
Authorized Service Centers In the event of any problem contacting a Service Center, please see our webpage www.truper.com to get an updated list, or call our toll-free numbers 01(800) 690-6990 or 01 (800) 018-7873 to get information about the nearest Authorized Service Center. - Página 35 ZAMORA, MICH. TEL.: 01(351) 517-8420 671432 MERCADO DE LA SOLDADURA DEL SURESTE, S.A. DE C.V. BLVD. ADOLFO RUÍZ CORTÍNEZ 2001-B, 670805 LA NUEVA FERRETERÍA TRUPER COL. ATASTA, VILLAHERMOSA, C.P. 86100 TEL.: 01(933) GENERAL PUEBLITA No. 356, COL. CENTRO C.P. 58600, 161-4820 | 161-4479 ZACAPU, MICH.
-
Página 36: Branches
This warranty shall be effective when presenting the product and the valid Warranty policy duly stamped by the supplier or the proof of purchase. To comply with this warranty, Truper will cover transportation expenses in case consumer’s address is out of range from Authorized Service Centers listed herein or at the website www.truper.com or at our toll free numbers: 01 (800) 690-6990 or 01(800) 018-7873.