Publicidad
Idiomas disponibles
Idiomas disponibles
Enlaces rápidos
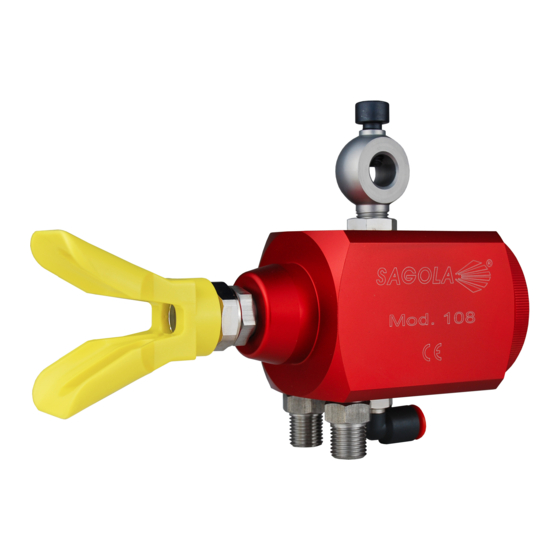
P i s t o l a A i r l e s s A u t o m á t i c a
A i r l e s s A u t o m a t i c S p r a y g u n
P S A A 1 0 8
m a n u a l d e i n s t r u c c i o n e s
l i s t a d e r e p u e s t o s
i n s t r u c t i o n m a n u a l
s p a r e p a r t s l i s t
m a n u e l d ' i n s t r u c t i o n s
l i s t e d e p i è c e s d é t a c h é s
Publicidad
Capítulos

Manuales relacionados para Sagola PSAA 108


Resumen de contenidos para Sagola PSAA 108
- Página 1 P i s t o l a A i r l e s s A u t o m á t i c a A i r l e s s A u t o m a t i c S p r a y g u n P S A A 1 0 8 m a n u a l d e i n s t r u c c i o n e s l i s t a d e r e p u e s t o s...
- Página 3 Índice 1 Introducción pág. 4 2 Advertencias pág. 4 3 Advertencias de seguridad pág. 4 4 Datos técnicos pág. 7 5 Lista de despiece pág. 8 6 Instalación y funcionamiento pág. 8 7 Limpieza de la pistola y accesorios pág. 9 8 Accesorios pág.
-
Página 4: Introducción
1. INTRODUCCIÓN Muchas gracias por haber adquirido un producto a todos nuestros productos para satisfacer las SAGOLA. Nos alegramos de haber encontrado expectativas más exigentes. un cliente en Usted. Para saber cómo utilizar correctamente su Los productos SAGOLA reúnen los más equipo, lea cuidadosamente este manual de elevados avances técnicos, de diseño y de... -
Página 5: Sistemas De Seguridad De La Pistola De Pulverización
de proceder al mantenimiento de alguna parte Dirigir la pistola hacia un cubo metálico puesto de la pistola. a tierra. NUNCA tratar de detener el chorro o una fuga Retirar el cerrojo de la pistola y accionar el con la mano o con cualquier parte del cuerpo. gatillo. -
Página 6: Seguridad De La Manguera
NO EXPONER las mangueras e) Colocar el seguro de la pistola. SAGOLA a temperaturas superiores a los 82ºC o inferiores a -40ºC. f) Colocar el interruptor del motor (equipos Continuidad eléctrica de la manguera... -
Página 7: Puesta A Tierra
Para evitar los riesgos de electricidad estática, d) Pistola de pulverización: su conexión a tierra deben ponerse a tierra los equipos en tiene lugar a través de una conexión a una conformidad con el párrafo «Puesta a Tierra». manguera de producto o pulverizador correctamente puesto a tierra. -
Página 8: Lista De Despiece
5. LISTA DE DESPIECE 10 17 Nº Cod. Nº Cod. Nº Cod. Nº Cod. Nº Cod. 85760301 81660001 83660201 85762137 52411984 80860101 86460203 56418002 87460703 84260106 87460402 30010013 57410302 55751802 30010209 85160012 80660407 54251013 84260014 84260047 84260855 57250809 6. INSTALACIÓN Y FUNCIONAMIENTO 6.1. -
Página 9: Limpieza De La Pistola Y Accesorios
7. LIMPIEZA DE LA PISTOLA Y ACCESORIOS 7.1. Limpieza de la pistola procedimiento: Nota: Si dispone de manual de procedimientos Boquilla fija de limpieza suministrado con el equipo de pulverización debe utilizar dicho procedimiento. 1.- Abrir válvula de descompresión del equipo. Siempre limpiar la bomba, pistola y accesorios 2.- Desmontar protector y tuerca de boquilla. -
Página 10: Sustitución De Junta De Cierre
7.3. Sustitución de junta de cierre 7.- Engrasar la nueva junta tórica e instalarla en el canal correspondiente. Antes de proceder a desmontar cualquier elemento de la pistola, asegurarse de que 8.- Introducir el conjunto aguja en su alojamiento no existe presión en su interior. (cuerpo de la pistola por zona de rosca), con cuidado de no dañar la junta durante el montaje. - Página 11 Caudal desalojo por boquilla (litros/minuto) Orificio Ángulo Anchura de 35 Kg/cm 70 Kg/cm 105 Kg/cm 140 Kg/cm de salida de boquilla pulverización 500PSI 1000PSI 1500PSI 2000PSI 0.007” 0.106 0.152 0.186 0.217 0.18 mm. 0.009” 0.147 0.208 0.255 0.450 0.28 mm. 0.011”...
-
Página 12: Condiciones De Garantía
Asimismo se perderá la GARANTÍA No se atenderá en garantía ningún aparato del cuando se constate que el aparato ha sido cual no conste en los archivos de SAGOLA manipulado por personas ajenas a nuestro S.A. el resguardo adjunto, del certificado de Servicio de Asistencia Técnica. -
Página 13: Tabla De Contenido
Index 1 Introduction page 14 2 Warnings page 14 3 Safety advice page 14 4 Technical data page 17 5 List of components page 18 6 Instalation and operation page 18 7 Cleaning the gun and accessories page 19 8 Accessories page 20 9 Warranty conditions page 22... -
Página 14: Introduction
1. INTRODUCTION Thank you very much for purchasing a product To know how to correctly use your equipment, SAGOLA. We are glad you found a customer. read this manual carefully. The SAGOLA products meet the highest After you have finished reading it, keep it in a technical progress, design and ease of use. - Página 15 NEVER attempt to block the jet or a leak with warning of the risk of products being injected the hand or any other part of the body. onto the skin and assists in reducing this danger, but it does not eliminate the risk of fingers or any Ensure the safety devices of the equipment part of the body from being placed too near the function correctly before each use.
- Página 16 3.2. HOSE SAFETY equipment used must be grounded, including hoses, containers and objects to be painted. The product circulating at high pressure in the hoses is potentially very dangerous. In the event Avoid any potential source of ignition, such as of a leak or burst in the hose due to wear of any the electrostatic charge of a plastic awning, naked kind, damage or improper use, the high pressure...
-
Página 17: Technical Data
g) All containers of solvents used in spraying, in metallic part of the spray gun (hand protector) accordance with the applicable legislation firmly pressed to the side of the container which currently in force. Use only containers which are is placed on the floor, and then operate the gun metallic and electrical conductors. -
Página 18: List Of Components
5. LIST OF COMPONENTS 10 17 Nº Cod. Nº Cod. Nº Cod. Nº Cod. Nº Cod. 85760301 81660001 83660201 85762137 52411984 80860101 86460203 56418002 87460703 84260106 87460402 30010013 57410302 55751802 30010209 85160012 80660407 54251013 84260014 84260047 84260855 57250809 6. INSTALLATION AND OPERATION 6.1. -
Página 19: Cleaning The Gun And Accessories
7. CLEANING THE GUN AND ACCESSORIES 7.1. Cleaning the gun Fixed tip Note: If you have a cleaning procedure manual 1.- Open the compression valve of the gun. supplied with the spraying unit, this procedure must be used. 2.- Remove the tip guard and nut. Always clean the pump, gun and accessories 3.- Extract the spray tip. -
Página 20: Accessories
7.3. Replacing the locking seal 7.- Grease the new O ring again and install it in the corresponding channel. Before disassembling any gun component, make sure that it is not pressuarised. 8.- Insert the needle assembly in its housing (gun body) with care in order not to damage the 1.- Clean the gun correctly. - Página 21 Flow generated by the tip (litres/minute) Outlet Spray 35 Kg/cm 70 Kg/cm 105 Kg/cm 140 Kg/cm orifice angle width 500PSI 1000PSI 1500PSI 2000PSI 0.007” 0.106 0.152 0.186 0.217 0.18 mm. 0.009” 0.147 0.208 0.255 0.450 0.28 mm. 0.011” 0.225 0.300 0.380 0.450 0.28 mm.
-
Página 22: Warranty Conditions
Any device for which there is no duly completed excluded. Likewise, the WARRANTY shall be guarantee certificate in the files of SAGOLA rendered null and void when it is evident that S.A. will be rejected. - Página 23 Index 1 Introduction page 24 2 Advertissement page 24 3 Mesures de sécurité page 24 4 Renseignements techniques page 27 5 Éclaté page 28 6 Installation et fonctionnement page 28 7 Nettoyage du pistolet et des accesoire page 29 8 Accesoires page 30 9 Conditions de garantie page 31...
-
Página 24: Introduction
SAGOLA. Nous sommes heureux d'avoir aux attentes les plus exigeantes. trouvé un client en vous. Pour savoir comment utiliser correctement Les produits SAGOLA réunissent les plus votre équipement, lisez attentivement ce hautes avancées techniques, design et et la manuel d'instructions. -
Página 25: Procédure De Décompression
Vérifiez que les dispositifs de sécurité de de produit et de réduire ce danger, mais ne l’appareil fonctionnent correctement avant supprime pas totalement les risques de placer chaque utilisation. accidentellement les doigts ou toute autre partie du corps à proximité de la buse de pulvérisation. Vérifiez que les dispositifs de sécurité... -
Página 26: Mise À La Terre
3.2. SÉCURITÉ DU TUYAU dans un local parfaitement aéré. Les différen- tes parties doivent toutes être branchées à la Le produit sous haute pression circulant dans terre, ainsi que les tuyaux, les récipients et les les tuyaux peut être très dangereux. Si une objets à... -
Página 27: Sécurité Au Cours De La Pulvérisation
d) Pistolet de pulvérisation: sa connexion à la h) Afin de maintenir la continuité de la mise à la terre est assurée par un branchement à un terre lors du nettoyage ou de la procédure de tuyau de produit ou directement au pulvérisa- décompression, maintenir fermement... -
Página 28: Éclaté
5. ÉCLATÉ 10 17 Nº Cod. Nº Cod. Nº Cod. Nº Cod. Nº Cod. 85760301 81660001 83660201 85762137 52411984 80860101 86460203 56418002 87460703 84260106 87460402 30010013 57410302 55751802 30010209 85160012 80660407 54251013 84260014 84260047 84260855 57250809 6. INSTALLATION ET FONCTIONNEMENT 6.1. -
Página 29: Nettoyage Du Pistolet Et Des Accesoire
7. NETTOYAGE DU PISTOLET ET DES ACCESOIRE 7.1 Nettoyage du pistolet Puis observez la procédure suivante: Remarque: Si un manuel d’instructions pour le Buse fixe nettoyage vous a été fourni avec l’appareil de 1.- Ouvrez la valve de décompression de pulvérisation, vous devez... -
Página 30: Accesoires
7.3. Remplacement du joint de fermeture 7.- Graissez le nouveau joint torique et placez-le dans le canal correspondant. Avant de démonter un élément du pistolet, assurez-vous que l’appareil n’est plus sous 8.- Introduire l’ensemble aiguille dans son pression logement (corps du pistolet zone du pas de vis), en ayant soin de ne pas endommager le 1.- Nettoyez correctement le pistolet. - Página 31 Débit de sortie de la buse (litres/minute) Orifice Angle de la Largeur de 35 Kg/cm 70 Kg/cm 105 Kg/cm 140 Kg/cm de sortie buse pulvérisation 500PSI 1000PSI 1500PSI 2000PSI 0.007” 0.106 0.152 0.186 0.217 0.18 mm. 0.009” 0.147 0.208 0.255 0.450 0.28 mm.
-
Página 32: Conditions De Garantie
De même, la GARANTIE sera reçu du certificat de garantie dûment rempli ne annulée si l'on constate que l'appareil a été figure pas dans les fichiers de SAGOLA S.A. manipulé par des personnes étrangères au service technique SAGOLA. SAGOLA se réserve le droit d'apporter les modifications techniques opportunes. - Página 36 II 2 G SAGOLA S.A. Urartea, 6 · 01010 Vitoria-Gasteiz · ESPAÑA Tel.: +34 945 214 150 · Fax: +34 945 214 147 e-mail: sagola@sagola.com · web: www.sagola.com...