
Manuales relacionados para CORBERO CCHC SF 45 MEC


Resumen de contenidos para CORBERO CCHC SF 45 MEC
- Página 1 BUILT-IN OVEN Compact oven Horno compacto CCHC SF 45 MEC CCHC SF 4506 DGTL USER MANUAL MANUAL DE INSTRUCCIONES...
- Página 2 Dear Customer, Thank you for relying on this product. We aim to allow you to optimally and efficiently use this environment-friendly product produced in our modern facilities under precise conditions with respect to sense of quality in total. We advise you to read these operating manual thoroughly before using the oven and keep it permanently so that the features of the built-in oven you have purchased will stay the same as the first day for a long time.
-
Página 3: Tabla De Contenido
Contents Important warnings Electrical connection Introducing the appliance Accessories Technical specifications Installation of appliance Control panel Using the oven Program types Cooking recommendations Cooking table Maintenance and cleaning Steam cleaning Cleaning and mounting oven door Cleaning oven glass Catalytic panel Rack positions Replacing oven lamp Troubleshooting... -
Página 4: Important Warnings
IMPORTANT WARNINGS 1. Installation and repair should always be performed by “AUTHORIZED SERVICE”. Manufacturer shall not be held responsible for operations performed by unauthorized persons. 2. Please read this operating instructions carefully. Only by this way you can use the appliance safely and in a correct manner. - Página 5 12. Ensure that the oven door is completely closed after putting food inside the oven. 13. NEVER try to put out the fire with water. Only shut down the device circuit and then cover the flame with a cover or a fire blanket. 14.
- Página 6 21. Put curtains, tulles, paper or any flammable (ignitable) material away from the appliance before starting to use the appliance. Do not put ignitable or flammable materials on or in the appliance. 22. Keep the ventilation channels open. 23. The appliance is not suitable for use with an external timer or a separate remote control system.
- Página 7 33. Do not use the appliance with its front door glass removed or broken. 34. Place the baking paper together with the food into a pre-heated oven by putting it inside a cooker or on an oven accessory. (tray, wire grill etc.) 35.
- Página 8 41. Do not use abrasive cleaners or sharp metal scrapers to clean the glass as the scratches that may occur on the surface of the door glass may cause the glass to break. 42. User should not handle the oven by himself. 43.
- Página 9 Electrical Safety 1. Plug the appliance in a grounded socket protected by a fuse conforming to the values specified in the technical specifications chart. 2. Have an authorized electrician set grounding equipment. Our company shall not be responsible for the damages that shall be incurred due to using the product without grounding according to local regulations.
- Página 10 11. The rear surface of the oven also heats up when the oven is operated. Electrical connections shall not touch the rear surface, otherwise the connections may be damaged. 12. Do not tighten the connecting cables to the oven door and do not run them over hot surfaces. If the cord melts, this may cause the oven to short circuit and even a fire.
- Página 11 19. Fixed connections shall be connected to a power supply enabling omnipolar disconnection. For appliances with over voltage category below III, disconnection device shall be connected to fixed power supply according to wiring code. Intended Use 1. This product has been designed for domestic use. Commercial use is not permitted.
-
Página 12: Electrical Connection
Electrical Connection This oven must be installed and connected to its place correctly according to manufacturer instructions and by an authorized service. Appliance must be installed in an oven enclosure providing high ventilation. Electrical connections of the appliance must be made only via sockets having earth system furnished in compliance with rules. -
Página 13: Introducing The Appliance
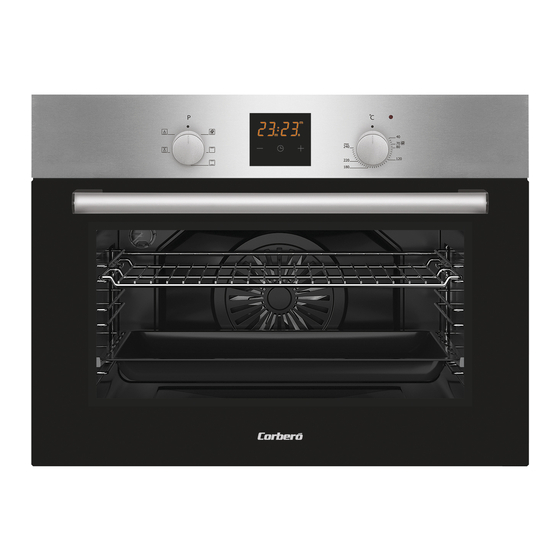
INTRODUCING THE APPLIANCE 1. Control panel 2. Wire grill 3. Standart tray 4. Oven door 5. Handle 6. Lamp... -
Página 14: Accessories
Accessories (optional) Deep tray * Used for pastry, big roasts, watery foods. It can also be used as oil collecting container if you roast directly on grill with cake, frozen foods and meat dishes. Tray Used for pastry (cookie, biscuit etc.), frozen foods. Circular tray * Used for pastry frozen foods. -
Página 15: Technical Specifications
Technical Specifications Specifications 45 cm Built-in oven Lamp power 15-25 W Thermostat 40-240 / Max °C Lower heater 1000 W Upper heater 1000 W Turbo heater 1800 W Grill heater 2000 W Supply voltage 220V-240V 50/60 Hz Technical specifications can be changed without prior notice to improve product quality. - Página 16 Important Warnings for Installation: Cooling fan shall take extra steam out and prevent outer surfaces of appliance from overheating during operation of oven. This is a necessary condition for better appliance operation and better cooking.Cooling fan shall continue operation after cooking is finished.
- Página 17 45 cm Built-In Oven Installation and Mounting Place of use for product must be located before starting installation. Product mustn't be installed in places which are under the effect of strong air flow. Carry the product with minimum two people. Do not drag the product so that floor isn't damaged.
- Página 18 Placing and Securing the Oven Place the oven into the cabin with two or more people. Ensure that oven's frame and front edge of the furniture match uniformly. Supply cord mustn't be under the oven, squeeze in between oven and furniture or bend.
- Página 19 Figure 2 438,5 Figure 3...
- Página 20 Figure 4...
- Página 21 Figure 5 If your product has drawer; Figure 2...
- Página 22 438,5 Figure 3 Figure 3.1...
- Página 23 Figure 4...
-
Página 24: Control Panel
Figure 5 CONTROL PANEL 1. Function button 2. Mechanical or digital timer 3. Thermostat WARNING: The control panel above is only for illustration purposes. Consider the control panel on your device. - Página 25 Thermostat Button: Helps to set cooking temperature of the food to be cooked in the oven. You can set the desired temperature by turning the button after placing the food into the oven. Check cooking table related to cooking temperatures of different foods. Mechanical Timer Button *: Helps to set time for the food to be cooked in the oven.
-
Página 26: Using The Oven
USING THE OVEN Initial Use Of Oven Here are the things you must do at first use of your oven after making its necessary connections as per instructions: 1. Remove labels or accessories attached inside the oven. If any, take out the protective folio on front side of the appliance. -
Página 27: Program Types
PROGRAM TYPES Program Button: Helps to set with which heaters the food placed in oven will be cooked. Heater program types in this button and their functions are stated below. Every model might not have all heater types and thus program types of these heaters. Heating program types in your appliance and important explanations of them are provided below for you can cook different foods appealing to your taste. -
Página 28: Cooking Recommendations
COOKING RECOMMENDATIONS You can find in the following table the information of food types which we tested and identified their cooking values in our labs. Cooking times can vary depending on the network voltage, quality of material to be cooked, quantity and temperature. Dishes to cook by using these values might not appeal to your taste. -
Página 29: Maintenance And Cleaning
MAINTENANCE AND CLEANING 1. Remove the power plug from electrical socket. 2. Do not clean inner parts, panel, trays and other parts of the product with hard tools such as bristle brush, wire wool or knife. Do not use abrasive, scratching materials or detergent. -
Página 30: Cleaning And Mounting Oven Door
Cleaning And Mounting Oven Door Figure 8 Figure 9 Figure 8.1 Figure 8.2 Figure 9.1 Figure 9.2 Open the door fully Set the hinge lock Later, close the For easier removal by pulling the oven to the widest angle opened oven door of oven door, when door toward as in figure 8.2. -
Página 31: Cleaning Oven Glass
Cleaning Oven Glass Lift by pressing on plastic latches on left and right side as shown in figure 10 and pulling the profile toward yourself as in figure 11. Glass is released after profile is removed as shown in figure 12. Remove the released glass by pulling toward yourself carefully. -
Página 32: Rack Positions
Rack Positions It is important to place the wire grill into the oven properly. Do not allow wire rack to touch rear wall of the oven. Rack positions Rack 3 are shown in the next figure. You may place Rack 2 Rack 1 a deep tray or a standard tray in the lower and upper wire racks. -
Página 33: Troubleshooting
TROUBLESHOOTING You may solve the problems you may encounter with your product by checking the following points before calling the technical service. Check Points In case you experience a problem about the oven, first check the table below and try out the suggestions. Problem Possible Cause What to Do... - Página 34 Problem Possible Cause What to Do Water dripping. Water or steam may generate under Steam coming out from a crack on certain conditions depending on Let the oven cool down and than oven door. the food being cooked. This is wipe dry with a cloth.
-
Página 35: Handling Rules
HANDLING RULES 1. Do not use the door and/or handle to carry or move the appliance. 2. Carry out the movement and transportation in the original packaging. 3. Pay maximum attention to the appliance while loading/unloading and handling. 4. Make sure that the packaging is securely closed during handling and transportation. -
Página 36: Environmentally-Friendly Disposal
ENVIRONMENTALLY-FRIENDLY DISPOSAL Dispose of packaging in an environmentally-friendly manner. This appliance is labelled in accordance with European Directive 2012/19/EU concerning used electrical and electronic appliances (waste electrical and electronic equipment - WEEE). The guideline determines the frame work for the return and recycling of used appliances as applicable throughout to the EU. - Página 37 Estimado Cliente, Gracias por confiar en este producto. Nuestro objetivo es que pueda usar de manera óptima y eficiente este producto respetuoso con el medio ambiente fabricado en nuestras modernas instalaciones bajo condiciones óptimas en cuanto a la calidad global. Le aconsejamos leer este manual de instrucciones en su totalidad antes de usar el horno y guardarlo para siempre para que las características del horno incorporado que ha adquirido permanezcan igual que el primer día...
- Página 38 Contenidos Advertencias importantes Conexión eléctrica Presentación del aparato Accesorios Especificaciones técnicas Instalación del aparato Panel de control Uso del horno Tipos de programas Recomendaciones acerca de la cocción Tabla de cocción Mantenimiento y limpieza Limpieza con vapor Limpieza y montaje de la puerta del horno Limpieza del cristal del horno Paredes catalíticas Posiciones del estante...
-
Página 39: Advertencias Importantes
ADVERTENCIAS IMPORTANTES 1. La instalación y la reparación siempre deben ser realizadas por el “SERVICIO AUTORIZADO”. El fabricante no se hace responsable de las operaciones realizadas por personas no autorizadas. 2. Lea atentamente estas instrucciones de funcionamiento. Solo de esta manera puede usar el dispositivo de forma segura y correcta. - Página 40 11. Para limpiar el aparato, no use limpiadores de vapor. 12. Asegúrese de que la puerta del horno esté com- pletamente cerrada después de colocar los alimentos dentro del horno. 13. NO TRATE NUNCA de apagar el fuego con agua. Solo apague el circuito del dispositivo y luego cubra la llama con una cubierta o una manta ignífuga.
- Página 41 19. Los niños no deben jugar con el aparato. La limpieza o el mantenimiento al aparato por parte del usuario no debe ser realizado por niños a menos que sean mayores de 8 años y sean supervisados por adultos. 20. Mantenga el aparato y su cable de alimentación lejos de niños menores de 8 años.
- Página 42 29. Tenga cuidado al usar alcohol en sus alimentos. El alcohol se evaporará a altas temperaturas y puede prenderse fuego y causar un incendio si entra en contacto con superficies calientes. 30. Después de cada uso, verifique si la unidad está apagada.
- Página 43 38. Nunca lo use a temperaturas de horno superiores a la temperatura de uso máxima indicada en su papel de hornear. No coloque el papel de hornear en la base del horno. Con el fin de evitar el riesgo de tocar las partes calientes y quemadores del horno, retire el exceso de papel de hornear colgante del accesorio o contenedor.
-
Página 44: Seguridad Eléctrica
46. El suministro del horno se puede desconectar durante cualquier trabajo de construcción en el hogar. Después de completar el trabajo, vuelva a conectar el horno debe ser hecho por un servicio autorizado. 47. Para evitar el sobrecalentamiento, el aparato no debe instalarse detrás de una cubierta decorativa. - Página 45 4. El cable de alimentación (el cable con enchufe) no debe entrar en contacto con las partes calientes del dispositivo. 5. Si el cable de suministro de energía (el cable con enchufe) está dañado, este cable debe ser reemplazado por el fabricante o su agente de servicio o un personal igualmente calificado para evitar una situación peligrosa.
- Página 46 13. Desenchufe la unidad durante la instalación, mantenimiento, limpieza y reparación. 14. Si el cable de alimentación está dañado, debe ser reemplazado por su fabricante o servicio técnico autorizado o cualquier otro personal calificado en el mismo nivel, para evitar cualquier situación peligrosa. 15.
- Página 47 Uso previsto 1. Este aparato está diseñado para uso en el hogar. El uso comercial del aparato no está permitido. 2. Este aparato solo se puede usar para cocinar. No debe usarse para otros fines, como calentar una habitación. 3. Este aparato no debe usarse para calentar placas debajo de la parrilla, para secar la ropa o las toallas colgándolas en el asa o con fines de calefacción.
-
Página 48: Conexión Eléctrica
Conexión Eléctrica Debe instalar y conectar el horno en su sitio correctamente según las instrucciones del fabricante de la mano de un servicio técnico autorizado. Debe instalar el aparato en una caja para horno con mucha ventilación. Las conexiones eléctricas del aparato debe llevarse a cabo únicamente con enchufescon conexión a tierra, instalados conforme las normativas. -
Página 49: Presentación Del Aparato
PRESENTACIÓN DEL APARATO 1. Panel de control 2. Parrilla 3. Bandeja estándar 4. Puerta del horno 5. Tirador 6. Lámpara... -
Página 50: Accesorios
Accesorios (opcional) Bandeja profunda * Se utiliza para pastelería, fritas y guiso. También puede utilizarla como recipiente de acumular aceite cuando se cocina pastel, comidas congeladas y comidas de carne directamente sobre parrilla. Bandeja / Bandeja vidrio * Se utiliza para pastelería (galleta e.t.c) y alimentos congelados. -
Página 51: Especificaciones Técnicas
Especificaciones Técnicas Especificaciones Horno incorporado de 45 cm Potencia de la lámpara 15-25 W Termostato 40-240 / Max °C Calefactor inferior 1000 W Calefactor superior 1000 W Calefactor turbo 1800 W Calefactor de la parrilla 2000 W Suministro de corriente 220V-240V 50/60 Hz Las especificaciones técnicas pueden modificarse sin previo aviso para mejorar la calidad del producto. - Página 52 Advertencias importantes para la instalación: El ventilador de refrigeración extraerá va- por adicional para evitar el sobrecalenta- miento de las superficies externas duran- te el funcionamiento del horno. Esta es una condición necesaria para una mejor cocción y funcionamiento del aparato. El ventilador de refrigeración seguirá...
- Página 53 Instalación y montaje del horno incorporado de 45 cm Deberá escoger el lugar para la instalación del producto antes de empezar la instalación. No instale el aparato en lugares donde haya fuertes corrientes de aire. Para el traslado del aparato serán necesarias, al menos, dos personas. Para evitar dañar el suelo, no arrastre el aparato.
- Página 54 Fije el horno a los muebles con los tornillos incluidos con el producto. Los tornillos deben colocarse tal como se indica en la figura 5 pasándolos a través de plásticos fijados en el marco del aparato. No apriete los torni- llos en exceso.
- Página 55 Figura 2 438,5 Figura 3...
- Página 56 Figura 4...
- Página 57 Figura 5 Si su producto tiene cajón; Figura 2...
- Página 58 438,5 Figura 3 Figura 3.1...
- Página 59 Figura 4...
-
Página 60: Panel De Control
Figura 5 PANEL DE CONTROL 1. Botón de función 2. Temporizador mecánico o digital 3. Termostato ADVERTENCIA: El panel de mandos de arriba es solo para fines ilustrativos. Considere el panel de mandos en su dispositivo. - Página 61 Botón del termostato: Le ayudará a configurar la temperatura de cocción de los alimentos que vayan a cocinarse en el horno. Gire el botón después de colocar los alimentos en el horno para establecer la temperatura deseada. Compruebe la tabla relacionada con las temperaturas de cocción de varios alimentos.
-
Página 62: Uso Del Horno
USO DEL HORNO Uso inicial del horno Deberá hacer lo siguiente cuando use el horno por primera vez y lleve a cabo las conexiones necesarias según las instrucciones: 1. Retire las etiquetas o los accesorios de dentro del horno. Si los hay, retire el folio de protección del lado frontal del aparato. -
Página 63: Tipos De Programas
TİPOS DE PROGRAMAS Botón del programa: Le ayudará a establecer con qué calefactores se cocerán los alimentos colocados en el horno. A continuación se indican los tipos de programas de calefacción y sus funciones. Puede que no todos los modelos tengan todos los tipos de calefactores y, por consiguiente, los tipos de estos calefactores. -
Página 64: Recomendaciones Acerca De La Cocción
RECOMENDACIONES PARA LA COCCIÓN En la siguiente tabla podrá encontrar información acerca de los tipos de alimentos que hemos probado y de los cuales hemos identificado sus valores de cocción en nuestros laboratorios. Los tiempos de cocción pueden variar según la tensión de red, la calidad, la cantidad y la temperatura del material a cocinar. -
Página 65: Mantenimiento Y Limpieza
MANTENIMIENTO Y LIMPIEZA 1. Retire el enchufe de la toma de corriente. 2. No limpie las piezas internas, el panel, las bandejas y otras piezas del aparato con herramientas sólidas tales como un cepillo de cerdas, lana de acero o cuchillo. No use materiales abrasivos o raspantes ni detergente. 3. -
Página 66: Limpieza Y Montaje De La Puerta Del Horno
Limpieza Y Montaje De La Puerta Del Horno Figura 7 Figura 8 Figura 7.1 Figura 7.2 Figura 8.1 Figura 8.2 Abra la puerta Fije el bloqueo de Más adelante, Para poder retirar totalmente tirando bisagra al mayor cierre la puerta la puerta del horno de ella hacia ángulo tal como se... -
Página 67: Limpieza Del Cristal Del Horno
Limpieza Del Cristal Del Horno Levántelo presionando los lotes de plástico tanto en los lados izquierdo y derecho como se muestra en la figura 9 y tirándolo hacia usted mismo como se muestra en la figura 10. El cristal se soltará después de retirar el perfil tal como se indica en la figura 11. -
Página 68: Recambio De La Luz Del Horno
Instalación y eliminación de estantes de alambre Para quitar los estantes de alambre, presione los clips que se muestran con las flechas en la figura, primero quite la parte inferior y la parte superior de la ubicación de instalación. Para instalar estantes de alambre, invierta el procedimiento para quitar el estante de alambre. -
Página 69: Solución De Problemas
SOLUCIÓN DE PROBLEMAS Puede resolver los problemas que puede encontrar con su producto al verificar los siguientes puntos antes de llamar al servicio técnico. Puntos de verificación En caso de que experimente un problema con el horno, primero revise la tabla a continuación y pruebe las sugerencias. Problema Causa probable Qué... - Página 70 Problema Causa probable Qué hacer Goteo de agua El agua o el vapor se pueden generar bajo ciertas condiciones Sale vapor de una grieta en la puerta Deje que el horno se enfríe y luego dependiendo de la comida que del horno.
-
Página 71: Reglas De Manipulación
REGLAS DE MANIPULACIÓN 1. No use la puerta y/o el asa para transportar o mover el aparato. 2. Realice el movimiento y el transporte en el embalaje original. 3. Preste la máxima atención al aparato mientras es cargado / descargado y manipulado. -
Página 72: Eliminación Respetuosa Con El Medio Ambiente
ELIMINACIÓN RESPETUOSA CON EL MEDIO AMBIENTE Deshágase del embalaje de una manera respetuosa con el medio ambiente. El aparato está etiquetado según la directiva europea 2012/19/EU sobre aparatos eléctricos y electrónicos usados (residuos de equipo eléctrico y electrónico - WEE por sus siglas en inglés). -
Página 73: Certificado De Garantia
Servicio Asistencia Técnica Atención al cliente: 902 107 122 CERTIFICADO DE GARANTIA Imprescindible la presentación de la factura de compra acompañada del presente certificado de garantía RIESGOS CUBIERTOS Este aparato está garantizado contra cualquier defecto de funcionamiento, siempre que se destine a uso doméstico, procediéndose a su reparación dentro del plazo de garantía y sólo por la red de SAT Autorizados.