
Manuales relacionados para Dog trace GPS X20+


Resumen de contenidos para Dog trace GPS X20+
- Página 1 GPS VYHLEDÁVACÍ ZAŘÍZENÍ GPS TRACKING SYSTEM GPS HUNDEORTUNGSGERÄT SISTEMA DE LOCALIZACIÓN GPS...
- Página 2 PROHLÁŠENÍ O SHODĚ Výrobce: VNT electronics s.r.o. Dvorská 605 563 01 Lanškroun IČO: 64793826 prohlašuje, že níže uvedený výrobek: Dogtrace DOG GPS X20+ je v souladu se směrnicí Rady Evropy 2014/53/EC, splňuje požadavky Generální licence Českého telekomunikačního úřadu podle všeobecného oprávnění č.
-
Página 3: Tabla De Contenido
OBSAH 2 Důležitá upozornění . . . . . . . . . . . . . . . . . . . . . . . . . . . . . . . . . . . . . . . . . . . . . . . . . . . . . . 4 3 ECMA . -
Página 4: Důležitá Upozornění
DŮLEŽITÁ UPOZORNĚNÍ Před použitím výrobku pečlivě prostudujte návod k použití. Nenechávejte psovi vysílač s obojkem na krku po dobu delší než 12 hodin denně. Dlouhodobé působení obojku na kůži psa může způsobit její podráždění. Pokud se tak stane, nepoužívejte DOG GPS, dokud všechny stopy podráždění nezmizí. Nepokládejte přijímač... -
Página 5: Úvod
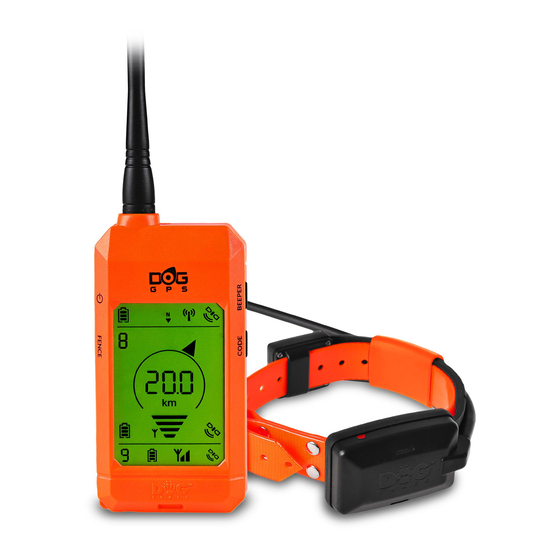
ÚVOD DOG GPS X20 je zařízení sloužící pro vyhledávání (lokalizaci) vašich psů až na vzdálenost 20 km. Skládá se z vysílače, který je umístěn na obojku psa a přijímače (ručního zařízení), na kterém psovod sleduje vzdálenost a směr k poloze psů. Vysílač svoji polohu získává... -
Página 6: Popis Zařízení
POPIS ZAŘÍZENÍ 5.1 Vysílač (obojek) 1. Vysílač 2. Indikační kontrolky 3. Nabíjecí kontakty 4. Terčík (půlkulatý červený bod) pro přiložení magnetu (zapnutí/vypnutí vysílače) 5. RF anténa 6. GPS anténa 7. Řemen (obojek) 5.2 Přijímač (ruční zařízení) 9. Klips pro zavěšení na opasek 1. - Página 7 tlačítko krátký stisk dlouhý stisk zapnutí/vypnutí zapnutí/vypnutí přijímače podsvícení displeje zpět do základní FENCE aktivace funkce FENCE obrazovky nastavení funkce BEEPER nahoru BEEPER - detekce pohybu psa párování - kódování dolu CODE vysílače s přijímačem CAL - kalibrace digitálního kompasu + BEEPER zapnutí/vypnutí...
-
Página 8: Napájecí Adaptér A Kabel S Nabíjecím Klipsem
Displej 1. Přesnost GPS pozice přijímače (ručního 11. Stav nabití akumulátoru dalšího zařízení) vysílače 2. Přesnost GPS pozice vysílače (obojku) 12. Vzdálenost vysílače od přijímače 3. Přesnost GPS pozice dalšího vysílače 13. Kompas - směr k magnetickému 4. Síla RF přijímaného signálu od vysílače severu 5. -
Página 9: Příprava Vysílače (Obojku)
PŘÍPRAVA VYSÍLAČE (OBOJKU) 6.1 Nabíjení vysílače Vysílač GPS obsahuje Li-Pol akumulátor. Před prvním použitím je nutné akumulátor nabít. 1. Odstraňte nečistoty z nabíjecích kontaktů. Připojte nabíjecí klips k vysílači (viz obrazek). 2. Kabel připojte k napájecímu adaptéru, který následně zapojte do elektrické sítě. 3. -
Página 10: Interval Aktualizace (Vysílání) Polohy
2. Po rozsvícení červené kontrolky oddalte přijímač od vysílače. Vysílač přestane blikat. 6.4 Interval aktualizace (vysílání) polohy DOG GPS X20 umožňuje volbu intervalu - rychlosti aktualizace polohy vašeho psa. Čím častěji vysílá obojek svojí polohu, tím máte aktuálnější informaci o poloze psa. 1. -
Página 11: Kontrola Stavu Akumulátoru V Přijímači
UPOZORNĚNÍ: Akumulátor nabíjejte v prostředí s teplotou od 0° do 40 °C. K nabíjení používejte originální napájecí adaptér dodaný výrobcem. Při použití jiného – nevhodného, by mohlo dojít k nenávratnému poškození akumulátoru. 7.2 Kontrola stavu akumulátoru stav nabití přijímač v přijímači 100% Stav akumulátoru v přijímači je indikovaný... - Página 12 Spuštění kalibrace Pokud znáte směr k severnímu magnetickému pólu, můžete rovnou přejít k bodu 2. 1. Stiskněte současně spodní dvě tlačítka po dobu 2 sekund - spustíte kalibraci. Poté postupně rotujte zařízením kolem každé ze tří os (viz obr. č. 1, 2 a 3). Kalibraci ukončíte stiskem tlačítka zpět.
-
Página 13: Funkce Dog Gps X20
FUNKCE DOG GPS X20 8.1 Vyhledávání Vysílač (obojek) i přijímač (ruční zařízení) mají v sobě zabudovaný GPS přijímač, pomocí kterého oba zjišťují svoji polohu. Vysílač informaci o své poloze posílá pomocí radiového signálu (RF) do přijímače, který zobrazí na displeji směr a vzdálenost psa od psovoda. Displej přijímače je rozdělen do třech částí: Informační... -
Página 14: Waypoint - Uložení Pozice Přijímače
Při zapnutí této funkce musí být přijímač na dobrém GPS signálu: 1. Zvolte v hlavním panelu navigace číslo psa, u kterého chcete zapnout funkci FENCE. 2. Stiskněte dlouze tlačítko FENCE. 3. Šipkami nastavíte vzdálenost akustické hranice. 4. Krátkým stiskem se vrátíte do hlavní obrazovky. Po zapnutí... -
Página 15: Funkce Beeper
UPOZORNĚNÍ: Uložením waypointu na pozici, na které máte spárovaný vysílač, tento vysílač z paměti přijímače smažete. 8.5 Funkce BEEPER Funkci BEEPER využijí hlavně myslivci/lovci pro rozlišení intenzity pohybu nebo přítomnosti psa u divokého prasete. Módy 0, 1, 2, 5, 6 slouží k informaci, zda je pes v pohybu, nebo nehybně stojí (vystavuje zvěř). - Página 16 UPOZORNĚNÍ: Zvukovou i vibrační indikaci lze nastavit maximálně pro 4 psy, vizuální indikace je nastavitelná pro 9 psů. Při nastavení indikace zvukové a vibrační lze jednotlivé psy rozeznat podle počtu pípnutí/vibrace (max. počet jsou 4 pípnutí či vibrace) označující pohyb/klid psa. Pokud je zvuková a vibrační indikace nastavena pro více psů, vibrace a zvuk probíhá...
-
Página 17: Poradce Při Potížích
8.6 CAR mode Karoserie a elektronika v automobilu může ovlivnit funkci digitálního kompasu v přijímači – směr k sledovanému psovi nemusí být zobrazen správně. Při aktivaci CAR módu nebude směr k psovi určován z digitálního kompasu, ale ze změny pozice GPS přijímače. -
Página 18: Údržba Zařízení
6. V případě nepřesné indikace směru psa od vás, proveďte znovu správně kalibraci kompasu – viz kapitola: 7.5 Kalibrace digitálního kompasu na str. 11. 7. Pokud zařízení neukazuje přesně polohu, zkalibrujte kompas, vyhledejte co nejlepší signál GPS a přesvědčte se, že antény RF a GPS na obou zařízeních směřují k nebi. 8. -
Página 19: Záruční Podmínky
ZÁRUČNÍ PODMÍNKY Firma VNT electronics s.r.o. poskytuje na výrobek záruku v případě výrobní závady v délce dvou let od zakoupení. Záruka nepokrývá následující položky: akumulátory řemeny (obojky) přímá nebo nepřímá rizika během dopravy výrobku ke kupujícímu mechanické poškození výrobku způsobené nedbalostí uživatele nebo nehodou (např. rozkousáním, rozbitím, nárazem, taháním za oko řemene obojku nadměrnou silou apod.) 1. -
Página 20: Declaration Of Conformity
DECLARATION OF CONFORMITY VNT electronics s.r.o. Dvorská 605 563 01 Lanškroun IČO: 64793826 declare under own responsibility that the product: Dogtrace DOG GPS X20+ is in compliance with the essential requirements and other relevant provisions of Directive 2014/53/EC, meets requirements of General Licence of The Czech telecommunication office according to general licence no. - Página 21 CONTENTS 2 Important notice . . . . . . . . . . . . . . . . . . . . . . . . . . . . . . . . . . . . . . . . . . . . . . . . . . . . . . . . 22 3 ECMA .
-
Página 22: Important Notice
IMPORTANT NOTICE Carefully study the instructions for use prior using the product. The collar should never be worn for more than 12 hours a day. Long-term effect of the collar on the dog’s skin can cause skin irritation. If a rash or sore skin is found, do not use the DOG GPS until it has healed. -
Página 23: Introduction
INTRODUCTION DOG GPS X20 is a device used for detection (localization) of your dog up to a distance of 20 km. It consists of a transmitter, which is placed on the dog collar and a receiver (handheld device) on which the handler monitors the position and the distance of the dogs. -
Página 24: Product Description
PRODUCT DESCRIPTION 5.1 Transmitter (collar) 1. Transmitter 2. LED indicators 3. Charging contacts 4. Target, (half round red indicator) indicating where the magnetic switch is located 5. RF antenna 6. GPS antenna 7. Strap (collar) 5.2 Receiver (handheld device) 1. - 4. Buttons (see the table on pg. 25) 9. - Página 25 Button Short press Long press backlight ON/OFF switch switch ON/OFF back to the main FENCE function FENCE activation screen function BEEPER activation BEEPER – detection of dog motion pairing – programming CODE down transmitter with receiver CAL – Calibration of the electronic compass CAR mode OFF/ON + BEEPER...
- Página 26 Display 1. Indicator of the GPS position accuracy of 10. The accumulator charge status of the receiver (handheld device) the transmitter 2. Indicator of the GPS position accuracy of 11. The accumulator charge status of the transmitter (collar) the next transmitter 3.
-
Página 27: Power Supply Adapter And Cable With A Rechargeable Clip
5.3 Power supply adapter and cable with a rechargeable clip 1. Power supply adapter 2. USB cable 3. Charging clip TRANSMITTER PREPARATION (COLLAR) 6.1 Transmitter charging Transmitter GPS contains Li-Pol accumulator. The accumulator must be recharged before first use. 1. Before charging clean the transmitter charging con- tacts from any dirt. -
Página 28: Switching The Transmitter (Collar) On/Off
6.3 Switching the transmitter (collar) ON/OFF To turn the transmitter ON/OFF is used a magnetic switch, which is activated by enclosing a magnet. Magnet is placed in receiver, marked with the red target (half round target on the bottom part of the receiver). Switching ON: 1. -
Página 29: Receiver Preparation (Handheld Device)
RECEIVER PREPARATION (HANDHELD DEVICE) 7.1 Receiver charging Receiver contains Li-Pol accumulator. Before first use, the accumulator must be recharged. 1. Before charging clean the receiver charging contacts from any dirt. Connect the charging clip to the receiver (see the picture). 2. -
Página 30: Digital Compass Calibration
7. If you need to pair another transmitter, follow the procedure from the step 3. 8. To finish the regime of pairing – coding press the button Note: To delete one of the paired transmitters (collars) from the receiver memory, perform pairing without switched on transmitter. -
Página 31: Functions Of Dog Gps X20
picture no. 5 picture no. 6 picture no. 7 WARNING: Accuracy of the direction arrow (pointing to the north) depends on the correct calibration of the electronic compass. Calibrate properly again, when the indication of the direction to the dog is inaccurate. If we place the transmitter in the vicinity of a magnetic field of another object or device, the digital compass may lose calibration –... -
Página 32: Compass Function - North Determination
Indicated statuses on the receiver display: – receiver has not received information about the position of the dog from the transmitter in a longer period of time. – indicator of the RF signal strength flashes – the information about the location of the chosen collar was received. -
Página 33: Waypoint - Storing The Receiver Position
Switching off the function FENCE: 1. Select the required dog number in the main navigation panel, for whom you want to switch off the function FENCE. 2. Press and hold the button FENCE. 3. Using the arrows set OFF. 4. Briefly press to return to the main navigation panel. - Página 34 3. In the ON mode move the target zones of the transmitter and receiver near to each other (just like during activation) and hold them together for 3 seconds – until an increasing tone is heard. 4. Move the receiver far from the transmitter. If you activated the function properly, the message BEEPER will appear on the display of the receiver in the main navigation panel.
-
Página 35: Car Mode
Setting the sensitivity – : Setting the sensitivity for modes 0, 1, 2, 5, 6 serves for more precise recognition between moving/stationary dog. S-1: Lower sensitivity – the dog is considered stationary even when it is moving al little bit. S-9: High sensitivity –... -
Página 36: Maximum Range And Gps Accuracy
and the BEEPER button This mode will be deactivated in the same way – push both simultaneously for 2 seconds. A message will be shown on the display. For proper operation, it is necessary to keep the RF receiver with its antenna in the direction of travel while moving (speed higher than 1 m/s). -
Página 37: Device Maintanance
DEVICE MAINTANANCE To clean your device DOG GPS X20 never use volatile substances, such as.: thinner, gasoline or other cleaners. Use a soft, damp cloth and neutral cleaner. If the device is not in use for longer period of time, charge the accumulator at least once a year. -
Página 38: Warranty Terms And Conditions
WARRANTY TERMS AND CONDITIONS VNT electronics s.r.o . provides a 2 year warranty on the Dogtrace products with respect to defects in material and workmanship under normal use and service from the date of the original purchase. The limited warranty does not cover the following: accumulators straps direct or indirect risks during transportation of the product to the retailer... -
Página 39: Konformitätserklärung
KONFORMITÄTSERKLÄRUNG Hersteller: VNT electronics s.r.o. Dvorská 605 563 01 Lanškroun Id. Nr.: 64793826 erklärt hiermit, dass das unten angeführte Erzeugnis: Dogtrace DOG GPS X20+ in Übereinstimmung mit der Richtlinie vom Europäischen Rat Nr. 2014/53/EC ist, die Anforderungen von General Lizenz des Tschechischen Amtes für Telekommunikationen nach allgemeiner Berechtigung Nr. - Página 40 INHALT 2 Wichtige Hinweise . . . . . . . . . . . . . . . . . . . . . . . . . . . . . . . . . . . . . . . . . . . . . . . . . . . . . . . 41 3 ECMA .
-
Página 41: Wichtige Hinweise
WICHTIGE HINWEISE Vor dem Gebrauch des Produkts lesen Sie sorgfältig die Gebrauchsanweisung. Lassen Sie den Hund den Sender mit dem Halsband nicht länger als 12 Stunden täglich tragen. Langfristige Wirkung von Kontaktpunkten auf der Haut des Hundes kann Irritationen hervorrufen. Falls so was passiert, benutzen Sie das DOG GPS nicht, bis sämtliche Merkmale der Irritation verschwunden sind. -
Página 42: Einleitung
erfüllen die neuesten technischen Normen und Sicherheitsparameter und deren Einhaltung wird streng kontrolliert. Die ECMA Association ist davon überzeugt, dass die elektronischen Hundezuchthalsbänder unter verantwortlicher Benutzung und im Zusammenhang mit einer Entlohnung und einem Lob effektive und menschenwürdige Ausbildungsmittel für professionelle Hundezucht, für die Zucht von Hunden mit problematischem Benehmen und auch für tägliche häusliche Benutzung darstellen. -
Página 43: Verpackung-Inhalt
4.2 Verpackung-Inhalt Empfänger inklusive des wieder aufladbaren Akkus Clip für Aufhängung des Empfängers am Gürtel und zwei Schrauben Sender inklusive des wieder aufladbaren Li-Pol 1850 mAh Akkus und des Halsbandes Stromversorgungsadapter dual, 2 Stck. USB-Kabel mit GPS-Lade-Clip Band fürs Aufhängen des Empfängers Betriebsanleitung und Garantieschein Koffer 4.3 Optionales Zubehör... -
Página 44: Empfänger (Handsteuerung)
5.2 Empfänger (Handsteuerung) 1. - 4. Tasten (siehe Tabelle) 9. Clip fürs Aufhängen am Gürtel 5. RF-Antenne 10. Aufhängung für Band 6. GPS-Antenne 11. Ladekontakte 7. Display 8. Target (halbrunder roter Punkt) Bezeichnung der Magnetlage fürs Einschalten des Empfängers Taste Kurzdruck Langdruck Einschalten/Ausschalten... - Página 45 Display 1. Genauigkeit des GPS-Signals am 10. Ladezustand des Akkus des Empfänger (Handsteuerung) Senders 2. Genauigkeit der GPS-Position des 11. Ladezustand des Akkus des Senders (Halsbandes) nächsten Senders 3. Genauigkeit des GPS-Signals des 12. Abstand zwischen dem Sender nächsten Senders und dem Empfänger 4.
-
Página 46: Stromversorgungsadapter Und Das Kabel Mit Einem Ladeclip
5.3 Stromversorgungsadapter und das Kabel mit einem Ladeclip 1. Stromversorgungsadapter 2. USB-Kabel 3. Ladeclip VORBEREITUNG DES SENDERS (HALSBANDES) 6.1 Ladung des Senders Der GPS-Senders enthält einen Li-Pol-Akku. Der Akku muss vor der ertsen Benutzung geladen werden. 1. Beseitigen Sie Verunreinigungen aus den Ladekon- takten. -
Página 47: Einschalten/Ausschalten Des Senders
6.3 Einschalten/Ausschalten des Senders Zum Ein-/Ausschalten des Senders ist ein System mit Magnetschalter bestimmt, das durchs Anlegen eines Magnetes aktiviert wird. Der Magnet befindet sich im Empfänger an der Stelle des roten Targets (halbrunder Punkt im unteren Teil des Empfängers). Einschalten: 1. -
Página 48: Rüsten Des Empfängers (Handsteuerung)
frei atmen und das Futter fressen kann. Wir empfehlen, das Halsband am stehenden Hund anzulegen. Lassen Sie den Hund den Sender mit dem Halsband nicht länger als 12 Stunden täglich tragen. Langfristige Wirkung von Kontaktpunkten auf die Haut des Hundes kann Irritationen hervorrufen. Falls so was passiert, benutzen Sie das DOG GPS nicht, bis sämtliche Merkmale der Irritation verschwunden sind. -
Página 49: Paarung Des Senders (Halsbandes) Mit Dem Empfänger
7.4 Paarung des Senders (Halsbandes) mit dem Empfänger 1. Schalten Sie den Empfänger und den Sender, die Sie miteinander paaren wollen ein - weitere Sender sind auszuschalten. 2. Drücken Sie die CODE-Taste am Empfänger und halten diese für 2 Sekunden. 3. -
Página 50: Eigenschaften Von Dog Gps X20
Bild Nr. 1 Bild Nr. 2 Bild Nr. 3 Bild Nr. 4 3. Führen Sie mindestens 10 Drehungen immer Richtung Norden durch, wie unten auf den Bildern. Um die hochwertige Kalibrierung durchzuführen, sollte jede einzelne Drehung mit kleiner Abweichung gegen die Nord-Richtung ausgeführt werden. -
Página 51: Suchen
EIGENSCHAFTEN VON DOG GPS X20 8.1 Suchen Der Sender (Halsband) und Empfänger (Handsteuerung) haben einen GPS-Empfänger eingebaut, der für die Ermittlung der Lage verantwortlich ist. Der Sender sendet die Informationen über seine Lage mittels des Radiosignals (RF) zum Empfänger, der die Richtung und Entfernung des Hundes im Display anzeigt. -
Página 52: Fence-Funktion - Akustische Grenze
8.3 FENCE-Funktion – akustische Grenze Die FENCE-Funktion wird Sie darauf aufmerksam machen, dass Ihr Hund sich hinter der Grenze des bestimmten Bereiches befindet. Die Grenze ist im Kreis des Empfängers höchstens 2 km von TK; Die FENCE-Funktion kann für mehrere Hunde aktiviert werden, die Einstellung wird für jeden Hund separat gespeichert. -
Página 53: Waypoint - Speichern Der Empfängerposition
8.4 WAYPOINT – Speichern der Empfängerposition Die Waypoint-Funktion ermöglicht das Speichern der GPS-Koordinaten des Ortes, an dem sich der Empfänger (Handsteuerung) aktuell befindet. Zum gespeicherten Punkt können Sie sich später navigieren lassen. In einem Empfänger können bis zu 4 Wegpunkte (Waypoints) gespeichert werden. Speicherung eines Wegpunkts: 1. - Página 54 Falls die Funktion richtig aktiviert wurde, wird die BEEPER-Aufschrift in der Haupttafel der Navigation im Display des Empfängers angezeigt. In oberer Zeile im Display wird die BEEPER-Aufschrift angezeigt, wenn die Funktion mindestens am Sender eines von den Hunden aktiviert wurde. Einstellung der BEEPER-Funktion: Die BEEPER-Funktion muss vor der Jagd richtig eingestellt werden.
-
Página 55: Car Mode
Einstellung der Empfindlichkeit ─ : Einstellung der Empfindlichkeit für die Modi 0, 1, 2, 5, 6 dient zu einer genaueren Unterscheidung des Zustands Bewegung/Stillstand des Hundes. S-1: Niedrigste Empfindlichkeit – damit der Stillstand ausgewertet wird, kann sich der Hund geringfügig bewegen. S-9: Hohe Empfindlichkeit –... -
Página 56: Maximale Reichweite Und Genauigkeit Vom Gps
Einschalten/Ausschalten des Car-Modus: 1. Drücken Sie zugleich die Tasten und BEEPER während 2 Sekunden. 2. Im Display wird die Aufschrift angezeigt. Dieser Modus wird auf die gleiche Weise ausgeschaltet – drücken Sie zugleich die Tas- und BEEPER während 2 Sekunden. Im Display wird die Aufschrift angezeigt. -
Página 57: Wartung Der Anlage
6. Im Fall der nicht genaueren Anzeige der Richtung des Hundes, führen Sie die Kalibrierung des Kompasses erneut aus, siehe Kapitel: 7.5 Kalibrierung des digitalen Kompasses Seite 49. 7. Im Fall der nicht genaueren Anzeige der Position, führen Sie die Kalibrierung des Kompasses erneut durch. -
Página 58: Technische Daten
TECHNISCHE DATEN Empfänger (Handsteuerung) Versorgung ..........Akku Li-Pol 1850 mAh Bereitschaftsmode des Akkus . -
Página 59: Garantiebedingungen
GARANTIEBEDINGUNGEN Firma VNT electronics s.r.o. Die Firma von VNT electronics s.r.o. gewährt die Garantie bei eventuellen Herstellungsfehlern bis zu zwei Jahre nach dem Einkauf. In der Garantie sind folgende Posten nicht enthalten: Akkus, Gürtel Halsbänder direkte oder indirekte Risiken während des Transports des Produkts zum Verkäufer mechanische Beschädigungen des Produkts, die durch Fahrlässigkeit des Benutzers oder durch Unfälle verursacht wurden (z.B. -
Página 60: Declaración De Conformidad
DECLARACIÓN DE CONFORMIDAD Nosotros: VNT electronics s.r.o. Dvorská 605 563 01 Lanškroun IČO: 64793826 declaramos, bajo nuestra responsabilidad, que el producto: Dogtrace DOG GPS X20+ cumple con los requisitos fundamentales y otras disposiciones pertinentes de la Directiva 2014/53/EC, Cumple con los requisitos de la Licencia General de la Oficina de Telecomunicaciones Checa, según la licencia general nº... - Página 61 CONTENIDOS 2 Aviso Importante . . . . . . . . . . . . . . . . . . . . . . . . . . . . . . . . . . . . . . . . . . . . . . . . . . . . . . . . 62 3 ECMA .
-
Página 62: Aviso Importante
AVISO IMPORTANTE Lea las instrucciones atentamente antes de usar este producto. Nunca acerque el mando o el collar a objetos sensibles a campos magnéticos pues podría dañarlos de forma permanente. No acerque el mando a objetos que generen campo magnético. Podría afectar a la brújula electrónica interna de este. -
Página 63: Introducción
INTRODUCCIÓN DOG X20 GPS es un dispositivo usado para la localización de su perro dentro de un rango de 20 km de distancia. Consiste en un transmisor, ubicado en el interior del collar y un receptor en el mando, desde el cual el usuario monitorea la posición y la distancia de los perros. -
Página 64: Descripción Del Producto
DESCRIPCIÓN DE PRODUCTO 5.1 Collar transmisor 1. Transmisor 2. Indicadores LED 3. Contactos de carga 4. Indicador de semicírculo rojo. Indica dónde se sitúa el interruptor magnético. 5. Antena RF 6. Antena GPS 7. Correa 5.2 Mando receptor 1. - 4. Botones (ver tabla en pág. 65) 9. - Página 65 Botón Pulsación corta Pulsación larga IIluminación de panta- Interruptor ON/OFF lla ON/OFF Volver a la pantalla FENCE Activar función FENCE principal Activar función BEEPER – detec- BEEPER arriba ción de movimiento del perro Sintonización del transmisor CODE abajo con el receptor CAL –...
- Página 66 Pantalla 1. Indicador de precisión de posición GPS del 10. Estado de carga de la batería mando receptor. del collar transmisor. 2. Indicador de precisión de posición GPS del 11. Estado de carga de la batería collar transmisor. del siguiente collar transmisor. 3.
-
Página 67: Adaptador De Corriente Y Cable Con Clip De Carga
5.3 Adaptador de corriente y cable con clip de carga 1. Adaptador de corriente 2. Cable USB 3. Clip de carga PREPARACIÓN DEL COLLAR TRANSMISOR 6.1 Cargar el collar transmisor El collar transmisor GPS contiene una batería Li-Pol. Esta debe cargarse antes del primer uso. 1. -
Página 68: Encendido Y Apagado Del Collar Transmisor
6.3 Encendido y apagado del collar transmisor El encendido y apagado del collar transmisor se da a través de un interruptor magné- tico, activado mediante el acercamiento de un imán. Dicho imán se ubica en la parte inferior del mando receptor (marcado con un semicírculo rojo). Encendido: 1. -
Página 69: Preparación Del Mando Receptor
collar al perro durante más de 12 horas al día. Un roce continuado sobre la piel del perro podría causarle irritación. Si detecta un sarpullido o una herida en la piel del animal, deje de utilizar el DOG GPS hasta que se haya curado. PREPARACIÓN DEL MANDO RECEPTOR 7.1 Cargar el mando receptor El mando receptor contiene una batería Li-Pol. -
Página 70: Calibración De La Brújula Digital
4. Pulse y mantenga pulsado el botón CODE nuevamente durante 2 segundos. 5. Acerque el collar al mando de forma que sus respectivas antenas RF queden parale- las la una a la otra. 6. Cuando esté sintonizado, la pantalla mostrará el texto hasta (número acorde con la posición seleccionada para el collar sintonizado). -
Página 71: Funciones Del Dog Gps X20
3. Apuntando al norte, efectúe un mínimo de 10 rotaciones tal y como se muestra en la imagen nº5. y nº6. Para un calibrado preciso, cada rotación individual debe hacerse con el mínimo desvío respecto al norte magnético (imagen nº7). Cuantas más rotaciones efectúe y más lentas sean estas, más precisión obtendrá... -
Página 72: Función Brújula. Fijación Del Norte
Nota: Si el indicador de dirección y distancia parpadea, significa que el mando re- ceptor no ha recibido información acerca de la posición GPS del perro durante un período de tiempo prolongado, o que el mando receptor o el collar transmisor no disponen de señal GPS. -
Página 73: Waypoint - Memorizado De La Posición Del Mando
o el collar transmisor no disponen de señal GPS o RF. Esto puede ocurrir si el perro entra en un edificio (donde no recibe señal GPS), se desplaza más allá del alcance de la señal RF o la batería del collar transmisor se ha agotado. Desconectar la función FENCE: 1. -
Página 74: Función Beeper
8.5 Función BEEPER La función BEEPER la usan principalmente cazadores o guardabosques para indicar si el perro está en carrera o en muestra. Activar la función BEEPER: 1. Encienda el collar transmisor – Vea la sección 6.3 Encendido y apagado del collar transmisor en la página 68. - Página 75 PRECAUCIÓN: Las señales acústica y de vibración pueden programarse para un máximo de 4 perros. La señal visual es programable en 9 perros. Cuando se configura la señal de audio y vibración, los perros individuales pueden ser identificados mediante el número de pitidos o vibraciones (máx. 4 pitidos o vibraciones) indicando si el perro está...
-
Página 76: Car Mode
Ajuste del volumen de la señal acústica – : La señal acústica puede ajustarse en 3 niveles. El nivel de volumen seleccionado afecta- rá a las otras funciones (función FENCE). 8.6 CAR MODE El propio vehículo y sus componentes electrónicos pueden afectar a la brújula electrónica del mando, de forma que la dirección del perro monitorizado puede no mostrarse correctamente. -
Página 77: Solución De Problemas
SOLUCIÓN DE PROBLEMAS 1. Lea de nuevo el manual y asegúrese de que el problema no se debe a un nivel de batería bajo en el mando receptor o en el collar transmisor. Cargue la batería si fuese necesario. 2. Si la batería se descarga rápidamente puede deberse a que la vida útil de esta se está agotando. -
Página 78: Especificaciones Técnicas
ESPECIFICACIONES TÉCNICAS Mando receptor Fuente de alimentación ........Batería Li-Pol 1850 mAh Duración de una carga de batería . -
Página 79: Garantía
GARANTÍA VNT electronics s.r.o. ofrece una garantía de reparación gratuita de cualquier material defectuoso del equipo durante dos años a partir de la fecha de compra. Esta garantía excluye: Baterías Correas Riesgos directos o indirectos durante el transporte del producto al comercio Daños mecánicos causados por negligencia del usuario o por accidente (por ejemplo, mordeduras, roturas, impactos, tirar en exceso de la anilla de sujeción de la correa, etc.).