Publicidad
Idiomas disponibles
Idiomas disponibles
Enlaces rápidos
UK - Installation and Operating Instructions
FR - Manuel d'installation et d'utlisation
ES - Instrucciones para montaje e instalación
IT
- Manuale di installazione ed uso
NL - Installatie- en montagehandleiding
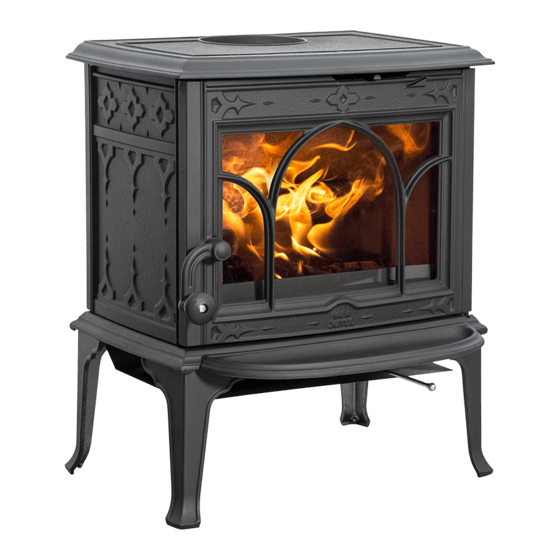
Jøtul F 100 ECO LL
Manualen må oppbevares under hele produktets levetid. Manualen skal opbevares under hele produktets levetid.
Manualen skall sparas under hela produktens levtid. Käyttöohje on säilytettävä tuotteen koko käyttöiän ajan.
Jøtul F 100 ECO LL SE
Jøtul F 100 ECO
Jøtul F 100 ECO SL
4
19
33
47
61
Jøtul F 100 ECO SL SE
Publicidad
Capítulos
Solución de problemas

Manuales relacionados para Jøtul F 100 ECO Serie


Resumen de contenidos para Jøtul F 100 ECO Serie
- Página 1 Jøtul F 100 ECO UK - Installation and Operating Instructions FR - Manuel d’installation et d’utlisation ES - Instrucciones para montaje e instalación - Manuale di installazione ed uso NL - Installatie- en montagehandleiding Jøtul F 100 ECO LL Jøtul F 100 ECO LL SE Jøtul F 100 ECO SL Jøtul F 100 ECO SL SE Manualen må...
- Página 3 EU no. 215/1186 - 24/04/2015...
-
Página 4: Tabla De Contenido
ENGLISH 1.0 Relationship to the Table of contents authorities Installation manual with technical data • Installation of a fi replace must be according to local codes 1.0 Relationship to the authorities ......4 and regulations in each country. • All local regulations, including those which refer to national and European standards, must be observed when 2.0 Technical data ............ -
Página 5: Safety
ENGLISH 3.0 Safety • Allow the fi re to burn out. Never extinguish the fl ames with water. • The fi replace becomes hot when lit and may cause burns NB! To guarantee optimal performance and safety, Jøtul if touched. recommends that its stoves are fi... - Página 6 ENGLISH...
-
Página 7: Installation
ENGLISH 4.0 Installation 3.3 Walls • Before installing the fi replace, check it carefully for any Distance to wall of fl ammable material - signs of damage. see fi g. 1 • The product is heavy! Ask someone to help you when The stove must be installed with a CE approved fl... - Página 8 ENGLISH Requirement for UK 4.2 Installation “The Jotul F 100 Eco stoves have been recommended as Assembly of fl ue pipe with top outlet suitable for use in smoke control areas when burning wood logs and when fi tted with a mechanical stop to prevent primary The product is assembled for a top outlet as standard.
- Página 9 ENGLISH Fig. 6 Fig. 8 3. Install the fl ue pipe into the fl ue outlet. 2. Mount the fl ue outlet (A) into the rear outlet. Assembly of fl ue pipe with rear outlet Fig. 9 If the fl ue pipe is to be rear mounted do the following: Fig.
- Página 10 ENGLISH Fig. 10 Fig. 12 3. Fasten the cover (A) with the screws (B). Fig. 11 5. Install the rear heat shield onto the stove. Fig. 13 4. Cut out the part (A) in the heat shield for the fl ue pipe. 6.
- Página 11 ENGLISH Installing the ash lip Fig. 14 Fig. 16 • Install the ash lip by hanging it under the door. • Install the fl ue pipe into the fl ue outlet 4.3 Chimney and fl ue pipe Mounting the door knob •...
- Página 12 ENGLISH 4.4 Performance check • Check that the afterburning (secondary combustion) starts. This is best indicated by yellow, fl ickering fl ames under the Once the product has been assembled, always check the baffl e. control handles. These should move easily and work in a •...
-
Página 13: Daily Use
ENGLISH Wood consumption to avoid discoloration of the fi replace, fl oor or surrounding building components. Jøtul F 100 ECO has a nominal heat output of ca. 5,5 kW. Use of wood, with nominal heat emission: Approx. 1,8 kg/h. It is important to get the wood burning quickly to avoid Another important factor for proper fuel consumption is that condensation the logs are the correct size. -
Página 14: Maintenance
ENGLISH to get the best heating eff ect from the product. It is a good idea Fig. 20 to do this in connection with the sweeping of the chimney and fl ue pipes. 6.3 Sweeping of fl ue pipes to the chimney On certain free-standing fi... -
Página 15: Service
ENGLISH 7.0 Service 7.2 Replacing the baffl e plate, burn plates and fi re grate Any unauthorised modifi cations to the product are prohibited! Only original spare parts may be used! Fig. 22 7.1 Replacing parts in the burn chamber Fig. - Página 16 ENGLISH Fig. 24 Fig. 26 11. Tilt the baffl e plate out. • Lift the fi re grate and tilt it out. Fig. 27 Fig. 25 12. Then remove the other burn plate. • Remove the rear bottom plate (A). When refi...
-
Página 17: Operational Problemes
ENGLISH 8.0 Operational problems - 10.0 Recycling troubleshooting 10.1 Recycling packaging Poor draught Your fi replace is delivered with the following packaging: • A wooden pallet that can be cut up and burned in the Check the length of the chimney and that it complies with fi... -
Página 18: Guaranee Terms
ENGLISH 11.0 Guarantee terms Our guarantee covers: Jøtul AS guarantees that the external cast-iron parts are free from defects in materials or manufacturing at the time of purchase. You may extend the guarantee on the external cast- iron parts to 25 years from the date of delivery by registering the product on jotul.com, and print out the extended guarantee card within three months of purchase. - Página 19 FRANCAIS 1.0 Relations avec les Sommaire autorités Relations avec les autorités ....19 • L’installation d’un poêle est soumise aux législations et Données techniques ......19 réglementations nationales en vigueur. Les réglementations locales, y compris celles se rapportant aux normes nationales et européennes, doivent être respectées lors de Sécurité...
- Página 20 FRANCAIS 3.0 Sécurité Protection d’un sol en bois Jøtul F 100 ECO SL et Jøtul F 100 ECO SL Remarque : Afi n d’assurer un niveau de rendement et de SE (Special Edition) (avec pieds courts) sécurité optimal, l’installation d’un poêle Jøtul doit être confi ée à...
- Página 21 FRANCAIS...
-
Página 22: Avant L'iNstallation
FRANCAIS 4.2 Installation 3.4 Le plafond Un espace d’au minimum 700 mm doit être respecté entre le Montage d’un conduit de fumée avec poêle et un plafond combustible. sortie par le haut Le produit est installé en usine pour une sortie par le haut. Fig. - Página 23 FRANCAIS Fig. 8 Fig. 6 6. Insérez le conduit de fumée dans le raccord de sortie de fumée. 2. Montez le raccord de sortie de fumée (A) dans la sortie arrière. Montage d’un conduit de fumée avec Fig. 9 sortie par l’arrière Le produit est installé...
- Página 24 FRANCAIS Fig. 10 Fig. 12 4. Fixez le cache (A) à l’aide des vis (B). Fig. 11 6. Montez le bouclier thermique sur le poêle. Fig. 13 5. Eff ectuez une découpe (A) dans le bouclier thermique pour le passage du conduit de fumée. 7.
-
Página 25: Fixer La Poignée De Porte
FRANCAIS La bavette Fig. 14 Fig. 16 8. Insérez le conduit de fumée dans le raccord de sortie de fumée. • Suspendez la bavette sous la porte. 4.3 Cheminées et conduits Fixer la poignée de porte • Le poêle peut être branché à une cheminée et à un conduit Fig. -
Página 26: Test De Fonctionnement
FRANCAIS Quelle est l’infl uence du vent et de la 4.5 Allumage météo sur l’appareil de chauff age ? • Pousser la commande d’air d’allumage et la commande La force du vent sur la cheminée peut considérablement d’air de combustion complètement à droite. (utiliser un aff... -
Página 27: Utilisation Au Quotidien
FRANCAIS insuffi sant), contactez un spécialiste. Pour plus de détails, Soyez particulièrement attentif à ne jamais brûler les matériaux suivants dans le poêle : reportez-vous à «4.0 Installation » (Cheminée et conduit • Les déchets ménagers, les sacs en plastique, etc. d’évacuation). -
Página 28: Nettoyage De La Vitre
FRANCAIS Fig. 20 Les jours où les conditions météorologiques et le vent sont défavorables, il est donc particulièrement important que la température de service de la cheminée soit atteinte le plus vite possible. Les fl ammes doivent vite être attisées. Conseil pratique : Fendez des bûchettes de bois particulièrement fi... -
Página 29: Entretien De La Surface Externe
FRANCAIS 7.0 Maintenance 6.4 Contrôle du poêle Jøtul recommande que l’utilisateur contrôle personnellement et soigneusement le poêle suite à une opération de ramonage/ Toute modifi cation non autorisée du produit est interdite. nettoyage. Vérifi er l’absence de fi ssures sur toutes les surfaces Utilisez uniquement des pièces de rechange d’origine visibles. - Página 30 FRANCAIS 7.2 Remplacement de la plaque du Fig. 24 défl ecteur, des plaques de doublage et de la grille du poêle. Fig. 22 4. Sortez le défl ecteur en biais. Fig. 25 1. Enlevez la bavette. Fig. 23 5. Sortez ensuite l’autre plaque de doublage. 2.
-
Página 31: Dysfonctionnements - Causes Et Dépannages
FRANCAIS 9.0 Dysfonctionnements – Fig. 26 Causes et dépannages Tirage faible Vérifi er que la longueur de la cheminée est conforme aux législations et aux réglementations nationales en vigueur. (Voir aussi «2.0 Données techniques» et «4.0 Installation» (Cheminées et conduits) dans le manuel d’installation à ce sujet.) Vérifi... -
Página 32: Recyclage De L'eMballage
FRANCAIS 10.0 Recyclage • Les vitres, la peinture, l’émail, les pierres naturelles, les éléments en béton et tous les revêtements décoratifs, • Les dommages liés à une mauvaise utilisation : combustible inapproprié ou de mauvaise qualité, surchauff e, défaut 10.1 Recyclage de l’emballage d’entretien, non respect des instructions d’utilisation •... - Página 33 ESPAÑOL 1.0 Relación con las Indice autoridades 1.0 Relación con las autoridades .....33 La instalación de una estufa debe efectuarse con arreglo a la normativa legal de cada país. La instalación del 2.0 Información técnica ......33 producto debe cumplir toda la normativa local en vigor, incluyendo la que se aplica a nivel nacional y europeo.
-
Página 34: Seguridad
ESPAÑOL 3.0 Seguridad Requisitos para la protección de tarimas de madera bajo la estufa N. B.: para garantizar un rendimiento y seguridad óptimos, Jøtul F 100 ECO SL y Jøtul F 100 ECO SL SE (Special Jøtul recomienda que sus estufas sean instaladas por Edition) (Patas cortas) un instalador cualifi... - Página 35 ESPAÑOL...
-
Página 36: Montaje Del Tubo De Humos Con Salida Superior
ESPAÑOL 3.4 Techo 4.2 Instalación Entre la estufa y el techo combustible debe mediar una Montaje del tubo de humos con salida distancia mínima de 700 mm. superior De serie, el producto se entrega con una salida de humos por la parte superior. -
Página 37: Montaje Del Tubo De Humos Con Salida Trasera
ESPAÑOL Fig. 6 Fig. 8 3. Instale el tubo de humos en la salida de humos. 5. Introduzca la salida de humos (A) en la salida trasera. Montaje del tubo de humos con salida Fig. 9 trasera Si necesita que el tubo de humos vaya en la parte posterior, lleve a cabo los pasos siguientes: Fig. - Página 38 ESPAÑOL Fig. 10 Fig. 12 7. Fije la tapa (A) con los tornillos (B). Fig. 11 9. Instale el escudo térmico trasero en la estufa. Fig. 13 8. Corte la parte (A) del escudo térmico para el tubo de humos. 10.
-
Página 39: Montaje De La Manija
ESPAÑOL La bandeja Fig. 14 Fig. 16 11. Instale el tubo de humos en la salida de humos. • Instale la bandeja recogeceniza colgándola debajo de la puerta. Montaje de la manija 4.3 Chimenea y tubo del tiro Fig. 15 •... -
Página 40: Empleo En Condiciones Climatológicas Diversas
ESPAÑOL Empleo en condiciones climatológicas • Coloque las pastillas de encendido o un poco de corteza de abedul entre los troncos. Apile encima unas astillas diversas • cruzadas unas sobre otras. Encienda el fuego. El efecto del viento en la chimenea puede infl uir en gran medida •... -
Página 41: Uso Diario
ESPAÑOL Astillas: afectada, ya sea el hogar, la estufa, el suelo, o el revestimiento. Longitud: Aprox. 25-33 cm Es importante comenzar con un fuego vivo lo antes posible Diámetro: 2 - 5 cm para evitar condensaciones. Cantidad por fuego: 6-8 trozos Si la condensación continúa, puede colocar arena mineral en Leña (troncos partidos): la base de la cámara de combustión. -
Página 42: Mantenimiento
ESPAÑOL Fig. 20 es importante dejar que la chimenea alcance la temperatura de funcionamiento adecuada antes de ajustar las entradas de aire para limitar la combustión en el hogar (las chimeneas de obra tardan más que las de acero en alcanzar la temperatura de funcionamiento). -
Página 43: Inspección De La Estufa
ESPAÑOL 7.0 Conservación 6.4 Inspección de la estufa Jøtul le aconseja que inspeccione personalmente la estufa de Está prohibido realizar modifi caciones no autorizadas en forma minuciosa después de deshollinar o limpiar. Compruebe el producto. si existen fi suras en las superfi cies visibles. Compruebe también Deben utilizarse exclusivamente piezas de repuesto que todas las uniones están selladas y que las juntas están originales. -
Página 44: Sustitución De La Placa Defl Ectora, De Las Placas De Combustión Y De La Rejilla De La Estufa
ESPAÑOL 7.2 Sustitución de la placa defl ectora, Fig. 24 de las placas de combustión y de la rejilla de la estufa Fig. 22 4. Incline la placa defl ectora hacia afuera. Fig. 25 1. Retire la bandeja recogeceniza. Fig. 23 5. -
Página 45: Problemas De Funcionamiento: Solución De Problemas
ESPAÑOL 8.0 Problemas de Fig. 26 funcionamiento: solución de problemas Poco tiro 1. Compruebe la longitud de la chimenea y que cumple los requisitos y normativas nacionales. (Consulte también la información de la secciones «2.0 Información técnica» y «4.0 Instalación» (Chimenea y tubo de humos). 2. - Página 46 ESPAÑOL 10.0 Reciclaje 11.0 Términos de la Garantía 1. Nuestra garantía cubre: 10.1 Reciclaje del embalaje Jøtul AS garantiza que las partes exteriores de hierro fundido están libres de defecto en materiales o fabricación en el • Su estufa se entrega con el siguiente embalaje: momento de la compra.
- Página 47 ITALIANO Indice generale 1.0 Conformità alle leggi L’installazione di una stufa deve essere eseguita in 1.0 Conformità alle leggi ......47 conformità alle leggi e alle norme locali di ogni paese. L’installazione del prodotto deve essere conforme a tutte 2.0 Dati tecnici ......... 47 le norme locali, incluse quelle che fanno riferimento a direttive europee o specifi...
- Página 48 ITALIANO 3.0 Sicurezza Jøtul F 100 ECO SL og Jøtul F 100 ECO SL SE (Special Edition) (montanti brevi) Nota: per garantire prestazioni e sicurezza ottimali, le Jøtul F 100 ECO può essere installato solo su pavimenti in stufe Jøtul devono essere montate da un installatore cui sia la superfi...
- Página 49 ITALIANO...
-
Página 50: Prima Dell'iNstallazione
ITALIANO 4.0 Installazione 4.2 Montaggio di un condotto con scarico superiore • Prima dell’installazione del camino, verifi care attentamente l’assenza di eventuali segni di danneggiamento. Il prodotto è montato di fabbrica per uno scarico superiore. • Il prodotto è pesante! Chiedere aiuto a qualcuno in fase di posizionamento e installazione. - Página 51 ITALIANO Fig. 6 Fig. 8 3. Installare il condotto di scarico fumi allo scarico. 2. Montare lo scarico fumi (A) nello scarico posteriore. Montaggio di un condotto con scarico Fig. 9 posteriore Il prodotto è montato di fabbrica con lo scarico fumi montato per uno scarico superiore.
- Página 52 ITALIANO Fig. 10 Fig. 12 4. Fissare la copertura (A) con le viti (B). Fig. 11 6. Installare lo scudo termico posteriore sulla stufa. Fig. 13 5. Tagliare la parte (A) nello scudo termico per il condotto di scarico fumi. 7.
- Página 53 ITALIANO Il ceneraio Fig. 14 Fig. 16 • Installare il ceneraio appendendolo sotto la porta. 8. Installare il condotto di scarico fumi allo scarico. Montaggio la maniglia della porta 4.3 Canna fumaria e condotto • Il caminetto deve essere collegato solo a una canna fumaria Fig.
-
Página 54: Accensione Iniziale
ITALIANO Come vento e agenti atmosferici • Collocare due ceppi di medie dimensioni su ciascun lato della base. N.B. Al fi ne di evitare che il vetro si copra di infl uiscono sulla stufa fuliggine, è importante che i ciocchi non vengano sistemati in prossimità... -
Página 55: Utilizzo Giornaliero
ITALIANO camera di combustione o nell’ambiente. Fascine: La condensa nella camera di combustione appare come un Lunghezza: circa 25-33 cm liquido nero. Questa deve essere rimossa per evitare danni Diametro: 2 - 5 cm alla colorazione del prodotto, del pavimento o del rivestimento. Quantità... - Página 56 ITALIANO stufa (una canna fumaria in muratura richiede più tempo per Fig. 20 raggiungere la temperatura operativa rispetto ad una canna fumaria in acciaio). È particolarmente importante raggiungere la temperatura operativa il più rapidamente possibile nei giorni in cui il tiraggio della canna fumaria non è...
-
Página 57: Manutenzione Esterna
ITALIANO 7.0 Assistenza superfi ci visibili per individuare eventuali crepe. Controllare anche che tutti i giunti siano sigillati e che tutte le guarnizioni siano nelle posizioni corrette. Qualsiasi guarnizione che mostri È vietata ogni modifi ca non autorizzata al prodotto. segni di usura o deformazione deve essere sostituita. - Página 58 ITALIANO 7.2 Sostituzione della piastra del Fig. 24 parafi amma, delle piastre refrattarie e della grata del fuoco Fig. 22 4. Inclinare ed estrarre la piastra del parafi amma Fig. 25 1. Rimuovere il ceneraio. Fig. 23 5. Quindi rimuovere l’altra piastra refrattaria. 2.
-
Página 59: Risoluzione Dei Problemi
ITALIANO 8.0 Risoluzione dei problemi Fig. 26 Scarso tiraggio Verifi care la lunghezza della canna fumaria e la conformità alle norme nazionali (per informazioni, vedere anche le sezioni «2.0 Dati tecnici» e «4.0 Installazione» (Canna fumaria e condotto) nel manuale di installazione). Accertarsi che la sezione trasversale minima della canna fumaria sia conforme a quanto riportato nella sezione «2.0 Dati tecnici»... - Página 60 ITALIANO 10.0 Riciclaggio 11.0 Termini della garanzia 1. La nostra garanzia copre: 10.1 Riciclaggio dell’imballo Jøtul AS garantisce che i componenti esterni in ghisa sono esenti da difetti di materiali o lavorazione al momento dell’acquisto. Ogni caminetto viene fornito all’interno del seguente imballo: È...
- Página 61 NEDERLANDS 1.0 Wettelijke voorschriften Inhoudsopgave Een haard moet in overeenstemming met de wetten en Wettelijke voorschriften......61 voorschriften van uw land worden geïnstalleerd. Alle lokale bepalingen, inclusief de bepalingen die betrekking Technische gegevens ......61 hebben op nationale en Europese normen, zullen worden nageleefd bij het installeren van het product.
-
Página 62: Technische Gegevens
NEDERLANDS 3.0 Veiligheid als de constructie zelf van onbrandbare materialen zijn. Het onbrandbare gebied moet een verlenging van minimaal 350 mm vanaf de kachel hebben. NB! Om zeker te zijn van optimale prestaties en veiligheid, dienen de kachels van Jøtul altijd te worden geplaatst door In deze omgeving adviseren wij de installatie op een vloer een gekwalifi... - Página 63 NEDERLANDS...
-
Página 64: Installatie
NEDERLANDS 4.2 Installatie muur kan tot uitdroging en verkleuring van verf leiden en barstjes veroorzaken. • De kachel moet zo worden opgesteld dat de kachel zelf, Een kachelpijp met een bovenuitlaat de kachelpijp en de schoorsteen schoongemaakt kunnen worden. monteren •... - Página 65 NEDERLANDS Afb. 6 Afb. 8 3. Installeer de kachelpijp in de kacheluitlaat. 2. Monteer de kacheluitlaat (A) in de achteruitlaat. Een kachelpijp met een achteruitlaat Afb. 9 monteren Als u een achteruitlaat wilt, gaat u als volgt te werk: Afb. 7 1.
- Página 66 NEDERLANDS Afb. 10 Afb. 12 4. Bevestig de afdekking (A) met de schroeven (B). Afb. 11 6. Installeer het achterste hitteschild op de kachel. Afb. 13 7. Verwijder het beschermende papier van de pakking en 5. Snijd in het hitteschild het deel (A) uit voor de kachelpijp. bevestig deze rondom de buitenkant van de kachelpijp.
-
Página 67: Installeer De Deurknop
NEDERLANDS De asrand Afb. 14 Afb. 16 8. Installeer de kachelpijp in de kacheluitlaat. • Installeer de asrand door deze onder de deur te hangen. 4.3 Schoorsteen en kachelpijp Installeer de deurknop • De haard mag uitsluitend worden aangesloten op een schoorsteen en kachelpijp die zijn goedgekeurd voor Afb. - Página 68 NEDERLANDS Werking tijdens verschillende weerszijden van de grondplaat. NB. Plaats geen hout tegen het glas, om te voorkomen dat het beroet raakt. Weeromstandigheden • Plaats aanmaakhoutjes of de schors van berkenhout tussen de blokken. Plaats wat klein gehakt hout hierboven De invloed van de wind op de schoorsteen kan een grote op in een kruispatroon.
-
Página 69: Dagelijks Gebruik
NEDERLANDS Condensatie Brandstofverbruik Er kan condensatie in een open haard / rookkanaal / De Jøtul F 100 ECO Series heeft door zijn effi ciëntie een nominale schoorsteen optreden. Dit kan worden veroorzaakt door capaciteit van 5,5 kW. Benodigde hoeveelheid hout voor nominale vochtig brandhout of verschillen in temperatuur in de open warmteafgifte: ongeveer 1,8 kg per uur. -
Página 70: Onderhoud
NEDERLANDS Afb. 20 te laten bereiken, voordat u de luchtopeningen aanpast om de verbranding in te kachel te verminderen (een stalen schoorsteen bereikt sneller de bedrijfstemperatuur dan een gemetselde schoorsteen). Met name wanneer de trek in de schoorsteen slecht is als gevolg van ongunstige wind- en weersomstandigheden is het van belang om de bedrijfstemperatuur zo snel mogelijk te bereiken. -
Página 71: De Buitenkant Onderhouden
NEDERLANDS 7.2 De keerplaat, de branderplaten en Maak de pakkingsgroeven grondig schoon, breng keramische lijm aan (te verkrijgen bij uw Jøtul-dealer) en druk de pakking het bodemrooster terugzetten goed in de groef. De lijm heeft een korte droogtijd. 6.5 De buitenkant onderhouden Afb. - Página 72 NEDERLANDS Afb. 24 Afb. 26 3. Til de keerplaat naar buiten. • Til het bodemrooster op en kantel het naar buiten. Afb. 27 Afb. 25 4. Verwijder vervolgens de andere branderplaat. • Verwijder de achterste bodemplaat (A). Bij hernieuwde installatie: •...
-
Página 73: Gebruiksproblemen - Problemen Oplossen
NEDERLANDS 8.0 Gebruiksproblemen - 10.0 Recycling problemen oplossen 10.1 Recyclen van de verpakking Slechte trek • Uw kachel wordt in de volgende verpakking geleverd: • Een houten pallet dat in stukken gesneden en in de kachel Controleer de lengte van de schoorsteen en of hij voldoet aan verbrand kan worden. -
Página 74: Garantievoorwaarden
NEDERLANDS 11.0 Garantievoorwaarden aan enig recht krachtens de geldende nationale wetgeving van toepassing op de verkoop van consumentengoederen. Het nationale reclamerecht geldt vanaf de aankoopdatum Onze garantie dekt: en uitsluitend onder overlegging van een aankoopbon/ Jøtul AS garandeert dat de externe gietijzeren onderdelen serienummer. - Página 75 NO | Kvalitet og sikkerhets kontroll Siden 1853 har Jøtul vært kjent for å produsere ovner og peiser av høy kvalitet og med lang levetid. Vi ønsker å tilby våre kunder de absolutt beste produktene og gir derfor også markedets lengste garanti. Gjennom vår produkt- og kvalitetskontroll vektlegges nettopp dette – trygghet og sikkerhet.
- Página 76 Jøtul pursue a policy of constant product development. Products supplied may therefore diff er in specifi cation, colour and type of accessories from those illustrated and described in the brochure. Jøtul vise sans cesse à améliorer ses produits. C’est pourquoi, il se réserve le droit de modifi er les specifi...