Tabla de contenido
Publicidad
Idiomas disponibles
Idiomas disponibles
Enlaces rápidos
Publicidad
Tabla de contenido

Manuales relacionados para Bimar VP455T

Resumen de contenidos para Bimar VP455T
- Página 1 LIBRETTO ISTRUZIONI INSTRUCTION BOOKLET BEDIENUNGSANLEITUNG NOTICE D'INSTRUCTIONS FOLLETO DE INSTRUCCIONES VENTILATORE A PIANTANA STAND FAN STANDVENTILATOR VENTILATEUR À PIED VENTILADOR DE PIE type VP455T (mod. FS01-16R)
-
Página 2: Avvertenze Generali
Scansiona il codice QR per guardare una Guida rapida del funzionamento. Questo simbolo vi invita a leggere attentamente queste istruzioni prima dell’uso dell’apparecchio, ed eventualmente informare terzi, se necessario. Conservare il libretto per ulteriori consultazioni e per l’intera durata di vita dell’apparecchio. Se nella lettura di queste istruzioni d’uso alcune parti risultassero difficili... - Página 3 - in aziende agricole o similari; - da clienti di alberghi, motel e altri ambienti di tipo residenziale; - in ambienti del tipo bed and breakfast. Non infilare alcun utensile o le dita fra le maglie della griglia di protezione della ventola.
- Página 4 L’apparecchio deve essere mantenuto fuori dalla portata di bambini. Attenzione: quando si utilizzano apparecchi elettrici, occorre sempre rispettare le precauzioni di sicurezza di base per evitare i rischi di incendio, di scosse elettriche e di lesioni fisiche. Non usare l’apparecchio se non funziona correttamente o se sembra danneggiato;...
- Página 5 Questo apparecchio non è destinato a essere fatto funzionare per mezzo di un temporizzatore esterno o con un sistema di comando a distanza separato, per evitare il rischio di incendio nel caso l’apparecchio sia coperto e/o sia posizionato in modo non corretto o ad altro dispositivo che possa accendere l’apparecchio automaticamente, evitando così...
- Página 6 La presa di corrente deve essere facilmente accessibile in modo da poter disinserire con facilità la spina in caso di emergenza. Posizionare l’apparecchio lontano da: - fonti di calore (ad es. fiamme libere, fornello gas, ecc. ) - contenitori di liquidi (ad esempio, lavelli ecc.) per evitare schizzi d’acqua o che vi possa cadere (distanza minima 2 metri) - tessuti (tende, ecc.) o materiali volatili che possano ostruire la griglia di aspirazione;...
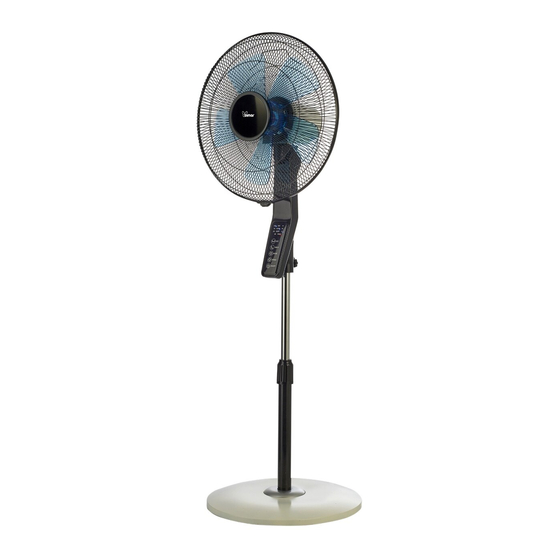
- Página 7 Vite a “L” Base con contrappeso Anello Telecomando Albero motore Ghiera fissaggio asta Tubo regolabile Vite fissaggio piantana Pannello comandi 10) Vite anello in plastica 11) Griglia anteriore/schermo di protezione 12) Griglia posteriore 13) Elica 14) Colonna 15) Ghiera fissaggio griglia posteriore 16) Ghiera fissaggio ventola...
- Página 8 Pannello comandi Telecomando Attenzione: il ventilatore può essere utilizzato solo se correttamente assemblato in buono stato. Le funzioni del ventilatore si azionano sia con la tastiera del pannello comandi, e con il telecomando che deve essere puntato frontalmente (distanza max di circa 4m) verso il pannello comandi.
- Página 9 Normal: ventilazione costante Silent: ventilazione costante e silenziosa (simbolo“ ”) 3. Natural: ventilazione intermittente (simbolo “ ”), cioè come gli schemi qui raffigurati. Velocità massima selezionata Velocità media selezionata Velocità minima selezionata Timer: imposta il tempo di funzionamento, al termine del quale l’apparecchio si arresta.
-
Página 10: Pulizia E Manutenzione
PULIZIA E MANUTENZIONE Attenzione: prima di eseguire le normali operazioni di pulizia, togliere la spina dalla presa di corrente. Per la pulizia utilizzare un panno morbido, leggermente inumidito; non utilizzare prodotti abrasivi o corrosivi. Non immergere nessuna parte del ventilatore in acqua o altro liquido: nel caso dovesse succedere non immergere la mano nel liquido ma per prima cosa togliere la spina dalla presa di corrente. -
Página 11: General Notices
Scan the qr code to see the quick "functioning" guide Please read these instructions carefully before using the appliance, and instruct other persons using it, too, if necessary. Keep the manual handy for future use. If when reading these instructions manual certain parts should be difficult to understand, or if there is any confusion, contact the company indicated on the last page before using the product. - Página 12 - bed and breakfast type environments Do not insert any tool, or your fingers, into the grille protecting the blades. Do not use the device at room temperatures above 40°C. This appliance can be used by children aged 8 years and above and persons with reduced physical, sensory or mental capabilities or lack of experience and knowledge if they are supervised or if they have been given instructions concerning...
- Página 13 Make sure that the fan is working correctly: if not, turn the appliance off and have it checked by professionally qualified personnel. Do not move the appliance when it is running. If the appliance is not in use, unplug it from the plug point. ...
- Página 14 Ensure that the fan is switched off from the supply mains before removing the guard. INSTALLATION After removing the packing materials, check the integrity of the appliance; if you are unsure, do not use it and ask for qualified professional help. The packing materials (plastic bags, polystyrene foam, nails, etc.) must be kept out the reach of children because they are potential sources of danger.
- Página 15 D. Unscrew the ring nut (15) and the ring nut (16) (turn clockwise) from the motor body. E. Insert the rear grill (12) into the motor body, make sure the handle is at the top and lock it using the ring nut (15). F.
- Página 16 "L" screw Base with counterweight Ring Remote controller Drive shaft Rod fixing ring nut Adjustable hose Floor fixing screw Control panel 10) Plastic ring screw 11) Front grill / protective screen 12) Rear grill 13) Propeller 14) Column 15) Rear grill fixing ring nut 16) Fan fixing ring nut Control panel Remote controller...
- Página 17 To replace the “CR2032" battery, move the tab to the centre (using a small screwdriver) and simultaneously remove the battery holder. Replace the battery (while checking correct polarity), and close the battery holder. Remove the battery for long periods of inactivity of the remote control.
-
Página 18: Cleaning And Maintenance
Vertical tilt (high-low): This is selected by tilting the motor body to the desired direction (high-horizontal-low). Height adjustment: unscrew the ring nut (6); raise or lower the main unit to the desired height and then lock the ring nut. To operate the fan, plug it into a socket: the “ "... -
Página 19: Allgemeine Hinweise
Dieses Symbol fordert Sie auf, diese Anleitung vor dem Gebrauch des Geräts zu lesen und bei Bedarf auch andere Personen darüber zu informieren. Bewahren Sie diese Anleitung zum späteren Nachschlagen und während der gesamten Lebensdauer des Geräts auf. Sollten Teile dieser Anleitung schwer verständlich sein oder wenn Sie Zweifel haben, kontaktieren Sie bitte das Unternehmen unter der auf der letzten Seite genannten Adresse, bevor Sie das Produkt... - Página 20 Keine Werkzeuge und auch die Finger nicht in die Maschen des Schutzgitters des Flügelrads stecken. Das Gerät nicht bei Umgebungstemperaturen über 40°C verwenden. Das Gerät kann von Kindern ab 8 Jahren und Personen mit eingeschränkten körperlichen, sensorischen oder geistigen Fähigkeiten oder mangelnder Erfahrung und Wissen benutzt werden, sofern sie die notwendige Aufsicht oder Anweisungen in Hinblick auf den sicheren Umgang mit dem Gerät erhalten, und wenn sie sich der möglichen...
- Página 21 Ziehen Sie, wenn das Gerät nicht benutzt wird, den Stecker aus der Steckdose. Ziehen Sie vor dem Zusammenbauen, dem Zerlegen oder der Säuberung des Geräts immer den Stecker aus der Steckdose. Setzen Sie das Gerät nicht der Witterung (Sonne, Regen, usw.) aus. ...
- Página 22 Werbezettel am Gitter müssen vor dem Gebrauch des Gerätes von diesem entfernt werden. Bevor Sie das Gerät an die Steckdose anschließen, kontrollieren Sie, dass die auf dem Typenschild angegebenen Werte mit denen der Stromversorgung übereinstimmen. Sollten der Stecker des Gerätes und die vorhandene Steckdose nicht kompatibel sein, lassen Sie die Steckdose von entsprechend qualifiziertem Fachpersonal austauschen.
- Página 23 D. Die Nutmutter (15) und die Nutmutter (16) (im Uhrzeigersinn drehen) vom Motorkörper losdrehen. E. Das hintere Schutzgitter (12) in den Motorkörper einsetzen und sich dabei vergewissern, dass sich der Griff oben befindet; es mit der dazugehörigen Nutmutter (15) festspannen. F.
- Página 24 L-Schraube Sockel mit Gegengewicht Ring Fernbedienung Motorwelle Nutmutter für Stangenbefestigung Einstellbare Stange Befestigungsschraube für Ständer Bedienungstafel 10) Schraube Kunststoffring 11) Vorderes Gitter/Schutzschirm 12) Hinteres Gitter 13) Lüfterrad 14) Säule 15) Nutmutter für Gitterbefestigung 16) Nutmutter für Lüfterradbefestigung Bedienungstafel Fernbedienung...
- Página 25 BENUTZUNG Achtung: Der Ventilator darf dann eingesetzt werden, wenn ordnungsgemäß zusammengebaut und in einwandfreiem Zustand ist. Die Ventilatorfunktionen lassen sich sowohl über die Tastatur der Bedienungstafel als auch über die Fernbedienung ansprechen; letztere muss dazu direkt in Richtung Bedienungstafel ausgerichtet werden (max. Abstand ca. 4 m).
- Página 26 Minimalgeschwindigkeit ausgewählt Timer: Er stellt die Betriebsdauer ein; nach deren Ablauf das Gerät anhält. Wiederholtes Betätigen der Taste „ “: Bei jedem Tastendruck ändert sich die Zeitdauer (von ½ Std. bis 7.30 Std. in Schritten von ½ Std.). Die Bedienungstafel zeigt die ausgewählte Dauer an. Zum Ausschalten des Timers die Taste so oft drücken, bis alle Zeitangaben sich ausschalten.
-
Página 27: Reinigung Und Pflege
REINIGUNG UND PFLEGE Achtung: ziehen Sie den Netzstecker aus der Netzsteckdose, bevor Sie das Gerät reinigen. Verwenden Sie zum Reinigen ein weiches, leicht feuchtes Tuch. Verwenden Sie keine scheuernden oder aggressiven Reinigungsmittel. Kein Teil des Ventilators darf in Wasser oder andere Flüssigkeiten eingetaucht werden: Sollte dies geschehen, keinesfalls die Hand in die Flüssigkeit tauchen, sondern als Erstes den Netzstecker aus der Netzsteckdose ziehen. -
Página 28: Avertissements Généraux
Nous vous prions de lire attentivement ces instructions avant d’utiliser l'appareil et de les divulguer à toutes les personnes qui pourraient en avoir besoin. Gardez-lez a portée de main. Si à la lecture de ce manuel d'instruction certaines parties étaient difficiles à... - Página 29 diffuser les arômes, versez quelques gouttes d’huile/d’essences (non fournies) sur le filtre, sans exagérer dans la quantité de façon à ne pas risquer d’endommager la peinture du ventilateur par l’effet de l’huile/du liquide oxydant. Accrochez le diffuseur d’arômes à la grille frontale ou à l’arrière (toujours à...
- Página 30 Assurez-vous que l’hélice fonctionne correctement : dans le cas contraire, éteignez l’appareil et faîtes-le contrôler par un technicien spécialisé. Ne déplacez pas l’appareil durant son fonctionnement. Retirez toujours la fiche de la prise de courant lorsque l’appareil ne fonctionne pas.
- Página 31 Avant chaque utilisation, vérifiez si l’appareil est en bon état, si le cordon électrique n’est pas endommagé: en cas de doute, il faut s’adresser à du personnel professionnellement qualifié. La prise de courant doit être facile d’accès afin de pouvoir débrancher facilement l’appareil en cas d'urgence.
- Página 32 1) Vis en forme de “L” Base avec contre poids Anneau Télécommande L’arbre moteur Capsule fixation tige Tuyau réglable Vis fixation Panneau de commandes 10) Vis anneau en plastique 11) Grille antérieure/écran de protection 12) Grille postérieure 13) Hélice 14) Colonne 15) Capsule fixation grille...
- Página 33 Panneau de commandes Télécommande UTILISATION Attention : le ventilateur ne peut être utilisé que s’il est bien assemblé et en bon état. Les fonctions du ventilateur se mettent en route soit à l’aide des touches du panneau de commandes et avec la télécommande qui doit être dirigée vers l’avant (distance maximale d’environ 4m) vers le panneau de commandes.
- Página 34 Le ventilateur a les éléments de réglage et de commande suivants : Touche stand/by-ON “ ”: pour actionner le ventilateur ou le désactiver en le mettant en stand-by - Ventilation : on peut sélectionner les trois vitesses en pressant la touche“ ”: le symbole correspondant s’affichecorrespondant à...
-
Página 35: Nettoyage Et Entretien
Pour actionner le ventilateur, insérer la fiche dans a prise de courant: s’affiche alors le symbole“ ” (indique l’état de stand-by);pour activer le ventilateur appuyer sur la touche“ ”et sélectionner les fonctions souhaitées. Pour désactiver l’appareil, appuyer sur la touche“ ”: le symbole“... -
Página 36: Advertencias Generales
Este símbolo le invita a leer atentamente las instrucciones antes de utilizar el aparato y a comunicarlas a terceros si es necesario. Guarde este folleto para referencias futuras y durante toda la vida del aparato. Si cualquier parte de estas instrucciones de uso es difícil de comprender o si tiene dudas, contacte con la empresa a la dirección que aparece en la última página antes de utilizar el producto. - Página 37 - por huéspedes de hoteles, moteles y otros entornos de tipo residencial; - en entornos del tipo bed and breakfast. No introducir ningún utensilio ni los dedos entre las mallas de la rejilla de protección del ventilador. No utilice el aparato con una temperatura ambiente superior a 40°C.
- Página 38 No utilice el aparato si no funciona correctamente o si parece estar dañado; en caso de dudas contacte con un técnico calificado. Asegúrese de que el ventilador funcione correctamente: de lo contrario apague el aparato y encargue a un profesional calificado para que lo revise.
-
Página 39: Instalación
Asegurarse que el ventilador se encuentre desconectado de la red de alimentación antes de quitar la pantalla de protección. INSTALACIÓN Después de retirar el embalaje, asegurarse de la integridad del aparato; en caso de duda, no utilizarlo y acudir a personal profesional calificado. Los elementos de embalaje (bolsas de plástico, poliestireno expandido, clavos, etc.) no se deben dejar al alcance de los niños ya que son fuentes potenciales de peligro, sino que se tienen que eliminar en los contenedores de recogida selectiva específicos. - Página 40 A. Desacople y extraiga la abrazadera (6) de la columna, introduzca el anillo (3) y vuelva a acoplar la abrazadera. B. Encaje la columna (14) en el alojamiento correspondiente de la base, bloquéela mediante el tornillo en forma de “L” con arandela (1) utilice también el contrapeso C.
- Página 41 Tornillos en forma de “L” Base con contrapeso Anillo Mando a distancia Eje motor Abrazadera de fijación de la varilla Tubo ajustable Tornillo de fijación del pedestal Panel de mandos 10) Tornillo anillo plástico 11) Rejilla delantera/pantalla de protección 12) Rejilla trasera 15) Abrazadera de fijación de 13) Hélice la rejilla trasera...
- Página 42 Las funciones del ventilador se accionan tanto con el teclado del panel de mandos como con el mando a distancia que se debe apuntar en la parte delantera (distancia máx. de aproximadamente 4 m.) hacia el panel de mandos. Para sustituir la batería “CR2032”, desplace la lengüeta hacia el centro (utilice un pequeño destornillador) y al mismo tiempo extraiga el soporte de baterías, sustituya la batería (según...
-
Página 43: Limpieza Y Mantenimiento
varía el tiempo (de ½ h a 7’h30’ con ajustes de ½ h), y en el panel de mandos se ilumina el tiempo seleccionado. Para desactivar el temporizador, pulse la tecla hasta que se apaguen todos los tiempos. Oscilación (derecha-izquierda): pulse la tecla “ ”, para activarla (símbolo encendido) o desactivarla (símbolo apagado), “... - Página 44 Advertencias para la correcta eliminación del producto conforme la Directiva Europea 2011/65/UE. Al final de su vida útil, el producto no debe eliminarse con los residuos domésticos. Puede ser entregado en los correspondientes centros de recolección diferenciada predispuestos por las administraciones municipales, o bien en la sede de los distribuidores que ofrecen este servicio.
- Página 45 Prescrizioni relative alle informazioni/Information requirements/Informations/Informationsanforderungen/ Disposiciones relativas a las informaciones Descrizione/Description/ Description/ Simbol Valore/Valu Unità/Unit/ o/Sym Beschreibung/ Descripción Valeur/ Unité/ Wert/Valor Einheit/ Símbolo Portata massima d’aria/Maximum fan flow 50.35 m³/min rate/ Puissance de ventilation maximale/ Maximaler Luftdurchsatz Lüfters/ Capacidad máxima de aire Potenza assorbita ventilatore/Fan...
- Página 48 Via G.Amendola, 16/18 25019 Sirmione (BS) – ITALY www.bimar-spa.it Servizio clienti: servizioclienti@bimar-spa.it 8955895542 VP455T_I.B._17...