Tabla de contenido
Publicidad
Idiomas disponibles
Idiomas disponibles
Enlaces rápidos
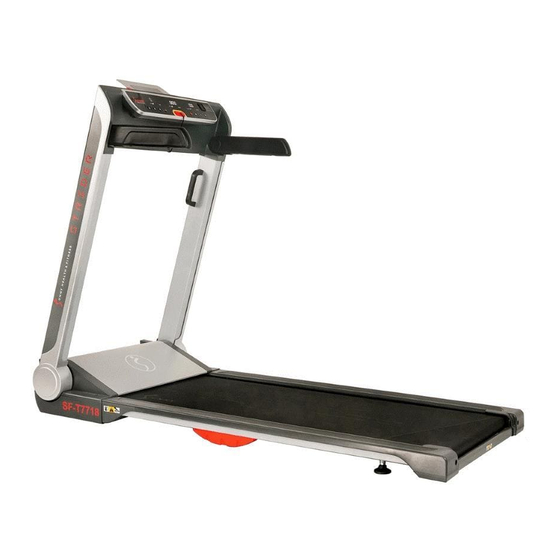
STRIDER TREADMILL WITH
English, Page 16 ~ 32
Español, Page 33 ~ 50
Français, Page 51 ~ 69
20" WIDE LOPRO DECK
USER MANUAL
IMPORTANT! Please retain owner's manual for maintenance and adjustment instructions.
Your satisfaction is very important to us, PLEASE DO NOT RETURN UNTIL YOU
HAVE CONTACTED US: support@sunnyhealthfitness.com or 1- 877 - 90SUNNY (877-907-8669).
¡IMPORTANTE! Conserve el manual del propietario para las instrucciones de mantenimiento y ajuste. Su
satisfacción es muy importante para nosotros, NO DEVUELVA HASTA HABERNOS
CONTACTADO: support@sunnyhealthfitness.com ó 1- 877 - 90SUNNY (877-907-8669).
IMPORTANT! Veuillez conserver le manuel du propriétaire pour les instructions de réglage et
d'entretien. Votre satisfaction est très importante pour nous, VEUILLEZ NE PAS
EFFECTUER DE RETOUR AVANT DE NOUS AVOIR CONTACTÉ :
support@sunnyhealthfitness.com ou 1- 877 – 90SUNNY (877-907-8669).
SF-T7718
Publicidad
Tabla de contenido
Solución de problemas

Manuales relacionados para Sunny SF-T7718


Resumen de contenidos para Sunny SF-T7718
- Página 1 STRIDER TREADMILL WITH 20” WIDE LOPRO DECK SF-T7718 USER MANUAL English, Page 16 ~ 32 IMPORTANT! Please retain owner’s manual for maintenance and adjustment instructions. Your satisfaction is very important to us, PLEASE DO NOT RETURN UNTIL YOU HAVE CONTACTED US: support@sunnyhealthfitness.com or 1- 877 - 90SUNNY (877-907-8669).
-
Página 2: Important Safety Instruction
IMPORTANT SAFETY INSTRUCTION When using electrical equipment, basic precautions should always be followed, including the following: Read all instructions before using this treadmill. DANGER– To reduce the risk of electrical shock: Always unplug the equipment from the electrical outlet immediately after using and before cleaning. WARNING –... -
Página 3: Informations De Sécurité Importantes
INFORMATIONS DE SÉCURITÉ IMPORTANTES L’utilisation d’un appareil électrique réclame toujours la prise de précautions élémentaires, notamment les suivantes : Veuillez lire toutes les instructions avant d’utiliser ce tapis de course. DANGER- Pour prévenir les risques d’électrocution : Débrancher toujours l’appareil de la prise électrique immédiatement après son utilisation et avant de le nettoyer. AVERTISSEMENT - Pour prévenir les risques de brûlures, d’incendie, d’électrocution ou de blessures corporelles: Le tapis roulant ne doit jamais être laissé... -
Página 4: Important Safety Information
IMPORTANT SAFETY INFORMATION We thank you for choosing our product. To ensure your safety and health, please use this equipment correctly. It is important to read this entire manual before assembling and using the equipment. Safe and effective use can only be achieved if the equipment is assembled, maintained and used properly. - Página 5 INFORMATIONS DE SÉCURITÉ IMPORTANTES Nous vous remercions d’avoir choisi notre produit. Pour votre santé et votre sécurité, veuillez utiliser correctement cet appareil. Il est important de lire entièrement le présent manuel avant d’assembler l’appareil et de l’utiliser. L’utilisation sûre et efficace n’est possible que si l’appareil est correctement assemblé, entretenu et utilisé.
- Página 6 IMPORTANT OPERATING INSTRUCTION Insert the power plug directly into the socket. Read the manual before operating the equipment. Changes in speed do not occur immediately. Set your desired speed using the adjustment keys on the main console. The speed will increase gradually. While on the treadmill, move with caution as distractions may cause you to lose balance and stray from walking in the center of the belt.
- Página 7 INSTRUCTIONS D’UTILISATION IMPORTANTES Brancher la fiche directement dans la prise de courant. Avant toute utilisation de l’appareil, veuillez consulter le manuel. Les changements de vitesse ne sont pas instantanés. Utiliser les touches de réglage de la console principale pour régler la vitesse souhaitée.
-
Página 8: Exploded Diagram
EXPLODED DIAGRAM 1... - Página 9 EXPLODED DIAGRAM 2...
-
Página 10: Parts List
PARTS LIST Description Specification Description Specification Base Frame Holder Guide Rod Connecting Frame 1 Plastic Nut Guide Rod Connecting Frame 2 Left Handlebar Main Frame Right Handlebar Folding Frame Left Handle Bar Front Cover Left Upright Tube Right Handle Bar Front Cover Right Upright Tube Handle Bar Side Cover Computer Bracket... - Página 11 Description Specification Description Specification Upper Signal Wire Bolt M8*35 Lower Signal Wire Bolt M8*25 Safety Key Connecting Wire Bolt M6*35 Safety Key Bolt M8*15 Amplifier Board Bolt M8*30 Amplifier Power Upper Wire Bolt M6*50 Amplifier Power Lower Wire Bolt M6*25 USB Power Upper Wire Bolt M6*10...
-
Página 12: Lista De Piezas
LISTA DE PIEZAS N.° Descripción Especificación Cant. N.° Descripción Especificación Cant. Estructura Base Soporte Estructura de Conexión de la Varilla Guía 1 Tuerca de Plástico Estructura de Conexión de la Varilla Guía 2 Barra del Manubrio Izquierdo Estructura Principal Barra del Manubrio Derecho Cubierta Frontal de la Barra del Mango Marco Plegable Izquierdo... - Página 13 N.° Descripción Especificación Cant. N.°. Descripción Especificación Cant. Cable de Señal Superior Perno M8*35 Cable de Señal Iinferior Perno M8*25 Cable de Conexión de la Llave de Perno M6*35 Seguridad Llave de Seguridad Perno M8*15 Tablero Amplificador Perno M8*30 Cable Superior de Energía del Amplificador Perno M6*50 Cable Iinferior de Energía del Amplificador...
-
Página 14: Liste Des Éléments
LISTE DES ÉLÉMENTS Description Spécification Qté Description Spécification Qté Cadre de Base Support Cadre de Fixation de la Barre de Guidage 1 Écrou En Plastique Cadre de Fixation de la Barre de Guidage 2 Guidons Gauche Cadre Principal Guidons Droite Cadre Pliant Couvercle Avant Du Guidon Gauche Tubes Verticaux Gauche... - Página 15 Description Spécification Qté Description Spécification Qté Câble de Signal Supérieur Boulon M8*35 Câble de Signal Inférieur Boulon M8*25 Câble de Branchement de la Clé de Boulon M6*35 Sécurité Clé de Sécurité Boulon M8*15 Panneau Amplificateur Boulon M8*30 Câble D’alimentation Supérieur de Boulon M6*50 L’amplificateur...
-
Página 16: Hardware Package
HARDWARE PACKAGE Ordering Replacement Parts (U.S. and Canadian Customers only) Please provide the following information in order for us to accurately identify the part(s) needed The model number (found on cover of manual) The product name (found on cover of manual) ... - Página 17 ASSEMBLY INSTRUCTIONS We value your experience using Sunny Health and Fitness products. For assistance with parts or troubleshooting, please contact us at support@sunnyhealthfitness.com or 1-877-90SUNNY (877- 907-8669). STEP 1: Open the carton and remove contents. Place the Treadmill (No. leveled ground.
- Página 18 We value your experience using Sunny Health and Fitness products. For assistance with parts or troubleshooting, please contact us at support@sunnyhealthfitness.com or 1-877-90SUNNY (877- 907-8669). STEP 3: Turn down the Left & Right Handle Bars (No. C10 & No. C11) to the fixed position.
-
Página 19: Maintenance & Care
MAINTENANCE & CARE General cleaning will help prolong the life and performance of your treadmill. Keep the unit clean and maintained by dusting the components on a regular basis. Clean both sides of the Running Belt (No. C31) to prevent dust from accumulating underneath the Running Belt (No. C31). Keep your running shoes clean so that dirt from your shoes do not wear out the Running Board (No. - Página 20 LUBRICATING THE TREADMILL IMPORTANT NOTE: You will need to lubricate your treadmill before the first use. RUNNING BELTS & TREADMILL LUBRICANT: Lubricating the Running Board (No. D18) and Running Belt (No. C31) is essential as the friction between the two affects the life span and function of the treadmill, therefore it is recommended that the Running Board (No.
- Página 21 FOLDING INSTRUCTIONS STEP 1: NOTE: Always unplug treadmill from the electrical outlet before folding. Pull out the Plastic Nut (No. C09) with your left hand and turn down the Holder (No. C08) with your right hand. Once the holder reaches a suitable angle, let go of the Plastic Nut (No.
- Página 22 STEP 3: Pull out the Rotating Plate (No. A12) with your right hand and place your left hand at the Handle (No. C42) [Position B]. Then push down the Left & Right Upright Tubes (No. 06 & No. 07) at the same time. When pushing down the Left &...
- Página 23 STEP 5: Place your hand on Position E, and using your foot, turn the Folding Fixed Board (No. A13) to horizontal position. STEP 6: Hold the treadmill at Position E with your hand. Next, using your foot, firmly push against treadmill at position J.
- Página 24 STORAGE OF TREADMILL This treadmill is designed for saving space. You can choose to store treadmill vertically or horizontally. A. Vertical Storage After folding, place the treadmill near the wall to avoid falling. Keep out of reach of children. B. Horizontal Storage After folding, you can store the treadmill under table or any other available space.
- Página 25 HOW TO MOVE THE TREADMILL Place your hands at Position E. Put the Folding Frame (No. A05) inside the bottom of the treadmill and turn the Folding Fixed Board (No. A13) to vertical with your foot to fix the Folding Frame (No. A05). To transport, hold the treadmill at Position tilt...
-
Página 26: Important Electrical Information
IMPORTANT ELECTRICAL INFORMATION WARNING: This treadmill requires a power source of 10 amps (100-120V) in order to properly operate. For your safety, as well as the safety of others, please verify that the power source is correct before plugging in the equipment. Any power source above or below this level could cause significant damage to the equipment and/or user. -
Página 27: Quick Start
OPERATING INSTRUCTIONS QUICK START: 1. Insert the magnet end of the safety key into the computer console. Turn on the power switch. 2. Press the START button, and the system will automatically display a 3 second countdown. Once the countdown reaches zero, the running belt will start at the initial default speed of 0.6 MPH. 3. -
Página 28: Function Keys
PROGRAMS Initial Default Value Set Range Display Range 0:00-99:00 TIME(MIN:SECOND) 0:00 15:00 5:00-99:00 SPEED(MPH) 0.6-9.0 0.6-9.0 0.00-99.9 DISTANCE(MILE) 0.00 1.00 0.50-99.9 PULSE(BPM) 50-200 0-999 CALORIE(KCAL) 10-999 FUNCTION KEYS: START: To start the treadmill, insert the magnet end of the Safety Key (D07) into the console and press the START button. - Página 29 FITNESS App. NOTE: This app will require Bluetooth connectivity to connect to the treadmill. Scan the QR barcode to directly locate SUNNY HEALTH & FITNESS App in the App Store on your device. In order to scan the QR Code, you must first download the QR READER App on your device.
- Página 30 TREADMILL FUNCTIONS SAFETY LOCK FUNCTION: Removing the Safety Key (No. D07) from the computer console while the treadmill is running will cause it to stop immediately. Once the treadmill reaches a full stop, the window display of the computer will show “- - -” and the buzzer will beep 3 times. To start the treadmill again, insert the magnet end of the Safety Key (No.
-
Página 31: Exercise Instructions
EXERCISE INSTRUCTIONS GETTING STARTED: Before starting any exercise program, you should consult your physician to determine if you have any medical or physical conditions that could put your health and safety at risk or prevent you from using the equipment properly. Be aware of your body’s signals. -
Página 32: Troubleshooting
TROUBLESHOOTING PROBLEM POSSIBLE CAUSE SUGGESTED ACTION Not plugged in. Plug cord into outlet. Treadmill will not start Safety Key is not inserted. Insert Safety Key. Tighten the adjustment bolts Running belt tension is not on the left and right side of the Running belt not centered correct on the left or right rear roller. - Página 33 Check motor wires to see if the motor is connected. If the The motor wire is not wire has been punctured or E06: Motor Abnormality connected, or the motor is damaged, you will need to damaged. replace it. If the problem is not rectified, you may need to replace the motor.
-
Página 34: Instrucciones De Armado
INSTRUCCIONES DE ARMADO Valoramos su experiencia con los productos de Sunny Health and Fitness. Para obtener ayuda con las piezas o la solución de problemas, contáctenos en support@sunnyhealthfitness.com o al 1-877-90SUNNY (877-907-8669). PASO 1: Abra la caja y retire el contenido. - Página 35 Valoramos su experiencia con los productos de Sunny Health and Fitness. Para obtener ayuda con las piezas o la solución de problemas, contáctenos en support@sunnyhealthfitness.com o al 1-877-90SUNNY (877-907-8669). PASO 3: Baje las Barras del Manubrios Izquierdo y Derecho (n.º C10 y n.°...
-
Página 36: Mantenimiento Y Cuidado
MANTENIMIENTO Y CUIDADO Una limpieza general le ayudará a prolongar la vida útil y el rendimiento de la caminadora. Mantenga la unidad limpia y cuidada; sacuda el polvo de los componentes periódicamente. Limpie ambos lados de la Banda de Caminadora (n.° C31) para evitar que se acumule polvo debajo de la Banda de Caminadora (n.°... -
Página 37: Lubricación De La Caminadora
LUBRICACIÓN DE LA CAMINADORA NOTA IMPORTANTE: Deberá lubricar la caminadora antes de usarla por primera vez. LUBRICANTE DE LA BANDA DE CAMINADORA Y DE LA CAMINADORA: Lubricando la Tabla de Caminadora (n.° D18) y la Banda para Caminadora (n.° C31) es esencial ya que la fricción entre las dos afectas la vida útil y la función de la Caminadora. -
Página 38: Instrucciones De Plegado
INSTRUCCIONES DE PLEGADO PASO 1: NOTA: Siempre desenchufe la caminadora antes de plegarla. Extraiga la Tuerca de Plástico (n.° C09) con la mano izquierda y baje el Soporte (n.° C08) con la mano derecha. Una vez que el soporte alcance ángulo adecuado, suelte la Tuerca de Plástico (n.°... - Página 39 PASO 3: Extraiga la Placa Giratoria (n.° A12) con la mano derecha y coloque la mano izquierda en Manubrio (n.° C42) [Posición B]. Luego empuje hacia abajo Tubos Verticales de la Izquierda y Derecha (n.° A06 y n.° A07) al mismo tiempo.
- Página 40 PASO 5: Coloque su mano en la Posición E, y con su pie, gire la Tablero Fijo Plegable (n.° A13) a la posición horizontal. PASO 6: Agarre la caminadora en la Posición E con su mano. Luego, con el pie, presione firmemente la caminadora en la posición J.
-
Página 41: Almacenamiento De La Caminadora
ALMACENAMIENTO DE LA CAMINADORA Esta caminadora está diseñada para ahorrar espacio. Puede optar por almacenar la caminadora de forma vertical u horizontal. A. Almacenamiento Vertical Después de plegar, coloque la caminadora cerca de la pared para evitar que caiga. Mantega fuera del alcance de los niños. -
Página 42: Cómo Mover La Caminadora
CÓMO MOVER LA CAMINADORA Coloque sus manos en la posición Coloque el Marco Plegable (n.° A05) dentro de la parte inferior de la caminadora y gire la Placa Fija Plegable (n.° A13) de forma vertical con su pie para fijar el Marco Plegable (n.°... - Página 43 INFORMATIÓN IMPORTANTE DE ELECTRICIDAD ADVERTENCIA: Esta caminadora requiere una fuente de alimentación de 10 amperios (100-120V) para que pueda funcionar correctamente. Para su seguridad y para la seguridad de los demás, verifique que la fuente de alimentación sea la correcta antes de enchufar el equipo. Una fuente de alimentación por encima o por debajo de este nivel podría provocar un gran daño al equipo o al usuario.
-
Página 44: Funciones De Control
INSTRUCCIONES DE USO INICIO RÁPIDO: 1. Inserte el extremo magnético de la llave de seguridad en la consola de la computadora. Encienda el interruptor de encendido. 2. Pulse el botón START (Inicio) y el sistema mostrará automáticamente una cuenta regresiva de 3 segundos. -
Página 45: Teclas De Función
CALORÍAS/DISTANCIA: Muestra la cantidad de calorías quemadas (0 a 999). Cuando la cuenta llegue a 999, se reiniciará y empezará desde 0. Al configurar en "Countdown Mode" (modo de cuenta regresiva), se contará desde la configuración deseada hasta 0. Cuando llegue a 0, la máquina se detendrá... -
Página 46: Reproducir Música
SUNNY HEALTH & FITNESS. NOTA: Esta aplicación requerirá conectividad Bluetooth para conectarse a la caminadora. Escanee el códigode barras QR para localizar la aplicación SUNNY HEALTH & FITNESS en su dispositivo. Para escanear el Código QR, primero debe descargar la aplicación ‘QR READER’ en su dispostivo. -
Página 47: Programas De Intervalo (P1-P9)
PROGRAMAS DE INTERVALO (P1-P9): Pulse el botón M para seleccionar un ajuste de intervalo. Los programas se muestran como P1-P9. Seleccione el programa, y la consola mostrará una cuenta regresiva desde los 10:00 MINUTOS, pulse los BOTONES DE VELOCIDAD +/- si desea aumentar o disminuir el tiempo de ejercicio. Pulse el botón START (inicio) para iniciar el programa de intervalos deseado. -
Página 48: Funciones De La Caminadora
FUNCIONES DE LA CAMINADORA BLOQUEO DE SEGURIDAD: Al extraer la Llave de Seguridad (n.° D07) de la consola de la computadora mientras la máquina esté en funcionamiento, esta se detendrá inmediatamente. Cuando la caminadora se detenga por completo, en la pantalla de la computadora aparecerá "- - -" y el timbre sonará 3 veces. Para volver a iniciar la máquina, inserte el extremo magnético de la Llave de Seguridad (n.°... -
Página 49: Instrucciones De Ejercicio
INSTRUCCIONES DE EJERCICIO COMIENZO: Antes de comenzar algún programa de ejercicios, deberá consultar con su médico para determinar si tiene alguna condición médica o física que pudiera poner en riesgo su salud y seguridad o que pudiera impedir que utilice correctamente el equipo. Esté... -
Página 50: Resolución De Problemas
RESOLUCIÓN DE PROBLEMAS PROBLEMA CAUSA POSIBLE ACCIÓN SUGERIDA Enchufe el cable en el No está enchufada. tomacorriente. La caminadora no arranca La llave de seguridad no Inserte la llave de seguridad. está insertada. La tensión de la banda de Ajuste los pernos del lado caminadora no es La banda de caminadora izquierdo y derecho del rodillo... - Página 51 Compruebe los cables del motor para revisar si el motor está El cable del motor no está conectado. Si el cable ha sido E06: Anormalidad del conectado o el motor está pinchado o dañado, deberá motor dañado. reemplazarlo. Si el problema no se soluciona, es posible que deba reemplazar el motor Compruebe los cables superior...
-
Página 52: Instructions D'ASsemblage
INSTRUCTIONS D’ASSEMBLAGE Nous apprécions votre expérience d'utilisation des produits Sunny Health and Fitness. Pour obtenir de l'aide concernant pièces dépannage, veuillez nous contacter à support@sunnyhealthfitness.com ou au 1-877-90SUNNY (877-907-8669). ÉTAPE 1: Ouvrir le carton et en retirer le contenu. Placer le Tapis de Course (n°... -
Página 53: Remarque Importante
Nous apprécions votre expérience d'utilisation des produits Sunny Health and Fitness. Pour obtenir de l'aide concernant pièces dépannage, veuillez nous contacter à support@sunnyhealthfitness.com ou au 1-877-90SUNNY (877-907-8669). ÉTAPE 3: Baisser les Guidons Gauche et Droit (n° C10 et n° C11) dans une position fixe. -
Página 54: Maintenance Et Entretien
MAINTENANCE ET ENTRETIEN Le nettoyage général prolonge la vie et améliore les performances de votre tapis de course. Maintenir l’appareil en état de propreté en essuyant ses éléments régulièrement. Nettoyer les deux faces de la Bande de Course (n C31) pour éviter que la poussière ne s’accumule dessous. Maintenir vos chaussures de course propres afin d’éviter que les saletés abîment la plate-forme et la Bande de Course (n C31). - Página 55 LUBRIFIER LE TAPIS DE COURSE REMARQUE IMPORTANTE: Vous devez lubrifier votre tapis de course avant la première utilisation. LUBRIFIANT POUR BANDE DE COURSE ET TAPIS DE COURSE : Il est essentiel de lubrifier la Plateforme de Course (n° D18) et la Bande de Course (n C31), car la friction entre les deux influence la durée de vie et le fonctionnement du tapis de course, il est donc recommandé...
-
Página 57: Instructions De Pliage
INSTRUCTIONS DE PLIAGE ÉTAPE 1: REMARQUE : Toujours débrancher le tapis de course de la prise de courant avant de le nettoyer. Retirer l’Écrou Plastique (n° C09) avec la main gauche et abaisser le Support (n° C08) avec la main droite. Une fois que le support atteint angle... - Página 58 ÉTAPE 3: Retirer la Plaque Rotative (n° A12) de la main droite et placer la main gauche sur la Poignée (n° C42) [position B]. Enfoncer ensuite les Tubes Verticaux Gauche et Droit (n° A06 et n° A07) en même temps. Enfoncer les Tubes Verticaux Gauche et Droit (n°...
- Página 59 ÉTAPE 5: Placer la main en E et utiliser le pied pour tourner la Plaquette de Fixation Rabattable (n° A13) en position horizontale. ÉTAPE 6: Saisir le tapis de course en E avec la main. Ensuite, donner un coup de pied ferme contre le tapis de course en J.
- Página 60 ENTREPOSAGE DU TAPIS DE COURSE Ce tapis de course est conçu pour économiser de l’espace. Il est possible de choisir d’entreposer le tapis de course verticalement ou horizontalement. A. Entreposage vertical Après le pliage, placer le tapis de course contre le mur pour éviter qu’il tombe.
- Página 61 COMMENT DÉPLACER LE TAPIS DE COURSE Placer les mains en E. Caler le Cadre Pliant (n° A05) au bas du tapis de course et tourner Plaquette Fixation Rabattable (n° A13) à la verticale avec le pied pour bloquer le Cadre Pliant (n°...
-
Página 62: Méthodes De Mise À La Terre
INFORMATIONS IMPORTANTES CONCERNANT l'ÉLECTRICITÉ AVERTISSEMENT: Ce tapis de course nécessite une alimentation de 10 ampères (100-120 volts) pour fonctionner correctement. Pour votre sécurité et celle des autres, veuillez vérifier que la source d’alimentation est appropriée avant de brancher l’appareil. Toute source d’alimentation à... -
Página 63: Démarrage Rapide
INSTRUCTIONS D’UTILISATION DÉMARRAGE RAPIDE: 1. Insérer l’extrémité magnétique de la clé de sécurité dans la console de l’ordinateur. Allumer l’interrupteur. 2. Appuyer sur la touche START (démarrage), et le système affichera automatiquement un décompte de 3 secondes. Quand le compte à rebours atteint zéro, la bande de course démarre à la vitesse par défaut initiale de 0,6 MPH. -
Página 64: Touches Fonction
CALORIES/DISTANCE Affiche la quantité de calories brûlées de 0 à 999 KCAL. En atteignant 999, le compteur se remet à 0 et reprend le compte. En mode Compte à rebours (Countdown), le décompte se fait du réglage choisi jusqu’à 0. Une fois qu’il atteint 0, l’appareil s’immobilise doucement et affiche «... -
Página 65: Connexion Usb
SUNNY HEALTH & FITNESS APP SUNNY HEALTH & FITNESS App vous permet de suivre votre entraînement! Suivre les progrès de votre entraînement est un facteur clé pour obtenir de meilleurs résultats et développer votre endurance. - Página 66 PROGRAMMES D’INTERVALLE (P1-P9): Appuyer sur la touche M pour sélectionner un intervalle. Les programmes s’affichent sous les noms P1 à P9. Sélectionner le programme souhaité, et la console affiche un compte à rebours à partir de 10:00 MIN, appuyer sur les touches SPEED +/- si vous souhaitez augmenter ou réduire la durée de l’exercice.
- Página 67 FONCTIONS DU TAPIS DE COURSE FONCTION DE VERROUILLAGE DE SÉCURITÉ: Retirer la Clé de Sécurité (n D07) de la console de l’ordinateur pendant que le tapis de course fonctionne l’arrêtera immédiatement. Une fois le tapis de course pleinement immobilisé, la fenêtre de l’ordinateur affiche «...
-
Página 68: Premiers Pas
INSTRUCTIONS D’EXERCICE PREMIERS PAS: Avant d’entamer un programme d’exercices, consultez votre médecin pour déterminer si vous avez quelque disposition physique ou médicale susceptible de mettre en danger votre santé et votre sécurité ou de vous empêcher d’utiliser cet appareil correctement. Soyez à... -
Página 69: Dépannage
DÉPANNAGE PROBLÈME CAUSE POSSIBLE ACTION SUGGÉRÉE Brancher cordon Il n’est pas branché. Le tapis de course ne d’alimentation à la prise. démarre pas La clé de sécurité n’est Insérer la clé de sécurité. pas insérée. La tension de la bande de Serrer les boulons de réglage course est La bande de course n’est... - Página 70 Vérifier les câbles du moteur pour voir si le moteur est Le câble du moteur n’est connecté. Si le câble a été E06: Anomalie du moteur pas connecté ou le moteur perforé ou endommagé, le est endommagé. remplacer. Si le problème n’est pas résolu, remplacer possiblement le moteur.