Tabla de contenido
Publicidad
Idiomas disponibles
Idiomas disponibles
Enlaces rápidos
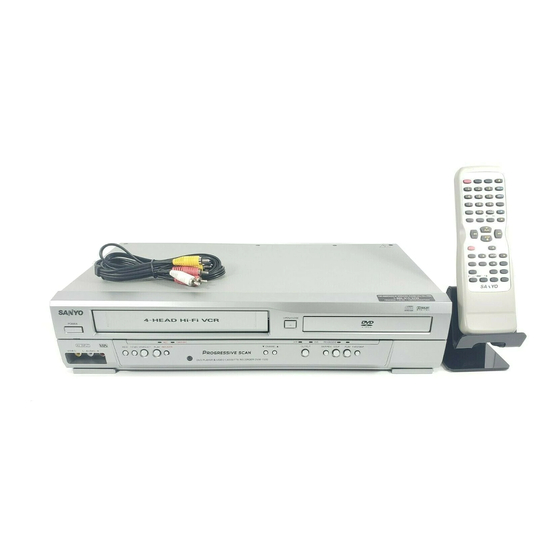
INSTRUCTION MANUAL
DVD Player & Video Cassette Recorder
SANYO'S HELP-LINE
Call the toll-free number below if you have any
difficulties operating this product.
TOLL FREE: 1-800-813-3435
(Weekdays: 7:30 AM - 4:00 PM Central Time)
Please read before using this equipment.
Table of Contents
Laser Safety. . . . . . . . . . . . . . . . . . . . . . . . . . . . . . . . . . . . . . . . 2
I IMPORTANT SAFEGUARDS . . . . . . . . . . . . . . . . . . . . . . . . . . . 3
Installation Location . . . . . . . . . . . . . . . . . . . . . . . . . . . . . . . . . . 4
Avoid the Hazards of Electrical Shock and Fire . . . . . . . . . . . . . . 4
Moisture Condensation Warning . . . . . . . . . . . . . . . . . . . . . . . . . 4
About Copyright . . . . . . . . . . . . . . . . . . . . . . . . . . . . . . . . . . . . . 4
Notice for Progressive Scan Outputs . . . . . . . . . . . . . . . . . . . . . 4
Symbols Used in This Manual . . . . . . . . . . . . . . . . . . . . . . . . . . 4
Maintenance . . . . . . . . . . . . . . . . . . . . . . . . . . . . . . . . . . . . . . . 4
I About the Video Cassettes and Discs . . . . . . . . . . . . . . . . . . . 5
Playable Video Cassettes . . . . . . . . . . . . . . . . . . . . . . . . . . . . . . 5
Playable Discs . . . . . . . . . . . . . . . . . . . . . . . . . . . . . . . . . . . . . . 5
Unplayable Discs . . . . . . . . . . . . . . . . . . . . . . . . . . . . . . . . . . . . 5
I Connections . . . . . . . . . . . . . . . . . . . . . . . . . . . . . . . . . . . . . . . 6
RF Output Channel . . . . . . . . . . . . . . . . . . . . . . . . . . . . . . . . . . 6
Hints for Cable Box or Satellite Box . . . . . . . . . . . . . . . . . . . . . . 6
Connection to an Audio System . . . . . . . . . . . . . . . . . . . . . . . . . 6
Connection to a TV . . . . . . . . . . . . . . . . . . . . . . . . . . . . . . . . . . 7
Front & Rear Terminals. . . . . . . . . . . . . . . . . . . . . . . . . . . . . . . . 7
Remote Control . . . . . . . . . . . . . . . . . . . . . . . . . . . . . . . . . . . . . 8
Installing the Batteries for the Remote Control . . . . . . . . . . . . . . 8
I Preparation for Use. . . . . . . . . . . . . . . . . . . . . . . . . . . . . . . . . . 9
Turn On the Unit for the First Time . . . . . . . . . . . . . . . . . . . . . . . 9
To Add/Delete Channels. . . . . . . . . . . . . . . . . . . . . . . . . . . . . . . 9
Clock Setup . . . . . . . . . . . . . . . . . . . . . . . . . . . . . . . . . . . . . . . . 9
I Function Overview . . . . . . . . . . . . . . . . . . . . . . . . . . . . . . . . . 10
Front Panel Indicator . . . . . . . . . . . . . . . . . . . . . . . . . . . . . . . . 10
VCR/DVD Switching . . . . . . . . . . . . . . . . . . . . . . . . . . . . . . . . . 10
I Playback . . . . . . . . . . . . . . . . . . . . . . . . . . . . . . . . . . . . . . . . . 11
I Other Operations . . . . . . . . . . . . . . . . . . . . . . . . . . . . . . . . . . 11
Index Search . . . . . . . . . . . . . . . . . . . . . . . . . . . . . . . . . . . . . . 11
Time Search. . . . . . . . . . . . . . . . . . . . . . . . . . . . . . . . . . . . . . . 11
Auto Repeat . . . . . . . . . . . . . . . . . . . . . . . . . . . . . . . . . . . . . . . 12
Basic TV Connection
Cable TV
Antenna
signal
or
(Back of TV)
Disconnect
5
Please refer to "Connections" on page 6.
Cable TV
Antenna
(Back of DVD+VCR)
signal
or
2
ANT-IN
Connect
ANT-OUT
Connect
RF cable
DVW-7200
Supplied Accessory
• Remote control
(NA230UD)
with two AA batteries
• Audio/Video
• Instruction
cables
manual
INSTRUCTION MANUAL
I Recording . . . . . . . . . . . . . . . . . . . . . . . . . . . . . . . . . . . . . . . . 12
Recording & OTR (One Touch Recording) . . . . . . . . . . . . . . . . 12
Timer Recording. . . . . . . . . . . . . . . . . . . . . . . . . . . . . . . . . . . . 12
Hints for OTR and Timer Recording . . . . . . . . . . . . . . . . . . . . . 13
Copying a Video Tape. . . . . . . . . . . . . . . . . . . . . . . . . . . . . . . . 14
I MTS System (Multi-Channel Television Sound) . . . . . . . . . . . 14
When You Play Back a Tape Recorded in Hi-Fi Stereo . . . . . . . 14
I Playback . . . . . . . . . . . . . . . . . . . . . . . . . . . . . . . . . . . . . . . . . 15
I On-Screen Display . . . . . . . . . . . . . . . . . . . . . . . . . . . . . . . . . 16
I Search Function . . . . . . . . . . . . . . . . . . . . . . . . . . . . . . . . . . . 17
Track Search / Title/Chapter Search / Time Search . . . . . . . . . . 17
I Marker Setup. . . . . . . . . . . . . . . . . . . . . . . . . . . . . . . . . . . . . . 17
I Repeat / Random / Programmed Playback . . . . . . . . . . . . . . 18
I Special Settings . . . . . . . . . . . . . . . . . . . . . . . . . . . . . . . . . . . 19
Subtitle Language / Audio Language / Camera Angle /
Black Level Setting / Stereo Sound Mode / Virtual Surround . . . . . . . 19
I DVD Setup . . . . . . . . . . . . . . . . . . . . . . . . . . . . . . . . . . . . . . . . 20
LANGUAGE Setting . . . . . . . . . . . . . . . . . . . . . . . . . . . . . . . . . 20
DISPLAY Setting . . . . . . . . . . . . . . . . . . . . . . . . . . . . . . . . . . . 21
AUDIO Setting . . . . . . . . . . . . . . . . . . . . . . . . . . . . . . . . . . . . . 21
PARENTAL Setting . . . . . . . . . . . . . . . . . . . . . . . . . . . . . . . . . . 22
OTHERS Setting . . . . . . . . . . . . . . . . . . . . . . . . . . . . . . . . . . . 22
I Troubleshooting Guide . . . . . . . . . . . . . . . . . . . . . . . . . . . . . . 23
I Specifications . . . . . . . . . . . . . . . . . . . . . . . . . . . . . . . . . . . . . 24
I Language List . . . . . . . . . . . . . . . . . . . . . . . . . . . . . . . . . . . . . 24
I Limited Warranty . . . . . . . . . . . . . . . . . . . . . . . . . . . . . . . . . . . 25
Español . . . . . . . . . . . . . . . . . . . . . . . . . . . . . . . . . . . . . . . . . . 26
(Back of TV)
3
(supplied)
• RF cable
• Quick start
guide
Quick start guide
4
AC
outlets
Plug in
From DVD+VCR
From TV
Publicidad
Tabla de contenido

Manuales relacionados para Sanyo DVW-7200

Resumen de contenidos para Sanyo DVW-7200
-
Página 1: Tabla De Contenido
INSTRUCTION MANUAL DVW-7200 DVD Player & Video Cassette Recorder Supplied Accessory • Remote control • RF cable (NA230UD) with two AA batteries SANYO’S HELP-LINE • Audio/Video • Instruction • Quick start Call the toll-free number below if you have any... -
Página 2: Precautions
• You can dispose of them at a collection point for used up batteries or special waste. Contact your council for details. For Customer Use: Read carefully the information located at the back of this unit and enter below the Serial No. Retain this information for future reference. DVW-7200 Model No. Serial No. – 2 –... -
Página 3: I Important Safeguards
IMPORTANT SAFEGUARDS 1. Read Instructions - All the safety and operating instruc- proper grounding of the mast and supporting structure, tions should be read before the appliance is operated. grounding of the lead-in wire to an antenna discharge unit, size of grounding conductors, location of antenna-dis- 2. -
Página 4: Installation Location
Installation Location Maintenance For safety and optimum performance of this unit: SERVICING • Do not stand the unit up vertically. Install the unit in ¡Please refer to relevant topics on the “Troubleshooting a horizontal and stable position. Do not place any- Guide”... -
Página 5: I About The Video Cassettes And Discs
About the Video Cassettes and Discs Playable Video Cassettes Use only cassettes marked with this unit. Playable Discs Recorded Playable Disc size Disc types Mark (logo) Region code signals discs DVD-Video * 1, 2, 4, 6 Example 12 cm Title 1 Title 2 Digital video Chapter 1 Chapter 2... -
Página 6: Setup
Setup Connections Please refer to “Basic TV Connection” on the front page before you use this unit. RF Output Channel If channel 3 is already occupied for broadcasting, 5) After a few seconds, press [PLAY B B ] on Hint Hint the unit for 3 seconds. -
Página 7: Connection To A Tv
LINE1, LINE2, 00, 90, 91, 92, 93 RCA: INPUT, TV/VCR, 00, 90, 91, 92, 93 INPUT, TV/VCR, 00, 90, 91, 92, 93 Samsung: TV/VIDEO Hitachi: INPUT, AUX Sanyo: VIDEO JVC: A/V CHANNEL, INPUT1, SVIDEO, INPUT2 Sharp: Kenwood: Sony: VIDEO1, VIDEO2, VIDEO3... -
Página 8: Remote Control
Remote Control DVD mode VCR mode OPEN Disc/Tape CLOSE POWER SPEED AUDIO Button (Alphabetical order) EJECT • To select channel. SKIP CH. • • To select chapter or title directly. • To select track directly. The +10 button has no effect in VCR mode. -
Página 9: I Preparation For Use
Preparation for Use Hint Hint Turn On the Unit for the To Add/Delete Channels First Time • If you accidentally select Spanish or French and need English: Press [MENU] - M E N U - and choose SELEC. IDIOMA or SELEC- MENU Press first. -
Página 10: I Function Overview
Hint Hint CLOCK SET CLOCK SET • To go back one step, press [s] (during MONTH DAY YEAR MONTH DAY YEAR the steps 2) to 7) ). 1 0 / 0 3 MON 2 0 0 5 1 0 / 0 3 MON 2 0 0 5 •... -
Página 11: Vcr Functions
VCR Functions Playback Before: Turn on the TV and set it to channel 3. • If channel 3 is already occupied for broad- OPEN CLOSE POWER SPEED AUDIO casting, see “RF Output Channel” section. EJECT Press first. POWER SKIP CH. VCR TV To start TIMER REC... -
Página 12: Auto Repeat
Auto Repeat This function will playback a tape - M E N U - repeatedly from the beginning MENU TIMER PROGRAMMING when the tape reaches to the end. B AUTO REPEAT [OFF] CHANNEL SET UP CLOCK SET - M E N U - LANGUAGE SELECT Press first. -
Página 13: Hints For Otr And Timer Recording
Hint Hint Select the desired start time ONE TIME PROGRAM PROGRAM NUMBER 1 (hour). • To go back one step, press [ ] (during DATE 1 0 / 2 4 MON the steps 3) to 9) ). START TIME 0 7 : 3 0 PM ONE TIME PROGRAM TIME 0 8 : 3 0 PM PROGRAM NUMBER 1... -
Página 14: Copying A Video Tape
Copying a Video Tape Warning: Unauthorized recordings of copyrighted video tapes may be an infringement of copyright laws. (Back of TV) (Back of another source) (Back of Recording DVD+VCR*) AUDIO OUT DVD/VCR DVD/VCR COMPONENT AUDIO OUT AUDIO IN VIDEO OUT ANT-IN DIGITAL COMPONENT... -
Página 15: Dvd Functions
DVD Functions Playback Before: Turn on the TV, amplifier and any other components which Hint Hint are connected to this unit. Make sure the TV and audio receiver OPEN • A “prohibited icon” may appear at POWER SPEED AUDIO CLOSE (commercially available) are set to the correct channel. -
Página 16: I On-Screen Display
On-Screen Display You can check the information about the current disc by pressing [DISPLAY] on the remote control. Press first. Press first. DVD-V DVD-V DISPLAY Angle icon, appears only when avail- Current playback status able on the DVD DISPLAY 4/12 0:03:21 - 0:02:15 Current playback status Remaining time of the current track 11/16 0:00:10 - 0:03:30... -
Página 17: I Search Function
Search Function Track Search Title / Chapter Search Time Search Press first. Press first. Press first. DVD-V DVD-V DVD-V DVD-V Using [SEARCH MODE] Using [SEARCH MODE] Using [SEARCH MODE] Using [SEARCH MODE] PLAY 1:29:00 TOTAL SEARCH MODE PLAY SEARCH Press repeatedly until MODE Press once for the the Time Search dis-... -
Página 18: I Repeat / Random / Programmed Playback
Repeat / Random / Programmed Playback Hint Hint Repeat Playback Random Playback • Press [CLEAR/C.RESET] at step 2 This function shuffles the playing order erase the most recently entered track. Press first. DVD-V DVD-V of tracks instead of playback in the •... -
Página 19: I Special Settings
Special Settings Subtitle Language Audio Language Stereo Sound Mode Press first. Press first. Press first. DVD-V DVD-V DVD-V DVD-V This unit allows you to select a subtitle This unit allows you to select an audio This unit allows you to select a sound language (if available) during DVD play- language (if multiple languages are mode during CD playback. -
Página 20: Dvd Setup
DVD Setup Press first. UICK SETUP Men UICK SETUP Men You can select the “PLAYER MENU”, “TV ASPECT”, or “DOLBY DIGITAL” from the QUICK SETUP menu quickly. SETUP STOP Select the desired item. <SETUP MENU> Confirm that “QUICK” is selected. ENTER SETUP QUICK... -
Página 21: Display Setting
DISPLAY Setting You can change the display functions. Follow the step 1) to 3) in the “CUSTOM Menu” section on page 20. Select the desired item. To exit the menu SETUP TV ASPECT: QUICK Select the (Default: 4:3 LETTER BOX) desired See Hint to the right. -
Página 22: Parental Setting
PARENTAL Setting Parental Control limits the disc viewing that exceed your settings. (An incorrect password will not play.) This feature prevents your children from viewing inappropriate materials. arental vels arental vels Parental Level allows you to set the rating levels of your DVD discs. Playback will stop if the ratings exceed the levels you set. Follow the steps 1) to 3) in the “CUSTOM Menu”... -
Página 23: Reset To The Default Setting (Except For Parental Setting)
Reset to the Default Setting (Except for PARENTAL Setting) To exit the menu SETUP STOP SETUP ENTER ENTER Select “YES”. Select “INITIALIZE”. <SETUP MENU> Press Hint Hint SETUP SETUP INITIALIZE SETUP twice. QUICK Initialize? • When you cancel to QUICK CUSTOM initialize at step 3), CUSTOM... -
Página 24: I Specifications
Specifications Video Heads : Operating temperature : • Designs and specifications are subject to change without notice. Four Heads 41°F (5°C) to 104°F (40°C) • If there is a discrepancy between lan- Output signal format : Dimensions : guages, the default language will be NTSC color W : 17-3/16"... -
Página 25: I Limited Warranty
SANYO product against defects in materials and workmanship for the periods of LABOR and PARTS specified above. SANYO will repair or replace (at its option) the product and any of its parts which fail to conform to this warranty with new or refurbished products or parts. -
Página 26: Conexiones
Instalación Conexiones Conexiones básicas del TV Señal de Antena Antena Señal de (Atrás del DVD+VCR) cable TV cable TV (Atrás del TV) (Atrás del TV) Enchufe ANT-IN estándar Desconecte Conecte ANT-OUT Del DVD+VCR Conecte Del TV Cable de RF (entregado) Canal de salida RF Si el canal 3 ya está... - Página 27 LINE1, LINE2, 00, 90, 91, 92, 93 RCA: INPUT, TV/VCR, 00, 90, 91, 92, 93 INPUT, TV/VCR, 00, 90, 91, 92, 93 Samsung: TV/VIDEO Hitachi: INPUT, AUX Sanyo: VIDEO JVC: A/V CHANNEL, INPUT1, SVIDEO, INPUT2 Sharp: Kenwood: Sony: VIDEO1, VIDEO2, VIDEO3...
-
Página 28: Mando A Distancia
Mando a distancia Modo DVD Modo VCR Disco/cinta OPEN Botón POWER SPEED AUDIO CLOSE (Orden alfabético) EJECT • • Para seleccionar Para seleccionar el canal. • Para seleccionar • SKIP CH. El botón +10 no tiene efecto directamente un capítulo directamente la pista. -
Página 29: Preparación Para Utilizar
Preparación para utilizar Consejo Consejo Conecte la unidad por primera vez Para agregar/borrar canales • Si selecciona accidentalmente Inglés o Francés y necesita el Español: Presione Presione primero - M E N U - [MENU] y elija LANGUAGE SELECT o SELECTION LANGUE. -
Página 30: Vista General De Las Funciones
Consejo Consejo AJUSTE DE RELOJ AJUSTE DE RELOJ • Para volver un paso atrás, presione [s] AÑO AÑO (durante los pasos 2) a 7) ). 1 0 / 0 3 LUN 2 0 0 5 1 0 / 0 3 LUN 2 0 0 5 •... -
Página 31: Reproducción
Funciones de VCR Reproducción Antes: Encienda el TV y ajuste al canal OPEN CLOSE POWER SPEED AUDIO • Si el canal 3 ya está ocupado por una EJECT emisora, vea la sección "Canal de salida RF". POWER SKIP CH. Presione primero VCR TV TIMER REC AV INPUT... -
Página 32: Repetición Automática
Repetición automática Esta función reproducirá - M E N U - MENU repetidamente una cinta desde el PROGRAMAR principio cuando la cinta llega al final. B AUTOREPETIR [OFF] AJUSTE CANAL AJUSTE DE RELOJ Presione primero SELEC. IDIOMA - M E N U - SALIDA DEL AUDIO TV ESTEREO [ON]... -
Página 33: Seleccione El Tiempo De Inicio
Consejo Consejo Seleccione el tiempo de inicio PROGRAMA NORMAL deseado (hora). NUMERO DE PRG. 1 • Para volver un paso, presione [ ] (durante los FECHA 1 0 / 2 4 LUN pasos 3) a 9) ). PROGRAMA NORMAL HORA INICIO 0 7 : 3 0 PM HORA FINAL 0 8 : 3 0 PM NUMERO DE PRG. -
Página 34: Copiado De Una Cinta De Video
Copiado de una cinta de video Advertencia: Las grabaciones no autorizadas de cintas de video protegidas por los derechos de autor puede infringir las leyes de derechos de autor. (Atrás del TV) (Atrás de otra fuente) (Atrás del DVD+VCR de grabación*) AUDIO OUT DVD/VCR DVD/VCR... -
Página 35: Funciones De Dvd
Funciones de DVD Reproducción Consejo Consejo Antes: Encienda el TV, amplificador y otros componentes que estén conectados a la unidad. Asegúrese que el TV y sintonizador de audio OPEN • Un “icono de prohibido” puede CLOSE POWER SPEED AUDIO (de venta en los comercios) están colocados en el canal correcto. aparecer arriba a la EJECT derecha en la... -
Página 36: Indicaciones En La Pantalla
Indicaciones en la pantalla Puede verificar la información acerca del disco actual presionando [DISPLAY] en el mando a distancia. Presione primero Presione primero DVD-V DVD-V El icono de ángulo puede aparecer DISPLAY DISPLAY sólo mientras existe en el DVD Estado de reproducción Estado de reproducción actual actual 4/12 0:03:21 - 0:02:15... -
Página 37: Función De Búsqueda
Función de búsqueda Búsqueda de pista Búsqueda de título/capítulo Búsqueda de tiempo Presione primero Presione primero DVD-V DVD-V DVD-V DVD-V Utilización de [SEARCH MODE] Utilización de [SEARCH MODE] Utilización de [SEARCH MODE] Utilización de [SEARCH MODE] Presione primero SEARCH MODE PLAY PLAY 1:29:00... -
Página 38: Reproducción Repetida/Aleatoria/Programada
Reproducción repetida/aleatoria/programada Reproducción repetida Reproducción repetida A-B Reproducción programada Presione primero DVD-V DVD-V DVD-V DVD-V Presione primero Presione primero Puede determinar el orden en el que se reproducen las pistas. La función de repetición sólo existe durante la reproducción. PLAY STOP PROGRAMA CD-DA... -
Página 39: Ajustes Especiales
Ajustes especiales Idioma de subtítulos Idioma de audio Modo de sonido estéreo Presione primero Presione primero Presione primero DVD-V DVD-V DVD-V DVD-V Esta unidad permite seleccionar un idioma de Esta unidad permite seleccionar un La unidad permite seleccionar un modo de sonido durante la audio (si hay múltiples idiomas disponibles) idioma de subtítulos (si existe) durante reproducción de CD. - Página 40 Ajuste DVD Presione primero Menú RÁPIDO Menú RÁPIDO Puede seleccionar rápidamente el "MENÚ REPRODUC.", "ASPECTO DE TV" o "DOLBY DIGITAL" del menú RÁPIDO. SETUP STOP Seleccione el ítem deseado. <MENÚ AJUSTE> Confirme que se seleccionó AJUSTE RÁPIDO ENTER RÁPIDO. Paso 5) MENÚ...
- Página 41 Ajuste PANTALLA Puede cambiar las funciones de pantalla. Siga los pasos 1) a 3) en la sección "Menú PERSNALIZ." en la página 40. Seleccione el ítem deseado. Para salir del menú SETUP ASPECTO DE TV: RÁPIDO Seleccione (Por omisión: 4:3 LETTER BOX) el ajuste Vea el Consejo a la derecha.
-
Página 42: Niveles De Edad
Ajuste PATERNO El control de edad limita el uso de discos que superen sus selecciones. (Una contraseña incorrecta no reproducirá.) Esta característica evita que sus niños vean materiales no adecuados. Niveles de edad Niveles de edad El nivel de edad permite seleccionar el nivel de prohibición para menores de sus discos DVD. La reproducción se detendrá si el nivel supera los niveles seleccionados. -
Página 43: Reprograme Al Ajuste Por Omisión (Excepto El Ajuste Paterno)
Reprograme al ajuste por omisión (Excepto el ajuste PATERNO) Para salir SETUP STOP del menú SETUP ENTER ENTER <MENÚ AJUSTE> Seleccione "SÍ". Seleccione "INICIALIZAR". Consejo Consejo AJUSTE INICIALIZAR AJUSTE AJUSTE Presione • Cuando cancele la ¿Ejecuta la inicialización? RÁPIDO RÁPIDO PERSNALIZ. -
Página 44: Garantía Limitada
Lo anterior está en lugar de todas las demás garantías explícitas y SANYO no asume ni autoriza a ninguna parte a asumir autorizar en su lugar cualquier otra obligación o responsabilidad.