Tabla de contenido
Publicidad
Idiomas disponibles
Idiomas disponibles
Enlaces rápidos
Publicidad
Tabla de contenido

Resumen de contenidos para Steren CCTV-095
-
Página 2: Sistema De Circuito Cerrado De Tv Con Cámarasy Monitor
Circuito Cerrado de TV. Para apoyo, compras y para todo lo nuevo que tiene Steren, visite nuestro sitio Web en: www.steren.com Antes de usar su nuevo Circuito Cerrado de TV STEREN, lea por completo este instructivo. -
Página 3: Características
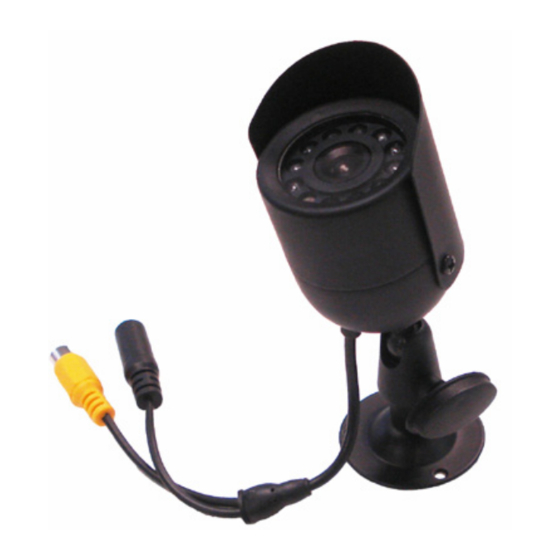
CARACTERÍSTICAS - El sistema de CCTV (Circuito cerrado de TV), es ideal para la vigilancia o supervisión de 4 áreas o zonas diferentes de manera simultánea. - Incluye un monitor de 10”. - Este monitor cuenta con un multiplexor para poder observar las cámaras de manera individual en cámara fija o en secuencia de cámaras. - Página 4 PARTES 1. Monitor 2. Cámaras (4) 3. Cables para las cámaras (4) 4. Adaptador de corriente...
- Página 5 INSTRUCCIONES DE INSTALACIÓN - Conecte el cable de alimentación del monitor. - Conecte el cable de cada cámara al monitor y a la cámara. El lado del conector de S-Video va al monitor, mientras que el de RCA y alimentación va a la cámara. El conector RCA amarillo es para el video y el conector rojo es para la alimentación.
- Página 6 - Coloque las cámaras apuntando hacia la zona que quiere supervisar. - Además, si cuenta con una cámara que tenga micrófono incorporado, puede conectar la salida de audio al cable RCA blanco y supervisar también el audio. - Si quiere supervisar desde otro monitor o grabar en un dispositivo adicional, conecte, mediante un cable RCA, desde el conector “V OUT”...
- Página 7 INSTRUCCIONES DE OPERACIÓN - Encienda el monitor usando el botón de POWER. - Con el botón MODE en la parte trasera puede seleccionar entre el modo manual (cámara por cámara) y el modo automático (se cambia automáticamente de cámara en una secuencia de la 1 a la 4).
- Página 8 - Para seleccionar el tiempo de visualización de cada cámara, gire el control TIME en la parte delantera. Se pude seleccionar desde 1 hasta 30 segundos. - Ajuste el video para cada una de las cámaras. Esto se logra girando el botón de V-HOLD y presionando SELECT para cambiar de cámara en el modo de selección manual.
-
Página 9: Especificaciones
ESPECIFICACIONES Monitor Alimentación: 12 V--- 2A Salida: 12 V--- para cada cámara. Cámara Alimentación: 12 V--- 120mW Convertidor Alimentación: 100-240 V~ 50/60 Hz 1,25 A Salida: 12 V--- 2A El diseño del producto y las especificaciones pueden variar, sin previo aviso. -
Página 10: Póliza De Garantía
1.- Para hacer efectiva la garantía, presente ésta póliza y el producto, en donde fue adquirido o en Electrónica Steren S.A. de C.V. 2.- Electrónica Steren S.A de C.V. se compromete a reparar el producto en caso de estar defectuoso sin ningún cargo al consumidor. Los gastos de transportación serán cubiertos por el proveedor. -
Página 12: Cameras And Monitor Cctv Kit
4 CAMERAS AND MONITOR CCTV KIT CCTV-095 Thank you for purchasing your new CCTV Kit. For support, shopping, and everything new at Steren, visit our website at: www.steren.com Before using your new Steren’s CCTV kit, read carefully this User’s manual. - Página 13 FEATURES - The CCTV system is perfect to maintain under surveillance up to 4 different areas simultaneously. - The kit includes a 10” B/W monitor. - The monitor has a multiplexer to watch 4 images one by one. - The camera connectors are S-Video type. - The system includes 4 CMOS cameras with 510x492 lines of resolution and infrared LEDs for night vision.
- Página 14 PARTS 1. Monitor 2. Cameras (4) 3. Camera cable (4) 4. Power adapter...
- Página 15 INSTALL INSTRUCTIONS - Connect the power adapter to the monitor. - Connect each camera cable to the monitor and the camera. The S-Video side goes to the monitor, and the RCA and power terminals to the camera. The yellow RCA connector is for video and the red connector is for power.
- Página 16 - Point the cameras to the zone you want to supervise. - Besides, if you have a microphone incorporated camera, you can connect the audio out to the white RCA cable and supervise audio too. - If you want to supervise from another monitor or record on an external device, connect it, by RCA cable, from the monitor’s “V OUT”...
- Página 17 OPERATION INSTRUCTIONS - Turn on the monitor using the POWER button. - With the MODE button in the back you can select between the manual mode (camera by camera) and the automatic mode (camera view changes in sequence from 1 to 4). MODE SELECT V-HOLD...
- Página 18 - To select the cameras’ viewing time in automatic mode, turn the TIME control in the front. You can select from 1 to 30 seconds. - Adjust cameras’ video. This can be achieved by pressing the SELECT button to select the camera and turning the V-HOLD button in the manual mode.
- Página 19 SPECIFICATIONS Monitor Power input: 12 V--- 2A Power output: 12 V--- each camera Camera Power input: 12 V--- 120mW Power converter Input: 100-240 V~ 50/60 Hz 1.25 A Output:: 12 V--- 2A Product design and specifications are subject to change without previous notice.
- Página 20 2.- If the product stills on the warranty time, the company will repair it free of charge. 3.- The repairing time will not exceed 30 natural days, from the day the claim was received. 4.- Steren sell parts, components, consumables and accessories to customer, as well as warranty service, at any of the addresses mentioned later.


