Tabla de contenido
Publicidad
Enlaces rápidos
Models/Modelos/Modéles
710LF-HDF & 711LF-HDF
Series/Series/Seria
Write purchased model number here.
Escriba aquí el número del modelo comprado.
Inscrivez le numéro de modèle ici.
You may need/Usted puede necesitar/Articles dont vous pouvez avoir besoin:
For easy installation of your Delta
faucet you will need:
• To READ ALL the instructions completely
before beginning.
• To READ ALL warnings, care, and
maintenance information.
Para instalación fácil de su llave Delta
usted necesitará:
• LEER TODAS las instrucciones completamente
antes de empezar.
• LEER TODOS los avisos, cuidados, e
información de mantenimiento.
Pour installer votre robinet Delta
facilement, vous devez:
• LIRE TOUTES les instructions avant de débuter;
• LIRE TOUS les avertissements ainsi que toutes
les instructions de nettoyage et d'entretien;
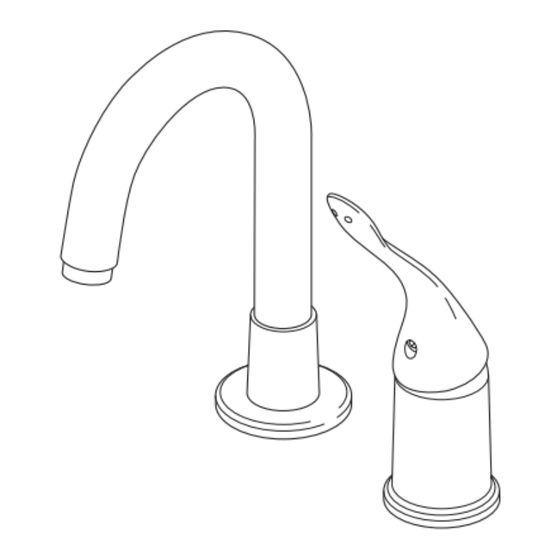
SINGLE HANDLE CLASSIC
77529
BAR / PREP FAUCET
GRIFO CLÁSICO MONOMANDO PARA
BARES / FREGADEROS DE PREP
ROBINET CLASSIC À UNE MANETTE
POUR ÉVIER DE BAR OU D'ÎLOT
1
T E FLO N
10/1/15
Rev. B
Publicidad
Tabla de contenido

Resumen de contenidos para Delta 710LF-HDF
- Página 1 • To READ ALL the instructions completely before beginning. • To READ ALL warnings, care, and maintenance information. Para instalación fácil de su llave Delta usted necesitará: • LEER TODAS las instrucciones completamente antes de empezar. • LEER TODOS los avisos, cuidados, e información de mantenimiento.
-
Página 2: Garantía Limitada De Las Llaves De Agua Comerciales Delta
Cette garantie s’applique seulement aux produits commerciaux des sociétés Delta Faucet preuve d’achat à notre usine, FRAIS DE TRANSPORT PRÉPAYÉS, à l’adresse indiquée. et Delta Faucet Canada et est nulle de plein droit pour tout dommage causé à ce robinet CETTE GARANTIE EST LA SEULE GARANTIE EXPRESSE FAITE PAR DELTA. - Página 3 RP64697s Spout Assembly RP64696 RP54687s 711 Series (Swivel) Spout Assembly Handle & Set Screw Ensamble del Surtidor 710 Series (Locked) Manija y tornillo de presión Serie 711 (Cerrado) Ensamble del Surtidor Poignée et vis de calage Serie 710 (Cerrado) Série 711 (pivotant) Série 710 (fixe) RP152 Set Screw...
-
Página 4: Mantenimiento
1/8" (3.2 mm) 1/8 po (3.2 mm) Maintenance Cleaning and Care If faucet exhibits very low flow: If faucet leaks from spout outlet–SHUT OFF Care should be given to the cleaning of this product. A. Remove aerator (1) and clean , or WATER SUPPLIES. -
Página 5: Spout Installation
Spout Installation Valve Installation NOTE: These faucets are designed to fit a maximum countertop thickness of 2 1/2". Slide the gasket (1) up over tubes of valve assembly (2) SHUT OFF WATER SUPPLIES. Assemble spout (1) and gasket (2). Slide spout tube and shank and place in groove in base (3). - Página 6 Slide tube end (1) into adapter (2) and secure with clip (3). Pull moderately on tube to Thread sleeve (1) over bonnet (2) and hand tighten. Place handle ensure connection has been made. (3) on stem (4) and secure with set screw (5). Deslice el extreme del tubo (1) en el adaptador (2) y fije con el gancho (3).
-
Página 7: Water Line Connections
Remove aerator (1) and move faucet handle (2) to the full on mixed Water Line Connections position. Turn on hot and cold water supplies (3) and flush water lines for Ensure all fittings and end connections are free of debris. Faucet one minute. -
Página 8: Fijando La Parada De Límite De La Manija (Opcional)
Setting The Handle Limit Stop (Optional) This faucet includes an integrated handle limit stop that has two positions. Position because it limits the amount of hot water in the mix; however, this handle limit stop 1, to the left, allows full handle motion (the full range between “all cold” to “all hot”). will not always prevent scalding because it does not compensate for incoming pressure or sudden water temperature changes.


