
Manuales relacionados para Steren PLATINUM CCTV-0900


Resumen de contenidos para Steren PLATINUM CCTV-0900
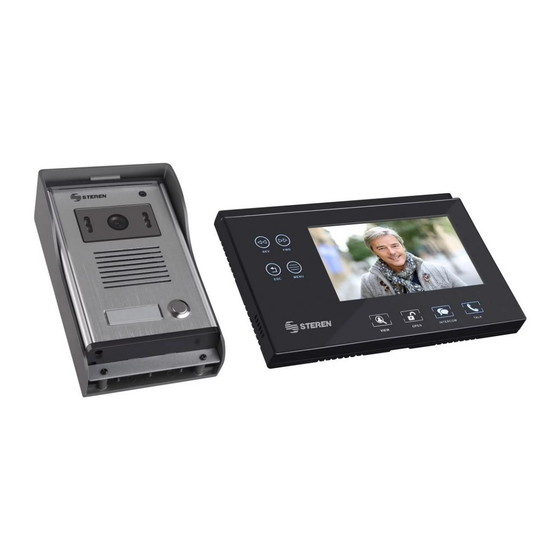
- Página 1 CCTV-0900 Video intercomunicador con captura automática de foto VIEW OPEN INTERCOM TALK line 0616m V0.0...
-
Página 2: Importante
La información que se muestra en este manual sirve únicamente como referencia sobre el producto. Debido a actualizaciones pueden existir diferencias. Consulte nuestra página web www.steren.com para obtener la versión más reciente de este manual. Precauciones • Este producto NO es un juguete; manténgalo fuera del alcance de los niños. -
Página 3: Tabla De Contenido
Contenido Placa aseguradora VIEW OPEN INTERCOM TALK Video intercomunicador Cámara Convertidor Cable de de voltaje interconexión Protector Arnés de 3 pines Placa de soporte Arnés de 4 pines (x2) Manual de instrucciones Kit de tornillos y taquetes... -
Página 4: Parte Interna
Partes Cámara Lente Micrófono LEDs de visión nocturna Altavoz Placa de Timbre identificación Parte interna Palanca para ajuste de lente Entrada para intercomunicador Jumper Terminal para cerradura... -
Página 5: View
Video intercomunicador Desplazamiento Configuración Micrófono Salir/ Pantalla Tomar foto Apertura Contestar/ Colgar VIEW OPEN INTERCOM TALK Monitoreo Intercomunicador Entrada de alimentación Conexión de cámara Intercomunicador secundario Sin función Volumen Altavoz... -
Página 6: Retirar Las Tapas De La Cámara
Retirar las tapas de la cámara... -
Página 7: Diagramas De Conexión
Diagramas de conexión Utilice cable UTP CAT 5 para realizar las conexiones (máximo 50m) Conexión básica Cable de interconexión Conexión de cerradura *Las cerraduras se venden por separado. Consulte a su distribuidor autorizado para obtener información acerca de las cerraduras compatibles con este producto. Opción 1 Cerradura eléctrica* EL y AC entregan 12 V en los... -
Página 8: Instalación
Opción 2 Cerradura magnética Retire el jumper para que funcione correctamente el sistema Fuente de alimentación BC y EL se PUSH comportan como un switch normalmente abierto Instalación Intercomunicador Seleccione un muro o superficie sólida para instalar el intercomunicador. No olvide considerar el largo del cable de interconexión necesario y del cable del convertidor de voltaje... - Página 9 Cámara No coloque la cámara en lugares donde esté expuesta directamente a condiciones de sol o de lluvia. Debe quitar la tapa posterior para tener acceso a la palanca de ajuste. (Ver página 6) En caso de ser necesario, ajuste el lente de la cámara Seleccione un muro o superficie sólida para instalar la cámara.
- Página 10 La cámara se alimenta de energía a través del intercomunicador...
-
Página 11: Funcionamiento
Funcionamiento Modo de espera Modo activo VIEW OPEN INTERCOM TALK VIEW OPEN INTERCOM TALK Cámara desactivada Cámara activada Llamada del visitante Cuando un visitante toque el timbre, se activará la cámara automáticamente y tomará una fotografía. Activar/Desactivar el altavoz de la cámara, para comunicarse con el visitante. -
Página 12: Captura De Fotografías
Captura de fotografías Además de la captura automática, puede tomar fotografías de la siguiente forma: Tomar una fotografía mientras la cámara está activada Si está en modo de espera, activa la cámara e inmediatamente toma una fotografía VIEW Las fotografías se almacenan en la memoria interna del intercomunicador. Visualizar fotografías En modo de espera, presione Después de unos segundos podrá... -
Página 13: Configuración General
Configuración general Seleccionar tono de timbre 1. Cuando el intercomunicador esté en modo de espera, presione para escuchar el tono de timbre. TALK 2. Presione para escuchar las melodías disponibles. Se guardará como TALK tono de timbre la última melodía reproducida. Menú... -
Página 14: Garantía
ELECTRÓNICA STEREN S.A. DE C.V. Biólogo Maximino Martínez No. 3408, San Salvador Xochimanca, Del. Azcapotzalco, México, D.F. 02870, RFC: EST850628-K51 STEREN PRODUCTO EMPACADO S.A. DE C.V. Biólogo Maximino Martínez No. 3408 Int. 2, 3 y 4, San Salvador Xochimanca, Del. Azcapotzalco, México, D.F. 02870, RFC: SPE941215H43 ELECTRÓNICA STEREN DEL CENTRO, S.A. - Página 15 CCTV-0900 Ultraslim video doorphone VIEW OPEN INTERCOM TALK line 0616m V0.0...
-
Página 16: Important
The information that shown in this manual is only for reference about the product. Because to updates can be differences. Visit our website www.steren.com for the latest version of this manual. Cautions • This product is not a toy; keep out of reach of children. - Página 17 Content Lock plate VIEW OPEN INTERCOM TALK Video intercom Camera Voltage converter Interconnection Cable Protector 3-pin harness (x1) Backplate 4-pin harness (x2) Instruction manual Screws and bungs kit...
- Página 18 Parts Camera Lens Microphone Night vision LEDs Speaker ID plate Ring bell Internal part Lens adjustment control Intercom input Jumper Door lock terminal...
- Página 19 Video intercom Scroll Settings Microphone Exit/ Screen Take picture Open Answer/ Hang up VIEW OPEN INTERCOM TALK Monitoring Intercom Power input Camera connection Secondary intercom No function Volume Speaker...
- Página 20 Remove the camera top covers...
-
Página 21: Connection Diagrams
Connection diagrams Use CAT 5 UTP cable for connections (maximum 50m) Basic connection Interconnection Cable Door lock connection * The door locks are sold separately. Consult your authorized dealer to get information about door locks compatible with this product. Option 1 Electric door lock* EL and AC delivers 12V in the red and black wires... -
Página 22: Magnetic Door Lock
Option 2 Magnetic door lock Remove the jumper for correct system functioning Power supply EL and BC are PUSH like normally open switch Installation Intercom Select a wall or solid surface to install the intercom. Remember to consider the necessary length of interconnection cable and power converter cable 30 cm If it is necessary, drill a hole... - Página 23 Camera Do not place the camera in areas where it is exposed to direct sun or rain conditions. You must remove the back cover to access the adjustment control. (See page 6) If it is necessary, adjust the camera lens Select a wall or solid surface to install the camera.
- Página 24 The camera is powered by the intercom...
- Página 25 Operation Standby mode Active mode VIEW OPEN INTERCOM TALK VIEW OPEN INTERCOM TALK Disabledamera Enable camera Call Visitor When a visitor rings the bell, automatically activates the camera and takes a picture. Enable / Disable camera speaker, to communicate with the visitor.
-
Página 26: Take Pictures
Take pictures In addition to the automatic capture, you can take pictures as follows: Take a picture while the camera is enable If it is in standby mode, enable the camera and immediately take a picture VIEW The pictures are stored in the internal memory of the intercom. View pictures In standby mode, press After a few seconds you can scroll through... -
Página 27: General Settings
General settings Select ringtone 1. When the intercom is on standby mode, press to listen the ringtone. TALK 2. Press to listen the available melodies. The last one it will be saved as a TALK ringtone Menu 1. When the intercom is in standby mode, press Wait a few seconds and VIEW press... - Página 28 Part number: CCTV-0900 Brand: Steren WARRANTY This Steren product is warranted under normal usage against defects in workmanship and materials to the original purchaser for one year from the date of purchase. CONDITIONS 1. This warranty card with all the required information, invoice, product box or package, and product, must be presented when warranty service is required.
- Página 30 www.steren.com...