Tabla de contenido
Publicidad
Idiomas disponibles
Idiomas disponibles
Enlaces rápidos
LIBRETTO ISTRUZIONI
INSTRUCTION BOOKLET
BEDIENUNGSANLEITUNG
NOTICE D'INSTRUCTIONS
FOLLETO DE INSTRUCCIONES
RAFFRESCATORE/PURIFICATORE 3L. CON WIFi
AIR COOLER WIFI
RAFRAÎCHISSEUR/PURIFICATEUR 3L AVEC WIFi
KÜHLER/REINIGER 3L. MIT WIFI
REFRESCADOR/PURIFICADOR 3L. CON WIFi
type VR32 (mod.FT-TS45CRG)
1/84
Publicidad
Tabla de contenido

Manuales relacionados para Bimar VR32


Resumen de contenidos para Bimar VR32
- Página 1 LIBRETTO ISTRUZIONI INSTRUCTION BOOKLET BEDIENUNGSANLEITUNG NOTICE D'INSTRUCTIONS FOLLETO DE INSTRUCCIONES RAFFRESCATORE/PURIFICATORE 3L. CON WIFi AIR COOLER WIFI RAFRAÎCHISSEUR/PURIFICATEUR 3L AVEC WIFi KÜHLER/REINIGER 3L. MIT WIFI REFRESCADOR/PURIFICADOR 3L. CON WIFi type VR32 (mod.FT-TS45CRG) 1/84...
-
Página 2: Avvertenze Generali
Scansiona il codice QR per accendere alla guida rapida delle caratteristiche. Questo simbolo vi invita a leggere attentamente queste istruzioni prima dell’uso dell’apparecchio, eventualmente informare terzi, necessario. Conservare il libretto per ulteriori consultazioni e per l’intera durata di vita dell’apparecchio. Se nella lettura di queste istruzioni d’uso alcune parti risultassero difficili nella comprensione o se sorgessero dubbi, prima di utilizzare il prodotto contattare l’azienda all’indirizzo scritto in ultima pagina. - Página 3 volatili che potrebbero ostruire i filtri o danneggiare il motore. Ogni altro uso è da considerarsi improprio e pericoloso. Il costruttore non potrà essere ritenuto responsabile di eventuali danni derivanti da uso improprio, erroneo e irresponsabile e/o da riparazioni effettuate da personale non qualificato. Esempi di apparecchi per ambiente domestico sono apparecchi per tipiche funzioni domestiche, usati in ambito domestico, che possono essere utilizzati per tipiche funzioni...
- Página 4 spina nella presa di corrente, e poi utilizzare l’apparecchio. In caso di dubbio, rivolgersi a personale professionalmente qualificato. • Non usare l’apparecchio se non funziona correttamente o se sembra danneggiato; in caso di dubbio rivolgersi a personale professionalmente qualificato. • Se l’apparecchio non è in funzione togliere la spina dalla presa di corrente.
- Página 5 manutenzione non devono essere effettuate da bambini a meno che non abbiano più di 8 anni e siano sorvegliati. • L’apparecchio deve essere mantenuto fuori dalla portata di bambini. • L’apparecchio può essere utilizzato da bambini di età non inferiore a 8 anni e da persone con ridotte capacità fisiche, sensoriali o mentali, o prive di esperienza o della necessaria conoscenza, purchè...
- Página 6 • L’apparecchio deve funzionare sempre in posizione verticale. Pannetti ghiaccio Attenzione: mantenere sempre il tappo chiuso. La soluzione contenuta all'interno non deve essere toccata o ingerita o inalata. Tenere fuori dalla portata dei bambini e degli animali. INSTALLAZIONE • Dopo aver tolto l’imballaggio, assicurarsi dell’integrità dell’apparecchio; in caso di dubbio non utilizzarlo e rivolgersi a personale professionalmente qualificato.
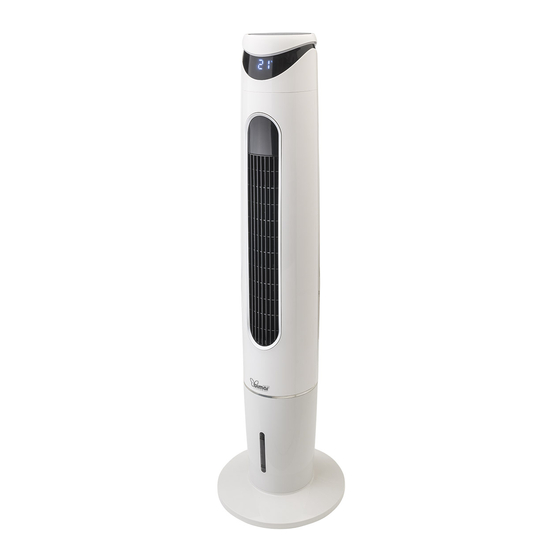
- Página 7 • L’apparecchio è dotato dei seguenti elementi: Attenzione: prima di assemblare l’apparecchio, assicurarsi che sia scollegato dalla presa di corrente. Base (per l’assemblaggio si prenda come riferimento le figure): posizionare sul fondo del corpo un guscio in modo da allineare i 4 fori del guscio con il corpo, accoppiare l’altro guscio in modo da sovrappore un estremità...
- Página 8 Assicurarsi che lo smartphone sia connesso alla stessa rete WiFi alla quale successivamente il dispositivo sarà associato. Prima Installazione/Configurazione 1.1 Installare l’applicazione “BIMAR Live Smart” tramite Google Play (Android) o da AppStore (iOS), oppure scansionare il codice QR qui presente. Per Android Per iOS 1.2 Al termine dell’installazione, icona dell’applicazione...
- Página 9 SMS o indirizzo email di registrazione (eventualmente controllare anche nella cartella Posta indesiderata, se non viene ricevuto nella cartella Posta in Arrivo). 1.4 Inserire la password desiderata e cliccare la scritta “Fatto”. 1.5 Appare una schermata e cliccare la scritta “Creazione della Famiglia”. 1.6 Appare una schermata (come 1.7 Terminata la personalizzazione correttamente, appare la schermata...
- Página 10 2. Per assocciare dispositivo allo smartphone Inserire la spina nella presa di corrente, si sentirà un “bip”, premere il tasto “MODE” per cinque secondi circa: si sentirà un “bip” e la spia “ ” lampeggia ; rilasciare il tasto. velocemente Aprire APP sullo smartphone: nella prima schermata cliccare su “AGGIUGERE DISPOSITIVO”...
- Página 11 ” rilasciare il tasto; lampeggia velocemente, aprire le impostazioni del telefono WI-FI e connettere alla rete “Bimar Live Smart xxx” o “Smart Life xxx” e poi premere “connettere ora”. 2.5 Nella schermata successiva “Impostare il Wi-Fi” (vedi sotto), inserire la PASSWORD della vostra rete Wi-Fi, e cliccare sul simbolo “confermare”...
- Página 12 Nel caso le operazioni sopra descritte non procedano correttamente, necessità resettare il dispositivo, operando in questo modo: togliere la spina dalla presa di corrente, lasciare scollegato il dispositivo 30 secondi. Re-inserire la spina nella presa di corrente del dispositivo, premere il tasto “MODE” per cinque secondi circa: si sentirà un “bip” e la spia ;...
- Página 13 Premere in basso a sinistra e poi sopra la parte alta della schermata, per esempio: per personalizzare (aggiornare e/o modificare dove è consentito) la posizione del dispositivo oppure la velocità del vento, pressione dell’aria, umidità e temperatura esterna (immagine a lato). Premere in alto a destra...
- Página 14 Il dispositivo è compatibile con i controlli vocale di Amazon Alexa, Google Assistant. Aprire APP corrispondente (assicurarsi che l’account e password utilizzati corrispondano a quelli dell’applicazione “Bimar Live Smart” oppure “Smart Life”) e seguire le impostazioni. Google Home: alcuni comandi vocali base sono: “OK Google”...
-
Página 15: Pulizia E Manutenzione
• tasto “SPEED” aziona le 6 velocità; ad ogni pressione varia la velocità, quando si illumina il simbolo corrispondente alla velocità selezionata: (01-02-03-04-05-06). • tasto “TIMER”: imposta il tempo di funzionamento, al termine del quale l’apparecchio si arresta. Premere ripetutamente il tasto: ad ogni pressione varia il tempo (da 0,5 h sino a 8h), e sul pannello comandi si illumina il tempo selezionato. - Página 16 Dopo averlo lavato, lasciarlo asciugare completamente prima di reinserirlo correttamente nella propria sede. Non lavarlo in lavastoviglie. Filtro in fibra non tessuta, a lamelle traforate (9) : rimuovere la cornice, quindi eliminare sporco con aspirapolvere o con un pennello facendo attenzione a non danneggiare le superfici, e sciacquare poi con acqua corrente.
-
Página 17: General Warnings
Scan the QR code to access the quick guide to characteristics. This symbol tells you to read these instructions carefully before using the appliance, and to inform any third parties if necessary. Keep the instruction booklet for further reference throughout the lifetime of the appliance. - Página 18 volatile materials, which might foul the filters or damage the motor. Any other use constitutes misuse and is hazardous. The manufacture cannot be held liable for any damage arising from misuse or incorrect or irresponsible use, and/or from repairs by unskilled staff. Examples of household appliances are appliances for typical household functions, those used in the home, or those which may be used for typical...
- Página 19 power socket. Check that the electrical parts of the appliance are not wet, and if this is the case dry them completely and carefully. Reconnect the plug to the power socket and then use the appliance. If in doubt, call in qualified staff. •...
- Página 20 safe way and have understood the hazards involved. Children must not play with the appliance. Cleaning and maintenance shall not be made by children unless they are over 8 years old and are supervised. • The appliance must be kept out of reach of children. •...
- Página 21 • Make sure that the cable is correctly positioned and not resting on any object. • The appliance must always be vertical when in operation. Ice blocks Warning: always keep the cap closed. The solution inside must not be touched, swallowed or inhaled. Keep out of reach of children and pets.
- Página 22 • In case of a fault or malfunction, switch the appliance off and have it checked by qualified staff; repairs by unqualified staff may be dangerous and lead to the loss of warranty cover. • The appliance comprises the following parts: Warning: before assembling the appliance, make sure that it is disconnected from the power socket.
- Página 23 Make sure that the smartphone is connected to the wi-fi network to be used for the appliance. First Installation/Setup 1.1 Install the "BIMAR life Smart" App via Google Play (Android) or AppStore (iOS), or scan the QR code provided here. For Android For iOS 1.2 Once installed, the app icon appears.
- Página 24 Spam folder if you cannot find the email in your "Incoming Mail" folder). 1.4 Enter the password required and click "Done". 1.5 A screen will open: click "Create Family". 1.6 A screen (as shown on the right) 1.7 Once you have customised the app correctly, the main screen appears.
- Página 25 button for about five seconds: a "beep" will be heard and the ” ” light flashes ; release the button. quickly Open APP on the smartphone: in the first screen, click “ADD DEVICE” or click “ ” in the top right corner. 2.3 In the next screen, click “...
- Página 26 Access smartphone WI-FI settings and connect to the “Bimar Live Smart xxx” or “Smart Life xxx” network, then press "connect now". 2.5 In the next screen, “Set Wi-Fi” (see below), type the PASSWORD of your Wi-Fi network and click the "confirm" symbol to activate the connection. The countdown (see below) starts and will be interrupted as soon as the smartphone has connected to the device.
- Página 27 If the above operations do not proceed correctly, the device must be reset by disconnecting the plug from the power socket and leaving the device disconnected for 30 seconds. Re-connect the plug to the power socket. Press the "MODE" button for about five seconds: a "beep"...
- Página 28 Press in the bottom left corner and then in the top of the screen, for example: customise (update and/or change where permitted) the appliance's position or the outdoor wind speed, air pressure, humidity and temperature (see right). Press top right to customise the following: Change Device name Device position Check Network...
- Página 29 The device is compatible with Amazon Alexa and Google Assistant voice controls. Open the corresponding App (make sure that the account and password used are the same as those of the “Bimar Live Smart” app) and follow the settings. Google Home: some basic vocal commands are: “OK Google”...
-
Página 30: Cleaning And Maintenance
• “SPEED” button: activates the 6 speeds. Each press varies the speed and the symbol corresponding to the speed selected illuminates: (01-02-03-04-05-06). • “TIMER“ button: sets the operating time after which the appliance stops. Press the button in repetition: each press modifies the time (from 0.5 h up to 8h), and the time selected lights up on the control panel. - Página 31 Put them back in place. • Check the filters constantly to ensure that they are clean, and also ensure that there are no deposits or suspended matter in the water in the tank, to make sure that the appliance functions at top performance. •...
-
Página 32: Allgemeine Hinweise
QR-Code für den Zugriff zur Schnellanleitung der Merkmale scannen. Dieses Symbol fordert Sie auf, diese Anleitung vor der Benutzung des Gerätes sorgfältig zu lesen und gegebenenfalls Dritte zu informieren. Bewahren Sie diese Anleitung zum Nachschlagen und für die gesamte Lebensdauer des Gerätes auf. Wenn ein Teil dieser Betriebsanleitung schwer verständlich ist oder Sie Zweifel haben, wenden Sie sich bitte an das Unternehmen unter der auf der letzten Seite angegebenen Adresse, bevor Sie das Produkt verwenden. - Página 33 • Das Gerät nicht im Freien oder in Umgebungen verwenden, die sehr staubig sind oder stark flüchtige Stoffe enthalten, die die Filter verstopfen oder den Motor beschädigen könnten. Jeder andere Gebrauch ist als Missbrauch und als gefährlich zu betrachten. Der Hersteller kann nicht für Schäden haftbar gemacht werden,...
- Página 34 Sicherheitsvorkehrungen, um die Gefahr von Feuer, Stromschlägen Körperverletzungen vermeiden. Noch mehr Sorgfalt und Vorsicht ist bei Verwendung Elektrogeräten Wasserbehälter geboten: überlaufendem Wasser zuerst Stromversorgung durch Ausschalten des Hauptschalters unterbrechen, und erst danach den Stecker aus der Netzsteckdose ziehen. Kontrollieren Sie, ob die elektrischen Bauteile des Geräts nass sind;...
- Página 35 betrieben werden, Brandgefahren vermeiden, wenn das Gerät abgedeckt oder falsch positioniert ist. • Bewegen Sie das Gerät nicht, wenn es in Betrieb ist. • Setzen Sie das Gerät nicht der Witterung (Sonne, Regen usw.) aus. • Das Gerät darf von Kindern ab einem Alter von 8 Jahren und von Personen mit eingeschränkten körperlichen, sensorischen...
- Página 36 haben Anweisungen für den sicheren Gebrauch des Geräts erhalten verstehen damit verbundenen Gefahren. Kinder dürfen nicht mit Gerät spielen. Benutzer durchzuführende Reinigung und Instandhaltung darf nicht unbeaufsichtigten Kindern durchgeführt werden. • Führen Sie keinen Gegenstand oder die Finger zwischen die Schlitze des Schutzgitters des Lüfters ein.
- Página 37 Kühlelemente Achtung: Die Verschlussschraube muss immer geschlossen sein. Die darin enthaltene Lösung darf nicht berührt, verzehrt oder eingeatmet werden. Außer der Reichweite von Kindern und Tieren aufbewahren. INSTALLATION • Vergewissern Sie sich nach dem Entfernen der Verpackung, dass das Gerät unversehrt ist.
- Página 38 Achtung: Bevor das Gerät zusammengebaut wird, ist sicherzustellen, dass es nicht an die Steckdose angeschlossen ist. Bodenplatte (beim Zusammenbauen so vorgehen, wie in den Abbildungen dargestellt): Am Boden des Körpers eine Plattenhälfte so anordnen, dass deren 4 Bohrungen mit dem Körper fluchten. Die zweite Plattenhälfte so einsetzen, dass ein Ende (A) und das andere unteren Ende (B) bis zum Anstoß...
- Página 39 Vergewissern Sie sich, dass Ihr Smartphone mit dem gleichen WiFi-Netzwerk verbunden ist, dem das Gerät später zugeordnet wird. Erstinstallation/Konfiguration 1.1 Installieren Sie die Anwendung „BIMAR Live Smart“ über Google Play (Android), AppStore (iOS) oder Einscannen des hier gezeigten QR-Codes. Für Android Für iOS...
- Página 40 Ordner für unerwünschte Post prüfen, wenn er nicht im Inbox-Ordner empfangen wird). 1.4 Geben Sie das gewünschte Passwort ein und klicken Sie auf die Schaltfläche „Fertig“. 1.5 Es erscheint ein Bildschirm und Sie klicken auf „Familie erstellen“. 1.6 Es erscheint ein Bildschirm (wie 1.7 Nach korrekt abgeschlossener Anpassung wird der Hauptbildschirm mit unten gezeigt), um das Haus...
- Página 41 2.1 Stecken Sie den Netzstecker in die Steckdose, es ertönt ein Piepton. Drücken Sie die Taste “MODE” zirka fünf Sekunden lang: es ertönt ein Piepton und die Meldeleuchte ; lassen Sie die Taste los. “ ” blinkt schnell Öffnen Sie APP auf Ihrem Smartphone: Klicken Sie auf dem ersten Bildschirm auf „GERÄT HINZUFÜGEN“...
- Página 42 “ ” blinkt schnell. Lassen Sie die Taste los, öffnen Sie die WI-FI-Einstellungen Ihres Telefons und verbinden Sie es mit dem Netz “Bimar Live Smart xxx” oder “Smart Life xxx” bestätigen dann “jetzt verbinden”. 2.5 Geben Sie auf dem nächsten Bildschirm „WiFi einstellen“ (siehe unten) das PASSWORD Ihres WiFi-Netzes ein und klicken Sie auf das Symbol „Bestätigen“, um die Verbindung zu aktivieren.
- Página 43 Wenn die oben beschriebenen Vorgänge nicht korrekt ausgeführt werden, muss das Gerät neugestartet werden. Gehen Sie hierfür folgendermaßen vor: Ziehen Sie den Stecker aus der Netzsteckdose, lassen Sie das Gerät 30 Sekunden ausgesteckt. Stecken Sie den Netzstecker wieder in die Steckdose des Geräts, drücken Sie die Taste “MODE” zirka fünf Sekunden lang: Es ertönt ein Piepton und die Meldeleuchte “...
- Página 44 Drücken unten links anschließend oben den oberen Bereich Bildschirms, Beispiel: um die Position des Geräts oder die Windgeschwindigkeit, den Luftdruck, die Luftfeuchtigkeit und die Außentemperatur anzupassen aktualisieren und/oder, sofern möglich, zu ändern) (Bild auf der Seite). Drücken Sie oben rechts, um Folgendes anzupassen: Name des Geräts ändern Position des Geräts...
- Página 45 Das Gerät ist kompatibel mit den Sprachsteuerungen von Amazon Alexa und Google Assistant unterstützt. Öffnen Sie die entsprechende APP (stellen Sie sicher, dass verwendeter Account und Passwort mit denen der Anwendung „Bimar Live Smart“ oder „Smart Life“ übereinstimmen) und folgen Sie den Einstellungen.
-
Página 46: Reinigung Und Instandhaltung
“ANION” erzeugt einen Fluss negativer Ionen, die die in der Luft vorhandenen positiven Ionen neutralisieren. Bei aktiver Funktion leuchtet das entsprechende Symbol. • Taste “SWING”, horizontale Schwingung (rechts-links); zum Aktivieren drücken. Bei aktiver Taste leuchtet das entsprechende Symbol. Zum Deaktivieren die Taste nochmals drücken. - Página 47 Es wird empfohlen, die Filter regelmäßig zu reinigen (mindestens alle 2 Wochen oder öfter, wenn das Gerät täglich in Dauerbetrieb arbeitet). Saug-Vorfilter (8): Lösen Sie die Schraube mit einem Schraubendreher und ziehen Sie den Filter an seinem Griff heraus. Den Staub mit einer Zahnbürste oder einem Staubsauger entfernen. Dabei darauf achten, dass keine Teile beschädigt werden.
- Página 48 Die getrennte Entsorgung eines Haushaltsgeräts verhindert mögliche negative Auswirkungen die Umwelt die Gesundheit, die sich seiner unzureichenden Entsorgung ergeben können, ermöglicht die Rückgewinnung der Materialien, aus denen es besteht, und erzielt somit eine erhebliche Einsparung von Energie und Ressourcen. Um die Pflicht zur getrennten Entsorgung von Haushaltsgeräten kenntlich zu machen, trägt das Produkt das Symbol der durchgekreuzten Mülltonne.
-
Página 49: Cet Appareil Est Destiné Exclusivement À Un Usage
Scannez le code QR pour accéder au guide rapide des caractéristiques. Ce symbole vous invite à lire attentivement ces instructions avant toute utilisation de l’appareil et éventuellement à informer des tiers, si nécessaire. Conservez notice pour pouvoir vous référer ultérieurement et pendant toute la durée de vie de l'appareil. Si certaines parties sont difficiles à... - Página 50 • Ne pas utiliser l’appareil à l’extérieur ou dans des pièces particulièrement poussiéreuses ou contenant matériaux extrêmement volatiles, pourraient obstruer les filtres ou endommager le moteur. Toute autre utilisation doit être considérée comme impropre et dangereuse. Le fabricant ne pourra pas être tenu responsable d’éventuels dommages causés par une utilisation impropre, erronée et irresponsable et/ou par des réparations effectuées par un personnel non qualifié.
- Página 51 • Attention: quand utilise appareils électriques, faut toujours respecter précautions inhérentes à la sécurité de base afin d’éviter les risques d’incendie, de chocs électriques et de lésions physiques. Une attention et des précautions supplémentaires sont nécessaires lors de l’utilisation d’appareils électriques comprenant un réservoir avec de l’eau: en cas de débordement d’eau, désactivez d’abord la prise de courant en éteignant l’interrupteur sur le tableau électrique,...
- Página 52 • Cet appareil n’est pas destiné à fonctionner au moyen d’un temporisateur externe ou avec un système de commande à distance indépendant, pour éviter le risque d’incendie au cas où l’appareil soit recouvert ou positionné de manière non correcte. • Ne déplacer l’appareil quand...
-
Página 53: N'iNtroduisez Pas Les Doigts Ou Un Quelconque
• Cet appareil peut être utilisé par des enfants âgés d’au moins 8 ans et par des personnes ayant des capacités physiques, sensorielles ou mentales réduites, manquant d'expérience connaissances nécessaires, à condition qu'elles soient sous la surveillance d’un adulte ou qu’elles aient reçu des instructions concernant l’utilisation en toute sécurité... - Página 54 • Assurez-vous câble positionné correctement et ne posez aucun objet dessus. • L’appareil doit fonctionner toujours à la verticale. Pains de glace Attention: gardez toujours le bouchon fermé. Le gel contenu à l’intérieur ne doit pas être touché, ingéré ou inhalé. Maintenir hors de portée des enfants et des animaux.
- Página 55 • En cas de panne ou de dysfonctionnement, éteignez l’appareil et faites-le vérifier par un professionnel qualifié. Les réparations effectuées par une personne non qualifiée peuvent être dangereuses et annuleront la garantie. • L’appareil est équipé des éléments suivants: Attention: avant d’assembler l’appareil, assurez-vous qu’il est bien débranché de la prise de courant.
- Página 56 Assurez-vous que votre smartphone est connecté au même réseau Wi-fi auquel l’appareil sera ensuite associé. Première installation/Configuration 1.1 Installez l’application «BIMAR Live Smart» après l’avoir téléchargée sur Google Play (Android) ou sur AppStore (iOS), ou bien, scannez le code QR ici présent. Pour Android Pour iOS 1.2 L’icône de l’application apparaît au terme de...
- Página 57 - cliquez sur «Obtenir le code de vérification», attendez quelques instants, puis saisissez le code reçu par texto ou courriel d’enregistrement dans la partie «Code de vérification» (dans ce dernier cas, vérifiez le dossier «Courrier non désiré» si le mél n’arrive pas dans votre boîte de réception).
- Página 58 2. Pour associer l’appareil au smartphone 2.1 Insérez la fiche dans la prise de courant, vous entendrez un «bip», appuyez sur la touche «MODE» pendant cinq secondes environ: vous entendrez un «bip» et le led ; relâchez la pression sur la touche. «...
- Página 59 WI-FI et connectez-vous au réseau «Bimar Live Smart xxx» ou «Smart Life xxx», puis appuyez sur «connecter maintenant». 2.5 Sur la page suivante «Sélectionner Wi-fi» (voir ci-dessous), saisissez le MOT DE PASSE de votre réseau Wi-fi et cliquez sur le symbole «confirmer» pour activer la connexion.
- Página 60 Si les opérations décrites ci-dessus ne se déroulent pas correctement, il faut réinitialiser l’appareil en opérant de la façon suivante: débranchez la fiche de la prise de courant et laissez l’appareil débranché pendant 30 secondes. Insérez à nouveau la fiche dans la prise de courant du dispositif, appuyez sur la touche «MODE»...
- Página 61 Appuyez en bas à gauche, puis sur la partie supérieure de la page, par exemple: pour personnaliser (mettre à jour et/ou modifier là où cela est possible) la position de l’appareil ou la rapidité du souffle, pression de l’air, humidité et température extérieure (image...
- Página 62 Ouvrez l’application correspondante (assurez-vous que le compte et le mot de passe utilisés correspondent à ceux de l’application «Bimar Live Smart») et suivez les paramétrages. Google Home : quelques commandes vocales de base : «OK Google» ou «Hey Google», allumez XX (nom du dispositif) «OK Google»...
-
Página 63: Nettoyage Et Maintenance
• Touche «SPEED»: actionne les 6 vitesses; à chaque pression de la touche, la vitesse varie, quand le symbole correspondant à la vitesse sélectionnée est éclairé: (01-02-03-04-05-06). • Touche «MINUTEUR»: établit le temps de fonctionnement, au terme duquel l’appareil s’arrête. Appuyer plusieurs fois sur la touche: à chaque pression le temps varie (de 0,5 h jusqu’à... - Página 64 Pour éliminer la poussière, utiliser une brosse à dents ou un aspirateur, en veillant à n’endommager aucune partie de l’appareil. Si le filtre est très sale, lavez-le à l’eau tiède et rincez-le plusieurs fois. La température de l’eau ne doit pas dépasser 40°C. Après l’avoir lavé, faites-le sécher complètement avant de le remettre correctement à...
-
Página 65: Advertencias Generales
Escanee el código QR para acceder a la guía rápida de características. Este símbolo invita a leer atentamente las instrucciones antes del uso del aparato, y en su caso informar a terceros. Conserve este folleto para poder consultarlo durante toda la vida útil del aparato. Si al leer estas instrucciones de uso encuentra dificultades para entenderlas o surge cualquier duda, contacte con la empresa en la dirección indicada en la última página antes de empezar a utilizar el producto. - Página 66 materiales muy volátiles que podrían obstruir los filtros o dañar el motor. Cualquier otro uso debe considerarse impropio y peligroso. El fabricante no podrá considerarse responsable por posibles daños derivados del uso impropio, erróneo e irresponsable y/o de reparaciones efectuadas por personal no cualificado.
- Página 67 de descarga eléctrica y de lesiones físicas. Debe prestarse aún más atención y precaución con los aparatos eléctricos que incluyen un depósito con agua. En caso de desbordamientos de agua, desactive en primer lugar la toma de corriente apagando el interruptor del cuadro eléctrico, y solo después saque la clavija del enchufe.
- Página 68 externo o de un sistema de mando a distancia separado. • No mueva el aparato cuando está funcionando. • El aparato no debe quedar expuesto a los agentes atmosféricos (sol, lluvia, etc.). • Este aparato puede ser utilizado por niños de 8 años en adelante y por personas con reducidas capacidades físicas, sensoriales o mentales o sin experiencia o conocimientos si se les brinda una...
- Página 69 con el mismo. No se debe permitir que los niños jueguen con el aparato. Las tareas de limpieza y de mantenimiento encomendadas al usuario no deben ser realizadas por niños sin vigilancia. • No se debe introducir ninguna herramienta ni los dedos entre la malla de las rejillas de protección del ventilador.
-
Página 70: Instalación
Panes de hielo Atención: mantenga siempre el tapón cerrado. La solución contenida en el interior no se debe tocar, ingerir o inhalar. Manténgase fuera del alcance de los niños y de los animales. INSTALACIÓN • Tras quitar el embalaje, compruebe la integridad del aparato; en caso de dudas no lo utilice y recurra a personal profesionalmente cualificado. -
Página 71: Descripción
Base (para el ensamblaje, tome las figuras como referencia): coloque sobre el fondo del cuerpo una cubierta, alineando los 4 orificios de la cubierta con el cuerpo; acople a fondo la otra cubierta de manera a superponer un extremo (ref.A) y el otro extremo debajo (ref.B). -
Página 72: Durante El Primer Acceso Regístrese Y Rellene Con Sus Datos
Compruebe que el smartphone está conectado a la misma red WiFi a la que posteriormente asociará el dispositivo. Primera Instalación/Configuración 1.1 Instale la aplicación “BIMAR Live Smart” buscándola en Google Play (Android) o en AppStore (iOS), opcionalmente escanee el código QR aquí presente. Para Android Para iOS 1.2 El icono de la aplicación aparece al final de la... - Página 73 1.6 Aparece una pantalla (como en la 1.7 Al terminar la personalización correctamente, aparece la pantalla imagen abajo) para personalizar principal con las siguientes funciones: la casa: nombre, posición, - Lista y gestión de dispositivos, nombre de la habitación, y luego confirme.
- Página 74 2.3 En la pantalla sucesiva haga clic en “ ”. 2.4 En la pantalla sucesiva haga clic en “ ”/Confirmar que el LED parpadea rápidamente: 74/84...
- Página 75 “ ” parpadea rápidamente botón., abra las configuraciones del teléfono WI-FI y conecte a la red “Bimar Live Smart xxx” o “Smart Life xxx” y luego pulse “conectar ahora”. 2.5 En la pantalla siguiente “Configurar el Wi-Fi” (véase abajo), introduzca la CONTRASEÑA de su red Wi-Fi y haga clic en el símbolo “confirmar”...
- Página 76 Si las operaciones arriba descritas no proceden correctamente, es necesario reiniciar el dispositivo, actuando de este modo: quite la clavija de la toma de corriente, deje desconectado el dispositivo 30 segundos. Vuelva a insertar la clavija en la toma de corriente del dispositivo, pulse el botón “MODE”...
- Página 77 Pulse abajo a la izquierda y luego en la parte alta de la pantalla, por ejemplo: para personalizar (actualizar y/o modificar cuando sea posible) la posición del dispositivo o bien la velocidad del viento, presión del aire, humedad y temperatura exterior (imagen al lado).
- Página 78 El dispositivo es compatible con los controles vocales de Amazon Alexa, Google Assistant. Abra la APP correspondiente (compruebe que la cuenta y contraseña utilizadas corresponden a las de la aplicación “Bimar Live Smart” o bien “Smart Life”) y siga las configuraciones.
-
Página 79: Limpieza Y Mantenimiento
• Tecla “SWING”, oscilación horizontal (derecha-izquierda); pulse para activarla, se ilumina el símbolo correspondiente. Pulse nuevamente para desactivarla. • Tecla “SPEED”, acciona las 6 velocidades; a cada presión la velocidad cambia, y se ilumina el símbolo correspondiente a la velocidad seleccionada: (01-02-03-04-05- 06). - Página 80 Para quitar el polvo utilice un cepillo o una aspiradora, prestando atención a que no se dañe ninguna parte. Si el filtro está muy sucio, lávelo en agua tibia y aclare varias veces. La temperatura del agua no debe superar los 40°C. Después de lavarlo, déjelo secar completamente antes de volver a ponerlo correctamente en su lugar.
- Página 81 81/84...
- Página 82 Prescrizioni relative alle informazioni/Information requirements/ Informations/Informationsanforderungen/ Disposiciones relativas a las informaciones Descrizione/Description/ Description/ Simb Valore/Val Unità/Unit/ Beschreibung/ Descripción olo/S Unité/ Einheit/ ymbo Valeur/ Símbolo Wert/Valor Portata massima d’aria/Maximum fan flow 3.09 m³/min rate/ Puissance de ventilation maximale/ Maximaler Luftdurchsatz Lüfters/ Capacidad máxima de aire Potenza assorbita...
- Página 83 83/84...
- Página 84 Via G.Amendola, 16/18 25019 Sirmione (BS) – ITALY www.bimaritaly.it Servizio clienti: servizioclienti@bimaritaly.it VR32_I.B._17022020 84/84...