Publicidad
Enlaces rápidos
PMG5617GA
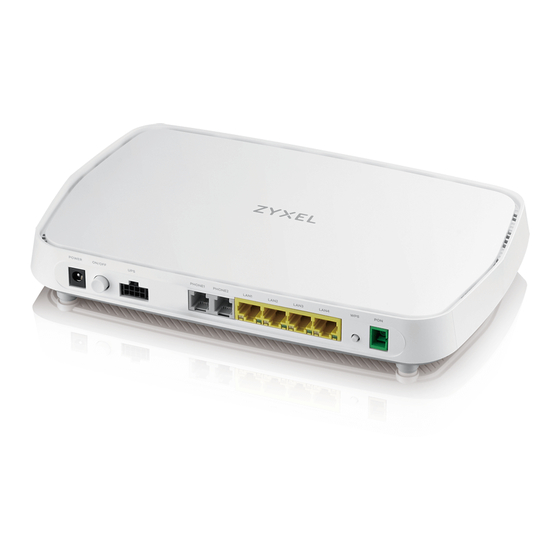
Dual-Band Wireless AC/N GPON HGU
with 4-port GbE LAN
Quick Start Guide
ENGLISH | DEUTSCH | FRANÇAIS | ITALIANO | ESPAÑOL |
NEDERLANDS | SVENSKA | SUOMI
Step 1
Hardware Installation
POWER
ON
POWER
UPS
1
2
On - Power on and system ready
Blue
Off - Power off
Blue
On - PON connection ready
Blinking - Trying to link up
On - Not receiving optical signal normally
Red
Blue
On - In Routing mode and WAN connection is up
Blinking - Transmitting data
Off - Physical WAN connection is down or in Bridge mode
Red
On - Attempted to get an IP address, but failed
Blue
On - SIP account registered
Blinking - Telephone off of the hook or incoming call
Off - SIP account not registered
Blue
On - Receiving power from UPS
Blinking - Not receiving power from UPS normally
Off - No UPS connected
Blue
On - USB device connected
Blinking - Transmitting data via USB
Off - No USB device connected
Green
On - 1000 Mbps LAN connection ready
LAN
Amber
On - 100 Mbps LAN connection ready
(Left)
Off - 10 Mbps LAN connection ready
Green
On - LAN connection ready
LAN
(Right)
Blinking - Transmitting data via LAN
1/2
Warning! To avoid possible eye injury, do NOT look into
an operating fiber-optic module's connector.
PHONE
LAN
PON
3
4
5
Package Contents
PMG5617GA
Power Cable Ethernet Cable Phone Cable
See the User's Guide at www.zyxel.com for more information,
including customer support and safety warnings.
EU Importer
Zyxel Communications A/S
Gladsaxevej 378, 2. th. 2860 Søborg, Denmark
http://www.zyxel.dk
US Importer
Zyxel Communications, Inc
1130 North Miller Street Anaheim, CA 92806-2001
http://www.us.zyxel.com
Copyright © 2018 Zyxel Communications Corp. All Rights Reserved.
EN
1
Connect the power cable to the modem and press the power button.
2
Connect a UPS (Uninterruptible Power Supply) to the UPS port.
Connect a phone to a phone port using the phone cable.
3
Connect a computer to the LAN port using the yellow Ethernet cable.
4
Connect the fiber optic cable from your service provider's network to the PON port.
5
DE
Schließen Sie das Netzkabel an das Modem an, und drücken Sie auf die Ein/Aus-Taste.
1
2
Schließen Sie eine UPS (Unterbrechungsfreie Stromversorgung) an den UPS
Anschluss an.
Schließen Sie ein Telefon mit dem Telefonkabel an den Telefonanschluss an.
3
Schließen Sie einen Computer mit dem gelben Ethernet-Kabel an den LAN-Port an.
4
Schließen Sie das Glasfaserkabel aus dem Netzwerk Ihres Dienstanbieters an den PON
5
Anschluss an.
FR
1
Branchez le câble d'alimentation au modem et appuyez sur le bouton ON/OFF.
Connectez un UPS (onduleur) au port UPS.
2
Fixez un téléphone au port téléphone à l'aide du câble téléphonique.
3
4
Connectez un ordinateur au port LAN en utilisant le câble Ethernet jaune.
Connectez le câble à fibre optique du réseau de votre fournisseur de services au port
5
PON.
IT
Collegare il cavo di alimentazione a modem e premere il pulsante di accensione.
1
2
Collegare un UPS (gruppo di continuità) alla porta dell'UPS.
3
Collegare un telefono alla porta del telefono tramite il cavo telefonico.
Collegare un computer alla porta LAN mediante il cavo Ethernet Giallo.
4
Collegare il cavo in fibra ottica dalla rete del fornitore di servizi alla porta PON.
5
ES
1
Conecte el cable de alimentación al módem y presione el botón de encendido.
Conecte una UPS (fuente de alimentación ininterrumpida) al puerto UPS.
2
Conecte un teléfono al puerto del teléfono usando el cable de teléfono.
3
4
Conecte un equipo al puerto LAN con el cable Ethernet amarillo.
Conecte el cable de fibra óptica de la red de su proveedor de servicios al puerto PON.
5
NL
1
Sluit de stroomkabel aan op het modem en druk op de AAN/UIT knop.
2
Verbind een UPS (Uninterruptible Power Suppy) met de UPS-poort.
Sluit een telefoon aan op een telefoonpoort met de telefoonkabel.
3
Sluit een computer aan op de LAN-poort met de gele Ethernetkabel.
4
Verbind de glasvezelkabel van het netwerk van je service provider met de PON-poort.
5
SE
1
Anslut nätkabeln till modemet och tryck på strömbrytaren.
Anslut en UPS (avbrottsfri strömförsörjning) till UPS-porten.
2
3
Anslut en telefon till telefonporten med telefonkabeln.
Anslut en dator till LAN-porten med den gula Ethernet-kabeln.
4
Anslut den fiberoptiska kabeln från din tjänsteleverantörs nätverk till PON-porten.
5
FI
1
Kytke virtajohto modeemiin ja paina virta painiketta.
Liitä varavirtalähde UPS-porttiin.
2
Kytke puhelin puhelinporttiin puhelinkaapelilla.
3
Kytke tietokone LAN-porttiin keltaisella Ethernet-kaapelilla.
4
Liitä operaattorin valokuitukaapeli PON-porttiin.
5
DoC
Quick Start
Declaration of
Guide
Conformity
Safety Warning
Publicidad

Resumen de contenidos para Zyxel PMG5617GA
- Página 1 Power Cable Ethernet Cable Phone Cable Quick Start Declaration of Guide Conformity Safety Warning See the User's Guide at www.zyxel.com for more information, including customer support and safety warnings. EU Importer Zyxel Communications A/S Gladsaxevej 378, 2. th. 2860 Søborg, Denmark http://www.zyxel.dk...
- Página 2 Unit: mm Posizionare il PMG5617GA in modo che i fori di montaggio a parete siano allineati con le viti (2-a). Far scorrere delicatamente il PMG5617GA verso il basso per fissarlo in posizione (2-b). Perfore dos agujeros en la pared a una distancia de 130mm. Inserte los anclajes de los tornillos y los tornillos (no incluidos).


