Publicidad
Idiomas disponibles
Idiomas disponibles
Enlaces rápidos
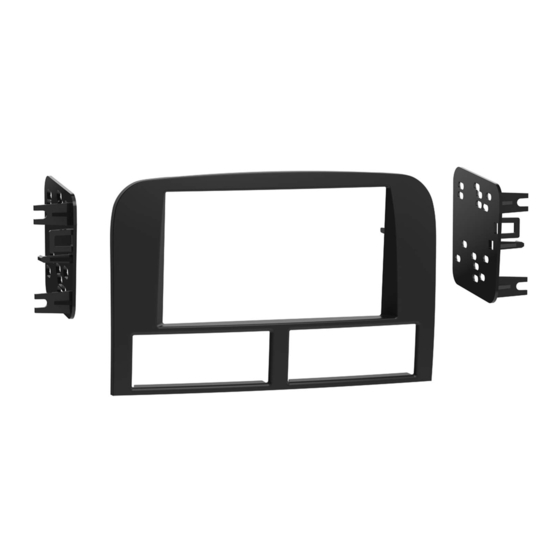
KIT COMPONENTS
• A) Radio trim panel • B) Radio brackets • C) Panel clips (2)
A
B
Metra. The World's Best Kits.
®
Jeep Grand Cherokee
KIT FEATURES
• ISO DDIN radio provision
• Painted matte black
C
MetraOnline.com
1999-2004
© COPYRIGHT 2021 METRA ELECTRONICS CORPORATION
95-6546B
I N S TA L L AT I O N I N S T R U C T I O N S
TABLE OF CONTENTS
Dash Disassembly ..................................................2
Kit Preparation .......................................................3
Kit Assembly ..........................................................3
WIRING & ANTENNA CONNECTIONS (sold separately)
Wiring Harness: Visit metraonline.com for audio/
video and steering wheel control interface options.
Antenna Adapter: N/A (99-01) • 40-CR10 (02-04)
TOOLS REQUIRED
• Panel removal tool • Phillips screwdriver
• Cutting tool • Grinding tool
Attention!
With the key out of the ignition,
disconnect the negative battery terminal
before installing this product. Ensure that all
installation connections are secure before
cycling the ignition to test this product.
REV. 8/3/21 INST95-6546B
Publicidad

Manuales relacionados para Metra 95-6546B


Resumen de contenidos para Metra 95-6546B
- Página 1 Ensure that all installation connections are secure before cycling the ignition to test this product. Metra. The World’s Best Kits. MetraOnline.com ® © COPYRIGHT 2021 METRA ELECTRONICS CORPORATION REV. 8/3/21 INST95-6546B...
-
Página 2: Dash Disassembly
DASH DISASSEMBLY KIT PREPARATION 1. Unclip and remove the radio trim panel. 1. Carefully grind or cut away the (4) plastic (Figure A) welded tabs securing the a/c vents to the radio trim panel, then remove the vents. 2. Remove (4) Phillips screws securing the (Figure A) radio, then unplug and remove the radio. -
Página 3: Kit Assembly
2. Locate the factory wiring harness and antenna connector in the dash and complete all necessary connections to the radio. Metra recommends using the proper mating adapter from Metra and/or Axxess. Test the radio for proper operation. 3. Secure the radio assembly to the dash using the factory screws. - Página 4 Log onto www.installerinstitute.edu or call 386-672-5771 for more information and take steps toward a better tomorrow. Metra recommends MECP certified technicians Metra. The World’s Best Kits. MetraOnline.com ® © COPYRIGHT 2021 METRA ELECTRONICS CORPORATION REV. 8/3/21 INST95-6546B...
- Página 5 Asegúrese de que todas las conexiones de instalación estén seguras antes de realizar un ciclo de encendido para probar este producto. Metra. The World’s Best Kits. MetraOnline.com ® © COPYRIGHT 2021 METRA ELECTRONICS CORPORATION REV. 8/3/21 INST95-6546B...
-
Página 6: Desmontaje Del Tablero
DESMONTAJE DEL TABLERO PREPARACIÓN DEL KIT 1. Desenganche y quite el panel de la 1. Rectifique o corte cuidadosamente las moldura del radio. (Figura A) (4) lengüetas soldadas de plástico que fijan las rejillas de aire acondicionado 2. Quite los (4) tornillos Phillips que fijan el al panel de moldura del radio. -
Página 7: Ensamble Del Kit
Metra recomienda el uso de adaptadores de acoplamiento adecuados de Metra o de Axxess. Pruebe el radio para asegurarse de que funciona bien. 3. Sujete el ensamble del radio al tablero usando los tornillos de fábrica. - Página 8 Log onto www.installerinstitute.edu or call 386-672-5771 for more information and take steps toward a better tomorrow. Metra recomienda MECP técnicos certificados Metra. The World’s Best Kits. MetraOnline.com ® © COPYRIGHT 2021 METRA ELECTRONICS CORPORATION REV. 8/3/21 INST95-6546B...