Publicidad
Enlaces rápidos
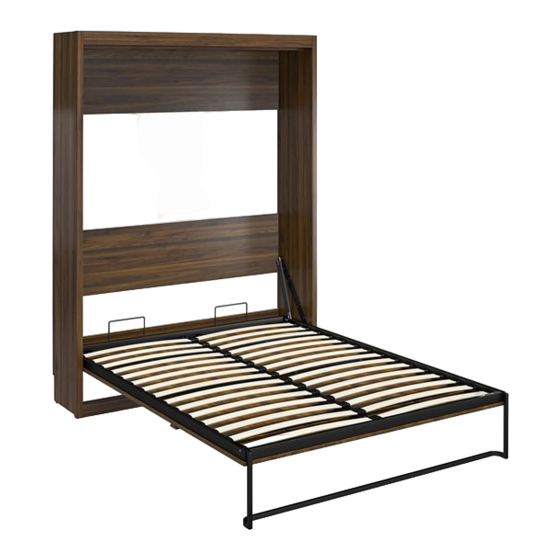
8368222COM (Columbia Walnut)
8368340COM (Andover Oak)
8368341COM (Magnolia Oak)
Wall Bed
Date of Purchase ___ / ___ / ___
Lot Number:
WARNING:
* WARNING FOR YOUNG CHILDREN -
This product contains small components,
please ensure that they are kept away
from small children. Children under the
age of 6, small infants and babies must
not sleep on this bed for safety reasons.
To prevent injury and damage to this unit,
PROHIBIT jumping on it.
* This product is designed for home use
and not intended for commercial use.
We highly recommend having a
professional assemble your
product
THIS INSTRUCTION BOOKLET CONTAINS IMPORTANT SAFETY INFORMATION. PLEASE READ AND KEEP FOR FUTURE REFERENCE.
Do Not Return This Product!
Contact our customer service team for help first.
Call: 1-800-489-3351 (toll free)
Monday-Friday 9am - 5pm CST
Visit: www.ameriwoodhome.com
WARNING
- Unit can tip over causing severe injury or death.
- Anchor unit to studs in wall (if instructed to).
- Do Not allow children to climb on unit.
Easy
Assembly Difficulty Meter
Follow Ameriwood Home
You
Tube
B348368000COM0
Tough
Publicidad

Manuales relacionados para Signature Sleep 8368222COM

Resumen de contenidos para Signature Sleep 8368222COM
- Página 1 8368222COM (Columbia Walnut) 8368340COM (Andover Oak) 8368341COM (Magnolia Oak) Wall Bed Date of Purchase ___ / ___ / ___ B348368000COM0 Lot Number: WARNING: * WARNING FOR YOUNG CHILDREN - This product contains small components, please ensure that they are kept away from small children.
-
Página 2: Helpful Hints
Contact Us! Do NOT return this product! Contact our friendly customer service team first for help. Assembly Tips Call us! 1-800-489-3351 Monday-Friday 9am - 5pm CST Tube Visit ameriwoodhome.com to view the limited warranty valid in the U.S. and Canada. Helpful Hints PEOPLE NEEDED FOR ASSEMBLY: 2 ESTIMATED ASSEMBLY TIME: 5 HOURS... -
Página 3: Before You Start
Before You Start Read through each step carefully and follow the proper order Separate and count all your parts and hardware Give yourself enough room for the assembly process Have the following tools: #2 Phillips Head Screwdriver, Hammer, Level, Stud Finder, Pencil, Drill with 1/8" and 1/4" bits. Caution: If using a power drill or power screwdriver for screwing, please be aware to slow down and stop when screw is tight. - Página 4 Board Identification Not actual size ameriwoodhome.com...
- Página 5 Board Identification parts for 8368222COM (Columbia Walnut) parts for 8368340COM (Andover Oak) Parts List Parts List PART PART ITEM DESCRIPTION ITEM DESCRIPTION NUMBER NUMBER 38368222010 LEFT PANEL LEFT PANEL 38368340010 38368222020 RIGHT PANEL 38368340020 RIGHT PANEL 38368222030 38368340030 38368222040 BOTTOM 38368340040 BOTTOM 38368222050 VALANCE 38368340050 VALANCE 38368222060 KICK 38368340060...
-
Página 6: Part List
Note that your unit may contain extra hardware Part List Actual Size (x22) (x8) (x16) (x22) #A22610 #A13950 #A22620 #A12105 cam bolt #8x3-1/2" pan head cam lock #8x7/16" pan head (x14) (x16) (x4) (x14) (x8) #A12400 #A22910 #A21660 #A43020 #A25400 connector bolt #8x5/8"... - Página 7 Bed Frame Identification Not actual size Note: Not all parts will be identified. Left Assembly Mattress Holder (2) Right Assembly 9632096-19a 9632096-19c 9632096-19d 9632096-19b Left Pivot Arm Wood Slat (30) Right Pivot Arm Gas Piston (4) Plastic Cap (60) U Bracket (4) 9632096-19e 9632096-19f 9632096-19g 9632096-19h 9632096-19i 9632096-19j M6 x 16mm Bolt (12) Cotter Pin (6) Pivot Pin (2) Large Clevis Pin (4) Small Clevis Pin (2) 9632096-19o 9632096-19n 9632096-19k 9632096-19l 9632096-19m M6 x 10mm Bolt (6) 4mm Hex Key Wrench Rubber Foot (3) Washer (8)
- Página 8 ameriwoodhome.com...
- Página 9 STEP 1 (x4) (x2) (x6) Proper orientation of Cam Lock Proper orientation of Cam Lock FLIP ameriwoodhome.com...
- Página 10 STEP 2 (x4) (x4) Proper orientation of Cam Lock Proper orientation of Cam Lock ameriwoodhome.com...
- Página 11 STEP 3 (x4) (x2) Proper orientation of Cam Lock Proper orientation of Cam Lock ameriwoodhome.com...
- Página 12 STEP 4 (x2) (x4) (x6) Proper orientation of Cam Lock FLIP Proper orientation of Cam Lock Proper orientation of Connector ameriwoodhome.com...
- Página 13 STEP 5 (x12) ameriwoodhome.com...
- Página 14 STEP 6 (x8) (x2) (x4) Proper orientation of Connector Proper orientation of Cam Lock Proper orientation of Connector Proper orientation of Cam Lock ameriwoodhome.com...
- Página 15 STEP 7 (x11) ameriwoodhome.com...
- Página 16 STEP 8 (x8) The Left Pivot Arm (19e) is located in the 9632096COM Wall Bed Mechanism box ameriwoodhome.com...
- Página 17 STEP 9 (x11) ameriwoodhome.com...
- Página 18 STEP 10 (x8) The Right Pivot Arm (19f) is located in the 9632096COM Wall Bed Mechanism box ameriwoodhome.com...
- Página 19 STEP 11 turn clockwise to lock in place ameriwoodhome.com...
- Página 20 STEP 12 turn clockwise to lock in place ameriwoodhome.com...
- Página 21 STEP 13 ameriwoodhome.com...
- Página 22 STEP 14 ameriwoodhome.com...
- Página 23 STEP 15 ameriwoodhome.com...
- Página 24 STEP 16 (x4) (x4) Lay the unit onto its front Tap in Bushings (10) with a hammer Screw in Glides (6) all the way ameriwoodhome.com...
- Página 25 The next steps are to assemble your unit to the wall Assembled unit MUST be square on the height, width, and depth to function properly Assembled unit MUST be placed flat against the wall Assembled unit MUST be screwed into wall studs at the top and bottom for safety DO NOT use wall anchors to fasten your unit to the wall For Masonry, Concrete, or other...
- Página 26 STEP 17 Place your unit FLUSH against the wall There are notches provided at the back of your unit. These notches are to fit around the baseboard on your wall. If your baseboard is higher or thicker than the notches provided on the unit, you will need to remove the baseboard, cut it down to fit on both sides of your...
- Página 27 STEP 18 Assembled unit MUST be flush on the height, width, and depth to function properly A ladder will be required Do not lean against the top of the unit, it may cause sagging If required, unscrew the Glides counter-clockwise as necessary in all 4 corners until your unit is level in all directions...
- Página 28 STEP 19 Locate the studs in the wall, using a stud finder. Using a pencil, mark the stud locations on the upper surface of the Upper Back Panel (G). Using a level, carry the stud locations down to the Bottom Stringer (L), and with a pencil, mark the stud locations.
- Página 29 STEP 20 (x8) First, make sure that your unit is still level in all directions. Drill 1/8" (3mm) pilot holes through the Upper Back Panel (G) and Bottom Stringer (L) at the stud locator marks. Fasten the unit to the studs in the wall with the Screws (3). A ladder will be required Do not lean against the top of the unit, it may...
- Página 30 The next steps are to assemble the metal bed frame and mechanism These parts are located in the #9632096COM Wall Bed Mechanism Carton ameriwoodhome.com...
- Página 31 STEP 21 (x3) (x1) (x4) press in each hole ameriwoodhome.com...
- Página 32 STEP 22 (x1) (x4) (x8) (x8) ameriwoodhome.com...
- Página 33 STEP 23 (x1) (x4) ameriwoodhome.com...
- Página 34 STEP 24 (x4) (x4) (x4) The "long" end of both pistons is to be fastened here The "long" end of both pistons is to be fastened here The ends of both pistons need to be inserted into the groove of the bed frame when assembled. ameriwoodhome.com...
- Página 35 STEP 25 (x1) (x2) (x2) Already fastened to your unit The cabinet is not shown to allow a clear view of the bed frame assembly With a person on each side, lift the bed mechanism, line up the holes of the Bed Assembly with the large bushing hole of the Left and Right Pivot arm (19e &...
- Página 36 STEP 26 (x1) (x4) With a person on each side, carefully lift the bed frame in the closed position. While one person pushes the bed frame into the cabinet, passed the 90 degrees, the other person is to engage the front Gas Piston (19h) on each side of the unit, to the front pin of the Left and Right Pivot Arm (19e &...
- Página 37 STEP 27 (x2) (x2) The cabinet is not shown to allow a clear view of the bed frame assembly Pull the bed frame down, then attach Leg (19c) as shown Apply Warning Label here The bed frame is equipped with a locking mechanism to lock the Leg (19c) in place.
- Página 38 STEP 28 (x8) (x4) (x4) (x4) Proper orientation of bracket Handle Molding (M) is to be centered on the Left Door Panel (J) ameriwoodhome.com...
- Página 39 STEP 29 (x4) (x8) (x4) (x4) Proper orientation of bracket Handle Molding (M) is to be centered on the Right Door Panel (K) ameriwoodhome.com...
- Página 40 STEP 30 Support Rail With the help of another person, lift the Left Door Panel (J), position the Brackets (13) over the three Support Rails of the Bed Frame, and drop into position. Repeat the procedure for the Right Door Panel (K). IMPORTANT: First, unlock and flip the leg into the cabinet.
- Página 41 STEP 31 (x40) With the help of another person, carefully pull the bed frame open Line up the holes of the bed frame with the holes in Panels (J&K), and fasten with Screws (11). The cabinet is not shown to allow a clear view of the bed frame assembly ameriwoodhome.com...
- Página 42 STEP 32 (x4) (x60) (x30) A ladder will be required Do not lean against the top of the unit, it may cause sagging Fasten Stop Rail (I) to the underside of Top (C) with Screws (11) finished edge Press a Plastic Cap (19j) at each end of a Wood Slat (19g).
- Página 43 STEP 33 Front of unit is not shown to allow a clear view of the kick and bottom open frame slightly While one person slightly opens the bed frame and holds it in place, insert the connector bolts installed in the Kick (F) into the connectors of the Bottom (D).
- Página 44 Maximum Loads This unit has been designed to support the maximum loads shown. Exceeding these load limits could cause sagging, instability, product collapse, and/or serious injury. This bed is designed to accommodate a Queen Size Mattress, up to 10" inches thick. * with a maximum weight of 70 lbs (31.8 kgs) * with a minimum weight of 35 lbs (15.9 kgs) After you have finished assembling your...
- Página 45 Register your product to receive the following: * New trend details - sneak peek on what's new * Surveys - have a voice within our community * Exclusive deals and discount codes * Quick and easy replacement part service To register your product, visit ameriwoodhome.com Visit your local retailer's website, rate your purchased product and leave us some feedback! We would like to extend a big "Thank You"...
- Página 46 Espa ol Cubie rta Delantera Este libro de instrucciones contiene informaci n IMPORTANTE de seguridad. Por favor lea y mant ngalo para referencia en el futuro. No Regrese este producto! Comuniquese con nuestro amistoso equipo de servicio al cliente para obtener ayuda.
- Página 47 Espa ol Sistema de fijar el bloqueo de leva (p gina 3) Esta sistema de fijar el bloqueo de leva sera usado en todo el proceso ensamble. P gina 6 Tenga en cuenta que su unidad puede contener hardware adicional P gina 7 Nota: No se identificar n todas las piezas.
- Página 48 Espa ol P gina 26 Coloque su unidad al ras contra la pared Hay muescas en la parte posterior de su unidad. Estas muescas deben encajar alrededor del z calo de la pared. Si su z calo es m s alto o m s grueso que las muescas provistas en la unidad, deber quitar el z calo, cortarlo para que quepa en ambos lados de su unidad y luego volver a fijarlo a la pared.
- Página 49 Espa ol P gina 34 El extremo "largo" de ambos pistones debe fijarse aqu . Los extremos de ambos pistones deben insertarse en la ranura del marco de la cama cuando se ensamblan. P gina 35 Ya fijado a su unidad Con una persona a cada lado, levante el mecanismo de la cama, alinee los orificios del conjunto de la cama con el orificio del buje grande del brazo de pivote izquierdo y derecho (19e y 19f) ya instalado en su unidad e inserte los pasadores de pivote (19k) como se muestra.
- Página 50 Espa ol P gina 40 Carril de soporte Con la ayuda de otra persona, levante el panel de la puerta izquierda (J), coloque los soportes (13) sobre los tres rieles de soporte del marco de la cama y col quelos en su posici n. Repita el procedimiento para el panel de la puerta derecha (K).
- Página 51 Espa ol P gina 44 CARGA MAXIMA Esta unidad ha sido dise ada para soportar la carga m xima anotada. El exceder estos l mites puede causar inestabilidad, colapsarse y/o causar serias lesiones. Esta cama est dise ada para acomodar un colch n tama o Queen, de hasta 10" pulgadas de grosor. * con un peso m ximo de 70 libras (31,8 kgs) * con un peso m nimo de 35 libras (15.9 kgs) Una vez que haya terminado de montar su cama abatible, conserve el manual de montaje coloc ndolo...
- Página 52 Fran ais Couverture Avant CE LIVRET D'INSTRUCTION CONTIENT DES INFORMATIONS IMPORTANTES SUR LA S CURIT . VEUILLEZ LIRE ET GARDER POUR UNE R F RENCE FUTURE Ne retournez pas ce produit! Contactez notre quipe de service la client le amicale d'abord pour obtenir de l'aide.
- Página 53 Fran ais Syst me de Fixation de Came (page 3) Ce Syst me de Fixation de Came sera utilis tout au long de l'assemblage Page 6 Notez que votre appareil peut contenir du mat riel suppl mentaire page 7 Remarque: les pi ces ne seront pas toutes identifi es. Page 9, 10, 11, 12, 14 bonne orientation du verrou came retourner...
- Página 54 Fran ais Page 26 Placez votre appareil contre le mur Il y a des encoches l'arri re de votre appareil. Ces encoches doivent s'adapter autour de la plinthe sur votre mur. Si votre plinthe est plus haute ou plus paisse que les encoches fournies sur l'unit , vous devrez retirer la plinthe, la couper pour qu'elle s'adapte des deux c t s de votre unit , puis la remettre au mur.
- Página 55 Fran ais Page 34 L'extr mit "longue" des deux pistons doit tre fix e ici Les extr mit s des deux pistons doivent tre ins r es dans la rainure du cadre de lit une fois assembl es. Page 35 D j attach votre appareil Avec une personne de chaque c t , soulevez le m canisme du lit, alignez les trous de l'assemblage du...
- Página 56 Fran ais Page 40 Rail de support Avec l'aide d'une autre personne, soulevez le panneau de porte gauche (J), positionnez les supports (13) sur les trois rails de support du cadre de lit et mettez-le en place. R p tez la proc dure pour le panneau de porte droit (K). IMPORTANT: Tout d'abord, d verrouillez et retournez le pied dans l'armoire.
- Página 57 Fran ais Page 44 CHARGES MAXIMALES Ce meuble a t con u pour supporter les charges maximales indiqu es. En exc dant ces limites de charge, le meuble pourrait devenir instable, s'effondrer, et/ou causer des blessures graves. Ce lit est con u pour accueillir un matelas queen, jusqu' 10 pouces d' paisseur. * avec un poids maximum de 70 livres (31,8 kg) * avec un poids minimum de 35 livres (15,9 kg) Apr s avoir fini d'assembler votre lit escamotable, veuillez conserver le manuel de montage en le...