Publicidad
Idiomas disponibles
Idiomas disponibles
Enlaces rápidos
(2) Bottom
(4) Bottom Rail
Rail Caps
with rings
1
DETERMINE DESIRED MOUNTING METHOD
This two-in-one valance design allows you to easily mount the sun shade to either a
ceiling (Fig. 1) or a wall (Fig. 2).
For ease and flexibility in mounting divide your shade into three even zones, the three
quick-connect brackets can be positioned anywhere inside each of these three zones.
Be sure to keep each of the three brackets inside these zones for proper balance and
weight distribution of the valance.
WARNING: If you do not ensure the quick mount brackets are positioned
with the release button in the correct direction (Fig. 4 and Fig. 5), removing
the shade may be difficult. The brackets must be positioned and installed level
to ensure the shade hangs level and functions properly.
2
INSTALL QUICK CONNECT BRACKETS AND SUN SHADE
IMPORTANT: The screws included in your hardware kit are for use with
wood only. Call Customer Service (1-800-560-4667) for mounting
recommendations when attaching your shade to any other material.
A. In the desired locations, attach Quick Connect Brackets (Fig. 3) with screws,
into wooden stud.
B.
Install the Shade by snapping the unit securely into place.
NOTE: If installing to a ceiling (Fig. 4) ensure the tab on
the bracket facing towards you. If installing to a wall (Fig. 5)
ensure that the tab on the bracket is facing downward.
Allow at least 5.08 cm (2 in) of clearance between the
bracket and wall or ceiling to allow space to snap shade
onto bracket.
If brackets are installed upside down or backwards, the
blind WILL NOT FIT.
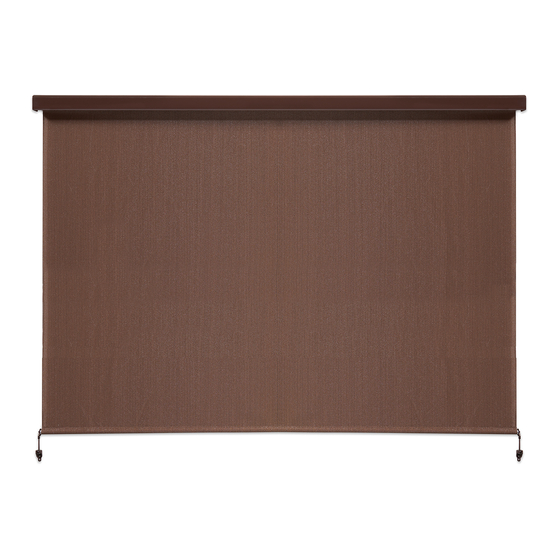
Outdoor Roller Shade
Easy Release
with Full Valance
(1) Full Valance
(3) Bungee
(5) Receiver
(6) Wood
(7) Brackets
(8) Anchors
(9) Tension
(1) Shade
(9) Idle End Plug
(10) Aluminum Tube
(1) Clutch Unit
(9) Idle End Plug
(10) Aluminum Tube
(2) Clutch Plug
(1) Clutch Unit
(2) Clutch Plug
(8) Idle End
Unit
(8) Idle End
Unit
(7) Shade
(7) Shade
(3) Wand
(6) Bottom Rail
(4) Bottom
(6) Bottom Rail
Rail Cap
(4) Bottom
Rail Cap
PARTS LIST
(10) sola panel
1
Full valance
(10) Idle End Plug
(11) Aluminum Tube
(1) Clutch Unit
(10) Idle End Plug
(11) Aluminum Tube
(2) Clutch Plug
(1) Clutch Unit
2
Bottom rail caps with rings
(2) Clutch Plug
(3) Bracket Covers
(9) Idle End
(3) Bracket Covers
Unit
(9) Idle End
Unit
3
Bungee
(8) Shade
(11) mounting
(8) Shade
(4) Wand
4
Bottom rail
bracket
(7) Bottom Rail
(7) Bottom Rail
(5) Bottom
Rail Cap
(5) Bottom
Rail Cap
5
Receiver
Screws
6
Wood Screws
(12) solar panel clip
7
Brackets
8
Anchors
9
Tension adjustment tool
(13) screw
ADDITIONAL TOOLS NEEDED
(14) nut screw
adjustment
Drill with 3/16 in bit
tool
Level
Tape Measure
Pencil
Fig. 5
Ceiling mount
Tabs forward
INSTALLATION
INSTRUCTIONS
(10) Idle End Plug
(11) Aluminum Tube
(1) Clutch Unit
(10) Idle End Plug
(11) Aluminum Tube
(1) Clutch Unit
(2) Clutch Plug
(2) Clutch Plug
(3) Bracket Covers
(3) Bracket Covers
(9) Idle End
Unit
(9) Idle End
Unit
(8) Shade
(4) Chain
(8) Shade
(4) Chain
(5) Bottom
(7) Bottom Rail
Rail Cap
(5) Bottom
(7) Bottom Rail
(6) Tie Downs
Rail Cap
(3) Wand
(6) Tie Downs
PARTS
(10) Idle End Plug
(11) Aluminum Tube
(1) Clutch Unit
(10) Idle End Plug
(11) Aluminum Tube
(2) Clutch Plug
(1) Clutch Unit
11-BRC
(2) Clutch Plug
(3) Bracket Covers
(9) Idle End
(3) Bracket Covers
Unit
(9) Idle End
Unit
11-BUNGEE TD
(9) Idle End Plug
(8) Shade
(4) Chain
(8) Shade
(4) Chain
(4) Wand
(5) Bottom
(7) Bottom Rail
Rail Cap
(5) Bottom
(7) Bottom Rail
Rail Cap
1-RECEIVER
4-WS
(8) Idle End
Z-14-FCIBW
Unit
(6) Bottom Rail
10-minute set up
(4) Bottom Rail
(4) Bottom Rail
Fig. 1
Fig. 2
OR
Fig. 3
Fig. 4
Wall mount
Tabs downward
QTY
1
2
2
(10) Aluminum Tube
1
(2) C
2
10
3
10
1
(1) Full Valance
(3) Bungee
(10) sola panel
(1) Full Valance
(3) Bungee
(10) sola panel
(5) Receiver
(5) Receiver
(11) mounting
bracket
(11) mounting
(6) Wood
bracket
Screws
(6) Wood
Screws
(7) Brackets
(12) solar panel clip
(8) Idle En
(12) solar panel clip
(7) Brackets
Unit
(8)
Un
(8) Anchors
(13) screw
(8) Anchors
(2) Bottom
(13) screw
(9) Tension
(14) nut screw
Rail Caps
(2) Bottom
adjustment
with rings
(4) Bottom
(9) Tension
(14) nut screw
(approximate time)
Rail Caps
(1) Shade
tool
adjustment
with rings
(6) Bottom Rail
(1) Shade
tool
(6) Bottom
Rail Cap
This side goes on
mounting surface
Publicidad

Manuales relacionados para Coolaroo Easy Release


Resumen de contenidos para Coolaroo Easy Release
- Página 1 Outdoor Roller Shade INSTALLATION Easy Release INSTRUCTIONS (10) Idle End Plug (11) Aluminum Tube (1) Clutch Unit (10) Idle End Plug (11) Aluminum Tube (1) Clutch Unit (2) Clutch Plug (9) Idle End Plug (10) Aluminum Tube (2) Clutch Plug...
- Página 2 Do not use bleach or chlorine. Register and Order Replacement Parts Online: Questions or Comments? Contact us at: www.coolaroousa.com Gale Pacific USA, Inc. | www.coolaroousa.com | 1-800-560-4667 © by Gale Pacific Limited. All rights reserved. Coolaroo® is a registered trademark of Gale Pacific Limited. 5.04.004.267...
- Página 3 Store à enroulement INSTRUCTIONS automatique d’extérieur POUR L’INSTALLATION Dégagement rapide avec la cantonnière (10) Idle End Plug (11) Aluminum Tube (1) Clutch Unit (10) Idle End Plug (11) Aluminum Tube (2) Clutch Plug (1) Clutch Unit (9) Idle End Plug (10) Aluminum Tube (2) Clutch Plug (1) Clutch Unit...
-
Página 4: Réglage De La Tension
Des questions ou des commentaires? Communiquez avec nous au: www.coolaroousa.com Gale Pacific USA, Inc. | www.coolaroousa.com | 1-800-560-4667 © Gale Pacific Limited. Tous droits réservés. Coolaroo® est une marque de commerce déposée de Gale Pacific Limited. 5.04.004.267... -
Página 5: Liberación Fácil
Persiana en rollo para exteriores INSTRUCCIONES DE Liberación fácil INSTALACIÓN con Cenefa Completa (10) Idle End Plug (11) Aluminum Tube (1) Clutch Unit (10) Idle End Plug (11) Aluminum Tube (1) Clutch Unit (2) Clutch Plug (9) Idle End Plug (10) Aluminum Tube (1) Clutch Unit (2) Clutch Plug... -
Página 6: Cómo Subir Y Bajar La Persiana
¿Preguntas o comentarios? Póngase en contacto al: www.coolaroousa.com Gale Pacific USA, Inc. | www.coolaroousa.com | 1-800-560-4667 © por Gale Pacific Limited. Todos los derechos reservados. Coolaroo® es una marca registrada de Gale Pacific Limited. 5.04.004.267...