Publicidad
Enlaces rápidos
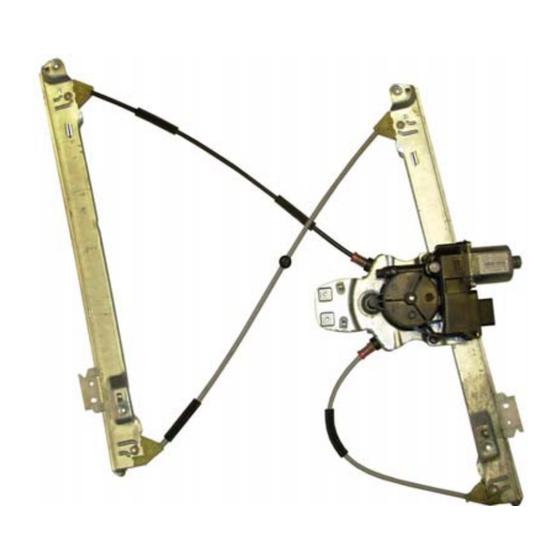
Power Windows | Leve-glace Electrique | Elektrische Fensterheber | Elevalunas Electricos
Máquina De Vidro Elétrico | Elektrische Raamheffers | Alzacristalli Elettrici
Pour / For
Citroën
Citroën C5 "MK2" (5/2008>)
Solo meccanismo per motori originali con
elettronica / Mechanical part only. Replaces
window regulator already provided with original
motor with electronic box / Solo mecanismo
para motor original con sistema confort
Citroën
Citroën C5 "MK2" Station Wagon
(5/2008>)
Solo meccanismo per motori originali con
elettronica / Mechanical part only. Replaces
window regulator already provided with original
motor with electronic box / Solo mecanismo
para motor original con sistema confort
14 w42
THIS INSTALLATION INSTRUCTION IS FOR BOTH LEFT AND RIGHT SIDE.
CETTE INSTRUCTION DE MONTAGE EST POUR LES DEUX COTES DROIT ET GAUCHE.
DIESE MONTAGE-ANLEITUNG IST FÜR DIE BEIDE LINKE UND RECHTE SEITE.
ESTA INSTRUCCION DE MONTAJE ES PARA LOS DOS LADOS IZQUIERDO Y DERECHO.
ESTAS INSTRUÇÕES VALEM TANTO PARA O LADO ESQUERDO QUANTO PARA O DIREITO.
DEZE AANWIJZINGEN GELDEN VOOR ZOWEL DE LINKER- ALS DE RECHTERKANT.
Η ΠΑΡΟΥΣΑ Ο∆ΗΓΙΑ ΑΦΟΡΑ ΤΟΣΟ ΤΗΝ ΑΡΙΣΤΕΡΗ ΟΣΟ ΚΑΙ ΤΗ ∆ΕΞΙΑ ΠΛΕΥΡΑ.
LA PRESENTE ISTRUZIONE VALE SIA PER IL LATO SINISTRO CHE PER IL LATO DESTRO.
851266 - 851267
Publicidad

Resumen de contenidos para Valeo 851266
- Página 1 Power Windows | Leve-glace Electrique | Elektrische Fensterheber | Elevalunas Electricos Máquina De Vidro Elétrico | Elektrische Raamheffers | Alzacristalli Elettrici 851266 - 851267 Pour / For Citroën THIS INSTALLATION INSTRUCTION IS FOR BOTH LEFT AND RIGHT SIDE. Citroën C5 "MK2" (5/2008>) CETTE INSTRUCTION DE MONTAGE EST POUR LES DEUX COTES DROIT ET GAUCHE.
- Página 2 CT722 18-05-2017 ENGLISH ENGLISH THIS INSTALLATION INSTRUCTION IS FOR BOTH LEFT AND RIGHT SIDE. A) Remove door trim and window regulator. B) Remove the original motor from the window regulator to replace and re-mount it on the new window regulator using the screws supplied. C) Insert the electric window regulator into the door and secure it into holes at positions 1, 2, 3, 4 and 5 (positions 1, 2 and 5 using the original screws).


