Publicidad
Idiomas disponibles
Idiomas disponibles
Enlaces rápidos
SKU #1002 632 074
Model #LEDR56/4WY/HD
USE AND CARE GUIDE
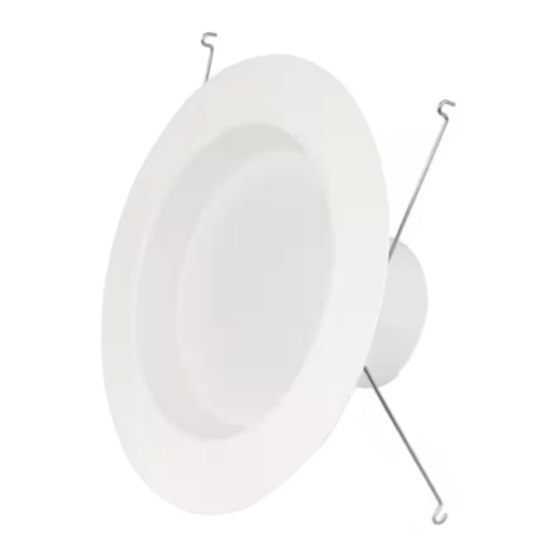
5-6 IN. RETROFIT KIT WITH
SELECTABLE COLOR TEMPERATURES
Questions, problems, missing parts? Before returning to the store,
call Commercial Electric Customer Service
8 a.m. - 7 p.m., EST, Monday - Friday, 9 a.m. - 6 p.m., EST, Saturday
1-877-527-0313
HOMEDEPOT.COM
THANK YOU
We appreciate the trust and confidence you have placed in Commercial Electric through the purchase of this LED Retrofit Kit. We strive to
continually create quality products designed to enhance your home. Visit us online to see our full line of products available for your home
improvement needs. Thank you for choosing Commercial Electric!
Publicidad

Resumen de contenidos para Commercial Electric LEDR56/4WY/HD
- Página 1 THANK YOU We appreciate the trust and confidence you have placed in Commercial Electric through the purchase of this LED Retrofit Kit. We strive to continually create quality products designed to enhance your home. Visit us online to see our full line of products available for your home...
-
Página 2: Tabla De Contenido
Table of Contents Table of Contents ........2 Safety Information . -
Página 3: Pre-Installation
Pre-Installation For 5 in. Recessed Housings For 6 in. Recessed Housings COMPONENTS INCLUDED Part Description Quantity Medium Base Adapter Retrofit Trim Assembly HOMEDEPOT.COM Please contact 1-877-527-0313 for further assistance. -
Página 4: Installation
Installation into Existing Recessed Incandescent Fixture NOTICE: For use with 5 in. or 6 in. recessed housings (housing sold Installing the Adapter separately). LED recessed trim will retrofit into select existing 5 in. or 6 in. nominal incandescent housings. □ Install the adapter (AA) into the socket. (See Fig. 3) Turning Off the Power Fig. - Página 5 Installation into Existing Recessed Incandescent Fixture (continued) Connecting the Wires Inserting the Trim □ Insert the torsion springs into the fixture housing □ Connect the orange connectors together. brackets. (See Fig. 5) (See Fig. 4a and 4b) Fig. 4a Fig. 5 Terminals For 5 in.
- Página 6 Installation into Existing Recessed LED Fixture with Compatible Orange Connectors NOTICE: LED recessed trim will retrofit into select existing nominal LED housings. Inserting the Trim Turning Off the Power □ Insert the torsion springs into the □ Turn OFF the power at the switch and fusebox fixture brackets.
-
Página 7: Changing The Color Settings
Changing the Color Settings (Soft White) (Bright White) (Daylight) (Light Switch) Switch NOTICE: The toggle switch is located on the back of the fixture. 4-way color changing: To change color temperatures using your existing light switch: 1. You can lock in one color temperature, change among multiple color temperatures, A. - Página 8 Questions, problems, missing parts? Before returning to the store, call Commercial Electric Customer Service 8 a.m. - 7 p.m., EST, Monday - Friday, 9 a.m. - 6 p.m., EST, Saturday 1-877-527-0313 HOMEDEPOT.COM Retain this manual for future use.
- Página 9 GRACIAS Agradecemos la confianza que ha depositado en Commercial Electric a través de la compra de esta Lámpara LED de pantalla plana. Nos esforzamos por crear continuamente productos de calidad diseñados para mejorar su hogar. Visítenos en línea para ver nuestra línea completa...
-
Página 10: Información De Seguridad
Tabla de contenidos Tabla de contenidos ....... . . 7 Información de Seguridad . -
Página 11: Preinstalación
Pre-Instalación Para 5 pulg. Empotrado Cajas Para 6 pulg. Empotrado Cajas PIEZAS INCLUIDAS Pieza Descripcción Cantidad Adaptador de base media Ensamblaje de reequipamiento HOMEDEPOT.COM Comuníquese con el 1-877-527-0313 para obtener más ayuda. -
Página 12: Instalación En Un Accesorio Incandescente Empotrado Existente
Instalación en un accesorio incandescente empotrado existente PRECAUCION: Para uso con carcasas empotradas de 5 “o 6” Instalación del adaptador (carcasa vendida por separado). Los recesos LED empotrados se adaptarán a carcasas incandescentes nominales existentes de 5 pulgadas o 6 pulgadas. □... -
Página 13: Conexión De Los Cables
Instalación en un accesorio incandescente empotrado existente (continuado) Conexión de los cables Inserción de la lampara □ Conecte los conectores naranja juntos. □ Inserte los resortes de torsión en los soportes de (Vea la Fig. 4a and 4b) la carcasa del aparato. (Vea la Fig. 5) Fig. -
Página 14: Instalación En Un Accesorio Led Empotrado Existente Con Compatibilida Conectores Naranja
Instalación en un accesorio LED empotrado existente con compatibilida Conectores naranja PRECAUCION: Los recesos LED empotrados se adaptarán a las carcasas de LED nominales existentes existentes. Inserción de la lampara Desactivación de la alimentación. □ Inserte los resortes de torsión en los □... -
Página 15: Cambiar La Configuración De Color
Cambiar la configuración de color (Soft White) (Bright White) (Daylight) (Light Switch) Switch PRECAUCION: El interruptor de palanca se encuentra en la parte trasera del aparato. Cambio de color en 4 direcciones Para cambiar las temperaturas de color usando su interruptor de luz existente: 1. - Página 16 Questions, problems, missing parts? Before returning to the store, call Commercial Electric Customer Service 8 a.m. - 7 p.m., EST, Monday - Friday, 9 a.m. - 6 p.m., EST, Saturday 1-877-527-0313 HOMEDEPOT.COM Retain this manual for future use.


