Tabla de contenido
Publicidad
Idiomas disponibles
Idiomas disponibles
Enlaces rápidos
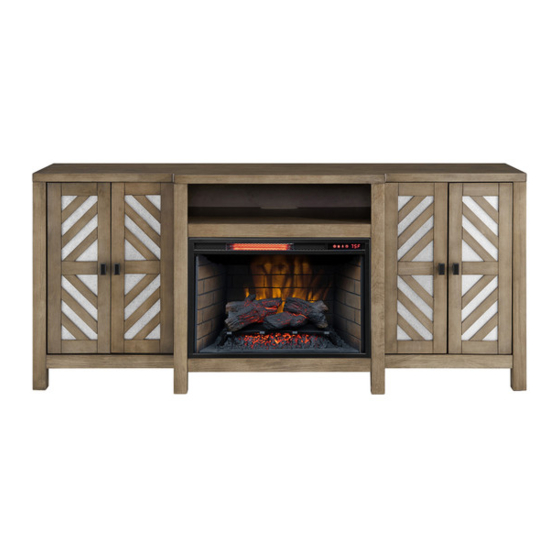
72" Fireplace Media
Console
ASSEMBLY, CARE & USE INSTRUCTIONS
MODEL # 1594FSO-26-269
Date Purchased _______________________
Questions, problems, missing parts?
Before returning to your retailer,
call our customer service department at
1-704-461-2414 8:30 a.m. - 5 p.m., EST, Monday - Friday.
www.greentouchhome.com
Français p. 18
Español p. 35
Publicidad
Tabla de contenido

Manuales relacionados para Greentouch Kathy Ireland Home 1594FSO-26-269


Resumen de contenidos para Greentouch Kathy Ireland Home 1594FSO-26-269
- Página 1 72” Fireplace Media Français p. 18 Español p. 35 Console ASSEMBLY, CARE & USE INSTRUCTIONS MODEL # 1594FSO-26-269 Date Purchased _______________________ Questions, problems, missing parts? Before returning to your retailer, call our customer service department at 1-704-461-2414 8:30 a.m. - 5 p.m., EST, Monday - Friday. www.greentouchhome.com...
-
Página 2: Package Contents
PACKAGE CONTENTS OPTIONAL SOUND SYSTEM (SOLD SEPARATELY) PAIR See page 10 PART DESCRIPTION QUANTITY PART DESCRIPTION QUANTITY Right Door Center Shelf Base Left Middle Wall Right Middle Wall Left Outer Wall Right Outer Wall OPTIONAL SOUND SYSTEM (SOLD SEPARATELY) Back Panel Center Back Panel Sound System Shelf... -
Página 3: Hardware Contents
HARDWARE CONTENTS (NOT SHOWN ACTUAL SIZE) OPTIONAL SOUND SYSTEM HARDWARE (SOLD SEPARATELY) See page 10 PART DESCRIPTION QUANTITY OPTIONAL SOUND SYSTEM HARDWARE (SOLD SEPARATELY) Long Bolt Screw Washer Speaker Bracket Wooden Dowel Wrench Back Panel Screw Shelf Pin Touch-up Pen Door Pull (with screw) - Página 4 PREPARATION Before beginning assembly of product, make sure Estimated Assembly Time: 45 minutes all parts are present. Compare parts with Tools Required for Assembly (not included): package contents list and hardware contents list. Phillips screwdriver If any part is missing or damaged, do not attempt to assemble the product.
- Página 5 1035IM-28-225 ELECTRICAL FIREPLACE ASSEMBLY INSTRUCTIONS (CONT’D) 2. Insert four wooden dowels (CC) into holes of base (L), align and attach the assembly from step 1 to the base (L), securing from underneath with four washers (BB) and four long bolts (AA). 1035IM-28-225 2# 1360FM-24-259 4# Hardware Used...
- Página 6 ELECTRICAL FIREPLACE ASSEMBLY INSTRUCTIONS (CONT’D) 5. From behind the assembly, attach back panel (G) to shelving areas using back panel screws (DD). Repeat for remaining back panel (G),center back panel (H). Note: Do not install center back panel (H) if you plan to install a sound system (sold separately) For more information see page 10.
- Página 7 ELECTRICAL FIREPLACE ASSEMBLY INSTRUCTIONS (CONT’D) 8. Hold the door (K) and align with the inside of the side wall of the main body. Align and slide the hooks/catches on the hinge body attached to door (K) into the recesses in the hinge mounting plates attached to the inside wall of the main body.
- Página 8 ELECTRICAL FIREPLACE ASSEMBLY INSTRUCTIONS (CONT’D) 10. From behind the assembly, remove the preassembled insert brackets from the middle area. Save brackets and screws for future use. 1037IM-28-245 3# Note: Before proceeding to the next step, with the help of another person, move the mantel close to the final desired location.
- Página 9 ELECTRICAL FIREPLACE ASSEMBLY INSTRUCTIONS (CONT’D) NOTE: Use the pre-assembled levelers on the base of the fireplace to level the unit. Twist the levelers counter clockwise to increase the height, twist the clockwise to decrease the height. Assembly is now complete. With the help of another person, move the assembly to the final desired location.
- Página 10 OPTIONAL SOUND SYSTEM (SOUND SYSTEM SOLD SEPARATELY) PACKAGE CONTENTS PAIR PART DESCRIPTION QUANTITY Sound System Sound System Remote Control Screw Speaker Bracket Wrench DC Adaptor Power Cable Optical Cable...
-
Página 11: Safety Information
SAFETY INFORMATION WARNING • Read and keep all instructions. • To reduce the risk of electric shock do not remove cover or back panel. No user-serviceable parts inside. Refer servicing to qualified service personnel. For Indoor use only. DO NOT expose this product to rain, moisture, dripping or splashing. •... - Página 12 SOUND SYSTEM ASSEMBLY INSTRUCTIONS If you have installed the center back panel (H) to the mantel, please follow these steps to remove it. 1. From behind the assembled mantel, remove the Center Back Panel (H) by unscrewing the screws on the back panel. 2.
- Página 13 SOUND SYSTEM ASSEMBLY INSTRUCTIONS (CONT’D) 4. From behind the assembly, to secure the sound system (R) with two screws (HH). Hardware Used Screw 10180SB-28-254 11# 5. Multiple sources can be wired to the sound system using the inputs located at the back of the unit. An optical cable is provided and we recommend using this option to wire your television to the system for best digital sound.
- Página 14 OPERATING INSTRUCTIONS Sound system Control Panel Remote Control CONTROL PANEL AND REMOTE CONTROL: The sound system settings ON/OFF can be adjusted with the control panel and/or the PAIR PLAY/PAUSE sound system remote control: VOLUME UP VOLUME DOWN SCROLL SOURCE OPTIONS SCROLL EQ SETTINGS ACCESSORIES DC Adaptor...
-
Página 15: Care And Maintenance
CARE AND MAINTENANCE Replacing the Remote Control Batteries When the sound system remote control (S) stops operating or its range seems reduced, it is time to replace the batteries. Note:The batteries should be removed if the product is to be left unused for a long time. 1. - Página 16 ONE-YEAR LIMITED WARRANTY The manufacturer warrants that your new Electric fireplace is free from manufacturing and material defects for a period of one year from date of purchase, subject to the following conditions and limitations. Install and operate this Electric fireplace in accordance with the installation and operating instructions furnished with the product at all times.
-
Página 17: Replacement Parts
REPLACEMENT PARTS For replacement parts, call our customer service department at 1-704-461-2414, 8:30 a.m. - 5 p.m., EST, Monday - Friday. PART DESCRIPTION PART # Hardware Pack (AA, PH-1594FSO-26- BB, CC,DD and EE) HARDWARE PACK... - Página 18 Console média de 72 po English p. 1 Español p. 35 pour foyer INSTRUCTIONS D’UTILISATION, D’ASSEMBLAGE ET DE MAINTENANCE MODÈLE # 1594FSO-26-269 Date d’achat _______________________ Des questions, des problèmes, des pièces manquantes? Avant de retourner l’article au détaillant, appelez notre service à la clientèle au 1-704-461-2414, entre 8h30 et 17 h (HNE), du lundi au vendredi.
-
Página 19: Contenu De L'EMballage
CONTENU DE L’EMBALLAGE SYSTÈME AUDIO EN OPTION (VENDU SÉPARÉMENT) PAIR Voir la page 27 PIÈCE DESCRIPTION QUANTITÉ PIÈCE DESCRIPTION QUANTITÉ Dessus Porte Droite Tablette Centrale Base Cloison Centrale Gauche Cloison Centrale Droite Paroi Extérieure Gauche Paroi Extérieure Droite SYSTÈME AUDIO EN OPTION (VENDU SÉPARÉMENT) Panneau Arrière Panneau Arrière Central... - Página 20 CONTENUS MATÉRIELS (NON REPRÉSENTÉS EN TAILLE RÉELLE) MATÉRIEL OPTIONNEL POUR LA SYSTÈME AUDIO (VENDU SÉPARÉMENT) Voir la page 27 PIÈCE DESCRIPTION QUANTITÉ MATÉRIEL OPTIONNEL POUR LA SYSTÈME AUDIO (VENDU SÉPARÉMENT) Boulon Long Rondelle Support de haut-parleur Groujon en Bois Clé Vis Pour Le Panneau Arrière Goupille à...
- Página 21 PRÉPARATION Avant de commencer l’assemblage de l’article, Temps d’assemblage approximatif : assurez-vous d’avoir toutes les pièces. Comparez 45 minutes. le contenu de l’emballage avec la liste des pièces et celle de la quincaillerie incluse. S’il y a des Outil nécessaire pour l’assemblage pièces manquantes ou endommagées, ne tentez (non inclus) : tournevis cruciforme.
- Página 22 1035IM-28-225 INSTRUCTIONS DE MONTAGE DU FOYER ÉLECTRIQUE (SUITE) 2. Insérez quatre goujons en bois (CC) dans les trous de la base (L), alignez et fixez l’ensemble de l’étape 1 à la base (L), en le fixant par le dessous avec quatre rondelles (BB) et quatre boulon long (AA). 1035IM-28-225 2# 1360FM-24-259 4# Quincallerie Utilisée...
- Página 23 INSTRUCTIONS DE MONTAGE DU FOYER ÉLECTRIQUE (SUITE) 5. De I’arrière de l’assemblage, fixez le panneau arrière (G) aux zones d’étagères à l’aide des vis (DD). Répétez l’opération pour le panneau arrière (G), panneau arrière central (H). Remarque: n'installez pas le panneau arrière du milieu (H) si vous envisagez d'installer une système audio (vendue séparément).
- Página 24 INSTRUCTIONS DE MONTAGE DU FOYER ÉLECTRIQUE (SUITE) 8. Tenez la porte (K) et alignez-la à l’intérieur de la paroi latérale du châssis. Alignez et faites glisser les crochets / attaches sur le châssis de la charnière fixé à la porte (K) dans les trous préusinés des plaques de montage de la charnière fixées à...
- Página 25 INSTRUCTIONS DE MONTAGE DU FOYER ÉLECTRIQUE (SUITE) 10. En restant toujours derrière l’assemblage, retirez de la zone centrale les supports du foyer encastrable préassemblés. Conservez les supports et les vis pour une utilisation ultérieure. 1037IM-28-245 3# Remarque: Avant de passer à l’étape suivante, et avec l’aide d’une autre personne, placez lemeuble à...
- Página 26 INSTRUCTIONS DE MONTAGE DU FOYER ÉLECTRIQUE (SUITE) NOTE : Utilisez les niveleurs préassemblés sur la base du foyer pour niveler l'appareil. Tournez les niveleurs dans le sens antihoraire pour augmenter la hauteur, tournez dans le sens horaire pour diminuer la hauteur. L'assemblage est maintenant terminé.
-
Página 27: Système Audio En Option
SYSTÈME AUDIO EN OPTION (SYSTÈME AUDIO VENDUE SÉPARÉMENT) CONTENU DE L’EMBALLAGE PAIR PIÈCE DESCRIPTION QUANTITÉ Système Audio Télécommande Du Système Audio Support de haut-parleur Clé Adaptateur CC Câble D’alimentation Câble Optique... -
Página 28: Consignes De Sécuritéfety
CONSIGNES DE SÉCURITÉFETY AVERTISSEMENT : • Lisez et respectez toutes les instructions. • Pour éviter tout risque d’électrocution, ne retirez pas le capot ou le panneau arrière. Il n’y a aucune pièce utile d’utilisateur à l’intérieur. Toute réparation doit être uniquement confiée à du personnel qualifié. -
Página 29: Précautions À Prendre
INSTRUCTIONS D’ASSEMBLAGE DE LA SYSTÈME AUDIO Procédez comme suit pour le retirer si vous avez installé le panneau arrière du milieu (H) sur la tablette de la cheminée. 1. Retirez le panneau arrière du milieu (H) en dévissant les vis du panneau arrière de derrière la tablette de la cheminée assemblé. - Página 30 INSTRUCTIONS D’ASSEMBLAGE DE LA SYSTÈME AUDIO (SUITE) 4. Depuis l'arrière du montage, fixez le système audio (R) avec deux vis (HH). Quincallerie Utilisée 5. Plusieurs sources peuvent être branchées au système sonore à travers les entrées situées au dos de l’appareil. Un câble optique est fourni et nous recommandons l’utilisation de cette option pour câbler votre téléviseur pour un son numérique optimal.
-
Página 31: Premier Jumelage De Votre Appareil
MODE D’EMPLOI Télécommande Du Panneau de Système Audio contrôle PANNEAU DE CONTRÔLE ET TÉLÉCOMMANDE: Les réglages du système audio peuvent être ajustés à partir du MARCHE/ARRÊT panneau de contrôle et/ou de la PAIR télécommande du système audio: LIRE/PAUSE AUGMENTER LE VOLUME BAISSER LE VOLUME PARCOURIR LES OPTIONS DE SOURCE... - Página 32 ENTRETIEN Remplacer Les Piles De La Télécommande Lorsque la télécommande du système audio (S) arrête de fonctionner ou que sa portée semble réduite, il est temps de remplacer les piles. Note : Les piles devraient enlevées si le produit sera inutilisé pendant une longue période.
- Página 33 GARANTIE LIMITEE D’UN ANE Cet article est garanti par le fabricant contre les défauts de matériaux et de fabrication pour une période de un an à compter de la date d’achat. La présente garantie est assujettie aux restrictions et aux conditions suivantes : Ce meuble doit être installé...
-
Página 34: Liste Des Pièces De Rechange
LISTE DES PIÈCES DE RECHANGE Pour obtenir des pièces de rechange, communiquez avec notre service à la clientèle au 1-704-461-2414, entre 8h30 et 17 h (HNE), du lundi au vendredi. PIÈCE DESCRIPTION Nº DE PIÈCE Paquet De Matériel (AA, PH-1594FSO-26- BB, CC,DD and EE) HARDWARE PACK... -
Página 35: Instrucciones De Ensamblaje, Cuidado Y Uso
Chimenea con consola English p.1 Français p. 18 multimedia de 72 pulg. INSTRUCCIONES DE ENSAMBLAJE, CUIDADO Y USO MODELO # 1594FSO-26-269 Fecha de compra _______________________ ¿Preguntas, problemas, piezas faltantes? Antes de volver a la tienda, llame a nuestro Departamento de Servicio al Cliente al 1-704-461-2414 de lunes a viernes de 8:30 a.m. -
Página 36: Contenido Del Paquete
CONTENIDO DEL PAQUETE SISTEMA DE SONIDO OPCIONAL (SE VENDE POR SEPARADO) PAIR Ver La Página 44 PIEZA DESCRIPCIÓN CANTIDAD PIEZA DESCRIPCIÓN CANTIDAD Cubierta Puerta Derecha Estante Central Base Pared Central Izquierda Pared Central Derecha Panel Exterior Izquierdo Panel Exterior Derecho SISTEMA DE SONIDO OPCIONAL (SE VENDE POR SEPARADO) Panel Posterior... -
Página 37: Contenido De Hardware
CONTENIDO DE HARDWARE (NO SE MUESTRAN EN TAMAÑO REAL) HERRAJES PARA LA SISTEMA DE SONIDO OPCIONAL (SE VENDE POR SEPARADO) Ver la página 44 PIEZA DESCRIPCIÓN CANTIDAD HERRAJES PARA LA SISTEMA DE SONIDO OPCIONAL (SE VENDE POR SEPARADO) Perno Largo Tornillo Arandela Soporte De Altavoz... -
Página 38: Preparación
PREPARACIÓN Antes de comenzar a ensamblar el producto, Tiempo Estimado De Ensamblaje: 45 minutos asegúrese de tener todas las piezas. Compare Herramientas necesarias para el ensamblaje las piezas con la lista del contenido del (no se incluyen): Destornillador Phillips paquete y la lista de aditamentos. No intente ensamblar el producto si falta alguna pieza o si estas están dañadas. - Página 39 1035IM-28-225 INSTRUCCIONES DE MONTAJE DE LA CHIMENEA ELÉCTRICA (CONT.) 2. Inserte cuatro taquetes de madera (CC) en los orificios de la base (L), alinee y fije el ensamble del paso 1 a la base (L), asegurándolos desde abajo con cuatro arandelas (BB) y cuatro perno largo (AA).
- Página 40 INSTRUCCIONES DE MONTAJE DE LA CHIMENEA ELÉCTRICA (CONT.) 5. Desde la parte posterior del ensamblaje, fije el panel posterior (G) a las áreas de estantería utilizando tornillos del panel posterior (DD). Repita los pasos para el Panel posterior que falta (G), Panel Posterior Central (H).
- Página 41 INSTRUCCIONES DE MONTAJE DE LA CHIMENEA ELÉCTRICA (CONT.) 8. Sostenga la puerta (K) y alinéela con el interior de la pared lateral de la estructura principal. Alinee y deslice los ganchos/retenes en la estructura de la bisagra unida a la puerta (K) dentro de los huecos en las placas de montaje de la bisagra unidas a la pared interior de la estructura principal.
- Página 42 INSTRUCCIONES DE MONTAJE DE LA CHIMENEA ELÉCTRICA (CONT.) 10. Atrás del montaje, retire los soportes preensamblados del área media. Guarde las abrazaderas y los tornillos para su uso futuro. 1037IM-28-245 3# Nota: Antes de seguir con el próximo paso, con la ayuda de otra persona, mueva la repisa a la ubicación final deseada 11.
- Página 43 INSTRUCCIONES DE MONTAJE DE LA CHIMENEA ELÉCTRICA (CONT.) NOTA: Utilice los niveladores pre-ensamblados sobre la base de la chimenea para nivelar la unidad. Gire los niveladores en sentido contrario a las manecillas del reloj para aumentar la altura, gire en sentido de las manecillas del reloj para disminuir la altura.
-
Página 44: Sistema De Sonido Opcional
SISTEMA DE SONIDO OPCIONAL (LA SISTEMA DE SONIDO SE VENDE POR SEPARADO) CONTENIDO DEL PAQUETE PAIR PIEZA DESCRIPCIÓN CANTIDAD Sistema de Sonido Control Remoto Del Sistema De Sonido Tornillo Soporte De Altavoz Llave Inglesa Adaptador Cable de Alimentación Cable de Fibra Óptica... -
Página 45: Información De Seguridad
INFORMACIÓN DE SEGURIDAD ADVERTENCIA: • Lea y conserve todas las instrucciones. • Para reducir el riesgo de una descarga eléctrica, no retire la cubierta ni el panel posterior. No contiene partes en el interior que el usuario pueda reparar. En caso de que requiera servicio de mantenimiento, consulte al personal de servicio cualificado. -
Página 46: Instrucciones De Ensamblaje De La Sistema De Sonido
INSTRUCCIONES DE ENSAMBLAJE DE LA SISTEMA DE SONIDO Si ha instalado el panel posterior central (H) en la repisa, siga estos pasos para retirarlo. 1. Desde detrás de la repisa ensamblada, retire el panel posterior central (H) desenroscando los tornillos en el panel posterior. 2. - Página 47 INSTRUCCIONES DE ENSAMBLAJE DE LA SISTEMA DE SONIDO (CONT.) 4. Desde detrás del ensamble, para asegurar el sistema de sonido (R) con dos tornillos (HH). Aditamentos Utilizados Tornillo 10180SB-28-254 11# 5. Es posible conectar varias fuentes al sistema de sonido utilizando las entradas ubicadas en la parte posterior de la unidad.
-
Página 48: Accesorios
INSTRUCCIONES DE FUNCIONAMIENTO Control Remoto Del Panel de Control Sistema De Sonido PANEL DE CONTROL Y CONTROL REMOTO: Las configuraciones del sistema ENCENDIDO/APAGADO de sonido se pueden ajustar con el panel de control y/o el control PAIR REPRODUCIR/PAUSAR remoto del sistema de sonido: AÑADIR VOLUMEN DISMINUIR EL VOLUMEN DEZPLAZAMIENTO DE... -
Página 49: Cuidado Y Mantenimiento
CUIDADO Y MANTENIMIENTO Reemplazo De Las Pilas Del Control Remoto Cuando el control remoto del sistema de sonido (S) deje de funcionar o su rango parezca reducido, es el momento de cambiar las pilas. Nota: Las pilas se deben retirar si la unidad no se usará... -
Página 50: Garantía Limitada De Un Año
GARANTÍA LIMITADA DE UN AÑO El fabricante garantiza que este producto no presentará defectos de materiales o de fabricación por un período de un año a partir de la fecha de compra original. Esta garantía está sujeta a las siguientes condiciones y limitaciones: Esta repisa se debe instalar y operar de acuerdo con las instrucciones de instalación y operación proporcionadas con el producto. -
Página 51: Lista De Piezas De Repuesto
LISTA DE PIEZAS DE REPUESTO Para obtener piezas de repuesto, llame a nuestro Departamento de Servicio al Cliente all 1-704-461-2414, de lunes a viernes de 8:30 a.m. a 5:00 p.m., hora del Este. PIEZA DESCRIPCIÓN PIEZA # Paquete de Hardware PH-1594FSO-26- (AA,BB, CC,DD and HARDWARE PACK...