Tabla de contenido
Publicidad
Idiomas disponibles
Idiomas disponibles
Enlaces rápidos
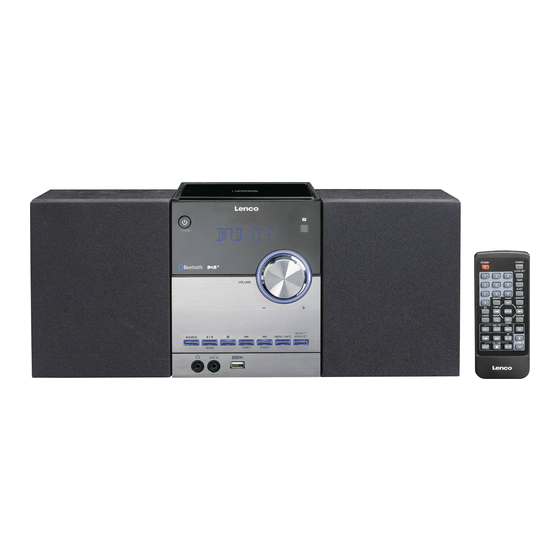
Model MC-150
User manual - Hi-Fi set with DAB+/FM radio, CD MP3, Bluetooth and USB player
Gebruikshandleiding – HiFi-set met DAB+/FM-radio, CD MP3, Bluetooth en USB-speler
Bedienungsanleitung - Hi-Fi-Anlage mit DAB+/FM-Radio, CD-/MP3-, Bluetooth und USB-
Player
Mode d'emploi - Chaîne Hi-Fi avec radio DAB+/FM, CD MP3, Bluetooth et port USB
Manual de usuario – Equipo Hi-Fi con radio DAB+/FM, CD MP3, Bluetooth y reproductor USB
Publicidad
Tabla de contenido

Manuales relacionados para Lenco MC-150


Resumen de contenidos para Lenco MC-150
- Página 1 Model MC-150 User manual - Hi-Fi set with DAB+/FM radio, CD MP3, Bluetooth and USB player Gebruikshandleiding – HiFi-set met DAB+/FM-radio, CD MP3, Bluetooth en USB-speler Bedienungsanleitung - Hi-Fi-Anlage mit DAB+/FM-Radio, CD-/MP3-, Bluetooth und USB- Player Mode d’emploi - Chaîne Hi-Fi avec radio DAB+/FM, CD MP3, Bluetooth et port USB...
-
Página 2: Tabla De Contenido
Index English ........................................3 Nederlands ....................................... 14 Deutsch ........................................26 Français ........................................38 Español ........................................50... -
Página 3: English
English MC-150 CAUTION: Usage of controls or adjustments or performance of procedures other than those specified herein may result in hazardous radiation exposure. This unit should not be adjusted or repaired by anyone except qualified service personnel. PRECAUTIONS BEFORE USE KEEP THESE INSTRUCTIONS IN MIND: Do not use this device near water. - Página 4 33. This product is intended for non professional use only and not for commercial or industrial use. 34. Make sure the unit is adjusted to a stable position. Damage caused by using this product in an unstable position or by failure to follow any other warning or precaution contained within this user manual will not be covered by warranty.
-
Página 5: Front Panel
FRONT PANEL 1. CD DISC COMPARTMENT DOOR 2. STANDBY Press to turn on the unit. Press again to turn off and go to Standby mode 3. DISPLAY Display the unit operation status and information 4. – VOLUME + Adjust the main volume 5. -
Página 6: Rear Panel
DAB/FM: Press to display station information Press and hold to enter the Menu for setting change 14. SELECT/MONO/ST DAB/FM: Press to select the change setting in the menu operation Press and hold to toggle between stereo and force mono when FM station is received 15. -
Página 7: Remote Control
REMOTE CONTROL STANDBY NUMERIC BUTTONS MEMORY PREVIOUS /TUNE FOLDER REPEAT FOLDER INFO SCAN MENU BT PREVIOUS BT NEXT BT PLAY/PAUSE 10. ID3 TAG DISPLAY CD/USB STOP CD/USB PLAY/PAUSE 11. VOLUME + VOLUME – 12. MUTE 13. RANDOM 14. CH- 15. NEXT /TUNE 16. -
Página 8: Basic Operation
To replace a new battery, please refer to the figure shown below. When inserting a battery, be sure to do so in the proper direction. If the remote control conflicts with other devices, the operation will be affected. Do not simultaneously press buttons on the unit and the remote control. - Página 9 6. To select another channel (Example: 5A-13F), press the PREVIOUS or NEXT button and then press the ENTER button to confirm. 7. To quit manual scan, press the MENU button on the remote control. Tuning Press the TUNE or TUNE button to display the information of the next station.
-
Página 10: Fm Radio Operation
4. Press the MENU button on the remote control to exit the menu control. FM RADIO OPERATION Auto Scan 1. Turn on the unit in FM mode. 2. Press and hold the SCAN button to start auto-scanning and saving the available stations (max. 20 storage). Manual Scan 1. -
Página 11: Cd/Usb Operation
2. If the unit has never been paired with a Bluetooth device before or cannot find the last paired device, the display and the Bluetooth status indicator will keep on flashing. Turn on the Bluetooth function of your device and enable the search until “Lenco MC-150”... -
Página 12: Language Setup
If it is in AUX mode more than 4 hours, it will automatically switch to standby mode. When it is 10 minutes before entering the standby, the display will flash. You can press PLAY button to disable the auto-off function. EQ OPERATION You can enjoy different EQ sound effect modes. -
Página 13: Technical Specifications
Our product is improved ceaselessly and the specification and function may be changed without prior notice. GUARANTEE Lenco offers service and warranty in accordance to European law, which means that in case of repairs (both during and after the warranty period) you should contact your local dealer. -
Página 14: Nederlands
Nederlands MC-150 LET OP: Gebruik van bedieningen of afstellingen of uitvoer van procedures anders dan gespecificeerd in deze documentatie kan leiden tot blootstelling aan schadelijke straling. Dit apparaat dient uitsluitend te worden aangepast of gerepareerd door gekwalificeerd onderhoudspersoneel. VOORZORGSMAATREGELEN VOOR GEBRUIK ONTHOUD DE VOLGENDE INSTRUCTIES: Gebruik dit apparaat niet in de buurt van water. -
Página 15: Installatie
29. Aandacht voor het milieu is nodig bij het verwijderen van de batterijen. 30. Het apparaat kan alleen worden gebruikt in gematigde klimaten. Extreem koude of warme omgevingen moeten worden vermeden. 31. Het nominale specificatielabel is te vinden op het paneel aan de onder- of achterkant van het apparaat. 32. -
Página 16: Voorpaneel
VOORPANEEL 1. KLEP VAN CD-HOUDER 2. STAND-BY Indrukken om het apparaat in te schakelen. Nogmaals indrukken om uit en weer op stand-by te schakelen 3. SCHERM Toont de gebruiksmodus van het apparaat en andere informatie 4. – VOLUME + Het hoofdvolume aanpassen 5. -
Página 17: Achterpaneel
DAB/FM: Indrukken om stationsinformatie weer te geven Ingedrukt houden om het menu te openen en instellingen te veranderen 14. SELECTEREN/MONO/ST DAB/FM: Indrukken om instellingen te veranderen in het menu Ingedrukt houden om te wisselen tussen stereo en geforceerd mono wanneer een FM-station wordt ontvangen 15. -
Página 18: Afstandsbediening
AFSTANDSBEDIENING STAND-BY NUMERIEKE TOETSEN GEHEUGEN VORIGE /AFSTEMMEN FOLDER HERHAAL FOLDER INFO SCAN MENU BT VORIGE BT VOLGENDE BT START/PAUZE 10. WEERGAVE ID3-TAG CD/USB STOP CD/USB START/PAUZE 11. VOLUME + Volume – 12. DEMP 13. WILLEKEURIG 14. Kanaal- 15. VOLGENDE /AFSTEMMEN 16. -
Página 19: Algemene Bediening
Raadpleeg de afbeelding hieronder om de batterij te vervangen door een nieuwe. Let tijdens het installeren van de batterij op de juiste polariteitrichting. Als de afstandsbediening interferentie ontvangt van andere apparatuur, dan kan de werking ervan worden verstoord. Druk niet gelijktijdig knoppen op het apparaat en de afstandsbediening in. - Página 20 DAB handmatig scannen Schakel het apparaat in en selecteer de DAB-modus. 2. Druk op de toets MENU op de afstandsbediening om de menubediening te openen. 3. Druk op de toets VORIGE of VOLGENDE totdat “MANUAL” (handmatig) wordt weergegeven en druk vervolgens op de toets ENTER.
- Página 21 3. Druk op de toets VORIGE of VOLGENDE om de DRC-waarde te selecteren en druk vervolgens ter bevestiging op de toets ENTER. 4. Druk op de toets MENU op de afstandsbediening om de menubediening te verlaten. Opmerking: - Niet alle DAB-stations ondersteunen het gebruik van de DRC-functie. Als het radiostation de DRC-functie niet ondersteunt, dan zal de DRC-instelling in het apparaat geen effect hebben.
- Página 22 3. Druk op de toets VORIGE of VOLGENDE om te wisselen tussen de selecties “ALL” (alle) of “STRONG” (sterk) en druk vervolgens ter bevestiging op de toets ENTER. Wanneer “All” (Alle) is geselecteerd, zullen alle stations worden gevonden tijdens de FM-scan, zelfs als een radiostation veel ruis bevat. Wanneer “STRONG” (Krachtig station) is geselecteerd, dan worden alleen de krachtige stations waargenomen.
-
Página 23: Eq-Bediening
Bluetooth-statusindicator blijven knipperen. Schakel de Bluetooth-functie van uw apparaat in en laat deze zoeken totdat “Lenco MC-150” is gevonden. Selecteer “Lenco MC-150” op het Bluetooth-apparaat om de verbinding tot stand te brengen. Voer eventueel het wachtwoord “0000” in. - Página 24 3. Druk op de toets VORIGE of VOLGENDE totdat “SYSTEM” (systeem) wordt weergeven en druk vervolgens op de toets ENTER. 4. Druk op de toets VORIGE of VOLGENDE totdat “LANGUAGE” (taal) wordt weergegeven en druk vervolgens op de toets ENTER. 5.
-
Página 25: Technische Specificaties
GARANTIE Lenco biedt service en garantie in overeenstemming met de Europese wet, wat betekent dat u contact dient op te nemen met uw lokale winkelier in het geval van reparaties (zowel tijdens als na de garantieperiode). Belangrijke opmerking: Het is niet mogelijk om producten die moeten worden gerepareerd rechtstreeks naar Lenco te sturen. -
Página 26: Deutsch
Deutsch MC-150 ACHTUNG: Die zweckentfremdete Bedienung, Benutzung oder Einstellung der Prozeduren kann zu gefährlichen Unfällen durch Strahlen führen. Dieses Gerät darf außer von qualifizierten Fachleuten von niemand anderem repariert oder eingestellt werden. VORSICHTSMASSNAHMEN VOR DER BENUTZUNG BEFOLGEN SIE IMMER FOLGENDE ANWEISUNGEN: Benutzen Sie das Gerät nicht in der Nähe von Wasser. - Página 27 29. Bei der Batterieentsorgung sind die Entsorgungsvorschriften einzuhalten. 30. Das Gerät kann nur bei moderaten Temperaturen verwendet werden. Eine Nutzung in extrem kalten oder heißen Umgebungen sollte vermieden werden. 31. Das Typenschild befindet sich an der Unter- oder Rückseite des Gerätes. 32.
- Página 28 VORDERANSICHT 1. CD-FACH 2. EINSCHALTTASTE/STANDBY Drücken Sie die Taste, um das Gerät einzuschalten. Drücken Sie die Taste erneut, um es auszuschalten und in den Standby-Modus zu versetzen. 3. ANZEIGE Zeigt den Betriebsstatus des Geräts und Informationen an. 4. – LAUTSTÄRKE + Stellen Sie hiermit die Lautstärke ein.
- Página 29 Drücken und halten Sie diese Taste, um den nächsten verfügbaren UKW-Radiosender zu suchen. CD/USB/BLUETOOTH: Drücken Sie diese Taste, um den nächsten Titel zu suchen. 13. MENÜ/INFO DAB/UKW: Drücken Sie diese Taste zur Anzeige von Radiosenderinformationen. Drücken und halten Sie diese Taste, um das Menü zum Ändern der Einstellungen aufzurufen. 14.
- Página 30 FERNBEDIENUNG EINSCHALTTASTE/STANDBY NUMMERNTASTEN SPEICHER VORHERIGER /TITEL VERZEICHNIS WIEDERHOLE VERZEICHNIS INFO SENDERSUCHLAUF MENÜ VORHERIGER BLUETOOTH-TITEL NÄCHSTER BLUETOOTH-TITEL BLUETOOTH WIEDERGABE/ PAUSE 10. ID3-TAG-ANZEIGE CD/USB BEENDEN CD/USB WIEDERGABE/PAUSE 11. LAUTSTÄRKE + LAUTSTÄRKE - 12. STUMM 13. RANDOM (ZUFALL) 14. SENDER- 15. NÄCHSTER /TITEL 16.
-
Página 31: Grundlegende Bedienung
Halten Sie sich zum Ersetzen der Batterie bitte an die Abbildung unten. Achten Sie beim Einlegen der Batterie auf die richtige Richtung. Kommt die Fernbedienung in Konflikt mit anderen Geräten, wird ihr Betrieb beeinträchtigt. Drücken Sie nicht gleichzeitig Tasten am Gerät und auf der Fernbedienung. ... - Página 32 Automatischer Suchlauf 1. Schalten Sie das Gerät ein und wählen Sie den DAB-Modus. 2. Drücken Sie die Taste SCAN zum Starten des automatischen Sendersuchlaufs. Die gefundenen Radiosender werden automatisch gespeichert (maximal 20 Sender). Manueller DAB-Sendersuchlauf Schalten Sie das Gerät ein und wählen Sie den DAB-Modus. 2.
-
Página 33: Radiotext
DRC low (niedrige Kompression): Halbe Signalkompression des übertragenen Services DRC off (keine Kompression): Keine Kompression 1. Drücken Sie auf der Fernbedienung die Taste MENU, um in die Menüsteuerung zu gelangen. 2. Drücken Sie die Taste PREVIOUS oder NEXT bis „DRC“ („KOMPRESSOR“) angezeigt wird und dann die Taste ENTER. 3. - Página 34 Sendersuchlaufeinstellung 1. Drücken Sie auf der Fernbedienung die Taste MENU, um in die Menüsteuerung zu gelangen. 2. Drücken Sie die Taste PREVIOUS oder NEXT bis „SCAN“ („SUCHEN“) angezeigt wird und dann die Taste ENTER. 3. Drücken Sie die Taste PREVIOUS oder NEXT zum Umschalten zwischen „ALL“...
-
Página 35: Energiesparen
Display und die Bluetooth-Statusanzeige weiter. Schalten Sie in diesem Fall die Bluetoth-Funktion Ihres Geräts ein und aktivieren Sie die Suche bis „Lenco MC-150“ gefunden wurde. Wählen Sie auf dem Bluetooth-Gerät „Lenco MC-150”, um die Verbindung herzustellen. Geben Sie, falls erforderlich, den Zugangscode „0000“ ein. -
Página 36: Zurücksetzen Auf Werkseinstellung
SPRACHEINSTELLUNG Sie können die Anzeigesprache des Geräts festlegen. 1. Wechseln Sie hierfür in den DAB- oder UKW-Modus. 2. Drücken Sie auf der Fernbedienung die Taste MENU (oder drücken und halten Sie auf der Vorderseite der Anlage die Taste MENU/INFO), um auf die Menüsteuerung zugreifen zu können. 3. -
Página 37: Technische Spezifikationen
Änderungen. GARANTIE Lenco bietet Service- und Garantieleistungen in Übereinstimmung mit europäischem Recht, was bedeutet, dass Sie im Falle von Reparaturen (innerhalb und außerhalb der Garantiezeit) Ihren lokalen Händler kontaktieren sollten. Wichtiger Hinweis: Es ist nicht möglich, Geräte für Reparaturen direkt an Lenco zu schicken. -
Página 38: Français
Français MC-150 ATTENTION : L’utilisation de commandes ou de réglages ou l’exécution de procédures autres que ceux spécifiés dans ce manuel peut entraîner une exposition à des rayonnements dangereux. Cet appareil ne doit pas être réglé ou réparé par quiconque d’autre que du personnel qualifié. - Página 39 28. Si l'appareil a lapossibilité de fonctionne r sur batterie, n’exposez pas la batterie à une chaleur extrême telle que les rayons du soleil, le feu ou toute autre chaleur. 29. Veuillez considérer les questions environnementales lors de la mise au rebut des piles. 30.
- Página 40 FAÇADE 1. PORTE DU COMPARTIMENT DE CD 2. MISE EN VEILLE Appuyez dessus pour mettre en marche l'appareil. Rappuyez dessus pour éteindre et passer en mode veille. 3. AFFICHAGE Pour afficher l'état de fonctionnement de l'appareil et des informations 4. – VOLUME + Pour régler le volume principal 5.
-
Página 41: Panneau Arrière
13. MENU/INFO DAB/FM : Appuyez dessus pour afficher les informations de la station. Maintenez enfoncé ce bouton pour accéder au menu pour modifier les réglages. 14. SÉLECTION/MONO/ST DAB/FM : Appuyez dessus pour sélectionner le réglage à modifier dans le menu. Maintenez enfoncé... -
Página 42: Télécommande
TÉLÉCOMMANDE MISE EN VEILLE PAVÉ NUMÉRIQUE MÉMOIRE PRÉCÉDENT /RÉGLAGE DOSSIER RÉPÉTITION DOSSIER INFO RECHERCHE MENU BT PRÉCÉDENT BT SUIVANT BT LECTURE/PAUSE 10. AFFICHAGE ID3 TAG ARRÊT CD/USB LECTURE /PAUSE CD/USB 11. VOLUME + Volume – 12. SOURDINE 13. ALÉATOIRE 14. STATION- 15. -
Página 43: Fonctionnement De Base
Pour installer une pile neuve, consultez la figure ci-dessous. En installant une pile, veillez à suivre les instructions. Si la télécommande entre en conflit avec d’autres appareils, le fonctionnement sera affecté. N'appuyez pas simultanément sur des boutons sur l’appareil et la télécommande. ... - Página 44 4. Appuyez sur le bouton PRÉCÉDENT ou SUIVANT pour sélectionner une station voulue (par ex. : 5A-13F). 5. Appuyez sur le bouton ENTER pour confirmer. 6. Pour sélectionner une autre station (par ex. : 5A-13F), appuyez sur le bouton PRÉCÉDENT ou SUIVANT , puis sur le bouton ENTER pour valider.
- Página 45 - Après avoir réglé le niveau de DRC, le son peut être plus fort. Éliminer toutes les stations non valables Cette fonction supprime les stations inactives. 1. Appuyez sur le bouton MENU de la télécommande pour accéder aux commandes du menu. 2.
-
Página 46: Audio Bluetooth
Bluetooth continueront de clignoter. Activez la fonction Bluetooth de votre appareil et activez la recherche jusqu’à ce qu'il ait trouvé « Lenco MC-150 ». Sélectionnez « Lenco MC-150 » sur l'appareil Bluetooth pour établir la connexion. Saisissez le mot de passe « 0000 », si nécessaire. -
Página 47: Économie D'ÉNergie
5. Vous pouvez appuyer sur le bouton LECTURE/PAUSE BT pour mettre la lecture en pause ou la reprendre. 6. Vous pouvez appuyer sur le bouton PRÉCÉDENT ou SUIVANT pour rechercher la piste suivante ou précédente. Entrée auxiliaire Elle vous permet de brancher le son d’un lecteur externe à votre appareil. 1. -
Página 48: Réinitialisation Des Réglages D'USine
RÉINITIALISATION DES RÉGLAGES D'USINE Cette fonction rétablit les réglages d’usine initiaux de l'appareil. 1. Mettez l’appareil en marche et réglez-le en mode DAB ou FM. 2. Appuyez sur le bouton MENU de la télécommande (ou maintenez enfoncé le bouton MENU/INFO en façade de l'appareil) pour accéder aux commandes du menu. -
Página 49: Caractéristiques Techniques
Étant donné que nous améliorons constamment nos produits, leurs caractéristiques et fonctions peuvent changer sans préavis. GARANTIE Lenco propose un entretien et une garantie conformément à la législation européenne, ce qui signifie qu’en cas de besoin de réparation (aussi bien pendant et après la période de garantie), vous pouvez contacter votre revendeur le plus proche. -
Página 50: Español
Español MC-150 PRECAUCIÓN: El uso de los controles o ajustes o el funcionamiento de los procedimientos excepto a aquellos especificados aquí pueden provocar una exposición peligrosa a la radiación. Esta unidad no debe ajustarse o repararse por ninguna persona salvo personal de servicio cualificado. -
Página 51: Instalación
30. El aparato solo debe usarse en climas moderados o extremadamente fríos y deben evitarse los entornos calurosos. 31. La etiqueta identificativa aparece marcada en la parte inferior o en el trasero del aparato. 32. Este aparato no está diseñado para su uso por personas (incluyendo niños) con discapacidades físicas, sensoriales o mentales o con falta de experiencia o conocimientos, salvo que estén bajo la supervisión o hayan recibido formación sobre el uso correcto del dispositivo por parte de una persona responsable de su seguridad. - Página 52 PANEL FRONTAL 1. PUERTA DEL COMPARTIMENTO DE DISCOS CD 2. ESPERA Púlselo para encender la unidad. Vuélvalo a pulsar para apagarla y entrar en modo en espera. 3. PANTALLA Muestra el estado de funcionamiento de la unidad y cierta información al respecto 4.
-
Página 53: Ventana De Recepción Ir
DAB/FM: Púlselo para mostrar la información de la emisora. Manténgalo pulsado para entrar en el menú para un cambio de configuración 14. SELECCIÓN/MONO/ST DAB/FM: Púlselo para cambiar la configuración en el funcionamiento del menú Manténgalo pulsado para cambiar entre estéreo y mono fuerza cuando se reciba una emisora FM. 15. -
Página 54: Mando A Distancia
MANDO A DISTANCIA ESPERA BOTONES NUMÉRICOS MEMORIA ANTERIOR /SINTONIZAR CARPETA REPETIR CARPETA INFORMCIÓN BÚSQUEDA MENÚ BT ANTERIOR BT SIGUIENTE REPRODUCCIÓN / PAUSA DEL BT 10. MOSTRAR ETIQUETA ID3 PARADA DEL CD/USB REPRODUCCIÓN / PAUSA DEL CD/USB 11. VOLUMEN + VOLUMEN – 12. -
Página 55: Operaciones Básicas
Para sustituir una pila, por favor, remítase a la figura que aparece a continuación. Cuando inserte una pila, asegúrese de que lo hace en la dirección adecuada. Si el mando a distancia entra en conflicto con otros dispositivos, el funcionamiento se verá afectado. ... -
Página 56: Siguiente
5. Pulse el botón ENTER para confirmar. 6. Para seleccionar otro canal (Ejemplo: 5A-13F), pulse el botón ANTERIOR o SIGUIENTE y posteriormente, pulse el botón ENTER para confirmarlo. 7. Para salir de la búsqueda manual, pulse el botón MENU en el mando a distancia. Sintonización Pulse el botón TUNE o TUNE... -
Página 57: Funcionamiento De La Radio Fm
Eliminar emisoras inactivas Esta función elimina las emisoras inactivas. 1. Pulse el botón MENU en el mando a distancia para acceder al control del menú. 2. Pulse el botón ANTERIOR o SIGUIENTE hasta que se muestre “PRUNE” y posteriormente, pulse el botón ENTER. 3. -
Página 58: Funcionamiento De Cd/Usb
Bluetooth seguirán parpadeando. Encienda la función Bluetooth de su dispositivo y active la búsqueda hasta que se encuentre “Lenco MC-150”. Seleccione “Lenco MC-150” en el dispositivo Bluetooth para realizar la conexión. Introduzca la contraseña “0000” si la solicita. -
Página 59: Entrada Aux
ENTRADA AUX Esto le permitirá conectar el sonido de un reproductor externo mediante la unidad. 1. Conecte el cable de audio de 3.5mm (no incluido) en la salida de línea del reproductor externo y el otro extremo en la toma AUX 2. -
Página 60: Accesorios
Nuestro producto se mejora constantemente y las especificaciones y funciones pueden cambiarse sin previo aviso. GARANTÍA Lenco ofrece servicio y garantía conforme a la legislación europea, por lo que en caso de reparaciones (tanto durante como tras el periodo de garantía) debe ponerse en contacto con su distribuidor local.