Publicidad
Enlaces rápidos
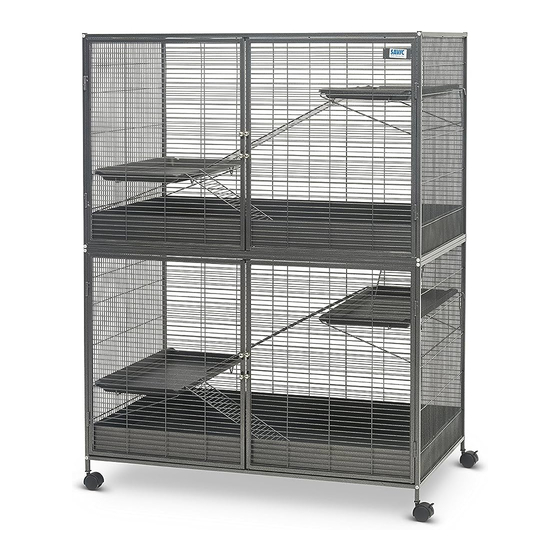
SUITE ROYALE XL
super de luxe
extra large
small animal home
assembly instructions for the Suite Royale XL
richtlijnen voor de montage van de Suite Royale XL
instructions pour le montage de la Suite Royale XL
Aufbau-Anleitung des Suite Royale XL
instrucciones de montaje de la Suite Royale XL
инструкция по сборке Suite Royale XL
115 x 67,5 x 153m (total)
115 x 67,5 x 147,5 cm (cage)
Publicidad

Resumen de contenidos para savic SUITE ROYALE XL
- Página 1 Suite Royale XL richtlijnen voor de montage van de Suite Royale XL instructions pour le montage de la Suite Royale XL Aufbau-Anleitung des Suite Royale XL instrucciones de montaje de la Suite Royale XL инструкция...
- Página 2 Savic would like to thank you for your purchase and Wir, die Firma Savic, danken Ihnen für Ihren Einkauf confidence in our Suite Royale xl cage. We can assure und Ihr Vertrauen in unserem Käfig Suite Royale xl. Wir you that you have acquired a high quality small ani- sind davon überzeugt, daß...
- Página 3 Parts list - Inhoud onderdelen - Liste des pièces livrées - Gelieferte teile - Lista de piezas - Обозначения деталей A) open intermediate tray A) open middenschuif A) bac intermédaire ouvert B) closed bottom tray B) gesloten bodemschuif B) bac de fond fermé C) middle open grid C) open middenrooster C) grille ouverte intermédaire...
- Página 4 L) back panel L) rugpaneel L) panneau arrière M) back panel with openings for M) rugpaneel met openingen voor M) panneau arrière avec trous pour wheels de wielen les roues N) front panel N) voorpaneel N) panneau frontal O) front panel with openings for O) voorpaneel met openingen voor O) panneau frontal avec trous pour wheels...
- Página 5 Only tighten all the screws after the cage has been completely assembled! Schroef pas alle vijzen goed vast wanneer de kooi volledig gemonteerd is! Serrez bien tous les vis quand la cage est complètement montée! Schrauben erst nach zusammenbau des kompletten Käfiges fest anziehen! Solamente apretar los tornillos despues del montaje completo de la jaula! Затяните...
- Página 6 Next, put a screw in the top plastic connector. Steek vervolgens een schroef in het bovenste plastic verbindingsstuk. Ensuite, placez une vis dans le raccord en plastique supérieur. Drehen Sie nun eine Schraube in den oberen Kunststoffverbinder. A continuación, coloque un tornillo en el conector de plástico superior.
- Página 7 Slide the floor grid in the bottom grooves of the side panels. Please make sure that all the pins are well placed in the openings of the front panel. Schuif het grondrooster in de onderste groeven van de zijpanelen. Zorg ervoor dat alle pinnen goed in de openingen van het voorpaneel zitten.
- Página 8 Slide the middle grid in the top grooves of the sides panels Schuif het middenrooster in de bovenste groeven van de zijpanelen. Faites glisser la grille intermédiaire dans les rainures supérieures des panneaux latéraux. Schieben Sie nun das mittlere Gitter in die oberen Nuten der seitlichen Felder.
- Página 9 Install now the wheels. Installeer nu de wielen. Montez à présent les roues Montieren Sie nun die Räder. Coloque las ruedas. Теперь установите колесики. Slide the remaining back panel over the plastic connectors and fix with screws. Schuif het resterende rugpaneel over de plastic verbindingsstukken en maak het vast met schroeven.
- Página 10 Take the remaining side panels and fix them to the top back panel. Again, make sure that the grooves are facing inwards and that the pins of the side panels are well placed in the openings of the back panels. Neem de resterende zijpanelen en maak ze vast aan het bovenste rugpaneel.
- Página 11 Slide the roof panel in the top grooves of the side panels. Fix now at the top all the top panels with screws. Schuif het dakpaneel in de bovenste gleuven van de zijpanelen. Maak nu bovenaan alle bovenpanelen vast met schroeven. Faites glisser le panneau de toit dans les rainures supérieures des panneaux latéraux.
- Página 12 Ringlaan 10 • B-8501 Heule • Belgium Tel. +32 56 35 33 45 • Fax +32 56 35 77 30 info@savic.be...


