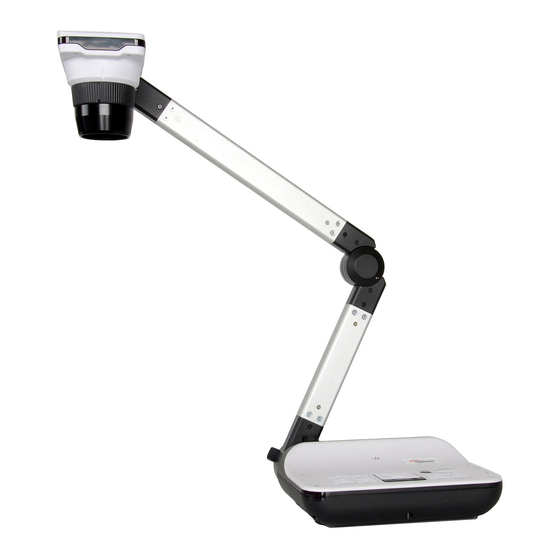
Optoma DC552 Guía Rápida
Ocultar thumbs
Ver también para DC552:
- Manual del usuario (23 páginas) ,
- Guia de inicio rapido (3 páginas)
Publicidad
Enlaces rápidos
DC552 / DC556
Knowing the Parts
Camera Head
USB Port
LED Lamp
VGA Output Port
Control Panel
HDMI Output Port
Audio Output Port
Speaker
Audio Input Port
VGA Input Port
SD Card Slot
HDMI Input Port
RS232 Port
Microphone
Anti-theft Slot
USB Port
Remote Control
(For USB Flash Drive)
Signal Receiver
Remote Control Signal
DC 5V Power Socket
Receiver
Carrying Handle
Power On
1. Plug in the power cord.
2. Press the Power button (
) to turn on the
Document Camera.
KURZANLEITUNG
Sich mit Einzelteilen
vertraut machen
Kamerakopf
USB-Anschluss
LED-Lampe
VGA-Ausgang
Bedienpanel
HDMI Ausgabe
Audio-Ausgang
Lautsprecher
Audio-Eingang
VGA-Eingang
SD-Card
HDMI Eingang
RS232-Anschluss
Mikrofon
Aufnahme für
USB-Anschluss (Für
Diebstahlschutz
USB-Speicher Sticks)
IR Empfänger für
IR Empfänger für
Fernbedienung
Fernbedienung
5 V DC Anschluss
Tragegriff
Einschalten
1. Schließen Sie die Netzleitung an.
2. Drücken Sie die Ein/Aus-Taste (
Dokumentenkamera einzuschalten.
QUICK GUIDE
Connecting the Output Display
1. Turn on projector or any display device
2. Connect a VGA Cable to VGA OUT Port (or HDMI Cable to
HDMI OUT Port)
3. Connect the other end of VGA Cable to VGA In Port (or other
end of HDMI Cable to HDMI In Port) of your projector or display
device.
Setting the OSD Language
1. Press the MENU button (
2. Select Setting→Language.
3. Use Right/Left Arrow to adjust and press OK (
Working with SmartDC Pro software
1. Make sure the USB connection setting is at "PC-Cam".
2. Connect device and PC with accessory USB cable.
3. Start SmartDC Pro on your PC.
Notices for Operation
1. Please adjust the camera head with one hand on the base.
2. To Prevent your eyes from damaged, please do not look directly
to the LED lamp.
3. Choose the focus mode according to distance to object :
Normal mode for 3cm to ∞@1X ; 30cm to ∞@17X.
Macro mode for 3cm to ∞.
*Optical zoom won't be available when in MACRO mode.
DEUTSCH
Anschließen der Ausgabeanzeige
1. Schalten Sie den Projektor oder ein anderes Anzeigegerät ein.
2. Verbinden Sie ein VGA Kabel mit dem VGA Ausgang
(oder HDMI Kabel mit dem HDMI Ausgang).
3. Verbinden Sie das andere Ende des VGA Kabels mit dem VGA
Eingang (oder das andere Ende des HDMI Kabels mit dem HDMI
Eingang) Ihres Projektors oder Bildschirms
VGA
Einstellen der OSD-Sprache
1. Drücken Sie die MENU-Taste (
2. Wählen Sie Einstellung→Sprache.
3. Stellen Sie die Sprache mit den Nach-oben/Nach-unten-Pfeilen
ein und bestätigen Sie sie durch Drücken von OK (
Handhabung der SmartDC Pro Software
1. Stellen Sie sicher, dass die USB Verbindung auf „PC-Cam" steht.
2. Verbinden Sie die Kamera mit dem PC mit dem mitgeliefertem USB
Kabel
3. Starten Sie die SmartDC Pro Software auf Ihrem Computer.
Hinweise für die Bedienung
1. Halten Sie bitte den Kamerakopf mit einer Hand am Unterteil fest.
2. Um nicht Ihre Augen zu verletzen, schauen Sie bitte nicht direkt in die
LED-Lampe.
3. Wählen Sie den Fokusmodus entsprechend des Abstands zum Objekt:
Normaler Modus für 3 cm bis ∞@1X ; 30 cm bis ∞@17X.
Makromodus für 3 cm bis ∞."
), um die
*Der optische Zoom ist im MAKRO-Modus nicht verfügbar.
ENGLISH
VGA
HDMI
) .
) to confirm.
HDMI
) .
).
Basic Operation
Power on/off
Invert image 180 ∘
"Freeze the current image
*Pause the clip while playing video"
Capture a still image
Show or hide Menu
Direction button
Zoom in
Zoom out
One-time auto focus
Pass the signal from PC
Turn on/ off and adjusting the brightness
of the LED lamp
Show/hide brightness adjustment bar
Record a video clip
Enter playback mode to display recorded
still images and video clips
HDMI - VGA Output Switch
VESA MOUNT INFORMATION
75mm Standard VESA Mounting
Screw size M3 needed
75 x 75 mm
TS-82-932-01020-005
Grundbedienung
Schaltet das Gerät ein/aus
Kehrt das Bild um 180° um
Zeigt das aktuelle Bild als Standbild
Macht eine Fotoaufnahme
Zeigt das Menü an und bestätigt eine Auswahl
Richtungstaste
Verkleinert das Bild
Vergrößert das Bild
Einmaliger Autofokus
Aktiviert den PC-Modus für die
„PASSTHROUGH"-Funktion
Schaltet die LED-Lampe ein/aus und stellt ihre
Helligkeit ein
Schnelltaste zum Einstellen der Helligkeit.
Macht eine Video- und Audioaufnahme
Aktiviert den Wiedergabemodus, um Video-
und Bildaufnahmen anzuzeigen
HDMI-VGA Umschaltung
VESA Anschluss Information
75mm Standard-VESA-Anschluss
benötigte Schraubengröße M3
75 x 75 mm
Publicidad

Resumen de contenidos para Optoma DC552
- Página 1 QUICK GUIDE DC552 / DC556 ENGLISH Knowing the Parts Basic Operation Connecting the Output Display 1. Turn on projector or any display device Power on/off 2. Connect a VGA Cable to VGA OUT Port (or HDMI Cable to Invert image 180 ∘...
- Página 2 GUIDE RAPIDE FRANÇAIS Présentation des parties Raccordement de l'affichage de sortie Fonctionnement de base 1. Mettez en marche le projecteur ou tout autre périphérique d'affichage. Marche/Arrêt 2. Connectez un câble VGA sur la sortie VGA (ou un câble HDMI sur la sortie HDMI) Retournement de l'image à...

