Publicidad
Idiomas disponibles
Idiomas disponibles
Enlaces rápidos
Publicidad

Manuales relacionados para MINIMOKA CM-4758


Resumen de contenidos para MINIMOKA CM-4758
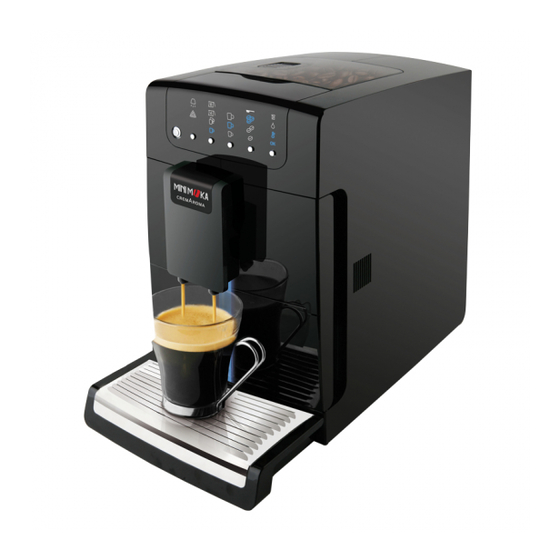
- Página 1 Cafetera automática CM-4758...
- Página 3 C Unidad dispensadora de altura regulable Le agradecemos que se haya decidido por la compra de D Surtidor de café un producto de la marca MINIMOKA de DEMOKA . E Contenedor para posos Su tecnología, diseño y funcionalidad, junto con el Botones de menú/5 funciones...
- Página 4 el aparato a un Servicio de Asistencia Técnica autorizado. No inten- te desmontarlo o repararlo ya que puede existir peligro. - Antes de conectar el aparato a la red, verificar que el voltaje indica- do en la placa de características coincide con el voltaje de red. - Conectar el aparato a una base de toma de corriente provista de toma de tierra y que soporte como mínimo 10 amperios.
- Página 5 Atención: Ajustes del menú Si aparece la siguiente advertencia en la pantalla, debe Para programar los distintos ajustes debe accederse a la llenarse el depósito antes de poder servir el siguiente función menú – por ejemplo, para programar el nivel de café.
- Página 6 Configuración de la finura de molido: Es posible realizar las siguientes selecciones: Utilizar la palanca (L) para configurar la finura de molido. Para ello, proceder del modo siguiente: - Colocar una Jarra de café aprox. 190ml taza bajo el surtidor de café. - Pulsar OK (botón 6) para preparar el café. Taza de café...
- Página 7 Atención: Soltar el botón. El nuevo nivel de llenado quedará Recordar que en el modo dos tazas, la máquina realiza memorizado. dos servicios en secuencia y, del mismo modo, si se se- Atención: lecciona la opción jarra para el modo cuatro/ocho tazas, la máquina realiza 4 u 8 servicios.
- Página 8 -Disponer una taza bajo el surtidor de café. Atención: -Para reducir la pérdida de calor evitar salpicaduras, Repetir el procedimiento para cambiar también el nivel ajustar la altura del surtidor al tamaño de la taza despla- de llenado de los demás tamaños de taza. zándolo hacia arriba o hacia abajo.
- Página 9 • Tiempo de apagado • Iluminación del depósito de agua Para restaurar el aparato con los valores por defecto de fábrica, mantener pulsados los botones 2 y 4 durante aprox. 3 segundos. Los símbolos parpadearán varias -Guardar los datos y salir del menú confirmando con el veces para confirmar que se ha completado la acción. botón de OK (botón 6). Todos los indicadores de función Seguidamente el aparato volverá...
- Página 10 seco sin pelusas. -Limpiar la unidad dispensadora de café a fondo por -Vaciar el contenedor para posos: dentro y por fuera con un cepillo y agua caliente para -El símbolo siguiente aparecerá en la pantalla: eliminar los restos de café y evitar que se forme moho. -Volver a introducir la unidad dispensadora de café.
- Página 11 dola en agua caliente. Especialmente las placas de acero inoxidable deben enjuagarse bien para eliminar cualquier resto de café. -Abrir la tapa del contenedor de granos de café (N) y el compartimento de café en polvo (J). -Introducir una pastilla de lavado en el Compartimento para el café en Agitar suavemente la unidad de elaboración bajo el agua.
- Página 12 Atención: El proceso de descalcificación funciona en dos fases, -El aparato realizará varios ciclos de descalcificación. dura aproximadamente 10 minutos y no debe interrum- Los intervalos de pausa sirven para que el agente desin- pirse antes de tiempo. crustante haga su efecto. En el caso de producirse una bajada de tensión durante -Al finalizar la primera fase del proceso de descalcifi- el proceso, deberá...
- Página 13 iluminado. En caso de detectar cualquier anomalía consulte la - A continuación pulsar OK (botón 6). siguiente tabla: Aparecerá el siguiente mensaje: CAUSA SOLUCIÓN Unidad Retirar la unidad dispensadora dispensadora de Extraer la unidad de elaboración y limpiarla a fondo de café...
- Página 14 PROBLEMA CAUSA SOLUCIÓN El espresso/café no sale lo • Calentar las tazas con agua caliente. • Las tazas están demasiado frías. bastante caliente • Aumentar la temperatura del café • Medir bien la cantidad de café: añadir como máximo 1 cuchara dosificadora de granos de café. • No se ha utilizado suficiente café...
- Página 15 Para productos de la Unión Europea y/o en caso de que así lo exija la normativa en su país de origen: Los materiales que constituyen el envase de este aparato, están integrados en un sistema de recogida, clasificación y reciclado de los mismos. Si desea desha- cerse de ellos, puede utilizar los contenedores públicos apropiados para cada tipo de material.
- Página 16 Net weight (Aprox.): 8.16 Kg Coffeemotion S.L. Gross weight (Aprox.): 9.45 Kg Josep Escaler S/n E 25790 Oliana Spain...
- Página 17 Automatic coffee maker CM-4758...
- Página 19 Dear customer, B ON/OFF button Welcome to the coffee gourmets´club. C Height-adjustable dispenser unit Many thanks for choosing to purchase a MINIMOKA by D Coffee spout DEMOKA brand product. E Grounds box Its technology, design and practicality, along with fact...
- Página 20 Do not attempt to disassemble or repair the appliance by yourself in order to avoid a hazard. - Ensure that the voltage indicated on the rating label matches the mains voltage before plugging in the appliance. - Connect the appliance to a base with an earth socket withstanding a minimum of 10 amperes.
- Página 21 Note: Menu settings If the following warning appears on the display, the water The menu function must be accessed to undertake va- tank must topped up before the next drink is dispensed. rious settings – for example, to set the determined water Otherwise further function is not possible.
- Página 22 Setting the grinding fineness: The following selections are possible: You can set the grinding fineness (L) with the help of the lever. Jar of coffee approx. 190ml To set the grinding fineness, proceed as follows: - Place a cup under the coffee dispensing spout. Cup of coffee approx. 120ml - Press OK (button 6) to prepare the coffee. Cup of espresso approx.
- Página 23 Note: Note: Remember that in two cup mode, two brewing operations Repeat the procedure if you also wish to change the are implemented in sequence and correspondingly, if a filling level for the other cup sizes. pot is selected for four/eight cup mode, 4 or 8 brewing All values remain stored even when the coffee machine operations are implemented.
- Página 24 The stored cup filling levels for each individual cup sym- bol only applies in powder mode. Setting and storing the coffee temperature -Switch to the menu function by simultaneously pressing buttons 2 and 3 for approx. 3 seconds. Note: If the height adjuster is difficult to move, clean it. Press OK (button 6) to dispense coffee. Note: -The function displays of the menu will flash first in a You can stop coffee dispensing prematurely by briefly blinking line, then the current settings will be displayed.
- Página 25 • Coffee grinding quantity • Coffee temperature • Shut-off time • Water tank illumination To reset the appliance to the factory settings, press and -Save the entries and quit the menu by confirming with hold buttons 2 and 4 for approx. 3 seconds. The reset OK (button 6). All function displays of the menu flash for is confirmed by the symbols flashing several times. The approx. 3 seconds to confirm. The appliance then returns appliance returns automatically to the normal operating to the normal operating mode.
- Página 26 through the opening in the cup grate. -Thoroughly clean the coffee dispensing unit from the - Clean the drip tray with the cup grate (H) with warm inside and outside with warm and a suitable brush to water and a mild washing-up liquid. remove any coffee residue and prevent mould from - Wipe the coffee bean container with a dry lint-free cloth.
- Página 27 least 3 times. -Put a cleaning tablet into the coffee powder shaft. -Clean the opened brewing unit under warm running -The press OK (button 6). water. In particular, the stainless steel screen must be rinsed out well to remove any coffee residue. The appliance will implement several cleaning cycles.
- Página 28 to determine the water hardness and to set the corres- -After the completion of the second descaling cycle, ponding hardness for the coffee machine. the function display “descaling programme” is flashing quickly. WARNING: -Remove the drip tray and empty it Irritation to skin or eyes can occur.If they come into - Press the drip tray back onto the appliance until it contact with the descaling solution! audibly engages...
- Página 29 CAUSE SOLUTION Brewing unit Remove the brewing -Replace the brewing unit by turning it into the right posi- soiled. unit and rinse it tion (the outlet tube facing downwards and to the front), thoroughly with insert the brewing unit into the guide grooves and push it flowing water.
- Página 30 PROBLEM CAUSE SOLUTION • Warm up cups with hot Espresso/coffee not hot • Cups too cold. water. enough • Increase the coffee temperature • Measure coffee properly: top up with max. 1 measuring spoon of coffee beans. • Not enough coffee powder used. •...
- Página 31 For EU product versions and/or in case that it is requested in your country: Ecology and recyclability of the product - The materials of which the packaging of this appliance consists are included in a collection, classification and recycling system. Should you wish to dispose of them, use the appropriate public recycling bins for each type of material.
- Página 32 Net weight (Aprox.): 8.16 Kg Coffeemotion S.L. Gross weight (Aprox.): 9.45 Kg Josep Escaler S/n E 25790 Oliana Spain...