Publicidad
Enlaces rápidos
US Customers
U.S.A.
houseofrohl.com/support
1-800-777-9762
INS11289A - Rev. 03/22
I N S T R U C T I O N M A N U A L
M A N U E L D ' I N S T R U C T I O N S
M A N U A L D E I N S T R U C C I O N E S
Garniture Robinet De Bain Mural Type T/P
For warranty or additional information, contact:
QUEBEC / MARITIMES / WESTERN CANADA
QUÉBEC / MARITIMES / OUEST CANADIEN
QUEBEC / MARITIMOS / CANADA OCCIDENTAL
houseofrohl.ca/support
1-866-473-8442
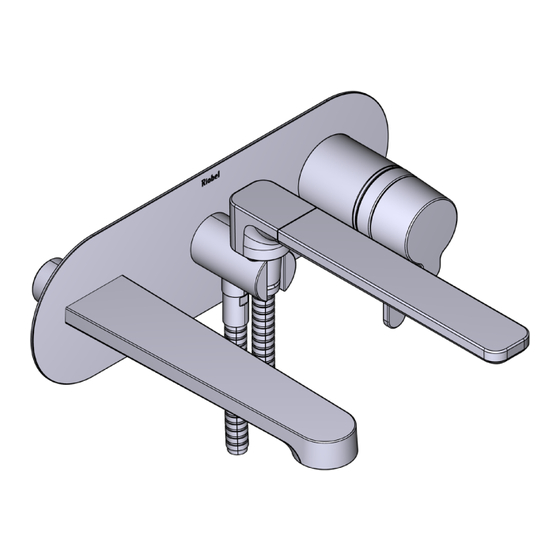
Type T/P Wall-Mount Tub Filler Trim
Moldura de llave de tina para
montaje mural tipo T/P
HELPFUL TOOLS
For safety and ease of installation, the use of these
helpful tools is recommended.
OUTILS UTILES
Pour des raisons de sécurité et de facilité
d'installation, l'utilisation de ces outils utiles est
recommandée.
HERRAMIENTAS ÚTILES
Por seguridad y facilidad de instalación, se
recomienda el uso de estas útiles herramientas.
Silicone
Flathead Screwdriver
Silicone
Destornillador de punta chata
Silicona
Tournevis à tête plate
Adjustable Wrench
Hex Wrench
Clé adjustable
Clé hexagonale
Llave ajustable
Llave Hexagonal
Canadian Customers
Phillips Screwdriver
Cable Connector
Destornillador Phillips
Conector para cable
Tournevis Phillips
Connecteur de câble
5mm
Safety Glasses
Hex Wrench
Lunettes de sécurité
Clé hexagonale
Gafas de seguridad
Llave Hexagonal
ONTARIO
houseofrohl.ca/support
1-800-287-5354
Publicidad

Resumen de contenidos para Riobel OD21C
- Página 1 I N S T R U C T I O N M A N U A L M A N U E L D ’ I N S T R U C T I O N S M A N U A L D E I N S T R U C C I O N E S Type T/P Wall-Mount Tub Filler Trim Garniture Robinet De Bain Mural Type T/P Moldura de llave de tina para...
-
Página 2: Parts List
Parts List Handle Sleeve Hand Shower Sleeve Bracket Tub Spout Shower Holder Hose Wall Plate Set Screw Spout Adaptor Set Screw M. Cartridge Top Ring Liste des pièces Poignée Manchon Douchette Support du manchon Bec de bain Support de douchette Tuyau Plaque murale Vis d’arrêt... - Página 3 Open Service Ouvert Entretien Abierto Mantenimiento Using a flathead screwdriver, rotate the Service Valves to the open position. Ensure Service Valves are now in the open position as illustrated. (Illustration shown is the service position.) S’assurer que les valves de service se trouvent maintenant dans la position À...
- Página 4 Test Cap Plug Capuchon protecteur d’essai Tapón de prueba Écrou Tuerca Unscrew the Nut and remove the Test Cap Plug. Run water for 20 seconds. Dévisser l’écrou et retirer le capuchon protecteur d’essai. Faire couler l’eau pendant 20 secondes. Desenrosque la tuerca y retire el tapón de prueba. Deje correr el agua durante 20 segundos.
- Página 5 TIGHTENING BY HAND SERRER À LA MAIN APRETAR A MANO 1/4 TURN 1/4 DE TOUR GIRAR 1/4 Install and tighten the Nut onto the Cartridge (M). Assemble in the order shown. Installer et serrer l’écrou sur la cartouche (M). Procéder à l’assemblage selon l’ordre illustré. Instale y apriete la tuerca en el cartucho (M).
- Página 6 C-Clip Bride en C Screw Plug Clip en C Bouchon à vis Tornillo de tapón Spout Plug Bouchon de bec Tornillo de tapón Spout Plug Bouchon de bec Tapón de la boquilla Remove spout plug and screw plug. Unscrew the spout plug and remove the C-Clip. Retirer le bouchon de bec et le bouchon à...
- Página 7 Put the sleeve bracket (I) into the Wall Plate (K) in the correct orientation as Apply silicon and insert the wall plate assembly on the rough. shown above. Appliquer un agent d’étanchéité à la silicone, et insérer Mettre le support du manchon (I) dans la plaque murale (K), dans le bon sens, l’assemblage de plaque murale sur la plomberie brute.
- Página 8 1. Install the Tub Spout (C). Push against the wall plate and tighten the set screw in the sleeve bracket. 2. Ensure Tub Spout is installed securely and tighten with the set screw. Tout en appuyant sur la plaque murale, visser la vis d’arrêt dans le support du 1.
- Página 9 1. Screw the hose (D) into the underside of the hand shower Installation is complete. holder (J). L’installation est terminée. 2. When installing the Hand Shower (B) ensure to install the La instalación está completa. gasket. 1. Visser le tuyau (D) sous le support de douchette (J). 2.
- Página 10 For warranty or additional information, contact: US Customers Canadian Customers QUEBEC / MARITIMES / WESTERN CANADA U.S.A. QUÉBEC / MARITIMES / OUEST CANADIEN ONTARIO houseofrohl.com/support QUEBEC / MARITIMOS / CANADA OCCIDENTAL houseofrohl.ca/support 1-800-777-9762 houseofrohl.ca/support 1-800-287-5354 1-866-473-8442 INS11289A - Rev. 03/22...


