Tabla de contenido
Publicidad
Idiomas disponibles
Idiomas disponibles
Enlaces rápidos
Publicidad
Tabla de contenido
Solución de problemas

Resumen de contenidos para Selecline TAC-07CPB RM
-
Página 5: Tabla De Contenido
TABLE OF CONTENTS: 1/ SAFETY INFORMATION ____________________________ P. 5 2/ TECHNICAL DATA _________________________________ P. 9 3/ DESCRIPTION ____________________________________ P. 10 4/ INSTALLATION ___________________________________ P. 11 5/ USE ____________________________________________ P. 13 6/ MAINTENANCE AND CLEANING _____________________ P. 15 7/ TROUBLESHOOTING ______________________________ P. 18 8/ WARRANTY AND LIMITATIONS OF LIABILITY __________ P. - Página 6 Always turn the product o and remove the power plug from the socket when cleaning or for any other maintenance operation. 10. Do not attempt to remove any part of the casing unless by an authorised technician. 11. Disconnect the plug from the socket if the product is not being used for a long period.
- Página 8 41. Do not clean the unit with water. Water can enter the unit and damage the insulation, creating a shock hazard. If water enters the unit, unplug it immediately and contact Customer Service. 42. Utilize two or more people to lift and install the unit. 43.
-
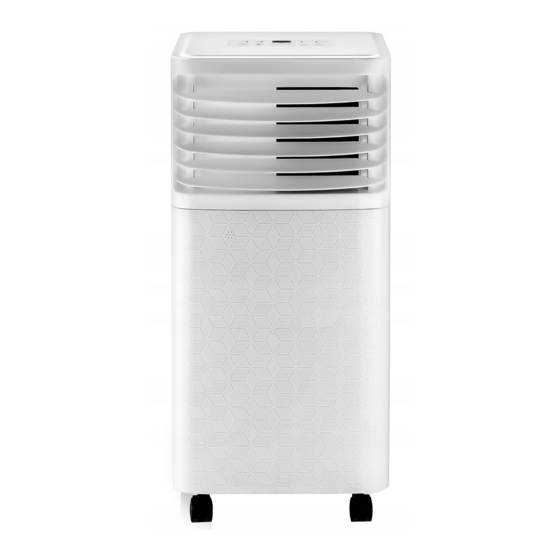
Página 10: 3/ Description
3/ DESCRIPTION 1. De ector 7. Condenser drain 2. Control panel 8. USB charging slot 3. Handle (both side) 9. Intake grille 4. Castors 10. Air outlet grille 5. Plug xer 11. Intake grille 6. Middle condenser drain 12. Power cable Control panel 1. -
Página 11: 4/ Installation
4/ INSTALLATION • Unpack all parts. • Check for completeness and shipping damage immediately after unpacking. If your shipment is damaged or incomplete, please contact our customer service. • Insert 2 AAA 1.5 V batteries into the remote control, make sure the battery polarity is correct. -
Página 13: 5/ Use
Notes: The window slider kit has been designed to t most standard vertical and horizontal window applications, however, it may be necessary for you to modify some aspects of the installation procedures for certain types of windows. The window slider kit can be fastened with screws. If the window opening is less than the minimum length of the window slider kit, cut the end without the hole in it short enough to t in the window opening. - Página 19 Problem Cause Solution • It is not plugged into the • Plug the appliance into mains. the mains. The appliance can not • Wait for 30 minutes, if the be turned on. • The internal safety device problem persists, contact has tripped.
-
Página 20: 8/ Warranty And Limitations Of Liability
8/ WARRANTY AND LIMITATIONS OF LIABILITY This product is guaranteed for a period of 24 months (de ned by local law) from the date of purchase against any failure resulting from manufacturing or material defects. This warranty does not cover damage caused by improper installation, improper use, or normal wear and tear of the product. -
Página 21: 1/ Consignes De Sécurité
SOMMAIRE : 1/ CONSIGNES DE SÉCURITÉ __________________________ P. 21 2/ CARACTÉRISTIQUES TECHNIQUES ___________________ P. 26 3/ DESCRIPTION ____________________________________ P. 26 4/ INSTALLATION ___________________________________ P. 27 5/ UTILISATION _____________________________________ P. 30 6/ ENTRETIEN ET NETTOYAGE _________________________ P. 32 7/ DÉPANNAGE _____________________________________ P. 35 8/ GARANTIE ET LIMITES DE RESPONSABILITÉ... - Página 22 Ne laissez pas les enfants jouer avec la télécommande ou insérer des objets dans la sortie d’air. Ne placez aucun objet et ne laissez personne s’asseoir sur l’appareil. Éteignez toujours l’appareil et retirez la d’alimentation de la prise lors du nettoyage ou pour toute autre opération d’entretien.
- Página 24 le côté, il doit être placé en position debout et laissé débranché pendant 6 heures. 38. Utilisez toujours l’interrupteur du panneau de commande ou la télécommande pour éteindre l’appareil, et ne le mettez pas en marche ou à l’arrêt en branchant ou en débranchant le cordon d’alimentation.
-
Página 26: 2/ Caractéristiques Techniques
2/ CARACTÉRISTIQUES TECHNIQUES Type d’appareil Climatiseur vertical Source d’alimentation 220-240 V~, 50 Hz Intensité de refroidissement 3,5 A Puissance de refroidissement en 780 W entrée Puissance frigori que 2050 W Puissance assignée 830 W Intensité nominale 3,9 A Débit volumique 225 m³/h Bruit (puissance sonore) 64 dB... -
Página 27: 4/ Installation
Télécommande 1. Touche Marche/Arrêt 6. Touche veille 2. Touche Mode 7. Touche Diminuer 3. Touche Augmenter 8. Touche de vitesse du ventilateur 4. Touche oscillation 9. Touche de sélection de l’unité (Ne fonctionne pas) 5. Touche minuterie Liste des accessoires 1. -
Página 30: 5/ Utilisation
5/ UTILISATION L’appareil peut être commandé à l’aide du panneau de commande ou de la télécommande. Dans les pages suivantes, le fonctionnement décrit concerne principalement l’utilisation de la télécommande. 1. Branchez le climatiseur sur une prise, l’appareil passe en mode veille. 2. - Página 36 Problème Cause Solution • Il n’est pas branché au • Branchez l'appareil sur secteur. une prise de courant. Impossible d’allumer • Patientez 30 minutes, l’appareil. • Le dispositif de sécurité si le problème persiste, interne s’est déclenché. contactez votre centre de service.
-
Página 37: 8/ Garantie Et Limites De Responsabilité
8/ GARANTIE ET LIMITES DE RESPONSABILITÉ Ce produit est garanti pour une période de 24 mois (dé nie par la législation locale) à compter de la date d’achat, contre toute défaillance résultant d’un vice de fabrication ou de matériau. Cette garantie ne couvre pas les dommages résultant d’une mauvaise installation, d’une utilisation incorrecte, ou de l’usure normale du produit. -
Página 38: 1/ Advertencias De Seguridad
ÍNDICE: 1/ ADVERTENCIAS DE SEGURIDAD ____________________ P. 38 2/ DATOS TÉCNICOS _________________________________ P. 42 3/ DESCRIPCIÓN ____________________________________ P. 43 4/ INSTALACIÓN ____________________________________ P. 44 5/ USO ____________________________________________ P. 46 6/ MANTENIMIENTO Y LIMPIEZA ______________________ P. 48 7/ SOLUCIÓN DE PROBLEMAS_________________________ P. 51 8/ GARANTÍA Y LIMITACIONES DE RESPONSABILIDAD ____ P. - Página 39 Apague siempre el producto y retire el enchufe de la toma de corriente cuando limpie o para cualquier otra operación de mantenimiento. 10. No intente quitar ninguna parte de la carcasa a menos que lo haga un técnico autorizado. 11. Desconecte el enchufe de la toma si el producto no se utiliza durante un periodo prolongado.
-
Página 41: Mantenga El Dispositivo Alejado De Productos
39. No toque los botones del panel de control con los dedos mojados ni húmedos. 40. Mantenga el dispositivo alejado de productos químicos peligrosos. Para evitar daños en el acabado de la super cie, use solo un paño suave para limpiar el aparato. -
Página 43: 3/ Descripción
3/ DESCRIPCIÓN 1. De ector 7. Drenaje del condensador 2. Panel de control 8. Ranura de carga USB 3. Asa (ambos lados) 9. Rejilla de entrada 4. Ruedas 10. Rejilla de salida de aire 5. Fijador de enchufe 11. Rejilla de entrada 6. -
Página 44: 4/ Instalación
4/ INSTALACIÓN • Desembale todas las partes. • Veri que la integridad y los daños de envío inmediatamente después de desembalar. Si su envío está dañado o incompleto, póngase en contacto con nuestro servicio al cliente. • Introduzca 2 pilas AAA de 1,5 V en el mando a distancia, asegúrese de que la polaridad de la pila sea correcta. -
Página 46: 5/ Uso
Notas: El kit deslizador de ventana ha sido diseñado para adaptarse a la mayoría de las aplicaciones estándar de ventanas verticales y horizontales, sin embargo, puede que se tengan que modi car algunos aspectos de los procedimientos de instalación para ciertos tipos de ventanas. El kit deslizador de ventana se puede jar con tornillos. - Página 52 Problema Causa Solución • No está enchufado a la red • Enchufe el aparato a la eléctrica. red eléctrica. El aparato no se • Espere 30 minutos, si puede encender. • El dispositivo de seguridad el problema persiste, interno se ha activado. póngase en contacto con su centro de servicio.
-
Página 53: 8/ Garantía Y Limitaciones De Responsabilidad
8/ GARANTÍA Y LIMITACIONES DE RESPONSABILIDAD Este producto dispone de una garantía de 24 meses (establecido por la legislación local), a partir de la fecha de compra, frente a cualquier fallo como resultado de un defecto de fabricación o de material. Esta garantía no cubre los daños provocados por una instalación inadecuada, uso incorrecto o desgaste normal del producto. -
Página 54: 1/ Informação De Segurança
ÍNDICE: 1/ INFORMAÇÃO DE SEGURANÇA _____________________ P. 54 2/ INFORMAÇÕES TÉCNICAS __________________________ P. 59 3/ DESCRIÇÃO ______________________________________ P. 59 4/ INSTALAÇÃO _____________________________________ P. 60 5/ UTILIZAÇÃO _____________________________________ P. 63 6/ MANUTENÇÃO E LIMPEZA _________________________ P. 65 7/ RESOLUÇÃO DE PROBLEMAS _______________________ P. 68 8/ GARANTIA E LIMITAÇÕES DE RESPONSABILIDADE _____ P. - Página 55 Não coloque objetos por cima do produto nem permita que outras pessoas se sentem sobre o mesmo. Desligue sempre o produto e retire a cha da tomada sempre que realizar uma limpeza ou outras operações de manutenção. 10. Apenas um técnico autorizado poderá tentar remover quaisquer peças da caixa.
- Página 57 38. Utilize sempre o interruptor no painel de controlo ou o controlo remoto para desligar a unidade e não ligue ou desligue o aparelho ligando ou desligando o cabo de alimentação. Existe o risco de choque elétrico. 39. Não toque nos botões do painel de controlo com os dedos molhados ou húmidos.
-
Página 59: 2/ Informações Técnicas
2/ INFORMAÇÕES TÉCNICAS Tipo de produto Aparelho de ar condicionado portátil Fonte de alimentação 220-240 V~, 50 Hz Corrente de refrigeração 3,5 A Potência de entrada de refrigeração 780 W Capacidade de refrigeração 2050 W Potência atribuída 830 W Corrente nominal 3,9 A Volume do uxo de ar 225 m³/h... -
Página 60: 4/ Instalação
Controlo remoto 1. Botão Ligar/Desligar 6. Botão de noite 2. Botão de modo 7. Botão de diminuir 3. Botão de aumentar 8. Botão de velocidade da ventoinha 4. Botão de oscilação (Sem função) 9. Botão de interruptor da unidade 5. Botão de temporizador Lista de acessórios 1. -
Página 63: 5/ Utilização
5/ UTILIZAÇÃO O produto pode ser controlado através do painel de controlo ou do controlo remoto. Nas páginas seguintes, descrevemos uma utilização essencialmente realizada através do controlo remoto. 1. Ligue o aparelho de ar condicionado a uma tomada e este entrará no modo de espera. 2. -
Página 69: 8/ Garantia E Limitações De Responsabilidade
• Janelas, portas e/ou • Feche as portas, janelas e cortinas estão abertas. cortinas. • Existem fontes de calor na divisão (forno, secador de • Elimine as fontes de calor. cabelo, etc). O aparelho funciona • Encaixe o tubo de •... - Página 70 Os defeitos causados pelo desgaste normal ou devidos ao envelhecimento normal do produto. As atualizações de software, devido a uma alteração dos parâmetros de rede. As falhas do produto devidas ao uso de software de terceiros para modi car, alterar, adaptar ou modi car o existente. As falhas do produto devido à...
-
Página 71: 1/ Informacje Na Temat Bezpieczeństwa
SPIS TREŚCI: 1/ INFORMACJE NA TEMAT BEZPIECZEŃSTWA ___________ S. 71 2/ DANE TECHNICZNE _______________________________ S. 76 3/ OPIS ____________________________________________ S. 76 4/ INSTALACJA _____________________________________ S. 77 5/ OBSŁUGA _______________________________________ S. 79 6/ KONSERWACJA I CZYSZCZENIE _____________________ S. 81 7/ ROZWIĄZYWANIE PROBLEMÓW ____________________ S. 84 8/ GWARANCJA ORAZ OGRANICZENIE ODPOWIEDZIALNOŚCI _______________________________ S. - Página 72 Dzieci nie powinny bawić się pilotem zdalnego sterowania ani wrzucać przedmiotów do wylotu powietrza. Nie umieszczaj żadnych przedmiotów na urządzeniu ani na nim nie siadaj. Pamiętaj, aby wyłączyć urządzenie i odłączyć jego przewód zasilający od gniazda zasilającego przed czyszczeniem lub konserwacją urządzenia. 10.
- Página 74 37. Urządzenie transportuj w pozycji pionowej i przed użytkowaniem umieść je na stabilnym, równym podłożu. Jeżeli podczas transportu urządzenie było ułożone na boku, ustaw je w pozycji pionowej i nie podłączaj go do zasilania przez 6 godzin. 38. Aby wyłączyć urządzenie, zawsze korzystaj z przełącznika na panelu sterowania lub pilocie.
-
Página 76: 2/ Dane Techniczne
2/ DANE TECHNICZNE Typ urządzenia Klimatyzator przenośny Źródło zasilania 220–240 V, 50 Hz Natężenie prądu podczas chłodzenia 3,5 A Moc wejściowa w trybie chłodzenia 780 W Moc chłodnicza 2050 W Moc znamionowa 830 W Natężenie znamionowe 3,9 A Przepływ powietrza 225 m³/godz. -
Página 77: 4/ Instalacja
Pilot 1. Przycisk włączania/wyłączania 5. Przycisk wyłącznika czasowego 2. Przycisk TRYBU 6. Przycisk snu 3. Przycisk zwiększania 7. Przycisk zmniejszania 4. Przycisk zmiany kierunku 8. Przycisk obrotów wentylatora (nieużywany) 9. Przycisk zmiany jednostek Lista akcesoriów 1. Złącze wejściowe węża × 1 5. - Página 85 Problem Powód Rozwiązanie • Urządzenie nie jest • Podłącz urządzenie do podłączone do sieci zasilania. zasilającej. Nie można włączyć urządzenia. • Uruchomione zostało • Odczekaj 30 minut, jeśli zabezpieczenie problem powtórzy się, wewnętrzne. skontaktuj się z serwisem. • Poprawnie umieść wąż odprowadzający powietrze;...
-
Página 86: 8/ Gwarancja Oraz Ograniczenie
• Zabezpieczenie sprężarki uniemożliwia ponowne Urządzenie nie działa uruchomienie • Odczekaj trzy minuty. Jest przez trzy minuty od urządzenia przed to zjawisko normalne. ponownego włączenia. upłynięciem trzech minut od ostatniego wyłączenia. Wyświetlone • Urządzenie zostało wyposażone w system zostaną następujące •... - Página 87 W produktach naprawionych lub wymienionych mogą znajdować się komponenty oraz wyposażenie nowe i/lub wykorzystywane ponownie. Warunki korzystania: W celu skorzystania z praw gwarancyjnych, należy odnieść produkt do miejsca sprzedaży wraz z dowodem zakupu (paragon kasowy, faktura itp.) produktu oraz dostarczanych akcesoriów, w oryginalnym opakowaniu. Należy również...
-
Página 88: Biztonsági Tájékoztató
TARTALOMJEGYZÉK: 1/ BIZTONSÁGI TÁJÉKOZTATÓ ________________________ 88. o. 2/ MŰSZAKI ADATOK ________________________________ 93. o. 3/ LEÍRÁS __________________________________________ 93. o. 4/ ÜZEMBE HELYEZÉS ________________________________ 94. o. 5/ HASZNÁLAT _____________________________________ 96. o. 6/ KARBANTARTÁS ÉS TISZTÍTÁS ______________________ 98. o. 7/ HIBAELHÁRÍTÁS __________________________________ 101. o. 8/ JÓTÁLLÁS ÉS FELELŐSSÉGKORLÁTOZÁS _____________ 103. - Página 89 Ne helyezzen semmilyen tárgyat a készülékre, és ne hagyja, hogy bárki ráüljön. Tisztítás vagy más karbantartási művelet végrehajtásakor előzőleg mindig kapcsolja ki a készüléket, és húzza ki a hálózati csatlakozót az aljzatból. 10. A készülék házának bármely részét csak meghatalmazott szakember távolíthatja el.
- Página 91 38. A készülék be- és kikapcsolásához mindig használja a kezelőpanel vagy a távirányító kapcsolóját, és ne a tápkábel csatlakoztatásával vagy kihúzásával indítsa el vagy állítsa le a működést. Ez áramütést okozhat. 39. Ne érintse meg a kezelőpanel gombjait vizes vagy nedves ujjakkal.
-
Página 93: 2/ Műszaki Adatok
2/ MŰSZAKI ADATOK A termék típusa Álló légkondicionáló Áramforrás 220-240 V~, 50 Hz Hűtési áramerősség 3,5 A Hűtési bemeneti teljesítmény 780 W Hűtési teljesítmény 2050 W Névleges teljesítmény 830 W Névleges áram 3,9 A Szállított légmennyiség 225 m³/h Zaj (hangerősség) 64 dB Hűtőközeg/Töltet/GWP R290/0,17 kg/3... -
Página 94: 4/ Üzembe Helyezés
Távvezérlő 1. BE/KI gomb 5. Időzítőgomb 2. Üzemmód gomb 6. Alvó funkció gombja 3. Növelő gomb 7. Csökkentő gomb 4. Légterelő funkció gombja (Nincs 8. Ventilátorsebesség gomb funkció) 9. Készülék kapcsológombja Tartozéklista 1. Légkivezető tömlő bemeneti 5. Csúszó ablakbetét csavarok x 2 eleme x 1 6. -
Página 102: 6/ Karbantartás És Tisztítás
Probléma Megoldás • Csatlakoztassa az • Nincs csatlakoztatva a elektromos hálózathoz a hálózathoz. készüléket. A készüléket nem • Várjon 30 percet, de ha lehet bekapcsolni. a probléma továbbra • A belső biztonsági berendezés is fennáll, vegye fel letiltotta a működést. a kapcsolatot a helyi szervizközponttal. -
Página 103: 8/ Jótállás És Felelősségkorlátozás
8/ JÓTÁLLÁS ÉS FELELŐSSÉGKORLÁTOZÁS Erre a termékre a vásárlás időpontjától számított 24 hónap (a helyi jogszabályok szerinti) jótállás vonatkozik minden gyártási, vagy anyaghibából eredő meghibásodásra. A garancia nem vonatkozik a hibás telepítésből, nem rendeltetésszerű használatból és a termék szokásos kopásából származó károkra. Pontosítva, a garancia az alábbi esetekre nem vonatkozik: Nem rendeltetésszerű... -
Página 104: 1/ Informa Ii Privind Siguran A
CUPRINS: 1/ INFORMA II PRIVIND SIGURAN A ___________________ P. 104 2/ DATE TEHNICE ____________________________________ P. 109 3/ DESCRIERE ______________________________________ P. 109 4/ INSTALARE ______________________________________ P. 110 5/ UTILIZARE _______________________________________ P. 113 6/ ÎNTRE INERE ȘI CURĂ ARE _________________________ P. 115 7/ REMEDIEREA DEFEC IUNILOR ______________________ P. - Página 105 Nu așeza i obiecte de orice fel și nu lăsa i nicio persoană să se așeze pe produs. Opri i întotdeauna produsul și scoate i ștecherul din priză când îl cură a i sau când efectua i orice altă opera ie de între inere. 10.
- Página 107 nu îl porni i sau opri i prin conectarea sau deconectarea cablului de alimentare. Aceasta poate provoca risc de electrocutare. 39. Nu atinge i butoanele de pe panoul de control cu degetele ude și umede. 40. Men ine i unitatea departe de substan ele chimice periculoase.
-
Página 109: 2/ Date Tehnice
2/ DATE TEHNICE Tip de produs Aparat de aer condi ionat x Sursa de alimentare 220-240 V~, 50 Hz Curent de răcire 3,5 A Puterea de intrare de răcire 780 W Capacitatea de răcire 2050 W Putere nominală la intrare 830 W Curentul nominal 3,9 A... -
Página 110: 4/ Instalare
Telecomandă 1. Buton Pornit/Oprit 6. Buton Somn 2. Buton Mod 7. Buton reducere 3. Buton crestere 8. Buton Viteză al ventilatorului 4. Butonul balansare (Fără func iune) 9. Butonul pentru comutarea unitatii 5. Buton cronometru Lista cu accesorii 1. Ori ciul de admisie al furtunului x 1 6. -
Página 113: 5/ Utilizare
5/ UTILIZARE Aparatul poate controlat cu panoul de control sau cu telecomanda. În paginile următoare, se descrie modul de operare cu ajutorul telecomenzii. 1. Conecta i aparatul de aer condi ionat la o priză, aparatul intră în modul standby. 2. Apăsa i butonul pentru a porni aparatul de aer condi ionat. -
Página 119: 8/ Garan Ie Și Limitări De Răspundere
• Ferestrele, ușile și/sau • Închide i ușile, ferestrele și perdelele sunt deschise. draperiile. • Există surse de căldură în • Elimina i sursele de cameră (cuptor, uscător de căldură. păr, etc). Aparatul • Monta i furtunul de • Furtunul de evacuare a func ionează, dar nu evacuare a aerului în aerului este detașat de... - Página 120 Defectarea produsului datorate utilizării de software ter ă parte pentru a modi ca, schimba sau adapta software-ul existent. De cien ele produsului cauzate de utilizarea fără accesorii aprobate de producător. Produse oxidate. În nici un caz producătorul nu poate responsabil pentru pierderea datelor stocate pe disc.
- Página 121 ________________ C. 121 __________________________ C. 126 _____________________________________ C. 126 _____________________________________ C. 127 _________________________________ C. 130 _____________________ C. 132 __________ C. 135 ____ C. 137...
- Página 122 —...
- Página 126 220–240 ~, 50 2050 225 ³/ /GWP R290/0,17 0,0005 IPX0 24,5 ON/OFF...
- Página 127 • • • AAA 1,5 • • • • • • •...
- Página 130 • • • 18-32 °C, • 24 °C 27 °C. • « »...
- Página 136 • • • • • • • • • • • • • • • • • • « » • • • • « » Lt/PF/Ft.
- Página 137 SIM- . .), IMEI (...
- Página 138 _______________________ C. 138 ___________________________________ C. 143 ___________________________________________ C. 144 _________________________________ C. 145 _________________________________ C. 147 __________________ C. 149 ______________________ C. 152 _____ C. 154 –...
- Página 140 —...
- Página 144 8. USB- ON/OFF...
- Página 145 • • • • • • • • • • • 17,7” (45...
- Página 147 • • • 18°C 32°C (64°F-90°F), •...
- Página 153 • • • • • • • • • • • • • • • • • • « ». • • • • : Lt/PF/Ft. « »...
- Página 154 SIM/SD , ...) IMEI (...