Publicidad
sauder.com
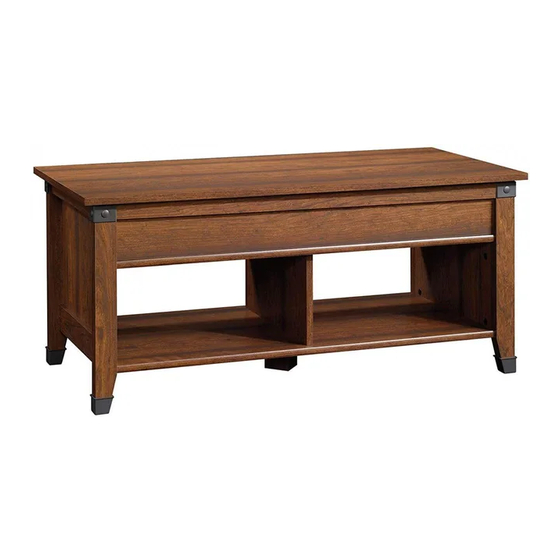
Lift-Top Coffee Table
Carson Forge Collection | Model 414444
Need help? Visit Sauder.com to view video assembly tips or chat with a live rep.
Prefer the phone? Call 1-800-523-3987.
Share your journey!
Guaranteed to hold
other beverages, too.
NOTE: THIS INSTRUCTION
BOOKLET CONTAINS IMPORTANT
SAFETY INFORMATION.
PLEASE READ AND KEEP FOR
FUTURE REFERENCE.
English pg 1-23
Français pg 24-26
Español pg 27-29
Lot # 536009
11/07/19
Purchased: __________________
Be sure to give us a ring before
making any returns. 1-800-523-3987
Publicidad
Tabla de contenido

Manuales relacionados para Sauder 414444


Resumen de contenidos para Sauder 414444
- Página 1 Carson Forge Collection | Model 414444 NOTE: THIS INSTRUCTION BOOKLET CONTAINS IMPORTANT SAFETY INFORMATION. Need help? Visit Sauder.com to view video assembly tips or chat with a live rep. PLEASE READ AND KEEP FOR FUTURE REFERENCE. Prefer the phone? Call 1-800-523-3987.
- Página 2 LEFT END (1) G2 SHELF (1) UPPER END MOLDING (2) C2 UPRIGHT (1) H2 RIGHT FRONT/LEFT REAR LEG (2) LOWER END MOLDING (2) TOP (1) LEFT FRONT/RIGHT REAR LEG (2) CENTER SUPPORT (4) E2 BOTTOM (1) BRACE (1) Page 2 414444 www.sauder.com/services...
-
Página 3: Part Identification
Now you know Part Identification our ABCs. www.sauder.com/services 414444 Page 3... - Página 4 BLACK 9/16" FLAT HEAD SCREW - 14 SILVER 1/2" MACHINE SCREW - 4 BLACK 3/4" PAN HEAD SCREW - 2 BLACK 3/4" MACHINE SCREW - 4 113S BLACK 1-15/16" FLAT HEAD SCREW - 8 BLACK 1-1/4" MACHINE SCREW - 4 Page 4 414444 www.sauder.com/services...
- Página 5 SHELF (G2). Then, insert the metal end of a CAM DOWEL (2F) into each HIDDEN CAM. Do not tighten the HIDDEN CAMS in this step. Arrow (8 used) Arrow Insert the metal end of the CAM DOWEL into the HIDDEN CAM. www.sauder.com/services 414444 Page 5...
- Página 6 Just think. The sooner you do this, the sooner you do something else. (16 used) Arrow Arrow Arrow Arrow Hole The arrow in the HIDDEN CAM must point toward the hole in the edge of the board. Page 6 414444 www.sauder.com/services...
- Página 7 Turn sixteen CAM SCREWS (8F) into the LEGS (H2 and I2). å Fasten a CORNER ACCENT (8E) to each LEG (H2 and I2). Use four SILVER 1/2" MACHINE SCREWS (38S). (16 used) SILVER 1/2" MACHINE SCREW (4 used in this step) www.sauder.com/services 414444 Page 7...
- Página 8 MOLDINGS over the heads of the SCREWS in the ENDS. Shoulder Shoulder Apply pressure with your hands as you guide the MOLDINGS over the SCREWS and onto the ENDS. These edges should be even. BLACK 9/16" FLAT HEAD SCREW (8 used in this step) Page 8 414444 www.sauder.com/services...
- Página 9 LEGS will overhang Angled edge this edge. S u r f a c i t h H I D D E N These surfaces Angled edge should be even. LEGS will overhang this edge. Angled edge www.sauder.com/services 414444 Page 9...
- Página 10 Finished edge BLACK 9/16" FLAT HEAD SCREW (6 used in this step) Finished edge Shoulder Apply pressure with your hands as you guide the MOLDINGS over the SCREWS and onto the PANELS. Page 10 414444 www.sauder.com/services...
- Página 11 Tighten Risk of damage or Arrow injury. HIDDEN CAMS must be completely Arrow Maximum tightened. HIDDEN 210 degrees CAMS that are not completely tightened may loosen, and parts may separate. To Minimum completely tighten: 190 degrees www.sauder.com/services 414444 Page 11...
- Página 12 NOTE: Start each SCREW a few turns before completely tightening any of them. 113S BLACK 1-15/16" FLAT HEAD SCREW (6 used in this step) Unfinished edge i t h o Unfinished edge f a c S u r D E N H I D Page 12 414444 www.sauder.com/services...
- Página 13 Step 9 å Insert two METAL PINS (1R) into the holes in the SHELF (G2). å Place the UPRIGHT (C2) onto the METAL PINS in the SHELF (G2). www.sauder.com/services 414444 Page 13...
- Página 14 HIDDEN CAMS. Maximum Arrow 210 degrees å Fasten the BOTTOM (E2) to the UPRIGHT (C2). Use two BLACK 1-15/16" FLAT HEAD SCREWS (113S). Minimum 190 degrees 113S BLACK 1-15/16" FLAT HEAD SCREW (2 used in this step) Page 14 414444 www.sauder.com/services...
- Página 15 Fasten the RIGHT END (A) and LEGS (H2 and I2) to the BOTTOM (E2) and SHELF (G2). Tighten four HIDDEN Maximum Arrow CAMS. 210 degrees å NOTE: You may need to use your short screwdriver to Minimum tighten the HIDDEN CAMS in the SHELF (G2). 190 degrees www.sauder.com/services 414444 Page 15...
- Página 16 Step 12 å Push four FEET (10E) onto the LEGS (H2 and I2). å With your hammer, gently tap four TACK GLIDES (13E) through the FEET and into the LEGS. Page 16 414444 www.sauder.com/services...
- Página 17 9/16" LARGE HEAD SCREWS (1S). å Slide the CENTER SUPPORTS (N) onto the FOOT BRACKETS (6E). å Firmly push the CORNER CAPS (5E) onto the CENTER SUPPORTS (N). BLACK 9/16" LARGE HEAD SCREW (6 used in this step) www.sauder.com/services 414444 Page 17...
- Página 18 Tighten two HIDDEN CAMS in the PANELS (F2). Hey! It's starting to look like something! å Push six BUMPERS (2M) into the PANELS (F2) and LEGS (H2 and I2). (6 used) Tighten Maximum Arrow 210 degrees Minimum 190 degrees Page 18 414444 www.sauder.com/services...
- Página 19 Use six BLACK 9/16" LARGE HEAD SCREWS (1S). å NOTE: Be sure to position the LIFT TABLE MECHANISMS on the TOP exactly as shown. BLACK 9/16" LARGE HEAD SCREW (6 used in this step) The holes are closer to this edge. www.sauder.com/services 414444 Page 19...
- Página 20 Fasten the SUPPORT BRACKETS (37G) to the LIFT TABLE MECHANISMS (23M). Use four WASHERS (13M), four NUTS (24M), and four BLACK 3/4" MACHINE SCREWS (92S). å NOTE: Use the adjustable wrench in this step. BLACK 3/4" MACHINE SCREW (4 used in this step) Page 20 414444 www.sauder.com/services...
-
Página 21: Important
BUSHING will allow the LIFT TOP to close completely. BLACK 3/4" PAN HEAD SCREW BLACK 9/16" LARGE HEAD SCREW (2 used for the BUSHINGS) (10 used in this step) These four holes must be here. Do not use. www.sauder.com/services 414444 Page 21... - Página 22 LIFT TABLE MECHANISMS (23M). Use four WASHERS (13M), four NUTS (24M), and four BLACK 1-1/4" MACHINE SCREWS (93S). å NOTE: Use the adjustable wrench in this step. BLACK 1-1/4" MACHINE SCREW (4 used in this step) Page 22 414444 www.sauder.com/services...
- Página 23 NOTE: Please read the back pages of the instruction booklet for important safety information. å This completes assembly. Clean with a damp cloth. Wipe dry. And to celebrate, why not share your success story? 50 lbs. 25 lbs. 40 lbs. total (16 used) To cover HIDDEN CAMS www.sauder.com/services 414444 Page 23...
-
Página 24: Liste De Pièces
Modèle 414444 Table basse à dessus relevable Utilisez les instructions d’ a ssemblage en français avec les NOUS SOMMES LA POUR VOUS AIDER! schémas étape par étape du manuel d’instruction en anglais. Nous faisons de notre mieux pour nous assurer que votre meuble Chaque étape en français correspond à... - Página 25 Répéter cette étape pour fixer les autres PIEDS (H2 et I2) à Fixer le DESSOUS (E2) à l'EXTRÉMITÉ GAUCHE (B). Serrer deux l'EXTRÉMITÉ DROITE (A). EXCENTRIQUES ESCAMOTABLES. Fixer le DESSOUS (E2) au MONTANT (C2). Utiliser deux VIS TÊTE PLATE 50 mm NOIRES (113S). www.sauder.com/services 414444 Page 25...
- Página 26 À l'aide d'un marteau, enfoncer un COUVERCLE D'EXCENTRIQUE (12P) sur chaque EXCENTRIQUE ESCAMOTABLE visible. REMARQUE : Prière de lire les informations importantes sur la sécurité figurant sur les pages arrière du manuel d’instructions. Ceci complète l'assemblage. Nettoyer avec un tissu humide. Essuyer. Page 26 414444 www.sauder.com/services...
-
Página 27: Mesita Para Café Con Tapa Superior
Si PASADOR DE EXCÉNTRICO ......8 EXTREMO IZQUIERDO ..........1 necesita ponerse en BIELA DE EXCÉNTRICO ........16 PARAL ...................1 contacto con Sauder en 37G SOPORTE DE APOYO..........2 PANEL SUPERIOR ............1 cuanto a esta unidad, refiérase al número TOPE ..................6 FONDO .................1... - Página 28 IZQUIERDO (B). Apriete seis EXCÉNTRICOS ESCONDIDOS. EXCÉNTRICOS ESCONDIDOS. Repita este paso para fijar las otras PATAS (H2 e I2) al Fije el FONDO (E2) al PARAL (C2). Utilice dos TORNILLOS EXTREMO DERECHO (A). NEGROS DE CABEZA PERDIDA de 50 mm (113S). Page 28 414444 www.sauder.com/services...
-
Página 29: Importante
EXCÉNTRICO ESCONDIDO visible. NOTA: Por favor, lea las páginas de atrás del folleto de instrucciones en cuanto a importante información de seguridad. Esto completa el ensamblaje. Limpiar con un trapo húmedo. Seque con un paño. www.sauder.com/services 414444 Page 29... - Página 30 Además, el peso y la ubicación del tubo de imagen tienden a causar la inestabilidad de televisores y son propensos a inclinarse hacia adelante. Page 30 414444 www.sauder.com/services...
-
Página 31: Garantie Limitée De 5 Ans
à compter de la date d'achat la première fois et qui sont signalés à Sauder dans les limites de couverture de la contre tout défaut de matériaux ou de fabrication des composantes de mobilier Sauder. - Página 32 So, how did it go? Dear Valued Customer: Thanks so much for choosing Sauder® furniture. I hope the Set a world record for speed? purchase and assembly process was a positive experience Feeling good about yourself? and you feel good about the furniture you just built. If you Nice.