Publicidad
Idiomas disponibles
Idiomas disponibles
Enlaces rápidos
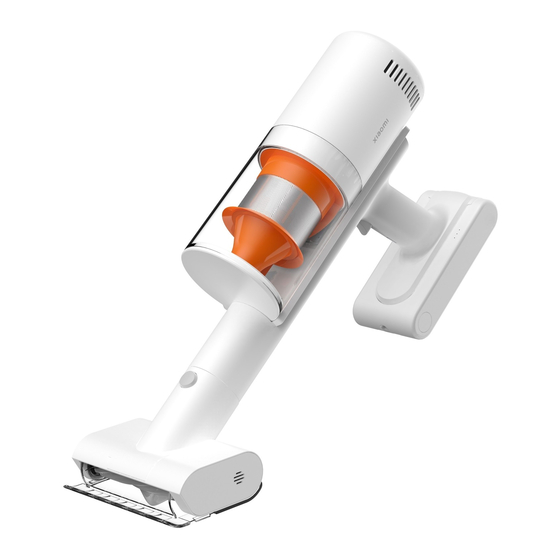
Vacuum Cleaner G11 Quick Start Guide
· 01
Xiaomi Vacuum Cleaner G11 Guida rapida
· 08
Xiaomi Vacuum Cleaner G11 Guide de démarrage rapide
· 15
Xiaomi Vacuum Cleaner G11 Kurzanleitung
· 22
Xiaomi Vacuum Cleaner G11 Manual de inicio rápido
· 29
Xiaomi Vacuum Cleaner G11 Guia de iniciação rápida
· 36
Xiaomi Vacuum Cleaner G11 Руководство по началу работы
· 43
Xiaomi Vacuum Cleaner G11 Skrócona instrukcja obsługi
· 50
Xiaomi Vacuum Cleaner G11 Hızlı Başlangıç Kılavuzu
· 57
Publicidad

Manuales relacionados para Xiaomi MI G11


Resumen de contenidos para Xiaomi MI G11
- Página 1 Vacuum Cleaner G11 Quick Start Guide · 01 Xiaomi Vacuum Cleaner G11 Guida rapida · 08 Xiaomi Vacuum Cleaner G11 Guide de démarrage rapide · 15 Xiaomi Vacuum Cleaner G11 Kurzanleitung · 22 Xiaomi Vacuum Cleaner G11 Manual de inicio rápido ·...
- Página 2 Precautions Do not directly rinse the vacuum cleaner, electric tangle-free brush bar, or Do not vacuum burning or smoking substances such as unextinguished electric mite brush with water. cigare e bu s, or hard or sharp objects like nails. To prevent injury, do not touch rotating parts while the vacuum cleaner is running.
- Página 3 Installation Installing the Accessories onto the Vacuum Cleaner Click into Place Click into Place Electric Tangle-free Brush Bar Brush Nozzle Electric Mite Brush Crevice Nozzle...
- Página 4 Display Functions Press to switch the language. Ba ery Status Indicator Status Display Auto English Suction Level/ Lock Bu on Language Bu on Se ing Language To use the selected language, press and hold the bu on for 3 seconds or no operation for 5 seconds.
- Página 5 How to Use Using the Power Bu on to Turn On the Vacuum Using the electric tangle-free brush bar can help to prevent the hair from ge ing tangled on the roller brush, reducing the maintenance frequency and extending the service life of the vacuum cleaner. Press the bu on to enable Continuous Mode, then press the power bu on * It is normal for the roller brush to accumulate small amounts of hair over time.
- Página 6 Routine Cleaning Easy-to-empty Dust Compartment Press firmly to close the dust compartment. Hold the dust compartment over a trash bin, then press the dust release bu on. Cleaning the Dust Sensor Rotate and remove the dust compartment, then clean the sensor area with a so dry cloth.
- Página 7 Care & Maintenance Cleaning the Filter Assembly Rinse the dust compartment, pre-filter, filter, and sponge filter under running tap water until clean, then set aside all parts to fully dry for at least 24 hours. Remove the filter assembly from the dust compartment, then unscrew the filter from the pre-filter and remove the sponge filter from the filter.
- Página 8 Status Errors If the vacuum cleaner is not working properly, the display will show an error message. Please refer to the troubleshooting table below to find your solution based on the error message. Error Icon Error Message Solution Clear any blockages from the dust compartment, pre-filter, filter, extension Airway Blocked rod, brush bar, and nozzle.
- Página 9 Precauzione Non risciacquare dire amente con acqua l'aspirapolvere, la spazzola ele rica Non aspirare sostanze che bruciano o fumano (ad es. mozziconi di sigare a anti-grovigli o la spazzola ele rica per acari. non spenti), né ogge i duri o taglienti (ad es. chiodi). Per evitare lesioni, non toccare le parti rotanti quando l'aspirapolvere è...
- Página 10 Installazione Installazione degli accessori nell'aspirapolvere Far sca are in posizione Far sca are in posizione Spazzola ele rica anti-grovigli Bocche a a spazzola Spazzola ele rica Bocche a a lancia (per fessure) per acari...
- Página 11 Funzioni dello schermo Premere per cambiare lingua. Indicatore di stato Schermo di stato della ba eria Auto English Pulsante livello di Pulsante di blocco aspirazione/Lingua Impostazione della lingua Per usare la lingua selezionata, tenere premuto il pulsante per 3 secondi o non eseguire alcuna operazione per 5 secondi.
- Página 12 Modalità d'utilizzo Uso del pulsante di accensione per accendere L'uso della spazzola ele rica anti-grovigli può aiutare ad evitare che i capelli si aggroviglino sulla spazzola a rullo, riducendo la frequenza di manutenzione e l'aspirapolvere prolungando la durata dell'aspirapolvere. * È normale che sulla spazzola a rullo si accumulino piccole quantità di residui e capelli nel Premere il pulsante per a ivare la Modalità...
- Página 13 Pulizie di routine Scomparto raccogli polvere facile da svuotare Premere con decisione per chiudere lo scomparto raccogli polvere. Tenere lo scomparto raccogli polvere sopra un cestino, quindi premere il pulsante di rilascio della polvere. Pulizia del sensore di rilevamento delle polveri Ruotare e rimuovere lo scomparto raccogli polvere, quindi pulire l'area del sensore con un panno morbido e asciu o.
- Página 14 Cura e manutenzione Pulizia del gruppo filtrante Risciacquare lo scomparto raccogli polvere, il pre-filtro, il filtro e il filtro di spugna so o acqua corrente fino a quando risultano puliti, poi lasciare tu e le Rimuovere il gruppo filtrante dallo scomparto raccogli polvere, poi svitare il parti ad asciugare completamente per almeno 24 ore.
- Página 15 Errori di stato Se l'aspirapolvere non funziona corre amente, lo schermo mostra un messaggio di errore. Per trovare una soluzione in base al messaggio di errore, consultare la tabella di risoluzione dei problemi riportata di seguito. Icona errore Messaggio di errore Soluzione Canale di passaggio dell'aria Rimuovere eventuali ostruzioni dallo scomparto polvere, dal pre-filtro, dal...
- Página 16 Précaution Ne rincez pas directement l’aspirateur, la barre de brosse ou la brosse anti- N’aspirez pas de substances brûlantes ou fumantes comme des mégots de acarien à l’eau claire. cigare e non éteints, ni d’objets durs et pointus comme des clous. Pour éviter de vous blesser, ne touchez aucune pièce rotative lorsque l’aspirateur est en marche.
- Página 17 Installation Installation des accessoires sur l’aspirateur Enclencher Enclencher Barre de brosse motorisée Suceur brosse Brosse anti-acarien Suceur fente motorisée...
- Página 18 Fonctions d’affichage Appuyez sur pour changer de langue. Voyant d’état de la Affichage de ba erie l’état Auto English Bouton du niveau Bouton de d’aspiration/de la langue verrouillage Configuration de la langue Pour valider la langue sélectionnée, maintenez le bouton enfoncé liste des langues disponibles.
- Página 19 Utilisation Utilisation du bouton d’alimentation pour allumer L’utilisation de la barre de brosse limite l’enchevêtrement de cheveux et de poils sur la brosse rotative, réduisant la fréquence d’entretien et prolongeant l’aspirateur par conséquent la durée de vie de l’aspirateur. * Il est normal que la brosse rotative accumule de petites quantités de poils au fil du temps. Appuyez sur le bouton pour activer le mode Continu.
- Página 20 Ne oyage de routine Compartiment à poussière facile à vider Appuyez fermement pour fermer le compartiment à poussière. Tenez le compartiment à poussière au-dessus d’une poubelle et appuyez sur le bouton de dégagement. Ne oyage du capteur de poussière Faites pivoter le compartiment à poussière et retirez-le, puis ne oyez la zone du capteur avec un chiffon doux et sec.
- Página 21 Entretien et maintenance Ne oyage de l’ensemble de filtre Rincez le compartiment à poussière, le préfiltre, le filtre et le filtre éponge à l’eau claire jusqu’à ce qu’ils soient propres, puis me ez les pièces de côté pour les Retirez l’ensemble de filtre du compartiment à poussière, puis dévissez le filtre du préfiltre et retirez le filtre éponge du filtre.
- Página 22 Erreurs d’état Si l’aspirateur ne fonctionne pas correctement, un message d’erreur apparaît sur l’écran d’affichage. Veuillez consulter le tableau de dépannage ci-dessous pour trouver la solution correspondant à votre message d’erreur. Icône d’erreur Message d’erreur Solution Vérifiez que le compartiment à poussière, le préfiltre, le filtre, le tube, la brosse Conduit d’air obstrué...
- Página 23 Vorsichtsmaßnahme Spülen Sie den Staubsauger, die elektrische Bürstenleiste oder die elektrische Saugen Sie keine brennenden oder rauchenden Gegenstände wie zum Beispiel Milbenbürste nicht mit Wasser ab. glühende Zigare enstummel oder harte oder scharfe Gegenstände wie Nägel auf. Um Verletzungen zu vermeiden, sollten Sie keine rotierenden Teile berühren, während der Staubsauger läu .
- Página 24 Installation Installation des Zubehörs am Staubsauger Einrasten lassen Einrasten lassen Verfilzungsfreie elektrische Bürstenrolle Bürstendüse Elektrische Milbenbürste Spaltdüse...
- Página 25 Anzeigefunktionen Drücken Sie , um die Sprache umzuschalten. Akkustandanzeige Status-Anzeige Auto English Saugstärke-/Sprachtaste Verschlusstaste Sprache einstellen Um die gewählte Sprache einzustellen, die Taste 3 Sekunden lang gedrückt halten oder 5 Sekunden lang keine Taste betätigen. Halten Sie die Taste 3 Sekunden lang gedrückt, um die Sprachenliste zu öffnen, und drücken Sie dann die Taste, um durch die Sprachen zu blä...
- Página 26 Verwendung Einschalten des Staubsaugers mit der Ein-/Ausschal aste Durch die Benutzung der verfilzungsfreien elektrischen Bürstenrolle kann verhindert werden, dass sich die Haare in der Bürstenrolle verheddern, wodurch die Wartungshäufigkeit verringert und die Lebensdauer des Staubsaugers Drücken Sie die Taste, um den Dauermodus zu aktivieren, und drücken Sie verlängert wird.
- Página 27 Routinemäßige Reinigung Leicht zu entleerender Staubbehälter Fest drücken, um den Staubbehälter zu schließen. Halten Sie den Staubbehälter über einen Mülleimer und drücken Sie dann die Freigabetaste des Staubbehälters. Reinigung des Staubsensors Drehen und entfernen Sie den Staubbehälter und reinigen Sie den Sensorbereich mit einem weichen, trockenen Tuch.
- Página 28 Pflege und Wartung Reinigung der Filtereinheit Spülen Sie den Staubbehälter, den Vorfilter, den Filter und den Schwammfilter unter fließendem Leitungswasser aus, bis sie sauber sind, und legen Sie alle Entfernen Sie die Filtereinheit vom Staubbehälter, schrauben Sie den Filter vom Teile mindestens 24 Stunden lang beiseite, bis sie vollständig getrocknet sind.
- Página 29 Status-Fehler Wenn der Staubsauger nicht ordnungsgemäß funktioniert, zeigt die Anzeige einen Fehlercode an. In der folgenden Tabelle können Sie anhand der Fehlermeldung die Lösung für das Problem finden. Fehler-Symbol Fehlermeldung Lösung Entfernen Sie etwaige Verstopfungen aus dem Staubbehälter, dem Vorfilter, dem Filter, dem Strömungsweg blockiert Verlängerungsrohr, der Bürstenrolle und der Düse.
- Página 30 Precaución No enjuague directamente la aspiradora, la barra del cepillo eléctrico No aspire sustancias combustibles o humeantes, como colillas de cigarrillos antienredos o el cepillo eléctrico antiácaros. encendidas, ni objetos duros o afilados, como uñas. Para no sufrir lesiones, no toque las piezas giratorias mientras la aspiradora esté...
- Página 31 Instalación Instalar los accesorios en la aspiradora La boquilla estará conectada al La boquilla estará conectada al hacer clic hacer clic Barra del cepillo eléctrico antienredos Boquilla con C e p i l l o e l é c t r i c o Boquilla para cepillo hendiduras...
- Página 32 Funciones de la pantalla Pulse para cambiar el idioma. Indicador del estado de la batería Pantalla de estado Auto English Botón de Nivel de Botón de bloqueo succión/Idioma Configuración del idioma Para utilizar el idioma seleccionado, mantenga pulsado el botón durante segundos o no realice ninguna operación durante 5 segundos.
- Página 33 Modo de uso Cómo usar el botón de encendido para encender la Usar la barra del cepillo eléctrico antienredos puede ayudar a evitar que el pelo se enrede en el cepillo de rodillo, reduciendo la necesidad de realizar tareas de aspiradora mantenimiento y alargando la vida útil de la aspiradora.
- Página 34 Limpieza rutinaria Compartimento de polvo fácil de vaciar Presione suavemente el compartimento de polvo para cerrarlo. Mantenga el compartimento de polvo sobre un cubo de basura y pulse el botón para extraer el polvo. Limpieza del sensor de polvo Gire y retire el compartimento del polvo y luego limpie la zona del sensor con un paño suave y seco.
- Página 35 Cuidado y mantenimiento Limpieza del conjunto del filtro Enjuague el compartimento de polvo, el prefiltro, el filtro y el filtro de esponja con agua del grifo hasta que estén limpios. A continuación, deje que se sequen Retire el conjunto del filtro del compartimento de polvo. Desenrosque el filtro por completo durante al menos 24 horas.
- Página 36 Error de estado Si la aspiradora no funciona con normalidad, en la pantalla aparecerá un mensaje de error. Consulte la tabla siguiente para encontrar la solución al problema en función del mensaje de error. Icono del error Mensaje de error Solución Quite las obstrucciones del compartimento de polvo, el prefiltro, el filtro, la Conducto de aire bloqueado...
- Página 37 Precaução Não passe diretamente o aspirador, a escova elétrica antiemaranhamento ou a Não aspire substâncias ardentes ou que estejam a fumar, como beatas de escova elétrica de limpeza de ácaros por água. cigarro mal apagadas, ou objetos duros e afiados, como pregos. Para evitar ferimentos, não toque nas peças rotativas enquanto o aspirador estiver a funcionar.
- Página 38 Instalação Instalar os acessórios no aspirador Clique para encaixar Clique para encaixar Escova elétrica antiemaranhamento Bocal com escova Escova elétrica de Bocal para fissuras limpeza de ácaros...
- Página 39 Funções do ecrã Prima para alterar o idioma. Indicador do estado da Ecrã do estado bateria Auto English Nível de sucção/Botão de idioma Botão de bloqueio Definição do idioma Para utilizar o idioma selecionado, mantenha o botão premido durante segundos ou não efetue nenhuma operação durante 5 segundos. Mantenha premido o botão durante 3 segundos para abrir a lista de idiomas e, de seguida, prima o botão para percorrer a lista até...
- Página 40 Como utilizar Utilizar o botão de alimentação para ligar o aspirador Utilizar a escova elétrica antiemaranhamento pode ajudar a evitar que os cabelos fiquem presos na escova rotativa, reduzindo a frequência de manutenção e prolongando a vida útil do aspirador. Prima o botão para ativar o Modo Contínuo e, de seguida, prima o botão de * É...
- Página 41 Limpeza de rotina Compartimento do pó de esvaziamento fácil Prima firmemente para fechar o compartimento do pó. Segure o compartimento do pó sobre um caixote do lixo e, de seguida, prima o botão de desbloqueio do pó. Limpar o sensor do pó Gire e remova o compartimento do pó...
- Página 42 Cuidados e manutenção Limpar a unidade de filtro Lave o compartimento do pó, o pré-filtro, o filtro e o filtro de esponja com água corrente até ficarem limpos. De seguida, coloque todas as peças de lado para Remova a unidade de filtro do compartimento do pó. De seguida, desaparafuse que sequem completamente durante, pelo menos, 24 horas.
- Página 43 Erros de estado Se o aspirador não estiver a funcionar corretamente, irá aparecer uma mensagem de erro no ecrã. Consulte a tabela de resolução de problemas abaixo para descobrir a solução adequada com base na mensagem de erro. Ícone de erro Mensagem de erro Solução Limpe todas as eventuais obstruções no compartimento do pó, pré-filtro,...
- Página 44 Меры предосторожности Не промывайте пылесос, электрическую щетку с защитой от наматывания Не убирайте с помощью пылесоса горящие или дымящиеся вещества или электрическую щетку против клещей непосредственно водой. (например, непогашенные окурки), а также твердые или острые предметы (например, гвозди). Во избежание травм не прикасайтесь к вращающимся деталям...
- Página 45 Установка Установка аксессуаров на пылесос Установите до щелчка Установите до щелчка Электрическая щетка с защитой от наматывания Насадка-щетка Электрическая щетка Щелевая насадка против клещей...
- Página 46 Функции дисплея Нажмите , чтобы сменить язык. Индикатор состояния Дисплей аккумулятора состояния Auto English Кнопка уровня всасывания / Кнопка блокировки выбора языка Установка языка Чтобы использовать выбранный язык, нажмите и удерживайте кнопку в течение 3 секунд или ничего не делайте в течение 5 секунд. список...
- Página 47 Инструкция Включение пылесоса с помощью кнопки питания Используя электрическую щетку с защитой от наматывания, можно предотвратить спутывание волос на роликовой щетке, благодаря чему необходимость в сервисном обслуживании будет не такой частой и Нажмите кнопку для перехода в режим непрерывной работы, а затем продлится...
- Página 48 Обычная уборка Легко опорожняемый отсек для пыли Сильно нажмите, чтобы закрыть отсек для пыли. Удерживая отсек для пыли над мусорным ведром, нажмите кнопку сброса пыли. Очистка датчика пыли Прокрутите и вытащите отсек для пыли, затем протрите область датчика мягкой сухой тканью. Датчик...
- Página 49 Уход и техническое обслуживание Очистка блока фильтра Промывайте контейнер для пыли, фильтр предварительной очистки, фильтр и губчатый фильтр под проточной водой, пока они не станут чистыми, затем Вытащите блок фильтра из отсека для пыли, затем открутите фильтр от отложите все детали, чтобы они полностью высохли, хотя бы на 24 часа. фильтра...
- Página 50 Ошибки состояния Если пылесос не работает надлежащим образом, на дисплее появится сообщение об ошибке. Способ устранения той или иной ошибки можно найти в приведенной ниже таблице устранения неполадок. Значок ошибки Сообщение об ошибке Решение Очистите отсек для пыли, фильтр предварительной очистки, фильтр, Воздушный...
- Página 51 Przestroga Nie płukać wodą odkurzacza, elektrycznej szczotki zapobiegającej plątaniu ani Nie odkurzać płonących lub dymiących substancji, takich jak niegaszone elektrycznej szczotki przeciw roztoczom. niedopałki papierosów, ani twardych lub ostrych przedmiotów, takich jak gwoździe. Aby zapobiec obrażeniom, nie należy dotykać obracających się elementów podczas pracy odkurzacza.
- Página 52 Montaż Montaż akcesoriów na odkurzaczu Zatrzaśnięcie na miejscu Zatrzaśnięcie na miejscu Szczotka elektryczna zapobiegająca plątaniu Dysza ze szczotką Elektryczna szczotka Dysza szczelinowa przeciw roztoczom...
- Página 53 Funkcje wyświetlacza Nacisnąć , aby zmienić język. Wskaźnik poziomu Wyświetlacz statusu naładowania akumulatora Auto English Przycisk siły ssącej/języka Przycisk blokowania Ustawianie języka Aby użyć wybranego języka, należy nacisnąć i przytrzymać przycisk przez sekundy lub nie wykonywać żadnych działań przez 5 sekund. Nacisnąć...
- Página 54 Użytkowanie Używanie przycisku zasilania do włączania odkurzacza Korzystanie z elektrycznej szczotki zapobiegającej plątaniu się włosów na szczotce z wałkiem zmniejsza częstotliwość konserwacji i wydłuża żywotność odkurzacza. W trybie czuwania odkurzacza nacisnąć przycisk, aby włączyć tryb ciągły, a * Czasem na szczotce wałkowej gromadzi się niewielka ilość włosów. W szczotce elektrycznej następnie nacisnąć...
- Página 55 Rutynowe czyszczenie Łatwy do opróżnienia pojemnik na kurz Nacisnąć mocno, aby zamknąć pojemnik na kurz. Przytrzymać pojemnik na kurz nad koszem na śmieci, a następnie nacisnąć przycisk usuwania kurzu. Czyszczenie czujnika kurzu Obrócić i wyjąć pojemnik na kurz, a następnie wyczyścić obszar czujnika miękką, suchą...
- Página 56 Dbanie o urządzenie i konserwacja Czyszczenie zespołu filtra Wypłukać pojemnik na kurz, filtr wstępny, filtr i filtr gąbkowy pod bieżącą wodą do czystości, a następnie odłożyć wszystkie części do całkowitego wyschnięcia Wyjąć zespół filtra z pojemnika na kurz, a następnie odkręcić filtr od filtra na co najmniej 24 godziny.
- Página 57 Błąd statusu Jeśli odkurzacz nie działa prawidłowo, na wyświetlaczu pojawi się komunikat o błędzie. Prosimy o zapoznanie się z poniższą tabelą rozwiązywania problemów, aby znaleźć rozwiązanie na podstawie komunikatu o błędzie. Ikona błędu Komunikat o błędzie Rozwiązanie Usunąć wszelkie blokady z pojemnika na kurz, filtra wstępnego, filtra, Zatkany przewód powietrzny przedłużenia, szczotki i dyszy.
- Página 58 Önlem Elektrikli süpürgeyi, elektrikli saç dolanmasını önleyici fırçayı veya elektrikli akar Sönmemiş sigara izmaritleri gibi yanan veya dumanı tüten maddeleri ya da çivi fırçasını doğrudan suyla durulamayın. gibi sert veya keskin nesneleri süpürmeyin. Yaralanmaları önlemek için elektrikli süpürge çalışırken dönen parçalara dokunmayın. Elektrikli süpürgeyi radyatör, mutfak veya banyo gibi ısı...
- Página 59 Kurulum Aksesuarları Elektrikli Süpürgeye Takma Yerine Takın Yerine Takın Elektrikli Saç Dolanmasını Önleyici Fırça Fırça Başlığı Elektrikli akar fırçası Aralık Başlığı...
- Página 60 Ekran İşlevleri Dili değiştirmek için düğmesine basın. Pil Durumu Göstergesi Durum Ekranı Auto English Emme Seviyesi/Dil Düğmesi Kilit Düğmesi Dili Ayarlama Seçili dili kullanmak için düğmeyi 3 saniye basılı tutun ya da 5 saniye boyunca işlem yapmayın. Dil listesini açmak için düğmeyi 3 saniye boyunca basılı...
- Página 61 Kullanım Elektrikli Süpürgeyi Açmak İçin Açma Kapatma Düğmesini Elektrikli saç dolanmasını önleyici fırçayı kullanmak, saçların döner fırçaya dolanmasını önlemeye yardımcı olarak bakım sıklığını azaltır ve elektrikli Kullanma süpürgenin hizmet ömrünü uzatır. * Döner fırçada zamanla az miktarda saç birikmesi normaldir. Elektrikli saç dolanmasını önleyici Sürekli Modu etkinleştirmek için düğmeye basın.
- Página 62 Rutin Temizlik Kolay Boşaltılan Toz Haznesi Toz haznesini kapatmak için sıkıca bastırın. Toz haznesini bir çöp kutusunun üzerine getirin. Ardından toz boşaltma düğmesine basın. Toz Sensörünü Temizleme Toz haznesini döndürerek çıkarın. Daha sonra sensör alanını yumuşak, kuru bir bezle temizleyin. Toz Sensörü...
- Página 63 Bakım Filtre Grubunu Temizleme Toz haznesini, ön filtreyi, filtreyi ve sünger filtreyi temizlenene kadar musluk suyu altında durulayın. Daha sonra tüm parçaları en az 24 saat tamamen Filtre grubunu toz haznesinden çıkarın. Daha sonra filtreyi ön filtreden sökün ve kurumaya bırakın. sünger filtreyi filtreden çıkarın.
- Página 64 Durum Hataları Elektrikli süpürge düzgün çalışmıyorsa ekranda bir hata mesajı görüntülenir. Çözümü hata mesajına göre bulmak için lütfen aşağıdaki sorun giderme tablosuna bakın. Hata simgesi Hata İletisi Çözüm Toz haznesi, ön filtre, filtre, uzatma çubuğu, fırça ve başlıktaki tüm Hava Kanalı Tıkalı tıkanıklıkları...