Publicidad
Enlaces rápidos
560LF--PP, 560LF--PP-1.0
560LF--PP-LPU
MODERN CYLINDRICAL
SÉRIE MODERN CYLINDRICAL
SERIE MODERN CYLINDRICAL
FOR EASY INSTALLATION OF YOUR DELTA FAUCET YOU WILL NEED:
• To READ ALL the instructions completely before beginning.
• To READ ALL warnings, care and maintenance information.
• To purchase the correct water supply hook-up.
POUR INSTALLER VOTRE ROBINET DELTA FACILEMENT, VOUS DEVEZ:
• LIRE TOUTES les instructions avant de débuter;
• LIRE TOUS les avertissements ainsi que toutes les instructions de nettoyage et d'entretien;
• Acheter le bon nécessaire de raccordement.
PARA INSTALACIÓN FÁCIL DE SU LLAVE DELTA USTED NECESITARÁ:
• LEER TODAS las instrucciones completamente antes de empezar.
• LEER TODOS los avisos, cuidados, e información de mantenimiento.
• Comprar las conexiones correctas para el suministro de agua.
PLEASE LEAVE the Maintenance & Installation (M&I) manual with owner for maintenance and troubleshooting information.
VEUILLEZ LAISSER le Guide d'entretien et d'installation au propriétaire pour les informations d'entretien et de dépannage.
DEJE manual de mantenimiento e instalación con el dueño a fines de información de mantenimiento y resolución de problemas
Robinet de lavabo à poignée unique
Llaves Monocontrol Para Lavamano
SERIES
TM
MD
TM
INSTALLATION NOTES
NOTES SUR L'INSTALLATION
NOTAS DE INSTALACIÓN
YOU MAY NEED
ARTICLES DONT VOUS POUVEZ AVOIR BESOIN
USTED PUEDE NECESITAR
1.25" (32mm)
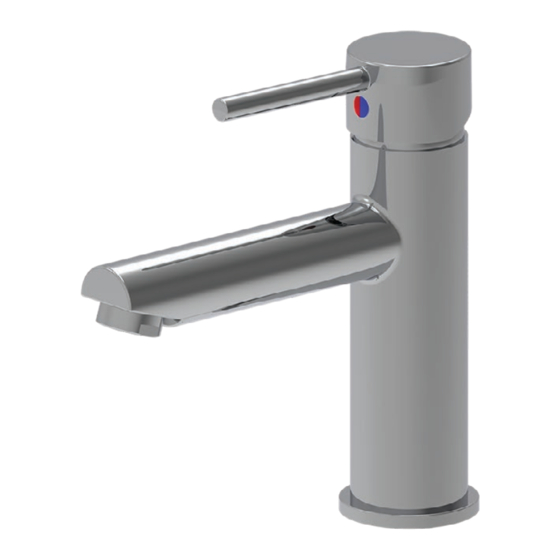
Single Handle Lavatory Faucet
10 mm
214819, Rev. D
Publicidad

Manuales relacionados para Delta MODERN CYLINDRICAL Serie


Resumen de contenidos para Delta MODERN CYLINDRICAL Serie
- Página 1 INSTALLATION NOTES NOTES SUR L’INSTALLATION NOTAS DE INSTALACIÓN FOR EASY INSTALLATION OF YOUR DELTA FAUCET YOU WILL NEED: • To READ ALL the instructions completely before beginning. • To READ ALL warnings, care and maintenance information. • To purchase the correct water supply hook-up.
- Página 2 PRODUCT DIMENSION DIMENSIONS DU PRODUIT DIMENSIONES DEL PRODUCTO 6.6" (168mm) 4.4" (112mm) 7.75" 6.0" (152mm) (197mm) Optional 6.8" Escutcheon (173mm) Écusson 3.7" en option 4.375" (94mm) Chapetón Ø 2.0" (111mm) 5.25" opcional (51mm) (133mm) 0.1875" (5mm) 3.0" 2.25" (57mm) (77mm) Ø...
- Página 3 Item QTÉ Article Description Description Descripción CANT. Artículo 560LF-PP 560LF-PP-LPU Faucet body Corps du robinet Cuerpo de la llave Single hole escutcheon Écusson monotrou Chapetón de un solo agujero Deck gasket Joint de comptoir Junta de la mesada Mounting stud Goujon de fixation Perno de montaje Mounting plate gasket...
- Página 4 INSTALLATION INSTALLATION INSTALACIÓN Step 1. FAUCet pLACeMeNt - SINGLe HOLe INStALL Figure 1 (see Figure 1) 1. Remove old faucet and clean off any debris left on the sink/countertop. 2. Position faucet body (A) and escutcheon (B) and deck gasket (C) on sink/countertop.
- Página 5 Figure 2 * Supplied by others Fourni par d’autres Suministrado por otros Step 2. DRAIN ASSeMBLY INStALLAtION (see Figure 2) FLANGE SEAL 1. Apply silicone to underside of flange (P). Insert flange (P) into sink drain hole. DRAIN INSTALL 1. Install black gasket (Q), washer (R) and nut (S) onto flange (P) from below sink but do not tighten nut (S). CAUTION DO NOT turn flange (P) while tightening nut (S) or sealant may not seal drain.
- Página 6 ÉtApe 2. INStALLAtION De L’eNSeMBLe De DRAIN (voir Figure 2) JOINT DE BRIDE 1. Appliquer de la silicone sur le dessous de la bride (P). Insérez la bride (P) dans le drain de l’évier. INSTALLATION DU DRAIN 1. Installez le joint noir (Q), la rondelle (R) et l’écrou (S) sur la bride (P) depuis le dessous de l’évier mais ne serrez pas l’écrou (S). NE PAS tourner la bride (P) pendant que le serrage de l’écrou (S) sinon le produit d’étanchéité...
- Página 7 Step 3. WAteR LINe CONNeCtIONS (see Figure 3) Figure 3 1. Ensure all fittings and end connections are free of debris. 2. Connect the faucet supply lines (H & I) to the supply valves (ZC*) (not supplied). NOTICE Hot water supply line (H) is marked with a red flag label (H-1) and the cold water supply line (I) is marked with a blue flag label (I-1).
- Página 8 Step 4. Step 4 - FLUSH SYSteM/CHeCK FOR LeAKS (see Figure 4 Figure 4) 1. Remove the aerator (J) from the body (A) with a wrench (T3). 2. Turn on hot and cold water supplies (ZC*). 3. Turn the faucet handle (AC) up to the full “ON” position and flush water lines for one minute.
- Página 9 REPAIR PARTS PIÈCES DE RECHANGE PARTES DE REPARACIÓN RP78367 RP78359 Cartridge Escutcheon & Base plate - Optional Cartouche Rosace et plaque de finition - Optionnel Cartucho Chapetón y placa de base - Opcional RP78360 Lift rod plug Tapón de la barra de elevación RP61340-1.2 Prise du levier de soulèvement 1.2 gpm (4.5 L/min)
-
Página 10: Maintenance Entretien Mantenimiento
MAINTENANCE ENTRETIEN MANTENIMIENTO ADJUSTING THE HOT LIMIT STOP (see Figure 5) Figure 5 CAUTION • Installation should be in accordance with local plumbing and building codes. • It is recommended to use an ASSE 1070/ASME A112.1070/CSA B125.70 Blue water temperature limiting device. Rouge Bleu •... - Página 11 5. Installez la butée de limite d’eau chaude (AH) dans la position souhaitée sur la cartouche du robinet (AI), en alignant le marqueur (AH-2) dans la position désirée. 6. Vérifiez que la butée de température d’eau chaude (AH) est réglée à la température souhaitée en : a.
- Página 12 NOTICE SHUT OFF WATER SUPPLIES prior to doing any maintenance. Figure 6 IF FAUCET LEAKS FROM UNDER HANDLE: 1. Remove handle (AC), by removing set screw (AE) located under the temperature indicator button (AD). 2. Remove decorative cap (AF) and tighten bonnet nut (AG) with a wrench (T3). IF LEAK PERSISTS: 1.
- Página 13 What You Must Do To Obtain Warranty Service or Replacement Parts A warranty claim may be made and replacement parts may be obtained by calling 1 800 345 DELTA (3358) or by contacting us by mail or online as follows (please include your model number and date of purchase):...
- Página 14 LA MESURE MESURE MAXIMALE PERMISE PAR LA LOI, CETTE GARANTIE NE COUVRE PAS, ET DELTA FAUCET COMPANY DÉCLINE TOUTE RESPONSABILITÉ Les pièces électroniques (autres que les piles), le cas échéant, de ce robinet Delta DES DOMMAGES SPÉCIAUX, FORTUITS OU CONSÉCUTIFS (Y COMPRIS LES sont garanties à...
- Página 15 MAUVAIS(E) OU INCORRECTEMENT RÉALISÉ(E), Y COMPRIS LE DÉFAUT DE normales. Si se justifi ca la reparación o el reemplazo, Delta Faucet Company puede SUIVRE LES INSTRUCTIONS D’INSTALLATION, DE SOINS ET DE NETTOYAGE decidir devolverle el importe de la compra a cambio de la devolución del producto.