Registrarse
Cargar
Manuales
Marcas
Mitsubishi Electric Manuales
Acondicionadores de Aire
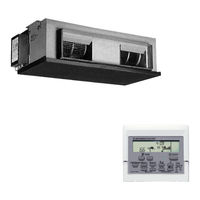
PEA-RP250GA
Mitsubishi Electric PEA-RP250GA Manuales
Manuales y guías de usuario para Mitsubishi Electric PEA-RP250GA. Tenemos
2
Mitsubishi Electric PEA-RP250GA manuales disponible para descarga gratuita en PDF: Manual De Instalación, Para El Usuario
Mitsubishi Electric PEA-RP250GA Manual De Instalación (184 páginas)
Marca:
Mitsubishi Electric
| Categoría:
Acondicionadores de Aire
| Tamaño: 3.35 MB
Tabla de contenido
English
7
1 Safety Precautions
7
Tabla de Contenido
7
Before Installation
7
Before Electrical Work
8
Before Installation (Relocation)
8
Before Starting the Test Run
8
2 Indoor Unit Accessories
8
3 Selecting an Installation Site
8
Install the Indoor Unit on a Ceiling Strong Enough to Sustain Its Weight
8
Securing Installation and Service Space
8
Combining Indoor Units with Outdoor Units
9
4 Fixing Hanging Bolts
9
5 Installing the Unit
9
Hanging the Unit Body
9
Confirming the Unit's Position and Fixing Hanging Bolts
9
6 Refrigerant Pipe and Drain Pipe Specifications
10
Refrigerant Pipe, Drain Pipe and Filling Port
10
7 Connecting Refrigerant Pipes and Drain Pipes
10
Refrigerant Piping Work
10
Drain Piping Work
10
8 Duct Work
11
9 Electrical Wiring
11
10 System Control
12
Grouping by Using LCD Remote Controller
12
Examples of Refrigerant System Address Setting
12
11 LCD Remote Controller
13
Installing Procedures
13
Connecting Procedures
13
Fitting the Upper Case
13
Function Selection
13
12 Test Run
17
Before Test Run
17
Test Run Procedures
17
Self-Check
18
Remote Controller Check
18
13 Troubleshooting
19
How to Handle Problems with the Test Run
19
The Following Occurrences Are Not Problems or Errors
20
Deutsch
21
1 Sicherheitsvorkehrungen
21
Vor der Installation
22
Vor der Installation (Verlegung)
22
Vor Durchführung von Elektroarbeiten
22
Vor Installationsbeginn
22
2 Versorgungseinrichtungen der Innenanlage
22
3 Einen Aufstellort Wählen
23
Die Innenanlage an einer Decke Montieren, die Stark Genug Ist, um das Gewicht zu Halten
23
Sicherstellen des Freiraums für Montage und Wartung/Bedienung
23
Innenanlagen mit Außenanlagen Verbinden
23
4 Befestigung der Hängebolzen
23
5 Aufstellen der Anlage
24
Aufhängen des Anlagenkörpers
24
Sich über die Richtige Lage der Anlage Vergewissern und die Hängebolzen Befestigen
24
6 Technische Daten der Kältemittel- und Auslaufrohrleitung
24
Kältemittelrohr, Auslaufrohr und Einfüllöffnung
24
7 Kältemittel- und Auslaufrohrleitungen Anschließen
24
Verrohrung der Kältemittelleitung
24
Verrohrung des Auslaufs/Der Dränage
25
8 Arbeiten am Strömungskanal
25
9 Elektroverdrahtung
26
10 Systemsteuerung
27
Gruppierung mit LCD-Fernbedienung
27
Beispiele für Kältemittelsystemadressen-Einstellung
27
11 LCD-Fernbedienung
27
Installationsabläufe
27
Anschlußverfahren
28
Anbringung des Oberen Kastens
28
Funktionswahl
28
12 Testlauf
32
Vor dem Testlauf
32
Testlaufverfahren
32
Selbsttest
33
Test der Fernbedienung
34
13 Fehlerbehebung
35
Handhabung von Problemen Beim Testlauf
35
Die Folgenden Erscheinungen Stellen keine Probleme oder Fehler Dar
35
Français
36
1 Consignes de Sécurité
36
Avant L'installation
37
Avant L'installation (Déplacement)
37
Avant L'installation Électrique
37
Avant D'effectuer L'essai
37
2 Eléments Qui Accompagnent L'appareil Intérieur
37
3 Comment Choisir le Lieu D'installation
38
Fixer L'appareil Intérieur à un Plafond Suffisamment Résistant pour Supporter Son Poids
38
Prévoir L'espace Nécessaire pour L'installation et L'entretien
38
Association des Appareils Intérieurs et des Appareils Extérieurs
38
4 Fixation des Boulons de Suspension
38
5 Installation de L'appareil
39
Suspension de L'appareil
39
Assurer L'emplacement de L'appareil et Fixer les Boulons de Suspension
39
6 Spécifications Techniques des Tuyaux de Réfrigérant et du Tuyau D'écoulement
39
Spécifications Techniques des Tuyaux de Réfrigérant et D'écoulement
39
Tuyau de Réfrigérant, Tuyau D'écoulement et Port de Remplissage
39
7 Raccordement des Tuyaux de Réfrigérant et D'écoulement
39
Mise en Place des Tuyaux de Réfrigérant
39
Travaux de Mise en Place du Tuyau D'écoulement
40
8 Raccords des Conduites
40
9 Câblage Électrique
41
10 Commande du Système
42
Groupement à L'aide de la Télécommande à LCD
42
Exemples de Réglage D'adresse D'un Système Réfrigérant
42
11 Télécommande à LCD
42
Méthodes D'installation
42
Méthodes de Connnexion
43
Assembler la Partie Supérieure
43
Sélection des Fonctions
43
12 Marche D'essai
47
Avant la Marche D'essai
47
Méthodes de Marche D'essai
47
Auto-Vérification
48
Vérification de la Télécommande
49
13 Guide de Dépannage
50
Comment Remédier aux Problèmes Survenant Lors de L'essai de Fonctionnement
50
Les Situations Suivantes Ne Constituent Pas des Problèmes ou des Erreurs de Fonctionnement
50
Español
51
Componentes Suministrados con la Unidad Interior
52
Precauciones
52
Antes de la Instalación
52
Antes de la Instalación (Reubicación)
52
Antes del Trabajo Eléctrico
52
Antes de Iniciar el Funcionamiento de Prueba
52
Fijación de Los Pernos de Suspensión
53
Selección de un Lugar para la Instalación
53
Instale la Unidad Interior en un Techo Suficientemente Resistente como para Aguantar Su Peso
53
Instalación de Seguridad y Espacio de Mantenimiento
53
Combinación de Unidades Interiores con Unidades Exteriores
53
Conexión de Los Tubos del Refrigerante y de Drenaje
54
Tareas con el Tubo del Refrigerante
54
Tareas con la Tubería de Drenaje
55
Especificaciones de Los Tubos del Refrigerante y de Drenaje
54
Tubo del Refrigerante, Tubo de Drenaje y Abertura de Relleno
54
Instalación de la Unidad
54
Suspensión de la Unidad
54
Confirmación de la Posición de la Unidad y Fijación de Los Pernos de Suspensión
54
Empalme de Los Conductos
55
Precauciones
55
Cableado Eléctrico
56
Control del Sistema
57
Agrupación Utilizando el Controlador Remoto con LCD
57
Ejemplos de Ajuste de Direcciones de Sistemas de Refrigerante
57
Controlador Remoto con LCD
57
Procedimientos de Instalación
57
Procedimientos de Conexión
58
Fijación de la Caja Superior
58
Selección de Funciones
58
Prueba de Funcionamiento
62
Antes de Realizar las Pruebas
62
Procedimientos para la Prueba de Funcionamiento
62
Comprobación Automática
63
Comprobación del Control Remoto
64
Localización y Reparación de Averías
65
Cómo Resolver Los Problemas con la Ejecución del Test
65
Las Siguientes Incidencias no Suponen un Problema O un Error
65
Italiano
66
1 Misure DI Sicurezza
66
Prima Dell'installazione
67
Prima Dell'installazione (Riposizionamento)
67
Prima DI Eseguire I Collegamenti Elettrici
67
Prima DI Iniziare la Prova DI Funzionamento
67
2 Accessori Della Sezione Interna
67
3 Selezione del Luogo D'installazione
68
Installare la Sezione Interna Su un Soffitto Sufficientemente Solido da Poterne Sopportare Il Peso
68
Sicurezza Dell'installazione E Spazio DI Servizio
68
Combinazione Delle Sezioni Interne con le Sezioni Esterne
68
4 Fissaggio Dei Bulloni DI Sospensione
68
5 Installazione Dell'unità
69
Sospensione Dell'unità
69
Conferma Della Posizione Dell'unità E Fissaggio Dei Bulloni DI Sospensione
69
6 Specifiche Delle Tubazioni del Refrigerante E DI Drenaggio
69
Tubo del Refrigerante, Tubo DI Drenaggio E Apertura DI Introduzione
69
7 Collegamento Delle Tubazioni del Refrigerante E DI Drenaggio
69
Collegamento Della Tubazione del Refrigerante
69
Collegamento Della Tubazione DI Drenaggio
70
8 Sistemazione Dei Condotti
70
9 Cablaggi Elettrici
71
10 Comando del Sistema
72
Raggruppamento Mediante Il Comando a Distanza con LCD
72
Esempi DI Impostazione Dell'indirizzo del Sistema DI Raffreddamento
72
11 Comando a Distanza con LCD
72
Procedure DI Installazione
72
Procedure DI Collegamento
73
Montaggio Della Scatola Superiore
73
Selezione Delle Funzioni
73
12 Prova DI Funzionamento
77
Operazioni Preliminari Alla Prova DI Funzionamento
77
Procedure Per la Prova DI Funzionamento
77
Autocontrollo
78
Controllare del Comando a Distanza
79
13 Ricerca Dei Guasti
80
Come Risolvere I Problemi Della Prova DI Funzionamento
80
Le Situazioni Seguenti Non Costituiscono Né Problemi Né Errori
80
Dutch
81
1 Veiligheidsvoorschriften
81
Voor Het Installeren
82
Voor Het Installeren (Bij Verplaatsing)
82
Voor Het Elektrisch Installatiewerk
82
Voordat U Het Apparaat Laat Proefdraaien
82
2 Accessoires Binnenapparaat
82
3 Keuze Van de Installatieplaats
83
Installeer Het Buitenapparaat Aan Een Plafond Dat Stevig Genoeg Is Om Het Apparaat te Dragen
83
Ruimte Voor Installatie en Onderhoud
83
Het Combineren Van Binnen- en Buitenapparaten
83
4 Bevestigingsbouten
83
5 Het Apparaat Installeren
84
Het Hoofddeel Ophangen
84
De Positie Van Het Apparaat Controleren en de Ophangbouten Bevestigen
84
6 Specificaties Van Koelstof- en Afvoerpijpen
84
Koelstofpijp, Afvoerpijp en Vulopening
84
7 Koelstofpijpen en Afvoerpijpen Aansluiten
84
Werkzaamheden Aan de Koelstofpijpen
84
Werkzaamheden Aan de Afvoerpijpen
85
8 Werkzaamheden Aan Kanalen
85
9 Elektrische Bedrading
86
10 Systeembediening
87
Groeperen Met de Afstandsbediening Met LCD-Scherm
87
Voorbeelden Voor Koelsysteemadresinstelling
87
11 Afstandbediening Met LCD-Scherm
87
Installatieprocedures
87
Aansluitprocedures
88
De Bovenkast Bevestigen
88
Functiekeuze
88
12 Proefdraaien
92
Voordat U Gaat Proefdraaien
92
Procedure Voor Proefdraaien
92
Zelfcontrole
93
Afstandsbediening Controleren
94
13 Probleemoplossen
95
Problemen Oplossen Tijdens Het Proefdraaien
95
De Volgende Verschijnselen Zijn Geen Storingen of Fouten
95
Svenska
96
1 Säkerhetsåtgärder
96
Innan Installation
96
Innan Installation (Flytt)
97
Innan Elarbeten
97
Innan Provkörning Inleds
97
2 Inomhusenhetens Tillbehör
97
3 Val Av Installationsplats
97
Installera Inomhusenheten I Ett Tak Som Är Tillräckligt Starkt Att Uppbära Dess Vikt
97
Installations- Och Underhållsutrymme
97
Kombinera Inom- Och Utomhusenheter
98
4 Montering Av Upphängningsbultar
98
5 Installation Av Enheten
98
Upphängning Av Enheten
98
Kontrollera Enhetens Position Och Montera Upphängningsbultarna
98
6 Specifikationer För Kylmedelsrör Och Dräneringsrör
99
Kylmedelsrör, Dräneringsrör Och Påfyllningsöppning
99
7 Anslutning Av Kylmedelsrör Och Dräneringsrör
99
Kylmedelsrörsarbeten
99
Dräneringsrörsarbeten
99
8 Kanaler
100
9 Elektrisk Ledningsdragning
100
10 Systemkontroll
101
Gruppering Med Hjälp Av LCD-Fjärrkontroll
101
Exempel På Kylmedelssystemadressinställningar
101
11 LCD-Fjärrkontroll
102
Installationsrutiner
102
Anslutningsrutiner
102
Montering Av Överdel
102
Funktionsval
102
12 Provkörningen
106
Innan Provkörningen
106
Självkontroll
107
Kontroll För Fjärrkontroll
108
13 Felsökning
109
Problem under Testkörningen
109
Följande Är Inte Fel Eller Problem
109
Dansk
110
1 Sikkerhedsforanstaltninger
110
Inden Installation
111
Inden Installation (Flytning)
111
Inden El-Arbejde
111
Inden Start Af Testkørsel
111
2 Tilbehør Til Indendørsenhed
111
3 Valg Af Montagested
111
Installér Indendørsenheden På et Loft, der er Stærkt Nok Til at Bære Dens Vægt
111
Sørg for Tilstrækkelig Plads Til Installations- Og Servicearbejdet
112
Kombination Af Indendørsenhed Og Udendørsenhed
112
4 Montering Af Ophængsbolte
112
5 Installation Af Enheden
112
Ophænging Af Enheden
112
Bekræftelse Af Enhedens Position Og Fastgørelse Af Ophængsboltene
112
6 Specifikationer for Kølemiddelrør Og Drænrør
113
Kølemiddelrør, Drænrør Og Påfyldningsåbning
113
7 Tilslutning Af Kølemiddel- Og Drænrør
113
Kølemiddelrør
113
Installation Af Drænrør
113
8 Installation Af Kanaler
114
9 El-Arbejde
114
10 Systemkontrol
115
Gruppering Ved Hjælp Af LCD-Fjernbetjeningen
115
Eksempler På Køleanlægsadresseindstilling
115
11 LCD-Fjernbetjening
115
Installationsprocedurer
115
Fremgangsmåde for Tilslutning
116
Montering Af den Overliggende del
116
Funktionsvalg
116
12 Testkørsel
120
Før Testkørsel
120
Testkørselsprocedurer
120
Selvkontrol
121
Kontrol Af Fjernbetjening
122
13 Fejlfinding
123
Sådan Håndteres Problemer Med Testkørslen
123
De Følgende Hændelser er Ikke Problemer Eller Fejl
123
Português
124
1 Instruções de Segurança
124
Antes da Instalação
125
Antes da Instalação (Reposição)
125
Antes de Efectuar O Serviço Eléctrico
125
Antes de Efectuar O Primeiro Teste de Funcionamento
125
2 Acessórios da Unidade Interior
125
3 Seleccionar um Local de Instalação
126
Instale a Unidade Interior Num Tecto Suficientemente Forte para Suportar O Seu Peso
126
Fixar a Instalação E Espaço de Serviço
126
Combinar as Unidades Interiores Com as Unidades Exteriores
126
4 Fixar os Parafusos de Suspensão
126
5 Instalar a Unidade
127
Pendurar O Corpo da Unidade
127
Confirme a Posição da Unidade E a Fixação Dos Parafusos de Suspensão
127
6 Especificações Do Tubo de Refrigerante E Do Tubo de Drenagem
127
Especificações Do Tubo de Refrigerante E Do Tubo de
127
Drenagem
127
Tubo de Refrigerante, Tubo de Drenagem E Porta de Enchimento
127
7 Ligar os Tubos de Refrigerante E os Tubos de Drenagem
127
Trabalho da Tubagem de Refrigerante
127
Trabalho da Tubagem de Drenagem
128
8 Trabalho da Conduta
128
9 Ligação Eléctrica
129
10 Controlo Do Sistema
130
Agrupamento Pelo Uso Do Controlo Remoto LCD
130
Exemplos de Ajuste de Endereço Do Sistema de Refrigerantes
130
11 Controlo Remoto LCD
130
Procedimentos de Instalação
130
Procedimentos de Ligação
131
Encaixar a Caixa Superior
131
Selecção de Funções
131
12 Ensaio
135
Antes Do Ensaio
135
Instruções de Ensaio
135
Autoverificação
136
Verificação Do Controlo Remoto
137
13 Resolução de Problemas
138
Como Tratar os Problemas Com O Teste de Funcionamento
138
As Seguintes Ocorrências Não São Problemas Nem Erros
138
Ελληνικά
139
1 Προφυλακτικά Μέτρα Ασφαλείας
139
Πριν Την Εγκατάσταση
140
Πριν Την Εγκατάσταση (Αλλαγή Θέσης)
140
Πριν Τις Ηλεκτρικές Εργασίες
140
Πριν Αρχίσετε Την Δοκιµαστική Λειτουργία
140
2 Προµήθειες Εσωτερικής Μονάδας
140
3 Εκλογή Σηµείου Εγκατάστασης
140
Εγκαταστήσατε Την Εσωτερική Μονάδα Σε Ταβάνι Το Οποίο Έχει Αρκετή Ανθεκτικ Τητα Για Το Βάρος
141
Εξασφάλιση Του Χώρου Εγκατάστασης Και Σέρβις
141
Συνδυασµ Σ Εσωτερικής Μονάδας Με Εξωτερική Μονάδα
141
4 Τοποθέτηση Μπουλονιών Κρεµάσµατος
141
5 Εγκατάσταση Της Μονάδας
141
Κρέµασµα Του Σώµατος Μονάδας
141
Εξακρίβωση Της Θέσης Της Μονάδας Και Τοποθέτηση Των Μπουλονιών Κρεµάσµατος
142
6 Προδιαγραφές Σωλήνα Ψυκτικού Και Σωλήνα Αποστράγγισης
142
Προδιαγραφές Σωλήνα Ψυκτικού Και Σωλήνα
142
Αποστράγγισης
142
Σωλήνας Ψυκτικού, Σωλήνας Αποστράγγισης Και Στ Μιο Γεµίσµατος
142
7 Σύνδεση Σωλήνων Ψυκτικού Και Αποστράγγισης
142
Σωλήνωση Ψυκτικού
142
Σωλήνωση Αποστράγγισης
143
8 Εργασία Αγωγών
143
9 Ηλεκτρικές Καλωδιώσεις
143
10 Έλεγχος Συστήµατος
144
Οµαδοποίηση Με Τη Χρήση Του LCD Τηλεχειριστηρίου
144
Παραδείγµατα Ρύθµισης Διευθύνσεων Ψυκτικού Συστήµατος
144
11 LCD Τηλεχειριστήριο
145
Ιαδικασίες Εγκατάστασης
145
Ιαδικασία Σύνδεσης
145
Τοποθέτηση Της Πάνω Θήκης
145
Επιλογή Λειτουργίας
146
12 Οκιµαστική Λειτουργία
149
Πριν Τη Δοκιµαστική Λειτουργία
149
Ιαδικασία Δοκιµαστικής Λειτουργίας
149
Ιαγνωστικ Σ Έλεγχος
150
Έλεγχος Τηλεχειριστηρίου
151
13 Αντιµετώπιση Προβληµάτων
152
Πώς Να Αντιµετωπίσετε Προβλήµατα Με Τη Δοκιµαστική Λειτουργία
152
Τα Παρακάτω Δεν Αποτελούν Προβλήµατα Ή Σφάλµατα
152
Türkçe
153
1 Güvenlik Önlemleri
153
Montajdan Önce
153
Montajdan Önce (Yer Deqixtirme)
154
Elektrik Tesisatwndan Önce
154
Test Amaçlw Çalwxtwrmadan Önce
154
2 Wç Ünite Aksesuarlarw
154
3 Montaj Yerini Seçme
154
Wç Üniteyi Aqwrlwqwnw Kaldwrabilecek Saqlamlwkta Bir Tavana Monte Etme
154
Montaj Ve Servis Için Gerekli Yeri Saqlama
154
Wç Ünitelerle Dwx Üniteleri Birlextirme
155
4 Askw Cwvatalarwnw Takma
155
5 Üniteyi Monte Etme
155
Ünite Gövdesini Asma
155
Ünitenin Konumunu Doqrulama Ve Askw Cwvatalarwnw Takma
155
6 Soqutucu Borusu Ve Drenaj Borusu Spesifikasyonlarw
156
Soqutucu Borusu, Drenaj Borusu Ve Doldurma Girixi
156
7 Soqutucu Borularwnw Ve Drenaj Borularwnw Baqlama
156
Soqutucu Tesisatw Ixleri
156
Drenaj Tesisatw Ixleri
156
8 Borular
157
9 Elektrik Tesisatw
157
10 Sistem Kontrolü
158
LCD Uzaktan Kumandasw Kullanwlarak Gruplama
158
Soqutucu Sistemi Adres Ayarw Örnekleri
158
11 LCD Uzaktan Kumandasw
159
Montaj Prosedürleri
159
Baqlantw Prosedürleri
159
Üst Kasayw Takma
159
Fonksiyon SeçIMI
159
12 Test Amaçlw Çalwxtwrma
163
Test Amaçlw Çalwxtwrmadan Önce
163
Test Amaçlw Çalwxtwrma Prosedürleri
163
Kendi Kendini Kontrol
164
Uzaktan Kumanda Kontrolü
164
13 Sorun Giderme
165
Test Amaçlw Çalwxtwrma Sorunlarwnw Ele Alma
165
Axaqwdaki Durumlar Sorun Veya Hata Deqildir
166
Publicidad
Mitsubishi Electric PEA-RP250GA Para El Usuario (138 páginas)
Marca:
Mitsubishi Electric
| Categoría:
Acondicionadores de Aire
| Tamaño: 4.97 MB
Tabla de contenido
English
3
1 Safety Precautions
3
Tabla de Contenido
3
Installation
3
Disposing of the Unit
4
During Operation
4
2 Names and Functions of Various Parts
4
3 Operation
5
Switching the Unit ON/OFF
6
Mode Select
6
Selecting a Temperature TEMP
6
Selecting a Fan Speed
6
Setting the Day of the Week and Time
6
Using the Timer
7
Locking the Remote Controller Buttons (Operation Function Limit Controller)
10
Other Indications
10
4 The Smart Way to Use
11
5 Caring for the Machine
11
6 Troubleshooting
12
7 Installation and Transferring Works, and Checking
13
8 Specifications
13
Deutsch
14
1 Sicherheitsvorkehrungen
14
Einbau
14
Während des Betriebs
15
Die Anlage Entsorgen
15
2 Namen und Funktionen der Teile
15
3 Betrieb und Bedienung
16
Die Anlage EIN-/AUSSCHALTEN
17
Betriebsart Wählen
17
Wahl einer Temperatur TEMP
17
Wählen einer Gebläsegeschwindigkeit
17
Einstellen des Wochentags und der Zeit
18
Verwenden des Timers
18
Sperren der Fernbedienungstasten (Beschränkung der Betriebsfunktionen)
21
Weitere Anzeigen
21
4 Geschickte Verwendung
22
5 Pflege
22
6 Fehlerbehebung
22
7 Installierung, Verlegung und Inspektion
24
8 Technische Daten
24
Français
25
1 Consignes de Sécurité
25
Installation
25
Pendant le Fonctionnement
26
Rangement de L'appareil
26
2 Noms et Fonctions des Différents Éléments
26
3 Fonctionnement
27
Pour ALLUMER/ÉTEINDRE le Climatiseur
28
Choix du Mode
28
Sélection D'une Température TEMP
28
Sélection D'une Vitesse de Ventilation
29
Régler le Jour de la Semaine et L'heure
29
Utiliser le Programmateur
29
Verrouiller les Boutons de la Télécommande (Limite de Fonctionnement D'opération)
32
Autres Indications
32
4 Comment Utiliser le Climatiseur Intelligemment
33
5 Entretien de L'appareil
33
6 Guide de Dépannage
34
7 Travaux D'installation et de DéMénagement et Vérification
35
8 Spécifications Techniques
35
Español
36
1 Medidas de Seguridad
36
Instalación
36
Durante el Funcionamiento
37
Eliminación de la Unidad
37
2 Nombres y Funciones de Los Diversos Componentes
37
3 Manejo
38
Encendido y Apagado de la Unidad
39
Selección de Modo
39
Ajuste de la Temperatura TEMP
39
Selección de la Velocidad de Ventilador
39
Configuración de Día de la Semana y Hora
40
Utilización del Temporizador
40
Bloqueo de Los Botones del Mando a Distancia (Límite de Función de Operación)
43
Otras Indicaciones
44
4 Consejos Prácticos para Usar el Acondicionador
44
5 Mantenimiento de la Máquina
45
6 Localización de Fallos
45
7 Tareas de Instalación y Traslado y Verificación
46
8 Especificaciones
47
Italiano
48
1 Misure DI Sicurezza
48
Installazione
48
Durante Il Funzionamento Dell'unità
49
Eliminazione Dell'unità
49
2 Nomi E Funzioni Delle Varie Parti
49
3 Funzionamento
50
Accensione/Spegnimento Dell'unità
51
Selezione Della Modalità
51
Impostazione Della Temperatura TEMP
51
Selezione Della Velocità Della Ventola
52
Impostazione del Giorno Della Settimana E Dell'ora
52
Utilizzo del Timer
52
Blocco Dei Pulsanti del Telecomando (Limite DI Funzionamento)
55
Altre Indicazioni
55
4 Uso Ottimale Dell'unità
56
5 Manutenzione Dell'unità
56
6 Ricerca Dei Guasti
57
7 Lavori D'installazione E DI Trasferimento - Ispezione
58
8 Dati Tecnici
58
Dutch
59
1 Veiligheidsvoorschriften
59
Installatie
59
Tijdens Gebruik
60
Het Apparaat Verwijderen
60
2 Naam en Functie Van de Diverse Onderdelen
60
3 Gebruik
61
Het Apparaat In- en Uitschakelen
62
Kiezen Van de Werkingsstand
62
De Temperatuur Instellen TEMP
62
Keuze Van de Ventilatorsnelheid
62
De Dag Van de Week en de Tijd Instellen
63
De Timer
63
De Knoppen Van de Afstandsbediening Vergrendelen (Functiebeperking Van Operation)
66
Andere Indicaties
66
4 Verstandig Gebruik
67
5 Het Apparaat Onderhouden
67
6 Problemen en Oplossingen
68
7 Installatiewerkzaamheden, Verplaatsing en Controle
69
8 Specificatie
69
Svenska
70
1 Säkerhetsåtgärder
70
Installation
70
Under Drift
71
Enhetens Avyttring
71
2 Olika Delars Namn Och Funktioner
71
3 Drift
72
Att Stänga På/Av Enheten
73
Val Av Arbetssätt
73
Inställning Av Temperatur TEMP
73
Val Av en Fläkthastighet
73
Ställa in Veckodag Och Tid
74
Använda Timer
74
Låsa Fjärrkontrollens Knappar (Funktionsbegränsning)
77
Andra Indikationer
77
4 Smart Användning
78
5 Maskinens Skötsel
78
6 Felsökning
78
7 Installation, Flyttningsarbeten Och Kontroll
79
8 Specifikationer
80
Dansk
81
1 Sikkerhedsforanstaltninger
81
Installation
81
Ved Betjening
82
Bortskaffelse Af Enheden
82
2 Navne Og Funktioner På Forskellige Dele
82
3 Drift
83
Start Og Stop Af Enheden
84
Valg Af Modus
84
Valg Af Temperatur
84
Temp
84
Valg Af Ventilatorhastighed
84
Indstilling Af Ugedag Og Tid
85
Anvendelse Af Timeren
85
Låsning Af Fjernbetjeningens Knapper (Funktionsbegrænsning)
88
Andre Meddelelser/Symboler
88
4 Den Smarte Brug Af Anlægget
89
5 Vedligeholdelse Af Anlægget
89
6 Fejlfinding
90
7 Installation Og Aflevering Af Arbejdet, Og Kontrol
91
8 Specifikationer
91
Português
92
1 Precauções de Segurança
92
Instalação
92
Durante O Funcionamento
93
Arrumação Do Aparelho
93
2 Nomes E Funções das Várias Peças
93
3 Funcionamento
94
Ligar/Desligar a Unidade
95
Selecção Do Modo
95
Selecção da Temperatura TEMP
95
Selecção de Uma Velocidade Do Ventilador
95
Acertar O Dia de Semana E a Hora
96
Utilização Do Temporizador
96
Bloquear os Botões Do Controlo Remoto (Limitação de Operações)
99
Outras Indicações
99
4 A Maneira Inteligente de Utilização
100
5 Cuidar da Máquina
100
6 Avarias
101
7 Instalação E Transferência de Trabalhos, E Verificação
102
8 Especificações
102
Úôê˘ï·îùèî¿ Ì¤Ùú
103
Áî·ù¿Ûù·ûë
103
2 Óôì·ù· ηè Ïâèùô˘úáè☠وó ‰È·êôúˆó Âí·úùëì·ùˆó
104
Ù·áì· Ùë˜ Ìô󿉷˜ Û·ó ¿¯Úëûùë
104
Ùë ‰È¿Úîâè· Ïâèùô˘úá
104
3 Âèùô˘úá
105
Õóôèáì· Î·è Îïâ›Ûèìô Ùë˜ Ìôó
106
ÈÏÔÁ‹ ÙúfiÔ˘ ÏÂÈÙÔ˘ÚÁ
106
ÈÏÔÁ‹ Iâúìôîú·û›·˜ TEMP
106
Èïôá‹ Ù·¯‡Ùëù·˜ ·Óâìèûù‹Ú
107
Ƒ‡Iìèûë Ù˘ Ë̤ڷ˜ Ù˘ Â'‰ÔÌ¿‰·˜ Î·È Ù˘ ÒÚ
107
ÃÚ‹ÛË ÙÔ˘ ¯Úôóô‰È·îfiÙë
107
Ï›‰ˆÌ· ÙˆÓ Ï‹ÎÙÚˆÓ ÙÔ˘ ÙËϯÂÈÚÈÛÙËÚ›Ô˘ (Fiúèô ÏÂÈÙÔ˘ÚÁ›·˜)
110
Õïïôè ‰Â›Îùâ
111
4 ͢ÓÔ˜ ÙúfiÔ˜ ¯Ú‹ÛË
111
5 ºúôóù›‰· Áè· Ùô Ì믿Óëì
112
6 Ó›¯Óâ˘ûë 'Ï·'òó
112
7 Úá·û›Â˜ Âáî·ù¿Ûù·ûë˜, Ìâù·êôú¿˜ ηè Âï¤Á¯ô
113
8 Úô‰È·áú·ê
114
Türkçe
115
1 Güvenlik Önlemleri
115
Montaj ‹Fllemi
115
Çal›Flma S›Ras›Nda
116
Cihaz›N At›Lmas
116
2 Cihaz› Oluflturan Çeflitli Parçalar›N Adlar› Ve Ifllevleri
116
3 Çalıfltırma
117
Üniteyi AÇMA/ KAPAMA
118
Mod SeçIMI
118
S›Cakl›K TEMP. Seçme
118
Fan H›Z›N› Seçme
118
Haftan›N Gününün Ve Zaman›N Seçilmesi
119
Zamanlay›C›N›N Kullan›Lmas
119
Uzaktan Kumanda Dü¤Melerinin Kilitlenmesi (‹Fllem Fonksiyon S›N›Rland›Rma Kumandas›)
122
DI¤Er Göstergeler
122
4 Klima Cihaz›N› Ak›Ll›Ca Kullanmak
123
5 Cihaz›N Bak›M
123
6 Ar›Zan›N Bulunmas› Ve Giderilmesi
124
7 Montaj Ve Nakil Iflleri Ve Kontrol
125
8 Spesifikasyonlar
125
Русский
126
1 Меры Предосторожности
126
Установка
126
В Период Эксплуатации
127
Утилизация Прибора
127
2 Названия И Функции Различных Частей
127
3 Эксплуатация
128
Переключение Устройства ON/OFF (ВКЛ./ВЫКЛ.)
129
Выбор Режима ...................................................................... 129 5. Уход За Прибором
129
Выбор Температуры TEMP
129
Установка Дня Недели И Времени
130
Использование Таймера
130
Выбор Скорости Вентилятора
130
Функцией Эксплуатации)
133
Прочая Индикация
133
4 Полезные Советы
134
6 Исправление Неполадок
135
7 Установка, Перемещение И Проверка Работы Оборудования
136
8 Технические Условия
137
Publicidad
Productos relacionados
Mitsubishi Electric PEA-RP200 WKA
Mitsubishi Electric PEA-RP250 WKA
Mitsubishi Electric PEA-RP Serie
Mitsubishi Electric PEA-RP200GA
Mitsubishi Electric PEA-RP400GA
Mitsubishi Electric PEA-RP500GA
Mitsubishi Electric PEA-RP200GAQ
Mitsubishi Electric PEA-RP250GAQ
Mitsubishi Electric PEA-RP400GAQ
Mitsubishi Electric PEA-RP500GAQ
Mitsubishi Electric Categorias
Acondicionadores de Aire
Controladores
Bombas de Calor
Aire Acondicionados
Controles Remotos
Más Mitsubishi Electric manuales
Login
Entrar
O
Iniciar sesión con Facebook
Iniciar sesión con Google
Cargar el manual
Cargar desde el disco
Cargar desde la URL