Registrarse
Cargar
Manuales
Marcas
Olympus Manuales
Accesorios para Camaras
PT-037
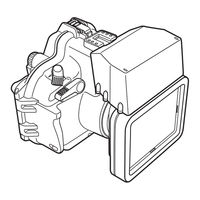
Olympus PT-037 Manuales
Manuales y guías de usuario para Olympus PT-037. Tenemos
1
Olympus PT-037 manual disponible para descarga gratuita en PDF: Manual De Instrucciones
Olympus PT-037 Manual De Instrucciones (300 páginas)
Marca:
Olympus
| Categoría:
Accesorios para Camaras
| Tamaño: 12.85 MB
Tabla de contenido
日本語
8
はじめに
2
ご使用の前に必ずお読みください
2
安全にお使いいただくために
3
電池について
4
カメラモードの設定について
5
お取り扱いについて
6
Tabla de Contenido
8
1 準備をしましょう
10
箱の中を確認します
10
各部名称
11
ディフューザーを取り付けます
13
ストラップを取り付けます
14
基本操作をマスターします
14
プロテクターの構え方
14
シャッターレバーの押し方
15
撮影モードの切り換え方
15
ズームレバーの使い方
15
ズームレバーのセット
16
Powerボタンの操作方法
16
Hボタンの操作方法
17
2 プロテクターの事前チェックをしましょう
18
使用前の事前テスト
18
事前テスト
18
3 デジタルカメラを装填しましょう
19
デジタルカメラをチェックします
19
電池の確認
19
撮影可能枚数の確認
19
デジタルカメラのストラップをはずしましょう
19
カメラを準備します
19
装填できるデジタルカメラは
19
カメラの電源を入れます
19
カメラの動作チェックをします
20
プロテクターを開けます
20
デジタルカメラを装填します
21
シリカゲルを装填します
21
モードダイヤルノブをセットします
22
専用バランスウェイト(別売)を取付けます
23
撮影シーン/撮影モードの確認
24
液晶フードの取り付け方、取りはずし方
25
レンズキャップの取り付け方、取りはずし方
25
4 水中での撮影方法
27
ストラップの使い方
27
フラッシュの使い方
27
撮影しましょう
27
液晶モニタで撮影画面を確認します
27
シャッターレバーを静かに押します
27
フラッシュ撮影時のご注意
27
5 水中撮影シーンに合わせた撮影
28
水中撮影シーンの種類
28
K水中ワイド1
28
L水中ワイド2
28
H水中マクロ
28
撮影シーンの選択方法
29
6 撮影終了後の取り扱い方法
30
水滴を拭き取りましょう
30
デジタルカメラを取り出します
31
プロテクターを真水で洗います
32
プロテクターを乾燥させましょう
32
7 防水機能のメンテナンスをしましょう
33
Oリングを取りはずします
33
Oリングの取りはずしかた
33
Oリングを取り付けます
35
Oリングへのグリス塗布方法
35
消耗品は取り替えましょう
36
English
50
Introduction
44
Please Read the Following Items before Use
44
For Safe Use
45
Batteries
46
Setting the Underwater Shooting Scene Mode
47
Handling the Product
48
1 Preparations
52
Check the Contents of the Package
52
Names of the Parts
53
Attach the Diffuser
55
Install the Strap
56
Master the Basic Operation
56
Holding the Case
56
How to Press the Shutter Lever
57
How to Switch the Shooting Mode
57
How to Use the Zoom Lever
57
Setting the Zoom Lever
58
How to Use the POWER Button
58
How to Use the H Button
59
2 Advance Check of the Case
60
Advance Test before Use
60
Advance Test
60
3 Install the Digital Camera
61
Check the Digital Camera
61
Battery Confirmation
61
Confirmation of the Remaining Number of Pictures to be Taken
61
Remove the Hand Strap from the Digital Camera
61
Prepare the Camera
61
Applicable Digital Cameras
61
Turn on the Digital Camera
61
Check the Camera's Operation
62
Seal the Case
62
Load the Digital Camera
63
Insertion of Silica Gel
63
Set the Mode Dial Knob
64
Make Sure the Camera Is Loaded Properly
64
Seal the Case
65
Attach the Special Balance Weight (Optionally Available)
65
Check the Operation of the Loaded Camera
66
Confirm the Shooting Scene and Shooting Mode
66
Mount/Remove the LCD Hood
67
Mounting and Removing the Lens Cap
67
Perform the Final Checks
67
Visual Inspection
67
Final Test (Water Leakage Test)
68
4 Taking Pictures under Water
69
How to Use the Hand Strap
69
Using the Flash
69
Taking Pictures
69
Confirm the Picture on the LCD Monitor
69
Press the Shutter Lever Gently
69
Cautions When Using the Flash
69
5 Underwater Shooting According to the Scene Type
70
Underwater Shooting Modes
70
Kunderwater Wide-Angle 1
70
Lunderwater Wide-Angle 2
70
Hunderwater Macro
70
How to Select the Shooting Scene
71
6 Handling after Shooting
72
Wipe off any Waterdrop
72
Take out the Digital Camera
73
Wash the Case with Pure Water
74
Dry the Case
74
7 Maintaining the Waterproof Function
75
Remove the O-Ring
75
Removal of the O-Ring
75
Remove any Sand, Dirt, Etc
76
Install the O-Ring
77
How to Apply Grease to the O-Ring
77
Replace Consumable Parts
78
8 Appendix
79
Q & a on the Use of the PT-037
79
Specifications
84
Français
92
1 Préparatifs
94
Contrôle du Contenu de L'emballage
94
Nomenclature des Pièces
95
Fixation du Diffuseur
97
Mise en Place de la Courroie
98
Maîtriser le Fonctionnement de Base
98
Tenue du Caisson
98
Comment Appuyer Sur le Déclencheur
99
Comment Changer le Mode de Prise de Vue
99
Comment Utiliser le Levier de Zoom
99
Réglage du Levier de Zoom
100
Utilisation de la Touche POWER
100
Comment Utiliser la Touche H
101
2 Contrôle Préliminaire du Caisson
102
Test Préliminaire Avant Utilisation
102
Test Préliminaire
102
3 Mise en Place de L'appareil Photo Numérique
103
Contrôle de L'appareil Photo Numérique
103
Contrôle de Batterie
103
Confirmation du Nombre de Vues Restant à Prendre
103
Retirer la Courroie de L'appareil Photo Numérique
103
Préparer L'appareil Photo
103
Appareils Photo Numériques Applicables
103
Mettre en Marche L'appareil Numérique
103
Vérifier le Fonctionnement de L'appareil Photo
104
Ouvrir le Caisson
104
Insérer L'appareil Photo Numérique
105
Introduction du Gel de Silice
105
Régler le Bouton de Molette Mode
106
Vérifier après Insertion
106
Sceller le Caisson
107
Fixer le Contrepoids Spécial (Disponible en Option)
107
Vérifier le Fonctionnement de L'appareil Photo Installé
108
Vérifier le Mode de Prise de Vue et de Scène de Prise de Vue
108
Fixation et Retrait du Cache D'écran ACL
109
Montage et Retrait du Bouchon D'objectif
109
Effectuer les Contrôles Finaux
109
Inspection Visuelle
109
Test Final (Test de Fuite D'eau)
110
4 Prise de Vues Sous L'eau
111
Utilisation de la Dragonne
111
Utilisation du Flash
111
Prise de Vues
111
Confirmer la Vue Sur L'écran ACL
111
Appuyer Doucement Sur le Déclencheur
111
Précaution en Utilisant le Flash
111
5 Prise de Vue Sous-Marine Selon le Type de Scène
112
Types de Scènes Sous-Marines
112
Kgrand Angle Sous-Marin 1
112
Lgrand Angle Sous-Marin 2
112
Hgros Plan Sous-Marin
112
Comment Sélectionner le Mode de Scène de Prise de Vue
113
6 Manipulation après la Prise de Vue
114
Essuyer Toute Goutte D'eau
114
Sortir L'appareil Photo Numérique
115
Laver le Caisson Avec de L'eau Pure
116
Sécher le Caisson
116
7 Maintien de la Fonction D'étanchéité
117
Retirer le Joint
117
Retrait du Joint
117
Retirer Tout Grain de Sable, Poussière, Etc
118
Installer le Joint
119
Comment Appliquer la Graisse Sur le Joint
119
Remplacer les Pièces Consommables
120
8 Annexe
121
Q & R Sur L'utilisation du PT-037
121
Fiche Technique
126
Deutsch
134
1 Vorbereitende Schritte
136
Packungsinhalt auf Vollständigkeit Prüfen
136
Bezeichnung der Teile
137
Die Diffusorscheibe Anbringen
139
Anbringen der Handgelenkschlaufe
140
Grundsätzliche Bedienungsschritte
140
Richtiges Halten des Gehäuses
140
So Betätigen Sie den Auslöserhebel
141
So Wählen Sie ein Neues Aufnahmeprogramm
141
Verwendung des Zoomhebels
141
Einpassen des Zoomreglers in den Zoomhebel
142
So Verwenden Sie die POWER-Taste
142
So Verwenden Sie die H-Taste
143
2 Systemcheck vor Benutzung des Gehäuses
144
Erster Systemcheck vor dem Gebrauch
144
Erster Dichtigkeitstest
144
3 Einsetzen der Digitalkamera
145
Überprüfen der Digitalkamera
145
Batterieleistung
145
Überprüfen der noch Verfügbaren Restaufnahmen
145
Entfernen Sie den Trageriemen von der Digitalkamera
145
Bereiten Sie die Kamera vor
145
Geeignete Digitalkameras
145
Schalten Sie die Digitalkamera ein (ON)
145
Überprüfen Sie die Kamera auf Einwandfreie Funktionsweise
146
Entriegeln des Unterwassergehäuses
146
Einsetzen der Digitalkamera
147
Einlegen des Silicagel-Beutels
147
Richten Sie den Programmwählknopf Einwandfrei aus
148
Überprüfen Sie die Kamera auf Einwandfreie Installation
148
Das Unterwassergehäuse Wasserdicht Verschließen
149
Bringen Sie das Tariergewicht (Optional Erhältlich) an
149
Überprüfen Sie die Eingesetzte Kamera auf Einwandfreie Funktionsweise
150
Überprüfen Sie das Aufnahmeprogramm/Motivprogramm
150
Anbringen/Abnehmen der LCD-Monitor-Blendschutzhaube
151
Anbringen und Abnehmen des Objektivschutzes
151
Abschließende Überprüfung des Gehäuses
151
Visuelle Inspektion
151
4 Unterwasseraufnahmen
153
Verwendung der Handgelenkschlaufe
153
Fotografieren mit Blitz
153
Aufnahmen machen
153
Bildüberwachung auf dem LCD-Monitor
153
Drücken Sie den Auslöserhebel Behutsam und Ruckfrei
153
Bitte Beim Fotografieren mit Blitz Beachten
153
5 Unterwasseraufnahme bei Verwendung eines Aufnahmeprogramms
154
Die Verfügbaren Unterwasser-Aufnahmeprogramme
154
Unterwasser-Weitwinkel 1
154
Unterwasser-Weitwinkel 2
154
H Unterwasser-Nahaufnahme
154
So Wählen Sie ein Aufnahmeprogramm/Motivprogramm
155
6 Behandlung nach dem Gebrauch
156
Entfernen von Wassertropfen
156
Entnehmen Sie die Digitalkamera
157
Reinigen des Gehäuses mit Klarem Wasser
158
Abtrocknen des Gehäuses
158
7 Wartung der Wasserdichtigkeit
159
Entfernen des O-Rings
159
Gehen Sie Hierzu wie Folgt vor
159
Reinigen des O-Rings
160
Anbringen des O-Rings
161
Einfetten des O-Rings
161
Austausch von Verschleißteilen
162
8 Anhang
163
Fragen und Antworten (PT-037)
163
Technische Daten
168
Español
176
1 Preparaciones
178
Compruebe el Contenido del Paquete
178
Nombres de las Piezas
179
Fije el Difusor
181
Coloque la Correa
182
Conozca la Operación Básica
182
Sostener la Caja
182
Cómo Presionar la Palanca del Obturador
183
Cómo Utilizar la Manecilla del Zoom
183
Ajustar la Manecilla del Zoom
184
Cómo Utilizar el Botón POWER
184
Cómo Usar el Botón H
185
2 Verificación Anticipada de la Caja
186
Prueba Anticipada Antes de Su Uso
186
Prueba Anticipada
186
3 Instale la Cámara Digital
187
Compruebe la Cámara Digital
187
Confirmación de Pila
187
Confirmación del Número de Fotos que Se Pueden Hacer
187
Retire la Correa de Mano de la Cámara Digital
187
Prepare la Cámara
187
Cámaras Digitales Compatibles
187
Encender la Cámara Digital
187
Compruebe la Operación de la Cámara
188
Desbloquee la Caja
188
Colocando la Cámara Digital
189
Inserción de Silicagel
189
Ajuste la Rueda de Modo
190
Compruebe la Condición de Colocación de la Cámara
190
Selle la Caja
191
Fije el Contrapeso de Equilibrio Especial (Disponible Opcionalmente)
191
Compruebe la Operación de la Cámara Colocada
192
Confirme el Modo de Escena de Toma Fotográfica y Toma Fotográfica
192
Montaje/Extracción del Parasol de LCD
193
Colocar y Retirar la Tapa del Objetivo
193
Realice las Verificaciones Finales
193
Inspección Visual
193
Prueba Final (Prueba de Filtración de Agua)
194
4 Tomando Fotos Debajo del Agua
195
Cómo Usar la Correa de Mano
195
Usando el Flash
195
Hacer Fotos
195
Confirme la Foto en el Monitor LCD
195
Presione Suavemente la Palanca del Obturador
195
Precaución al Usar el Flash
195
5 Toma Fotográfica Debajo del Agua de Acuerdo al Tipo de Escena
196
Tipos de Escenas de Toma Fotográficas Submarinas
196
Kgran Angular Submarino 1
196
Lgran Angular Submarino 2
196
Hmacro Submarino
196
Cómo Seleccionar el Modo de Toma Fotográfica
197
6 Manipulación Después de la Toma Fotográfica
198
Limpie Secando todo Vestigio de Agua
198
Retire la Cámara Digital
199
Lave la Caja con Agua Pura
200
Seque la Caja
200
7 Manteniendo la Función de Hermeticidad al Agua
201
Retire la Junta Tórica
201
Quite toda Arena, Suciedad, Etc
202
Coloque la Junta Tórica
203
Cómo Aplicar Grasa a la Junta Tórica
203
Reemplace las Piezas Consumibles
204
8 Apéndice
205
Especificaciones
210
汉语
218
检查包装盒中的内容
220
部件名称
221
安装漫射屏
223
安装手带
224
掌握基本操作
224
把持防水机壳的姿势
224
怎样使用快门按钮
225
怎样转换拍摄模式
225
怎样使用调焦按钮
225
设置调焦按钮
226
怎样使用Power按钮
226
H 按钮的操作方法
227
2 防水机壳的预先检查
228
使用前的预先检查
228
预先检查
228
3 装入数码照相机
229
检查数码照相机
229
确认电池
229
确认可拍摄图像数量
229
取下数码照相机上的手带
229
照相机的准备工作
229
可装入哪些型号的数码照相机
229
打开数码相机的电源
229
检查照相机的工作情况
230
打开防水机壳
230
装入数码照相机
231
插入硅胶
231
安装模式拨盘旋钮
232
安装专用平衡砝 (另售
233
拍摄场景/拍摄模式的确认
234
4 水中的拍摄方法
237
怎样使用手带
237
闪光灯的使用方法
237
拍摄照片
237
用液晶显示屏确认拍摄画面
237
轻轻按快门按钮
237
使用闪光灯拍摄时的注意事项
237
5 与水中拍摄场景相吻合的拍摄
238
水中拍摄场景的种类
238
K水中广角1
238
L水中广角2
238
H水中近拍
238
拍摄场景的选择方法
239
6 拍摄后的处理方法
240
擦干水滴
240
取出数码照相机
241
用清水清洗防水机壳
242
晾干防水机壳
242
7 防水功能的维护
243
取下O-环
243
取下O-环的方法
243
安装O-环
245
如何使用O-环软膏
245
更换消耗性零件
246
使用问答
247
조선말/한국어
260
1 시작하기
262
구성품 확인
262
부품 명칭
263
확산판 부착
265
스트랩 연결하기
266
기본 조작 익히기
266
케이스 잡기
266
셔터 버튼 누르는 법
267
촬영 모드의 전환 방법
267
줌 레버 사용법
267
줌 레버 설정
268
Power 버튼 사용법
268
H 버튼의 조작 방법
269
2 케이스 사전 점검
270
사용 전 사전 검사
270
사전 검사
270
3 디지털 카메라 장착
271
디지털 카메라 확인
271
배터리 확인
271
디지털 카메라에서 핸드 스트랩 제거
271
카메라를 준비합니다
271
장착 가능한 디지털 카메라
271
카메라의 전원을 켭니다
271
카메라 동작 체크
272
케이스 열기
272
디지털 카메라 장착
273
실리카겔 삽입
273
모드 다이얼 노브 세트
274
케이스 밀폐
275
촬영 신/촬영 모드의 확인
276
Lcd 후드의 부착법, 제거법
277
렌즈 뚜껑의 장착, 분리
277
최종 점검 수행
277
육안 검사
277
최종 점검
278
4 수중 촬영
279
핸드 스트랩 사용법
279
플래시 사용법
279
Lcd 모니터에서 사진을 확인합니다
279
셔터 버튼을 살며시 누릅니다
279
플래시 사용시 주의 사항
279
5 수중 촬영 신에 맞추어 촬영
280
수중 촬영 신의 종류
280
촬영 신의 선택 방법
281
6 촬영 후 취급 방법
282
디지털 카메라를 꺼냅니다
283
케이스는 물을 이용해 충분히 세척할 수 있습니다
284
케이스 건조
284
7 방수기능 유지관리
285
O-링 제거 방법
285
이물질 제거
286
O-링 설치하기
287
O-링에 윤활제 바르기
287
소모품 교체
288
사용 관련 질의 및 답변
289
제품 규격
294
Publicidad
Publicidad
Productos relacionados
Olympus PT-030
Olympus PT-032
Olympus PT-034
Olympus PT-035
Olympus PT-038
Olympus PT-033
Olympus PT-059
Olympus PT-058
Olympus PT-042
Olympus PT-047
Olympus Categorias
Cámaras Digitales
Objetivos Fotográficos
Camaras
Grabadoras de Voz
Accesorios para Camaras
Más Olympus manuales
Login
Entrar
O
Iniciar sesión con Facebook
Iniciar sesión con Google
Cargar el manual
Cargar desde el disco
Cargar desde la URL