Publicidad
Idiomas disponibles
Idiomas disponibles
Enlaces rápidos
Pontiac GTO 2004-2006
KIT FEATURES
• ISO DDIN Radio Provision
• 95-3528B - Black
• 95-3528G - Gray
KIT COMPONENTS
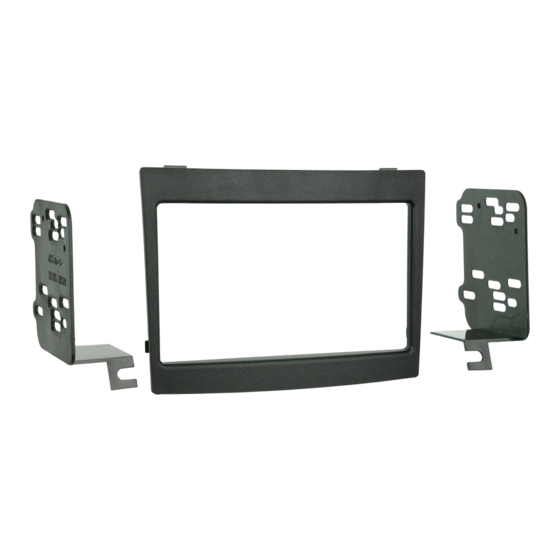
• A) ISO DDIN Brackets • B) ISO DDIN Trim plate
A
B
WIRING & ANTENNA CONNECTIONS (sold separately)
Wiring Harness: • 70-1784
Antenna Adapter: • 40-VW10
TOOLS REQUIRED
• Phillips Screwdriver • Panel Removal Tool • 86-3528 Radio Removal Keys
METRA. The World's best kits.
Installation instructions for part 95-3528
95-3528
metraonline.com
™
Table of Contents
Dash Disassembly ................................................. 2
Kit Assembly
– ISO DDIN radio provision ...................................... 3
CAUTION!
Metra recommends disconnecting the negative bat -
tery terminal before beginning any installation, unless the vehicle
manufacturer recommends against so. Please check with your local
Dealership for more information. All accessories, switches, climate
controls panels, and especially air bag indicator lights must be con -
nected before reconnecting the battery or cycling the ignition. Also,
do not remove the factory radio with the key in the on position, or the
vehicle running. It would be best to remove the key from the ignition
and then wait a few seconds before removing the factory radio.
© COPYRIGHT 2004-2015 METRA ELECTRONICS CORPORATION
Publicidad

Resumen de contenidos para Metra 95-3528
- Página 1 KIT COMPONENTS • A) ISO DDIN Brackets • B) ISO DDIN Trim plate CAUTION! Metra recommends disconnecting the negative bat - tery terminal before beginning any installation, unless the vehicle manufacturer recommends against so. Please check with your local WIRING & ANTENNA CONNECTIONS (sold separately) Dealership for more information.
-
Página 2: Dash Disassembly
95-3528 Dash Disassembly 1. Using the radio removal keys, pull 5. Remove (2) Phillips screws the factory radio from the dash and exposed at the bottom of the disconnect the wiring. (Figure A) center panel surrounding radio and remove panel. (Figure E) 2. -
Página 3: Kit Assembly
(Figure A) 2. Locate the factory wiring harness and antenna plug in the dash and make all necessary connections to the radio. Metra recommends using the proper mating adapters from Metra and/or AXXESS. Re-connect the negative battery... -
Página 4: Important
Installation instructions for part 95-3528 IMPORTANT If you are having difficulties with the installation of this product, please call our Tech Support line at 1-800-253-TECH. Before doing so, look over the instructions a second time, and make sure the installation was performed exactly as the instructions are stated. -
Página 5: Importante
800-354-6782 para obtener más información y avance hacia un futuro mejor. Metra recomienda técnicos con certificación del Programa de Certificación en Electrónica Móvil (Mobile Electronics Certification Program, MECP). METRA. The World’s best kits. metraonline.com ™ © COPYRIGHT 2004-2015 METRA ELECTRONICS CORPORATION... -
Página 6: Ensamble Del Kit
2. Localice el arnés de cableado de fábrica y el conector de la antena en el tablero y haga todas las conexiones necesarias al radio. Metra recomienda que use adaptadores adecuados de acoplamiento de Metra y/o de (Figura A) AXXESS. Vuelva a conectar la terminal negativa de la batería y... - Página 7 95-3528 Desmontaje Dash 5. Quite los (2) tornillos Phillips Usando las llaves de remoción de radio, jale el radio de fábrica del tablero y expuestos en la parte inferior del desconecte el cableado. (Figura A) panel central que rodea el radio y quite el panel.
-
Página 8: Características
Sería mejor retirar la llave de la ignición y esperar unos HERRAMIENTAS REQUERIDAS cuantos segundos antes de quitar el radio de fábrica. • Destornillador Phillips • Herramienta para quitar paneles • Llaves de remoción de radio 86-3528 METRA. The World’s best kits. metraonline.com ™ © COPYRIGHT 2004-2015 METRA ELECTRONICS CORPORATION...


