Dri-Eaz LGR 7000XLi Manual Para El Usuario
Ocultar thumbs
Ver también para LGR 7000XLi:
- Manual para el usuario (37 páginas) ,
- El manual del propietario (34 páginas) ,
- Guia de inicio rapido (3 páginas)
Tabla de contenido
Publicidad
Idiomas disponibles
Idiomas disponibles
Enlaces rápidos
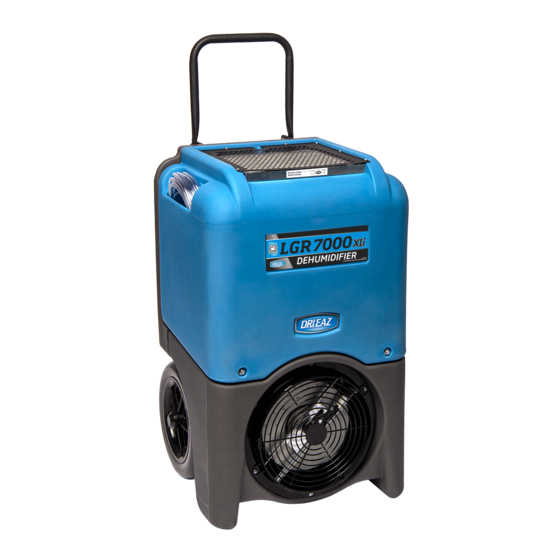
The Dri-Eaz® LGR 7000XLi dehumidifier reduces humidity in enclosed environments by
removing water vapor from the air. The 7000XLi is rugged, durable and highly portable, making
it ideal for water damage restoration, structural drying, construction, and other applications
requiring temporary, high-performance dehumidification.
R E A D A N D S A V E T H E S E I N S T R U C T I O N S
SAFETY INSTRUCTIONS
WARNING
[WARNING! Do not alter or modify your LGR 7000XLi
in any way. Use only replacement parts authorized
by Dri-Eaz Products, Inc. Modifications or use of
unapproved parts could create a hazard and will
void your warranty. Contact your authorized
distributor for assistance.
WARNING! Electric shock hazard, rotating fan, hot
surface hazards. Unplug unit before opening cover
for cleaning or servicing. Unit must be grounded.
• Inspect the power cord before use. If cord is
damaged, do not use. Always grasp the plug (not
the cord) to unplug.
• Insert three-prong plug on power cord into a
matching electrically grounded outlet. Do not use
adapter. Never cut off third prong. Do not use an
extension cord.
• The unit must be operated on a 115V/60 Hz circuit
protected by a Ground Fault Circuit Interrupter
(GFCI) device.
• Keep motor and wiring dry.
• Do not attempt to repair the unit. For Authorized
Service Centers, call Dri-Eaz at 800-932-3030.
07-01776F 2015-02 F412 (115V) Warranty 07-00420
Owner's Manual
LGR 7000XLi Portable Dehumidifier
Model F412
DRI-EAZ PRODUCTS, INC.
15180 Josh Wilson Road, Burlington, WA 98233
Phone: 800-932-3030 Fax: 360-757-7950 www.dri-eaz.com
Patents: http://www.LBpatents.com
BEFORE YOU BEGIN
Warranty registration
Visit warranty.drieaz.com to register your purchase.
Registration allows us to better assist you with using,
maintaining or servicing your equipment and to contact
you in case we have important safety information
concerning your Dri-Eaz product. If you determine
service is required, have your equipment model, serial
number and original proof of purchase available and call
your distributor for assistance with obtaining a return
material authorization (RMA).
CONTENTS GUIDE
OPERATIONS
Parts identification .......................................... 2
Positioning a dehumidifier ............................. 2
Operating your dehumidifier .......................... 2
Control Panel Guide ........................................ 3
At the end of the job ........................................ 4
Setting humidistat mode ................................. 4
MAINTENANCE
Maintenance schedule .................................... 6
Cleaning the coils and block .......................... 6
Cleaning the pump valve .............................. 11
Inspecting the Control Panel ........................ 17
Error messages ............................................. 19
Troubleshooting ............................................ 20
1
Dri-Eaz Products, Inc.
Publicidad
Capítulos
Tabla de contenido

Manuales relacionados para Dri-Eaz LGR 7000XLi


Resumen de contenidos para Dri-Eaz LGR 7000XLi
-
Página 1: Tabla De Contenido
15180 Josh Wilson Road, Burlington, WA 98233 Phone: 800-932-3030 Fax: 360-757-7950 www.dri-eaz.com The Dri-Eaz® LGR 7000XLi dehumidifier reduces humidity in enclosed environments by removing water vapor from the air. The 7000XLi is rugged, durable and highly portable, making it ideal for water damage restoration, structural drying, construction, and other applications requiring temporary, high-performance dehumidification. -
Página 2: Parts Identification
If the unit environment, contact Dri-Eaz at 800-932-3030. has been placed in a horizontal position, set it upright and let it stand for at least 30 minutes before turning it on. -
Página 3: Set Up Drain Hose
MENU SELECTION. Press to change the values of the "User Defined" settings. The MENU SELECTION key acts as the UP key for adjusting the setpoint for 07-01776F 2015-02 F412 (115V) Warranty 07-00420 Dri-Eaz Products, Inc. -
Página 4: At The End Of The Job
5. Unplug power cord from power supply and from base increments, cycling through 90%RH and starting again of the machine, coil neatly, and return it to the coil at 30%RH. storage pocket (see Fig. A). 07-01776F 2015-02 F412 (115V) Warranty 07-00420 Dri-Eaz Products, Inc. -
Página 5: Transportation And Storage
4. IMPORTANT: Remove power cord from base of unit, coil it neatly, and place it in the cord storage pocket. This will prevent the cord from catching on the stairs and possibly damaging the cord. 07-01776F 2015-02 F412 (115V) Warranty 07-00420 Dri-Eaz Products, Inc. - Página 6 Evaporator (cold) coil in. rear panel fasteners (×6) ⅜ in. rear panel Electrical box. base plate fasteners (×5, not shown) ⅜ in. rear panel fasteners (×6) Pump location ⅜ in. cover fasteners (×2) 07-01776F 2015-02 F412 (115V) Warranty 07-00420 Dri-Eaz Products, Inc.
-
Página 7: Maintenance Schedule
NOTICE: Replace used filters only with a new HAF filter dehumidifier before performing any maintenance. (Dri-Eaz part no. F368). Other filter types do not provide WARNING: Risk of dust and contaminants exposure. adequate filtration or airflow. Be sure to install the new Use of respirator mask and gloves is recommended. -
Página 8: Installing The Haf Filter
NOTICE: The unit is fitted with sensitive electronic sensors. Protect the sensors and their lead wires from damage and do not expose them to water or cleaning solution. Before proceeding, remove pump hose at quick-disconnect. Remove the four ∕ cover bolts shown: 07-01776F 2015-02 F412 (115V) Warranty 07-00420 Dri-Eaz Products, Inc. - Página 9 Note orientation of block for reassembly. Inspect the heat exchange block carefully. If dust is present, use compressed air or a HEPA-filtered vacuum cleaner to gently clear the channels of the block. 07-01776F 2015-02 F412 (115V) Warranty 07-00420 Dri-Eaz Products, Inc.
- Página 10 If using the coil cleaner, use a small container to capture runoff from the drain basin. Note: Use Dri-Eaz Coil Cleaner only. CAUTION: Be sure to thoroughly flush coil cleaner from coils to avoid damaging the pump and/or pump valve.
-
Página 11: Inspecting And Cleaning The Pump Check Valve
NOTICE: Do not place unit on its front, as this might cause any residual water to drip into sensitive electronic components. Remove the front cover as described under “To disassemble the unit for cleaning coils and heat exchange block,” p. 8. 07-01776F 2015-02 F412 (115V) Warranty 07-00420 Dri-Eaz Products, Inc. - Página 12 Clean and inspect the the pump check valve. First, use needle-nosed pliers to remove the pumpout hose from the barbed fitting on the pump. Tuck the hose inside the back cover housing. 07-01776F 2015-02 F412 (115V) Warranty 07-00420 Dri-Eaz Products, Inc.
- Página 13 Clean and inspect the check valve. Using a in wrench, unthread the check valve fitting and remove it from the pump. Using small-jawed pliers, carefully remove the valve compression fitting and the “duckbill” valve. 07-01776F 2015-02 F412 (115V) Warranty 07-00420 Dri-Eaz Products, Inc.
- Página 14 Ensure the float arm moves freely and that the switch operates. Take care not to bend or damage the float arm. Using a Philips screwdriver, remove the five screws from the impeller plate. 07-01776F 2015-02 F412 (115V) Warranty 07-00420 Dri-Eaz Products, Inc.
- Página 15 Failure to do so may result in the “flapper” becoming dislodged and limiting the pump’s performance or preventing the impeller from turning. NOTICE: Make sure O-ring is properly seated before tightening impeller cover. Do not overtighten cover screws. 07-01776F 2015-02 F412 (115V) Warranty 07-00420 Dri-Eaz Products, Inc.
-
Página 16: Reassembling Pump And Back Cover
TIP: Tighten cover bolts in increments from the bottom upward to create the best seal. As you tighten, check for proper alignment and ensure that all seals are in place and free of kinks. The unit is now ready for use. 07-01776F 2015-02 F412 (115V) Warranty 07-00420 Dri-Eaz Products, Inc. -
Página 17: Inspecting The Control Panel
“DEFR” (defrost sensor). Note that the DEFR cable is marked with silver paint. Make sure each cable is connected in the correct location and that they are firmly seated. 07-01776F 2015-02 F412 (115V) Warranty 07-00420 Dri-Eaz Products, Inc. - Página 18 When inspection is complete, replace the controller in the housing and tighten the screws. Do not overtighten. 07-01776F 2015-02 F412 (115V) Warranty 07-00420 Dri-Eaz Products, Inc.
-
Página 19: Error Messages
ERROR MESSAGES The LGR 7000XLi control system constantly monitors internal operating conditions. If the system detects an problem, it will produce an error (“ER”) message indicating the problem. If the display shows an ER message, first unplug the unit and then plug it back in. This will usually reset the electronics, and the unit will begin operating normally. If the error message reappears, refer to the explanation and solution shown below. -
Página 20: Troubleshooting
If the problem you are experiencing is not listed here, call your local distributor or contact our Service Department toll-free at 800-932-3030 for further assistance. SPECIFICATIONS Warranty information is available at www.dri-eaz.com. Model LGR 7000XLi (F412) Be sure to visit warranty.drieaz.com and register your Weight 107 lbs. -
Página 21: Antes De Comenzar
Dri-Eaz. Si considera que su producto necesita reparación, tenga a mano el modelo del equipo, ¡ADVERTENCIA! No altere ni modifique su LGR el número de serie y el comprobante de compra original,... -
Página 22: Identificación De Las Piezas
AVISO: Se recomienda no transportar ni guardar la obtener más información sobre cómo crear un ambiente unidad en posición horizontal. Cuando la máquina de secado óptimo, llame a Dri-Eaz al 800-932-3030. está en posición horizontal, el aceite del compresor puede fluir hacia los serpentines refrigerantes, lo... -
Página 23: Enchufe El Cable Eléctrico
Este inmediato. 07-01776F 2015-02 F412 (115V) Warranty 07-00420 Dri-Eaz Products, Inc. -
Página 24: Cómo Elegir El Modo "Humidistato
1. Si la unidad está en ciclo de descongelación, no haga Muestra la temperatura y la humedad relativa de entrada nada hasta que vuelva al modo de funcionamiento y salida que hay en el momento. 07-01776F 2015-02 F412 (115V) Warranty 07-00420 Dri-Eaz Products, Inc. -
Página 25: Importante
1. Apague la unidad una vez finalizado el ciclo de descongelación. Balancee suavemente la unidad en posición vertical sobre sus ruedas a fin de asegurarse de que el agua que pueda quedar en las superficies interiores caiga en el sumidero. 07-01776F 2015-02 F412 (115V) Warranty 07-00420 Dri-Eaz Products, Inc. - Página 26 (9,5 mm) (×5, no aparecen en la ilustración) Sujetadores del panel trasero de ⅜ pulgadas (9,5 mm) (×6) Ubicación de la bomba Sujetadores de la tapa de ⅜ pulgadas (9,5 mm) (×2) 07-01776F 2015-02 F412 (115V) Warranty 07-00420 Dri-Eaz Products, Inc.
-
Página 27: Cronograma De Mantenimiento
AVISO: Reemplace los filtros usados únicamente con un unidad haya estado expuesta a sustancias filtro HAF nuevo (pieza n.º F368 de Dri-Eaz). El resto de contaminantes potencialmente peligrosas, límpiela por los filtros no ofrecen el filtrado ni el flujo de aire completo y desinféctela antes de volver a usarla. -
Página 28: Acerca De Los Filtros Haf De 3M
07-01776F 2015-02 F412 (115V) Warranty 07-00420 Dri-Eaz Products, Inc. -
Página 29: Cómo Colocar El Filtro Haf
Antes de comenzar, saque la manguera de la bomba de la conexión rápida. Retire de la tapa los cuatro pernos ∕ pulgadas (9,5 mm) que aparecen en la imagen: 07-01776F 2015-02 F412 (115V) Warranty 07-00420 Dri-Eaz Products, Inc. - Página 30 Controle con detenimiento el bloque de intercambio de calor. En caso de que haya polvo, utilice aire comprimido o una aspiradora HEPA para limpiar cuidadosamente las canaletas del bloque. 07-01776F 2015-02 F412 (115V) Warranty 07-00420 Dri-Eaz Products, Inc.
-
Página 31: Cómo Volver A Colocar El Bloque De Calor Y La Tapa Superior
Nota: sólo Limpiador Uso Dri-Eaz Coil. PRECAUCIÓN: Asegúrese de lavar el filtro de la bobina de las bobinas para evitar daños en la bomba y / o la válvula de la bomba. -
Página 32: Cómo Controlar Y Limpiar La Válvula De Retención De La Bomba
Retire la tapa frontal como se explica en “Cómo desarmar la unidad para limpiar los serpentines y el bloque de intercambio de calor” en la página 8. 07-01776F 2015-02 F412 (115V) Warranty 07-00420 Dri-Eaz Products, Inc. - Página 33 Primero, utilice pinzas de punta aguja para sacar la manguera de extracción del conector dentado que se encuentra en la bomba. Inserte la manguera en el armazón de la tapa trasera. 07-01776F 2015-02 F412 (115V) Warranty 07-00420 Dri-Eaz Products, Inc.
- Página 34 Con una pinza de boca pequeña, retire cuidadosamente el accesorio de compresión de la válvula y la válvula tipo “pico de pato”. 07-01776F 2015-02 F412 (115V) Warranty 07-00420 Dri-Eaz Products, Inc.
- Página 35 Tenga cuidado de no doblar o dañar el brazo del flotador. Con un destornillador Philips, quite los cinco tornillos de la placa del impulsor. 07-01776F 2015-02 F412 (115V) Warranty 07-00420 Dri-Eaz Products, Inc.
- Página 36 AVISO: Asegúrese de que la junta tórica esté bien asentada antes de apretar la tapa del impulsor. No apriete demasiado los tornillos de la cubierta. 07-01776F 2015-02 F412 (115V) Warranty 07-00420 Dri-Eaz Products, Inc.
-
Página 37: Cómo Volver A Colocar La Bomba Y La Tapa Trasera
A medida que lo haga, asegúrese de que los pernos estén bien alineados y de que todas las juntas estén en su lugar y no estén torcidas. La unidad ya está lista para usar. 07-01776F 2015-02 F412 (115V) Warranty 07-00420 Dri-Eaz Products, Inc. -
Página 38: Drenaje / El Invierno
Con un destornillador Philips, retire los cuatro tornillos de sujeción de la placa de base. Levante cuidadosamente el panel de control. Las conexiones del sensor están ubicadas en la parte de abajo del panel. 07-01776F 2015-02 F412 (115V) Warranty 07-00420 Dri-Eaz Products, Inc. - Página 39 Al finalizar el control, vuelva a colocar el dispositivo de control en el armazón y ajuste los tornillos. No los ajuste demasiado. 07-01776F 2015-02 F412 (115V) Warranty 07-00420 Dri-Eaz Products, Inc.
-
Página 40: Mensajes De Error
Si persiste el problema, comuníquese con el centro de servicio técnico autorizado de su zona o con el Departamento de Servicio Técnico de Dri-Eaz al 800-932-3030. NOTA: El mensaje “FALLA ELÉCTRICA” no es un error del sistema. Cuando aparece este mensaje, significa que la unidad dejó... -
Página 41: Detección De Problemas
Si su problema no está incluido aquí, llame al distribuidor de su zona o comuníquese sin cargo con nuestro Departamento de Servicio Técnico al 800-932-3030 para que lo asistan. ESPECIFICACIONES La información sobre la garantía está disponible en Modelo LGR 7000XLi (F412) www.dri-eaz.com. Peso 107 lb | 49 kg Dimensiones (altura x 33,5 ×... - Página 42 à l’utilisation, l’entretien ou la réparation de votre appareil et de vous AVERTISSEMENT! Ne pas modifier le LGR 7000XLi contacter au cas où nous aurions des renseignements d’aucune façon. Utiliser seulement des pièces de importants en matière de sécurité...
-
Página 43: Identification Des Pièces
12 po. Panneau arrière. Retirer pour acccéder à la pompe. FIG. C : CONNEXION DU CORDON Étiquette et numéro de série. Prise du cordon. 07-01776F 2015-02 F412 (115V) Warranty 07-00420 Dri-Eaz Products, Inc. -
Página 44: Utilisation Du Déshumidificateur
Pour éteindre l'appareil. un complément d’information sur l’agencement d’un MENU D’AFFICHAGE Appuyez pour sélectionner l’article milieu de séchage optimal, appelez Dri-Eaz au 800-932- suivant du menu. L’article du menu 3030. apparaitra sur l'affichage. Appuyez pour faire défiler ou SÉLECTION DU MENU /... -
Página 45: Guide Du Panneau De Commande
Définit le niveau d’humidité lorsque l’appareil est en est plein. mode Hygrostat. Appuyez sur la touche SÉLECTION DU MENU pour changer la valeur d’humidité relative. Chaque fois que vous appuyez sur le bouton, la valeur 07-01776F 2015-02 F412 (115V) Warranty 07-00420 Dri-Eaz Products, Inc. -
Página 46: Après Chaque Utilisation
Ceci afin d’éviter que le APPAREIL EN MARCHE 00 HRS cordon se prenne sur une marche et s’abîme. ENTRÉE XX °C 07-01776F 2015-02 F412 (115V) Warranty 07-00420 Dri-Eaz Products, Inc. - Página 47 Coffret électrique plaque de base du panneau arrière (×5, non illustré) ⅜ Boulons de po du panneau arrière (×6) Emplacement de la pompe ⅜ Boulons de du couvercle (×2) 07-01776F 2015-02 F412 (115V) Warranty 07-00420 Dri-Eaz Products, Inc.
-
Página 48: Programme D'eNtretien
été exposé à des contaminants potentiellement AVIS : Remplacez-le uniquement par un filtre neuf HAF dangereux, nettoyez-le à fond et désinfectez-le avant de (Pièce Dri-Eaz n°. F368). Les autres types de filtres le réutiliser. n’offrent pas une filtration ni un passage de l’air AVIS : L’appareil est équipé... -
Página 49: Pose Du Filtre Haf
AVIS : L’appareil est équipé de capteurs électroniques sensibles. Protégez-les, ainsi que leurs fils, contre tout choc. Ne les exposez pas à l’eau ou à des solutions de nettoyage. Tout d’abord, retirez le tuyau à raccord rapide de la pompe. 07-01776F 2015-02 F412 (115V) Warranty 07-00420 Dri-Eaz Products, Inc. - Página 50 Pour éviter d’endommager le capteur avec une décharge d’électricité statique, ne touchez pas le circuit du capteur et ne placez pas de ruban adhésif ni tout autre matériau en contact avec le circuit du capteur. 07-01776F 2015-02 F412 (115V) Warranty 07-00420 Dri-Eaz Products, Inc.
- Página 51 Si vous utilisez le nettoyant pour serpentin, servez-vous d’un petit récipient pour récupérer ce qui aura coulé dans le récipient collecteur. Remarque: Nettoyant Utiliser Dri-Eaz Coil seulement. ATTENTION: Assurez-vous de bien rincer propre de la bobine de bobines pour éviter d'endommager la pompe et / ou la pompe vanne.
- Página 52 AVIS : Vérifiez que les boulons du boîtier sont enfilés correctement avant de les serrer. Ne pas trop serrer. N’utilisez pas d’outil électrique! L’appareil est prêt à être utilisé. 07-01776F 2015-02 F412 (115V) Warranty 07-00420 Dri-Eaz Products, Inc.
-
Página 53: Inspection Et Nettoyage De La Valve Anti-Retour De La Pompe
Faites basculer le dessus du panneau arrière et posez- le à plat devant l’appareil. Il n’est pas nécessaire de débrancher le faisceau de câbles du panneau arrière ou du coffret électrique. 07-01776F 2015-02 F412 (115V) Warranty 07-00420 Dri-Eaz Products, Inc. - Página 54 Lorsque la pompe est sortie du boîtier, faites-la tourner vers le haut et l’extérieur pour accéder plus facilement à la valve anti-retour. AVIS : Veillez à ne pas recourber ou abîmer l'ensemble « guimauve » du flotteur. 07-01776F 2015-02 F412 (115V) Warranty 07-00420 Dri-Eaz Products, Inc.
- Página 55 Inspectez l'interrupteur à flotteur et pompe pour un fonctionnement correct. S'assurer que le bras de flotteur bouge librement et que le commutateur fonctionne. Prenez soin de ne pas plier ou endommager le bras de flotteur. 07-01776F 2015-02 F412 (115V) Warranty 07-00420 Dri-Eaz Products, Inc.
- Página 56 Ne pas le faire peut entraîner la "palette" de devenir délogé et de limiter les performances de la pompe ou d'empêcher la roue de tourner. AVIS: Assurez-vous que le joint torique est bien en 07-01776F 2015-02 F412 (115V) Warranty 07-00420 Dri-Eaz Products, Inc.
-
Página 57: Remontage De La Pompe Et Du Couvercle Arrière
Ne serrez pas trop fort. Rebranchez le tuyau de vidange sur la sortie de la pompe. Remettez le couvercle arrière en place. Vérifiez que les joints d’étanchéité sont alignés correctement et ne sont pas tordus. 07-01776F 2015-02 F412 (115V) Warranty 07-00420 Dri-Eaz Products, Inc. - Página 58 CONSEIL : Serrez les boulons du couvercle graduellement du bas vers le haut pour créer un joint optimal. Au fur et à mesure que vous les serrez, vérifiez que l’alignement est correct et que tous les joints sont en place et bien plats. L’appareil est maintenant prêt à être utiliser. 07-01776F 2015-02 F412 (115V) Warranty 07-00420 Dri-Eaz Products, Inc.
-
Página 59: Inspection Du Panneau De Commande
“DEFR” (sonde de dégivrage). Remarquez que le câble DEFR est marqué avec de la peinture argent. Vérifiez que chaque câble est relié à l’emplacement correct et qu’ils sont bien enfoncés. 07-01776F 2015-02 F412 (115V) Warranty 07-00420 Dri-Eaz Products, Inc. - Página 60 Lorsque vous avez terminé l’inspection, replacez le contrôleur dans le boîtier et serrez les vis. Ne serrez pas trop fort. 07-01776F 2015-02 F412 (115V) Warranty 07-00420 Dri-Eaz Products, Inc.
-
Página 61: Messages D'eRreur
MESSAGES D’ERREUR Le système de commande du LGR 7000Xli surveille continuellement les conditions de fonctionnement interne. Si le système détecte une anomalie, il produit un message d’erreur (« ERR ») indiquant celle-ci. Si l'écran affiche un message « ER », commencez par débrancher l’appareil, puis rebranchez-le. En général, l’électronique sera alors réinitialisée, et l’appareil recommencera à... -
Página 62: Dépannage
Si l’anomalie que vous avez constatée n’est pas indiquée ici, appelez votre distributeur local ou contactez le service technique au numéro sans frais 800-932-3030 pour obtenir une aide supplémentaire. FICHE TECHNIQUE Les données de garantie sont disponibles sur le site Modèle LGR 7000XLi (F412) www.dri-eaz.com. Poids 107 lb | 49 kg Dimensions 33,5 ×... -
Página 63: Electrical Schematic
ELECTRICAL SCHEMATIC 07-01776F 2015-02 F412 (115V) Warranty 07-00420 Dri-Eaz Products, Inc.