Tabla de contenido
Publicidad
Enlaces rápidos
TM
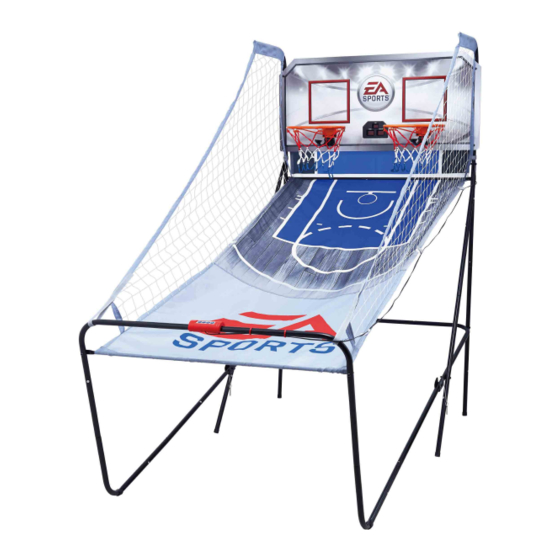
MODEL/MODELO: 1658127
WM USA
ASSEMBLY INSTRUCTIONS
INSTRUCCIONES DE ARMADO
ATTENTION
ATENCIÓN
DO NOT RETURN
NO DEVOLVERLO
TO THE STORE
A LA TIENDA
Contact
Contacto
MD Sports
MD Sports
Customer Service
Servicio al Cliente
Toll Free: 877-472-4296
Llamados gratuitos: 877-472-4296
* For additional resources and Frequently
* Por mayor información y Preguntas
Ask Questions, please visit us at
Frecuentes, favor visitarnos en
themdsports.com
themdsports.com
Publicidad
Tabla de contenido

Resumen de contenidos para MD SPORTS 1658127
- Página 1 MODEL/MODELO: 1658127 WM USA ASSEMBLY INSTRUCTIONS INSTRUCCIONES DE ARMADO ATTENTION ATENCIÓN DO NOT RETURN NO DEVOLVERLO TO THE STORE A LA TIENDA Contact Contacto MD Sports MD Sports Customer Service Servicio al Cliente Toll Free: 877-472-4296 Llamados gratuitos: 877-472-4296 * For additional resources and Frequently * Por mayor información y Preguntas...
-
Página 2: Garantía Limita De 90 Dias
Para preguntas o para piezas que no se hayan incluidos/dañadas, por favor pongase en contacto con nosotros. TIME HOME VISITOR (Continued on the next page.) (Continúe en la siguiente página.) www.themdsports.com 1658127... -
Página 3: Tools Required
Mantener alejados a los exterior. Solo para uso en interior. necesarios area de ensamble animales domesticos No utilizar ni guardar el producto en del area de ensamble lugares humedos o mojados (Continued on the next page.) (Continúe en la siguiente página.) www.themdsports.com 1658127... - Página 4 English Español 1658127 PARTS LIST / LISTA DE PARTES Tube - 2 Tubo - 2 Tube - 3 Tubo - 3 Tube - 4 Tubo - 4 Tube - 1 Tubo - 1 Φ22x685mm Φ22x685mm Φ22x890mm Φ22x890mm Φ22x890mm Φ22x890mm Φ22x580x440mm Φ22x580x440mm...
-
Página 5: Pre-Installed Parts / Piezas Preinstaladas
English Español 1658127 PARTS LIST / LISTA DE PARTES Red de Retorno Allen Key Llave Allen Plastic Buckle Hebilla De Plástico Ball Return Net Rim Net de Baloncesto 1658127 PRE-INSTALLED PARTS / PIEZAS PREINSTALADAS Clavija de Cerradura de Plastic Pole... - Página 6 5. Fije los Tubo - 5 y Tubo - 6 (#5 & #6) junto usando el using the spring lock mechanism (pre-installed) as mecanismo de resorte de cerradura (pre-instalado) como shown in FIG. 3. indicado en FIG. 3. 1658127 www.themdsports.com (Continued on the next page.) (Continúe en la siguiente página.)
- Página 7 FIG. 4C. Nota: Asegúrese que la cara de la mecanismo de resorte Note: Make sure the spring lock mechanism is de cerradura está hacia abajo. face down. 1658127 www.themdsports.com (Continued on the next page.) (Continúe en la siguiente página.)
- Página 8 (#5 & #6) using Bolts (#27 ), Washers (#22) and Nuts usando Pernos (#27), Arandelas (#22) y Tuercas (#28) (#28) as shown in FIG. 5 and 5B. como se indica en FIG. 5 y 5B. 1658127 www.themdsports.com (Continued on the next page.) (Continúe en la siguiente página.)
- Página 9 Tubo - 11 (#11) al Tubos - 10 (#10) usando el using the spring lock mechanism (pre-installed) as mecanismo de resorte de cerradura (pre-instalado) como shown in FIG. 6. mostrado en la FIG. 6. 1658127 www.themdsports.com (Continued on the next page.) (Continúe en la siguiente página.)
- Página 10 (#36) to the Rims (#17) as shown in FIG. 8A and 8B. 13. Instale la Red (#36) al Borde (#17) como mostrado en la FIG. 8A y 8B. 1658127 www.themdsports.com (Continued on the next page.) (Continúe en la siguiente página.)
- Página 11 Tuercas (#28) como mostrado en la FIG. 9D. Siga con in FIG. 9D. Follow the same procedure on the el mismo procedimiento para la derecha. right side. 1658127 www.themdsports.com (Continued on the next page.) (Continúe en la siguiente página.)
- Página 12 Tube - 6 (#5 & #6) as shown in FIG. 10C. 17. Inserte los Clavijas de cerradura (#P3) en Tubo - 5 and Tubo - 6 (#5 & #6) como se indica en FIG. 10C. 1658127 www.themdsports.com (Continued on the next page.)
- Página 13 FIG. 12. Conecte el Cable de Control al (#14) as shown in FIG. 12 and 12A. Marcador Electrónico (#14) como se indican en FIG. 12 y 12A. 1658127 www.themdsports.com (Continued on the next page.) (Continúe en la siguiente página.)
- Página 14 1658127 www.themdsports.com (Continued on the next page.) (Continúe en la siguiente página.)
-
Página 15: Operación Del Marcador Electrónico
CONTROL PANEL / PANEL DE CONTROL SELECT SELECT ON/OFF PLAY DOWN ENCENDIDO/ / JUGAR / SELECCIONE / SELECCIONE APAGADO ARRIBA ABAJO RESET SOUND PAUSE / RECONF- / SONIDO / PAUSA IGURAR 1658127 www.themdsports.com (Continued on the next page.) (Continúe en la siguiente página.) - Página 16 The first player to score 10 points wins the game. El primer jugador logrando 10 puntos gana el juego. Presione "PLAY" para reiniciar este juego. Press "PLAY" to restart this game. 1658127 www.themdsports.com (Continued on the next page.) (Continúe en la siguiente página.)
- Página 17 (El LED queda intermitente para el jugador con el más alto puntaje). Press "PLAY" to restart this game. El juego se acaba cuando un jugador marca 98 puntos. Presione "PLAY" para reiniciar este juego. 1658127 www.themdsports.com (Continued on the next page.) (Continúe en la siguiente página.)
- Página 18 Press "PLAY" to restart this game. El jugador con más puntos en la tabla ganará. (El LED queda intermitente para el jugador con el más alto puntaje). Presione "PLAY" para reiniciar este juego. 1658127 Continued on the next page.) www.themdsports.com (Continúe en la siguiente página.)
- Página 19 -- Consult the dealer or an experienced radio/TV technician for help. -- Consulte el proveedor o un técnico experienciado de radio/ televisión por ayudas YOU ARE NOW READY TO PLAY! ¡USTED ESTA AHORA LISTO PARA JUGAR! 1658127 www.themdsports.com (The last page) (La ultima página)


