Tabla de contenido
Publicidad
Enlaces rápidos
TM
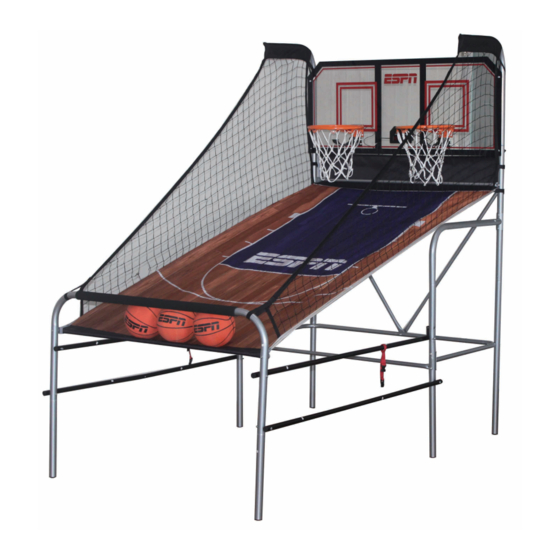
MODEL/MODELO: 1658129
WM.COM
ASSEMBLY INSTRUCTIONS
INSTRUCCIONES DE ARMADO
ATTENTION
ATENCIÓN
DO NOT RETURN
NO DEVOLVERLO
TO THE STORE
A LA TIENDA
Contact
Contacto
MD Sports
MD Sports
Customer Service
Servicio al Cliente
* For additional resources and Frequently
* Por mayor información y Preguntas
Ask Questions, please visit us at
Frecuentes, favor visitarnos en
themdsports.com
themdsports.com
Publicidad
Tabla de contenido

Manuales relacionados para MD SPORTS 1658129


Resumen de contenidos para MD SPORTS 1658129
- Página 1 MODEL/MODELO: 1658129 WM.COM ASSEMBLY INSTRUCTIONS INSTRUCCIONES DE ARMADO ATTENTION ATENCIÓN DO NOT RETURN NO DEVOLVERLO TO THE STORE A LA TIENDA Contact Contacto MD Sports MD Sports Customer Service Servicio al Cliente * For additional resources and Frequently * Por mayor información y Preguntas...
-
Página 2: Garantía Limita De 90 Dias
Para preguntas o para piezas que no se hayan incluidos/dañadas, por favor pongase en contacto con nosotros. TIME HOME VISITOR (Continued on the next page.) (Continúe en la siguiente página.) www.themdsports.com 1658129... -
Página 3: Tools Required
Mantener alejados a los exterior. Solo para uso en interior. necesarios area de ensamble animales domesticos No utilizar ni guardar el producto en del area de ensamble lugares humedos o mojados (Continued on the next page.) (Continúe en la siguiente página.) www.themdsports.com 1658129... - Página 4 English Español 1658129 PARTS LIST / LISTA DE PARTES Tube - 2 Tubo - 2 Tube - 3 Tubo - 3 Tube - 4 Tubo - 4 Tube - 1 Tubo - 1 Φ32x860mm Φ32x860mm Φ32x860mm Φ32x860mm Φ32x700mm Φ32x700mm Φ32x440x595mm Φ32x440x595mm...
- Página 5 English Español 1658129 PARTS LIST / LISTA DE PARTES Perno Clavija de Red de Retorno Ball Return Net Spacer Espaciador M6x40mm Bolt Locking Pin cerradura de Baloncesto M6x40mm Allen Key Llave Allen 1658129 PRE-INSTALLED PARTS / PIEZAS PREINSTALADAS Cerradura de...
- Página 6 5. Insert the Tube - 6 (#6) to the Tube - 5 (#5) as shown 5. Inserte los Tubo - 6 (#6) al Tubo - 5 (#5) como mostrado in FIG. 3. en la FIG. 3. 1658129 www.themdsports.com (Continued on the next page.) (Continúe en la siguiente página.)
- Página 7 Note: Make sure the spring lock mechanism is Nota: Asegúrese que la cara de la mecanismo de resorte face down. de cerradura está hacia abajo. 1658129 www.themdsports.com (Continued on the next page.) (Continúe en la siguiente página.)
- Página 8 10. Insert the Tubes - 1 (#1) to the Tubes - 2 (#2) as shown 10. Inserte los Tubos - 1 (#1) al Tubos - 2 (#2) como mostrado in FIG. 7. en la FIG. 7. 1658129 www.themdsports.com (Continued on the next page.) (Continúe en la siguiente página.)
- Página 9 Spacers (#40), Locking Pins (#38) and Nuts (#32) as (#26), Espaciadors (#40), Clavijas de cerradura (#38) y shown in FIG. 9A & 9B. Tuercas (#32) como mostrado en la FIG. 9A & 9B. 1658129 www.themdsports.com (Continued on the next page.) (Continúe en la siguiente página.)
- Página 10 Install the Net (#24) to the Rim (#21) as shown 15. Instale la Red (#24) al Borde (#21) como mostrado en in FIG. 11A and 11B. la FIG. 11A y 11B. 1658129 www.themdsports.com (Continued on the next page.) (Continúe en la siguiente página.)
- Página 11 Retorno de Baloncesto (#39) y lo adjunte al Tubo - 14 shown in FIG. 12C. (#14) usando Tornillos (#37), Arandelas (#26) y Tuercas (#32) como mostrado en la FIG. 12C. 1658129 www.themdsports.com (Continued on the next page.) (Continúe en la siguiente página.)
- Página 12 Tube - 8 (#8) as shown in FIG. 13C. 19. Inserte los (#38) a los Tubo - 8 (#8) Clavijas de cerradura como mostrado en la FIG. 13C. 1658129 www.themdsports.com (Continued on the next page.) (Continúe en la siguiente página.)
- Página 13 20. Conecte el Cable de Sensor de Paleta (#19) al Marcador the Electronic Scorer (#18) as shown in FIG. 14. Electrónico (#18) como mostrado en la FIG. 14. 1658129 www.themdsports.com (Continued on the next page.) (Continúe en la siguiente página.)
-
Página 14: Importante
- 13 (#13) , and slowly lower the table to the las Correas de Seguridad (#P6). Luego tire la manija y floor. el fondo del tubo - 13 (#13), y baje despacio la mesa al piso. 1658129 www.themdsports.com (Continued on the next page.) (Continúe en la siguiente página.) -
Página 15: Battery Installation
(2) Este dispositivo debe aceptar cualquier interferencia received, including interference that may cause recibida, incluyendo interferencias que puedan undesired operation. causar un funcionamiento no deseado. ¡VOUS ETES MAINTENANT PRET A JOUER! YOU ARE NOW READY TO PLAY! 1658129 www.themdsports.com (The last page) (La ultima página)